Most of the users encounter the error code ‘ASUS AURA Service is Currently Unavailable’ issue. In this article, we will discuss how to fix this issue in simple steps. Asus Aura basically runs on Windows 10. There are a lot of users present worldwide who have Asus aura hardware devices. The main use of these hardware devices is to use the official Asus Aura Sync utility so that RGB components can be managed. This feature is a savior only for those users who have LED strips on their devices.
Although Asus Aura has plenty of unique features, still users face few errors. Errors are mainly visible when an application is not launched properly. This drawback forces us to think about why Asus Aura Sync is not working? There are many possible reasons by which Asus Aura service is currently unavailable.
In this article, we will be discussing how to solve the issue of the Asus Aura service. It’s very easy to fix this problem but no worries you will surely overcome this issue permanently. But proceeding further we need to know in-depth about Asus Aura. Let’s get started.
Contents
- 1 What is Asus Aura?
- 2 Most Common Errors In Asus Aura Service
- 2.1 1. Error In Opening Of App
- 2.2 2. Asus Aura Sync-in App Buttons Improper Functioning
- 2.3 3. Working of Asus Aura Stopped
- 2.4 4. Asus Aura Unable To Detect Motherboard
- 2.5 5. Unable To Sync With RGB Components
- 3 How To Fix Asus Aura Service is Currently Unavailable Issue?
- 3.1 1. Disable Fast Startup
- 3.2 2. Try Reinstalling Asus Aura
- 3.3 3. Try Uninstalling Other Lightning Software On Your PC
- 4 Conclusion
What is Asus Aura?
Talking about the Asus Aura, it is the most significant application to control the RGB add-ons that are available at your site. For instance LED strips, RGB RAM, Motherboard, RGB fans, and many other components of your computer system. Its the must apply for the users who are hardcore RGB gamer. It’s useless for them to have a computer system without an Asus Aura application.  There is a drawback to using this app in your computer system. Asus Aura sync is compatible only with the Asus Aura Motherboard. It’s the necessity of the Asus Aura. although we have another option of making it compatible if we want to use a Gigabyte motherboard. The only thing you have to do is install a gigabyte RGB fusion app.
Most Common Errors In Asus Aura Service

Many errors occur in the Asus Aura service and before trying to fix them, we need to know about what errors occur in Asus Aura.
1. Error In Opening Of App
This is the main error that we face during the opening of the app. Most of the time when we install software on a computer system, users may suffer majorly from this issue. Here starting the app using the app icon is of no use to users.
2. Asus Aura Sync-in App Buttons Improper Functioning
There comes a situation many times where the app’s button doesn’t function properly. When the user makes an effort to click on the button, it greys out. The main reason for this issue is the unresponsive action of software towards hardware components on the computer system.
3. Working of Asus Aura Stopped
There is a very common error on Microsoft Windows systems that there is a no. of apps which cause the stopped working error. Asus Aura is also that app that stopped working on Microsoft Windows.
4. Asus Aura Unable To Detect Motherboard
It is a very complicated issue. We will not be able to access the benefits of the Aura Sync if our application will not be able to discover the motherboard. Most of the users suffer from this worst issue
5. Unable To Sync With RGB Components
This is one of the most crucial issues with the Aura Sync Application. Users spend most of their time syncing the hardware with each other and their coms no result. This issue only appears when the hardware will not go right with the system.
How To Fix Asus Aura Service is Currently Unavailable Issue?
There are a no. of methods by which this issue can be resolved. Have a look into its methods
1. Disable Fast Startup
Fast startup is one of the best features of Windows features that intended to reduce the boot time of your PC. But a sometimes fast startup can cause problems while using ASUS AURA services, so it would be best if you disable the fast startup.
- In the windows Cortana search box, you have to type the control Panel.
- Click on the control panel to open it.
- After that, you have to set the view by large icons and select the power section.
- Now click on the power button action on the left side menu.
- Click on the “Change the settings that are unavailable”.
- Disable the “fast startup” option and hit the save changes button.`
- Now Restart your PC and check if your issue of Asus Aura Currently unavailable is resolved or not.
2. Try Reinstalling Asus Aura
You need to uninstall the current version of the ASUS AURA service from your computer and then install it back by visiting the official website. Sometimes, instead of reinstallation, you can consider updating the service to the latest version.
- Click on the window log key and R together so that the Run box will appear. Then type appwiz.cpl in the Run box.
- Then click on the enter button.
- From the program, then list select Asus Aura.
- Right-click on it and select the option to uninstall.
- Then proceed further with screen follow up to uninstall Asus Aura and then you are ready to restart the computer system.
- Open the official website of Asus Aura and download the Asus Aura.

- Install the app on your PC and don’t alter the built-in installation directory on PC.
- After you have installed the Asus Aura, restart the Asus Aura to check if it’s working properly or not.
3. Try Uninstalling Other Lightning Software On Your PC
If you have any other software present on your systems like cooler master and corsair then they may compete with the Asus Aura and can cause problems in the working of Asus Aura. So to overcome the issue, you have to uninstall this software. After you have done this, you can open the Asus Aura to check if it’s working or not.
Conclusion
Asus Aura is a wonderful software for controlling the RGB lighting in peripherals. I hope you have fixed your issue with the Asus aura service is currently unavailable after reading the above-mentioned methods. In case you’re continuously facing this site I would suggest you restart your PC and reinstall Asus Aura. Don’t forget to share his useful article with your friends. Thanks…
After you install your case lighting, you may experience an issue with the aura service not being available, and the lights would not light up. The problem most likely is a hardware issue. In other words, this indicates the lights are not fastened onto the motherboard properly. However, in case it’s not a hardware issue, here is a guide to troubleshoot it.
Why Does Asus Aura Sync Software Not Work?
The usual issue causing this problem might just be a faulty RGB/ARGB header. This connects the lighting peripheral to the motherboard or a corrupt driver or an older Aura Sync app version.
You have to check whether your lighting components are compatible with the Asus Aura software or not. This is the first step in fixing Asus Aura not working. Next is to carry out a check if your motherboard is also compatible with Asus Aura software.
If you face any one of the compatibility issues it will render these solutions useless. Therefore, make sure of that beforehand to avoid disappointment later on. You can, however, check for compatibility of your components on the Asus Aura website.
How to Fix the Aura Service Not Working
There are a number of ways you can fix these software related issues. Each of which is listed in this article. We will guide you through each of our proposed solutions so that you do not encounter any difficulty.
1.Reconnecting the RGB Headers
Fastening the RGB/ARGB headers properly and in the exact position is of utmost importance. If you connect the header in an improper position on the motherboard or mix-up with other lighting components, no matter how hard you try the software will not detect the peripheral component(s).
Therefore, try to make sure of that beforehand, the connectors, two of them usually, lie on the very edge of the motherboard so it can be a little tough to squeeze your hand into the right place. Just be more careful.
2.Uninstalling all other RGB software
If you simultaneously run third-party RGB lighting software with the Asus Aura Sync, you are likely to face some issues. In order to fix this just uninstall all other RGB lighting software running on your system.
For complete uninstall of the software head over to the programs and features in the Control-panel:
Press Windows logo key + R, this will prompt the run program, type appwiz.cpl in the dialogue box and this will take you directly to the programs and features in the Control-panel.
Next thing is to look for RGB lighting software (other than Asus Aura) in the programs and features list of applications and click uninstall.
Doing so will ensure the complete removal of the software. If up till now the Asus Aura is still not working, try the next solution.
3.Disabling the Fast Startup feature on Windows
This Fast Startup feature on Windows operating system helps to boot up fast by restoring the previous configurations. This allows the users a fast boot-up of the system once they restart the system. This startup feature does not affect the installation procedure of the Asus Aura.
However, it can cause problems after installing the app. Sometimes the Asus Aura app upon starting the system fails to load, this means you do not get the RGB lighting effects upon startup and it has to be manually run from the windows application.
Follow the steps below to fix the problem:
Press Windows logo key + R, this will prompt the run program.
Type control panel in the dialogue box.
Next, search for the Power Options and click on it.
Once you are there, click on the option Choose what power buttons do.
Here you will see an option Change settings that are currently unavailable. Click on it. But you should keep in mind you can only access this option only if you are an administrator.
Now head to the bottom of the opened window, un-tick the box that says, Turn on fast startups.
Once that is done, apply changes and exit the control panel. Finally, just restart your computer to see if the RGB lighting works. If the problem persists, move over to the next solution.
4.Reinstalling the Asus Aura Sync software
Properly installing software that is already full of bugs can be a tedious task. There are a number of ways to do the re-installation of the Asus Aura Sync software correctly but we have picked the best method out for you.
If you are facing this issue, once you run Asus Aura it stops working, the problem might be with the software having trouble synchronizing with other components. Check this guide on the installation and download of Asus Aura Sync software.
Asus Aurora Sync will not work sometimes when your CPU is over-performing due to msmpeng.exe. ‘msmpeng.exe’ is a built-in feature of Microsoft Windows Defender. To halt its operation, disable the Windows Defender application.
Also try disabling anti-virus operations temporarily, now run the Asus Aura app which should fix the issue of “ Aura service is currently unavailable.”
Another annoying problem faced by users is that the motherboard is not detected by the Asus Aura service. To fix this issue what you can do is firstly, check whether your motherboard and other RGB components are Aura Sync compatible or not.
The Two-Step Solution
Step#1:
Now if you have found out your motherboard is indeed Aura Sync compatible then activate RGB lighting from the BIOS menu of your motherboard.
To do this restart your computer and rapidly press the F2 key to enter the BIOS menu. It may differ for some manufacturers.
Once you are there, press the Advanced mode(F7)>column named Advanced>Onboard Devices config.> navigate to RGB lighting and turn on both the options> save and exit BIOS.
Step#2:
Download the working Aura service Sync app and follow the installation instructions given here.
Following the instructions properly will ensure the problem with the motherboard detection is fixed.
If you come across the issue where the Asus Aura Sync software does not launch or open upon clicking the icon of the app, the problem might just be with the installation.
Uninstall the software and remove all the files.
Next, reinstall and download the files from here. And follow the installation guide, in doing so this should fix your issue.
On the user interface to see some button or icons that are unresponsive, these buttons do not highlight if you hover the cursor over them but you do see them working on someone else’s software.
The reason for this is that Asus Aurora is not picking up any lighting component indicating that the components are not fastened onto the motherboard properly.
Reasons why Asus Aura is not detecting motherboard
1.Improper RGB/ARGB header connections:
Most of the time sees the problem with the lighting is just a faulty connection. What happens is that usually, the users who want to light-up their gaming rigs have the motherboard already integrated within the system.
Therefore, it is hard to reach the exact place where the headers for the lighting are, and connecting all the components in the correct order is a bit of a challenge and it is this where we see most of the human errors committed.
We recommend you use a flashlight to properly see where the connection goes, also make sure the components are fastened properly and not dangling, and please do not use too much force.
Be careful not to damage the delicate connectors of the RGB header because if you do then you would have to get new ones soldered on the motherboard. And just imagine the hassle that would be in taking the motherboard out of the system.
2.Fast Startup
Windows has this built-in feature with the intention to boot up the system as quickly as possible once the user turns on or restarts the system. Aura Sync fails to load properly with this feature, you sometimes do not get a synchronized light-up of the entire system.
What happens is that Windows tries to disable as many services as possible in the startup. As a result, when the system is turned on, the Aura service is currently unavailable. One component might be showing one color while the other might still be turned off. Our recommendation would be to turn this feature off.
3. Corrupted installation file
During the download, if the user encounters an internet disconnection issue either due to a power outage or an unplugged router, the installation file consequently might corrupt. Just reinstall the file with a fresh download. We have a comprehensive guide to the multiple features of Asus Aura software in one of our other articles on the subject.
Conclusion
We have gone through each one of the multiple options available for fixing the aura service error. You are recommended to install the setup file in the default file location. Looking at how buggy the latest versions of the software are, just imagine how difficult the earlier versions of the software would be to use.
Now having said that we recommend you update to the latest version and erase all data, files, and folders of previous versions (they tend to cause inexplicable issues).
 In this post, we will see why ASUS aura service is currently unavailable appears, what the reasons behind this problem are and what to do to resolve this issue. So let’s get started.
Many ASUS motherboards come with AURA controlled LED backlighting. It provides customizable behavior of RGB indicators and even allows you to synchronize other LED strips attached to it.
The program allows users to personalize the color of LED indicators and set it in accordance with their preferences.
A number of different preset modes are already configured, so adding a new one will be much easier. Since the advent of the system, there have been many complaints from users that ASUS AURA does not work as expected. It either does not open at all or goes into a “not responding” state.
Since this application is tied to controls on the ASUS motherboard, there are several reasons why aura service is currently unavailable.
- Application installation files are corrupted and unusable.
- The specified AURA software installation path must be saved by default; otherwise, the application will not work.
- Conflict with other backlight control programs. It is already a known fact that other utilities for adjusting the backlight, such as Corsair and others, cause conflicts with ASUS AURA.
- Incorrectly connected RGB tape to the motherboard.
- The AURA software version is not compatible with the installed hardware.
- Activated quick start Windows. This feature helps to load the operating system very quickly, but may also conflict with the AURA application.
Before performing the following steps, check that the motherboard is not physically damaged, including the contacts of the LED backlight. In addition, you need to log in as an administrator.
Solution # 1: Try Disabling Windows Quick Launch
This feature is designed to reduce system startup time. It saves the initial Windows configuration when the computer shuts down. Therefore, when we turn on the PC again, it quickly retrieves the state of the system and boots up without taking much time. The function tries to give the feeling of “SSD” when the HDD is actually installed. We will try to disable this feature and see if the RGB display system works.
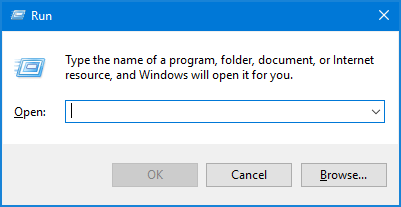
- Open the Run window (Win + R keys), type control panel, and press Enter to enter the Control Panel.
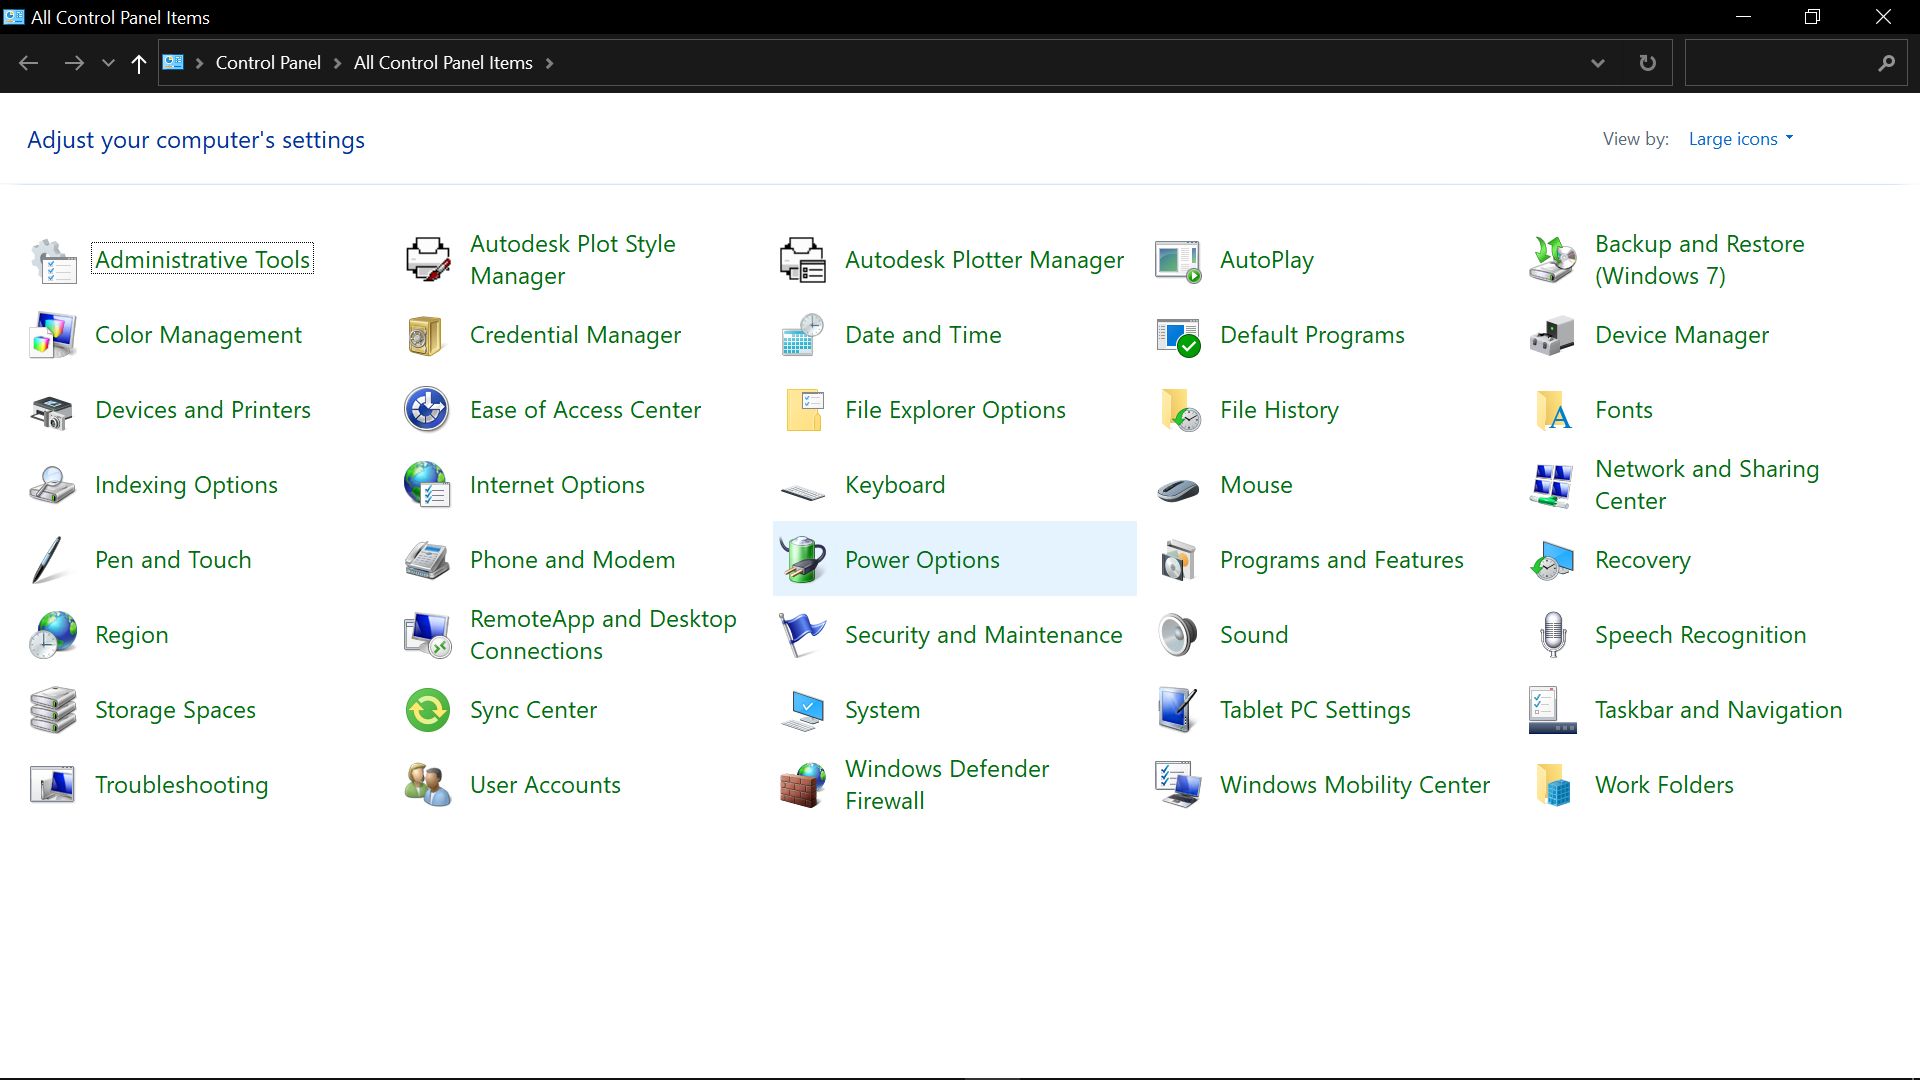
- Set the preview to large icons, and then go to the “Power” section.
- Select “Power Button Operation” on the left side menu.
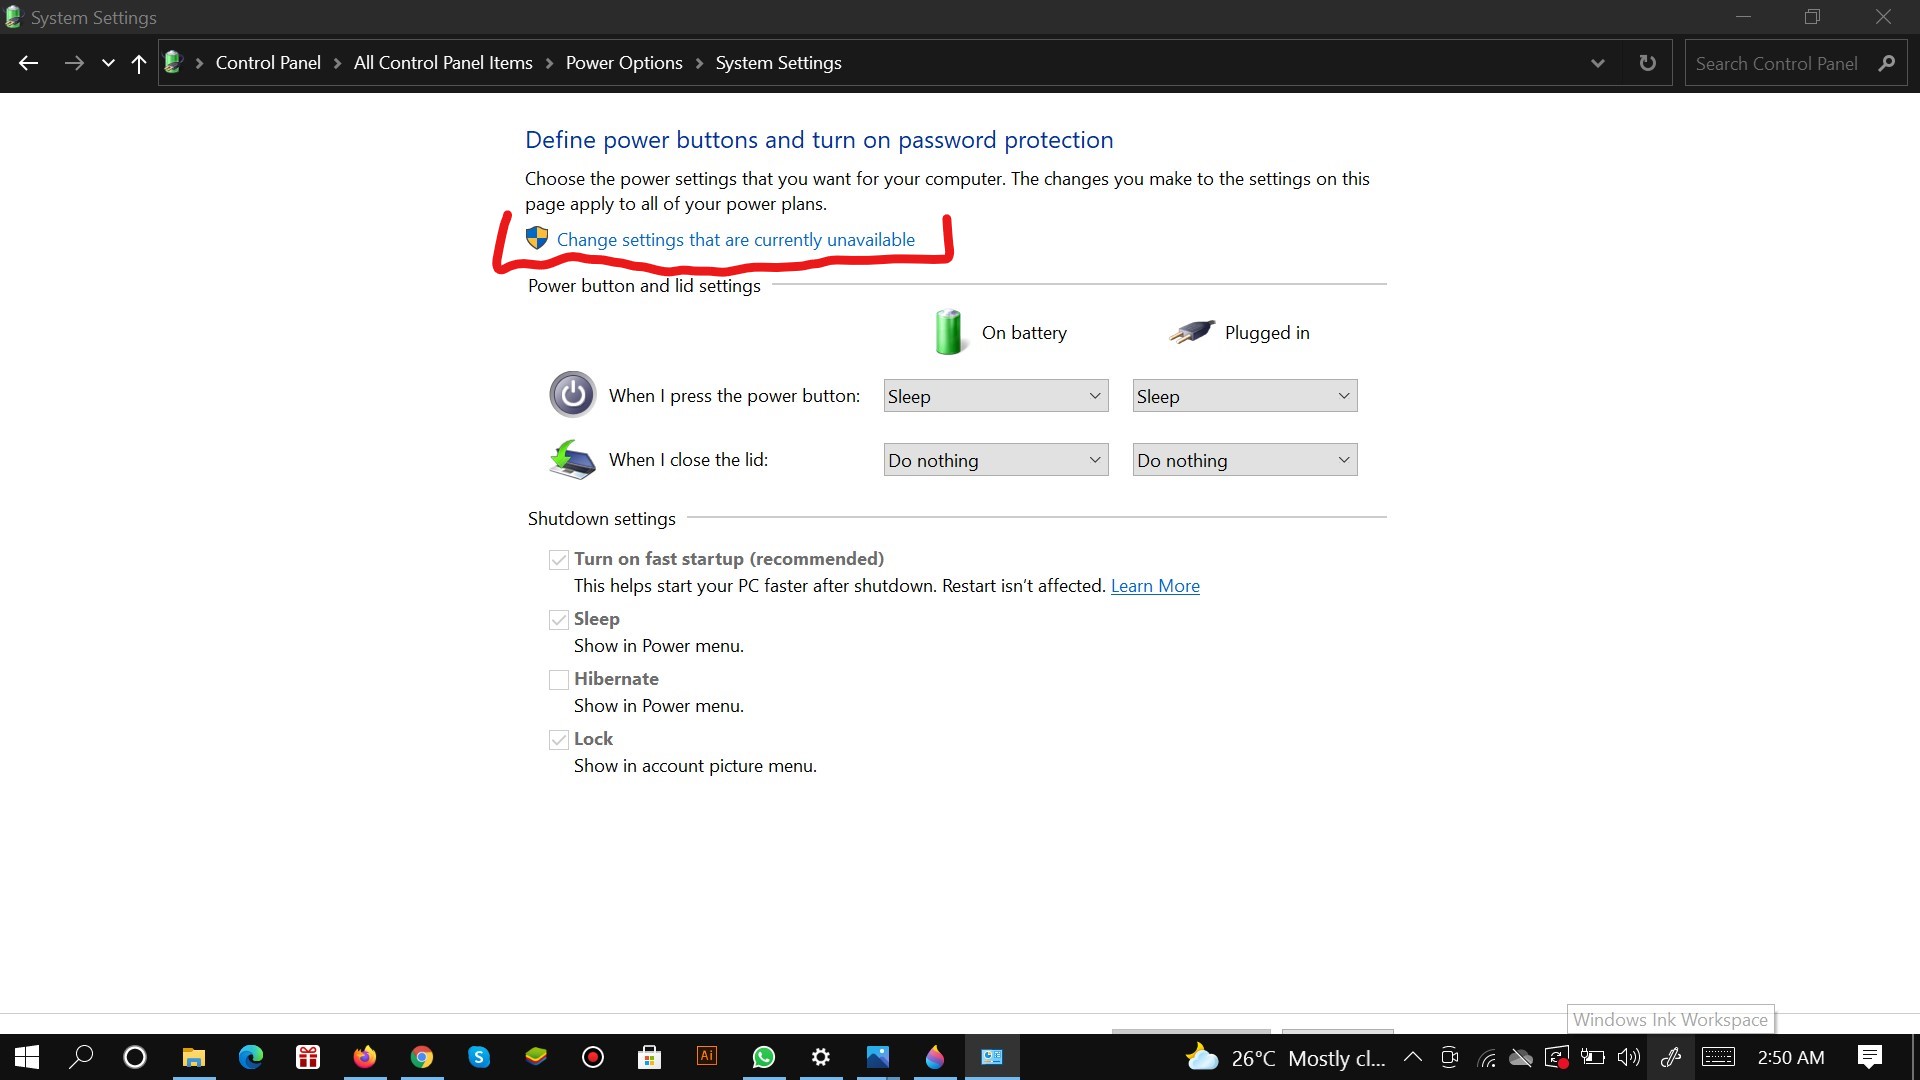
- Now click on the option that provides administrator rights with the name “Change settings that are currently unavailable.”
- After that, uncheck the box “Enable quick launch”, save the changes and exit the window.
- Restart your computer and check if the aura service is the currently unavailable problem resolved.
Solution # 1: Reinstall ASUS AURA
 If, after disabling the fast boot, AURA still does not work, try uninstalling the application completely and then replacing it with the latest version. The fact is, in addition to the installation files, the data of the saved user settings are corrupted. To remove, you need to use the AURA uninstaller so that no traces remain.
- Download the AuraCleaner utility. Right-click on the executable file and select run as administrator. AURA will be deleted with all files saved by the user.
- Turn off the computer. Unplug the power cable, also check that all peripheral devices are disconnected. Now, wait 5-10 minutes before plugging everything back in.
- Open the official website of ASUS AURA, download the latest version of the application.
- Run the executable file, and do not change the installation directory, leave the specified path by default, otherwise the application will not work.
- After installation is complete, restart the computer, see if the indication works.
If the latest version does not work on the configuration of your computer, try installing the previous one.
Solution #3 : Check RGB Connectors
Often users connect additional LED strips. There are basically two connectors on motherboards: for LED strip and fan backlight (Fan RGB header). Some tapes do not have guides so that you can make a mistake with the correct connection. Therefore, check again that the RGB tape is connected correctly. In addition, do not use physical force, as you may damage the connectors.
Solution #4: Remove Other backlight control programs
AURA is known to conflict with other RGB applications, including Corsair, Cooler Master, and others. Since all these applications use the same basic components, a situation may arise when each module competes for the use of an external resource.
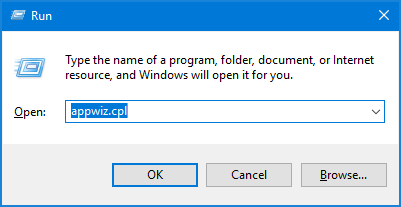
Open the Run dialog box (Win + R), type appwiz.cpl to enter the uninstall / change program section. Right-click on another installed backlight control program and delete it.
Restart your computer and check that the aura service is currently unavailable disappear, and the backlight function is working properly.
Go to ASUS
[Support] «Aura service is currently unavailable please close Aura and check if AuraService is installed», driving me crazy!
Guys, this is driving me crazy. I have had AURA sync on my pc for a few months to control the lights on my gpu, and it randomly stopped working and provided the error message in the post title.
I’ve tried uninstalling and re-installing, but nothing seems to work. I’ve done some searching on the internet but have not been able to find a simple solution. Any help would be greatly appreciated!
ASUS Aura Sync is one of the most polished RGB software for computers and gaming peripherals. The Aura RGB Lighting works seamlessly across a host of compatible gear including motherboards, keyboards, mice, AIO coolers, RAMs, GPUs and other accessories.
However, even with the vast customizability options and refined software features, the application doesn’t come without its own set of bugs. As a result, some users may face occasional hiccups where they can’t get Aura Sync to work.
People may get errors like “ASUS AURA service is currently unavailable” or “ASUS AURA has stopped working” due to several reasons. If you’ve been facing these issues and are looking for the solutions on the Internet, keep reading because we’ll be showing all the common errors related to Aura Sync in your PC and methods to fix them.
Most Common Asus Aura Sync Issues

There are multiple reasons why the Aura software might stop working on your PC, which may lead to several different errors depending on the kind of problem.
These are the most common issues people seem to have been facing with Aura Sync. There might be other cases, but the solutions would mostly be very similar.
1. Aura Service is Currently Unavailable
When the application displays the message “Aura service is currently unavailable”, there can be several probable causes for that. Common ones include damaged app installation files, other conflicting lighting software, loose RGB connectors on the motherboard, or the Aura version that is not compatible with your system’s hardware.
2. Asus Aura not detecting motherboard
The error “Asus Aura not detecting motherboard” is probably the most frustrating one among all. As a result of this error, none of the connected hardware can sync with the software rendering them essentially as regular non-RGB components.

3. Asus Aura Won’t Open
Sometimes you may keep clicking on the app icon, but your Asus Aura won’t open. This may happen because of improper installation of the app or malware in your PC. You may try running the app as an administrator, but in any case, we have the appropriate solutions later in the article.
4. Aura Sync unable to sync with RGB lighting of different components
As with any RGB software, Aura Sync only works as desired when all the connected hardware is compatible with it. If one or more components don’t work with Aura Sync, they might light weirdly or don’t light up at all. ASUS has an extensive list of all the officially compatible gear in their website, so make sure to refer to that when using Aura Sync with your peripherals.
Also Read: Best RGB Motherboards
All we want is to light up our rig and jump into our favorite game, and issues like these can annoy any user. Don’t worry! Here are some simple solutions you can use to fix “ASUS Aura not working”.
Before moving on, make sure your motherboard is not physically damaged and is compatible with Aura Sync. No “fix” can fix a faulty motherboard.
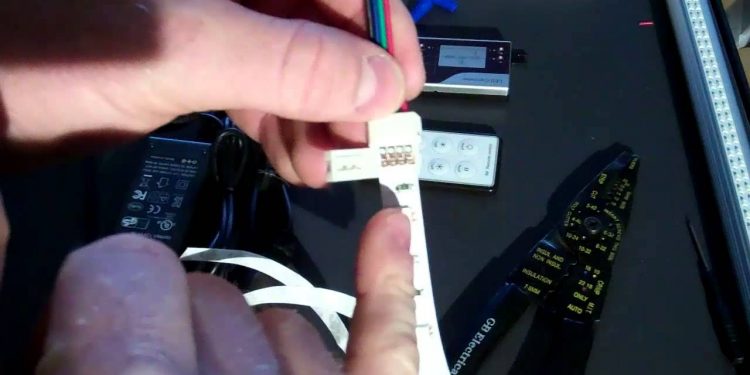
If the RGB strips are connected incorrectly to the motherboard or the connection is loose, knocking yourself out with all the software methods won’t help. The LED strips are not even connected and hence causing problems.
There are two common types of connectors: 3-pin ARGB headers and 4-pin RGB headers that need to be connected properly to work. You can try removing them and reconnecting the strips perfectly and without too much force or it may damage the pins.
2. Uninstall other RGB apps
Other RGB software like from Cooler Master, Corsair etc. can conflict with Aura Sync and cause problems. Since these components are compatible with all the major RGB software, there might be a condition where each component is trying to access a different software.
Step 1: Go to Settings > Apps > “name of RGB software” and tap Uninstall. You can also use the control panel to uninstall the apps, go to Control Panel > Uninstall a program > “name of RGB software” and click on Uninstall.
Step 2: Alternatively, Open the Run dialog box by pressing Windows Key + R. Type appwiz.cpl and press ENTER. This will open the application manager window, locate the additional RGB software, right-click on it and select Uninstall.
Step 3: Once you’ve removed all the other apps, reboot your PC and see if the issue is resolved.
3. Disable Fast Startup
Fast Startup, as the name suggests, is an inbuilt Windows feature meant to reduce boot times. It does so by storing the system configuration onto the hard drive so that the next time you boot up your computer, it can fetch system files and boot data quickly.
Although this is a useful feature and doesn’t usually hamper Aura software’s installation, it can sometimes keep the app from starting up during boot up, and you may require to start it separately. To prevent that from happening, all you need to do is disable the Fast Startup feature by following the steps below.
Step 1: Press Windows Key + R to open the Run dialog box. Type control panel and press ENTER.
Step 2: In the control panel, change the view to “Large icons” and select Power Options.
Step 3: In the left sidebar, click on Choose what the power buttons do.

Step 4: Click the option that says Change settings that are currently unavailable. There will be an “administrative privilege” icon right next to this option.
Step 5: Scroll down to the bottom and disable the checkbox that says Turn on fast startup. Save and exit the control panel.

Step 6: Reboot your computer and try to launch the Aura app.
Step 7: Uninstall Aura Sync using Revo uninstaller and Reinstall Aura Sync
If you encounter the errors “Asus Aura has stopped working” and “unable to obtain the Aura-enabled device information”, then running Revo uninstaller on the LightningServices folder seems to have worked for a lot of users.
If you simply uninstall the app on your own, there are chances of remnants and stubborn files staying on your PC. Revo uninstaller will conduct an advanced scanning of these files and force remove them so that there are no traces of the old programs or data.
Although Revo Uninstaller does have a paid “Pro” version, we don’t need that for this discussion. A quick and clean reinstallation of Aura Sync can be performed by using the following method.
Step 1: Download and Install Revo Uninstaller from here.
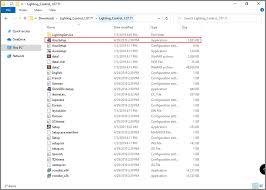
Step 2: Open File Explorer and browse to C:/ProgramFiles(x86).
Step 3: Locate the LightingServices folder. Right-click on it and select Uninstall with Revo Uninstaller, or you can also open Revo uninstaller and find the Aura file to remove from your computer.

Step 4: Follow the instructions in Revo uninstaller to remove Aura from your computer.
Step 5: Once the process is finished, delete the LightingService folder.

Step 6: Go to the Recycle Bin and empty all of its contents.
Step 7: Now download the latest version of Asus Aura from the manufacturer’s website.
Step 8: Install Aura Sync by running the setup file you just downloaded.
Step 9: The error will hopefully be fixed by now, and the Aura app should work right away.
It may happen that after installing the latest version of Aura, you will see messages like “Aura service is not installed”. In that case, simply install the Aura Service from the zip file in the LightingServices folder. If you notice that your motherboard is not showing up in the app, then the next step will solve that problem.
4. Unblock AsIO folders
Several users have reported that unblocking AsIO has seemed to resolve errors related to installing the Aura software and Aura service. Besides the AsIO folders, you can also unblock the Asus Aura setup zip file using the same method given below.
Step 1: Firstly, uninstall the existing Aura software.
Step 2: Now go to C:Program Files (x86)Io. You will find a list of all the AsIO folders.
Step 3: Start with the first folder. Right-click on it and select Properties.
Step 4: Enable the Unlock checkbox at the bottom of the properties window.
Step 5: Click on Apply and then OK to save the changes.
Step 6: Now repeat the same steps for all other AsIO folders.
Step 7: Once you’ve unblocked all of them, install Asus Aura once again. Launch it and check if the problem is solved.
Conclusion
Asus Aura is certainly a great software for gamers and RGB enthusiasts, well, until it stops working. If you are running a rather old version of the app, such issues might occur frequently and it’s always better to use the newest compatible version on your PC.
Quick fixes like removing conflicting apps and disabling fast startup seem to work many of the times, but in any event, a proper reinstallation of the software should resolve all the issues related to “Aura sync not working”.
So, how did it go for you? Did any of the above methods solve the problem, or you still can’t get it fixed? If it’s the latter, please drop us a comment, and we’ll try to be quick with our reply. Thanks for reading!