– Compatible Printer model: Xerox B1022 MFP
– Xerox B1022 MFP Error Codes with quick guides:
- Code: 01-100
- Description: Side Door Open RAP
The machine has detected that the side cover assembly is open. - Troubleshooting Guides: • Ensure the side cover assembly is closed.
Refer to Wiring Diagram 1 for B1022 Machines or Wiring Diagram 2 for B1025 Machines. Perform the steps that follow:
1. Power off the device, then power on the device, GP 4.
2. Enter dC330, code 01-100 side cover interlock, PL 1.10. Open and close the side cover assembly, PL 8.10 and check if the dC330 display changes.
3. Check the interlock switch actuator flag on the side cover, PL 8.10 Item 2 is not missing or damaged.
4. Check that the side cover assembly closes correctly.
5. Refer to GP 10, then check the wiring between the side cover interlock switch and the Main PWB B1025 or Main PWB B1022. If necessary, install a new side cover interlock switch and harness assembly, PL 1.10 Item 14.
- Code: 01-150
- Description: Front Door Open RAP
The machine has detected that the front cover is open. - Troubleshooting Guides: • Ensure the front cover is closed.
Refer to Wiring Diagram 1 for B1022 Machines or Wiring Diagram 2 for B1025 Machines. Perform the steps that follow:
1. Power off the device, then power on the device, GP 4.
2. Enter dC330, code 01-100 front cover interlock, PL 1.10. Open and close the front cover assembly, PL 28.10 Item 2 and check if the dC330 display changes.
3. Check that the switch actuator flag on the front cover assembly, PL 28.10 Item 2 is not missing or damaged.
4. Check that the front cover assembly closes correctly.
5. Refer to GP 10, then check the wiring between the front cover switch and the Main PWB B1025 or Main PWB B1022. If necessary, install a new front cover switch and harness assembly, PL 1.10 Item 5.
- Code: 01-200
- Description: Tray 2 Side Cover Open RAP
The machine has detected that the tray 2 side cover is open. - Troubleshooting Guides: • Ensure the side cover is closed.
• Check for obstructions behind the side cover.
Refer to Wiring Diagram 1 for B1022 Machines or Wiring Diagram 2 for B1025 Machines. Perform the steps that follow:
1. Power off the device, then power on the device, GP 4.
2. Enter dC330, code 08-210 T2 door open sensor, PL 7.20 Item 14. Open and close the side cover PL 7.20 Item 5 and check if the dC330 display changes.
3. Check that the sensor actuator on the side cover is not missing or damaged.
4. Check that the side cover closes correctly.
5. Refer to GP 10, then check the wiring between the T2 door open sensor and CN7 on the Tray 2 PWB.
Install new components as necessary:
1. T2 Door open sensor, PL 7.20 Item 14.
2. Tray 2 PWB, PL 7.20 Item 9.
- Code: 02-100, 02-200
- Description: USB Faults RAP
02-100 Invalid/Unknown USB device.
02-200 Check USB memory. - Troubleshooting Guides: Refer to Wiring Diagram 1 for B1022 Machines or Wiring Diagram 2 for B1025 Machines. Perform the steps that follow:
1. Power off the device, then power on the device, GP 4.
2. Ensure that the customer is using a valid USB device with sufficient free file space.
3. Refer to GP 10, then check the wiring between the USB Host and the Main PWB B1022 or Main PWB B1025.
Install new components as necessary:
1. Front USB host cable, PL 1.10 Item 8.
2. Main PWB, PL 1.10 Item 3.
- Code: 03-120
- Description: Tray 2 Interface Error RAP
The machine has detected tray 2, but a communications error has occurred. - Troubleshooting Guides: Refer to Wiring Diagram 1 for B1022 Machines or Wiring Diagram 2 for B1025 Machines. Perform the steps that follow:
1. Power off the device, then power on the device, GP 4.
2. Refer to GP 10, then check the wiring between the Main PWB B1022 or Main PWB B1025 and CN3 on the Tray 2 PWB.
Install new components as necessary:
1. Tray 2 PWB, PL 7.20 Item 9.
2. Main PWB, PL 1.10 Item 3.
- Code: 03-410, 03-420, 03-450
- Description: Paper Information Mismatch RAP
03-410 The machine has detected a tray 1 paper type or size mismatch.
03-420 The machine has detected a tray 2 paper type or size mismatch.
03-450 The machine has detected a bypass tray paper type or size mismatch. - Troubleshooting Guides: 1. Power off the device, then power on the device, GP 4.
2. From the UI or CWIS check that the appropriate tray paper size and type settings are correct.
3. On the machine check that the appropriate tray media and guide settings match.
4. 03-410 Only. Check the operation of the front and rear paper guides, PL 7.15. Install a new components as necessary: • Front guide, PL 7.15 Item 2. • Rear guide. PL 7.15 Item 4. • Left guide. PL 7.15 Item 13. • Pinion gear. PL 7.15 Item 11.
5. 03-420 Only. Refer to Wiring Diagram 1 for B1022 Machines or Wiring Diagram 2 for B1025 Machines. Refer to GP 10, then check the wiring between the Main PWB B1022 or Main PWB B1025 and CN3 on the Tray 2 PWB. Check the operation of the front and rear paper guides, PL 7.25. Install a new components as necessary: • Front guide, PL 7.25 Item 2. • Rear guide. PL 7.25 Item 4. • Left guide. PL 7.25 Item 13. • Pinion gear. PL 7.25 Item 11.
6. 03-450 Only. Check the operation of the front and rear gear racks and the pinion gear, PL 8.15. Install a new components as necessary: • Pinion gear. PL 8.15 Item 4 . • Bypass tray assembly, PL 8.10 Item 1.
- Code: 03-650
- Description: Ambient Temperature Sensor Fault RAP
The machine has detected a fault with the ambient temperature sensor. - Troubleshooting Guides: Refer to Wiring Diagram 1 for B1022 Machines or Wiring Diagram 2 for B1025 Machines. Perform the steps that follow:
1. Power off the device, then power on the device, GP 4. 2. Refer to GP 10, then check the wiring between the temperature sensor, PL 7.40 Item 14 and the Main PWB B1022 or Main PWB B1025. 3. Install a new temperature sensor, PL 7.40 Item 14.
- Code: 03-800
- Description: SD Card Failure RAP
The machine has detected a fault with the SD card. - Troubleshooting Guides: Perform the steps that follow:
1. Power off the device, then power on the device, GP 4. Install new components as necessary: 1. SD card, PL 1.10 Item 13.
2. Main PWB, PL 1.10 Item 3.
- Code: 03-900, 03-901
- Description: UI Fault RAP
03-900 A user interface to main PWB communications error has been detected.
03-901 The machine has detected a user interface failure. - Troubleshooting Guides: Refer to Wiring Diagram 1 for B1022 Machines or Wiring Diagram 2 for B1025 Machines. Perform the steps that follow:
1. Power off the device, then power on the device, GP 4.
2. Refer to GP 10, then check the wiring between the Main PWB B1022 or Main PWB B1025, PL 1.10 Item 3 and P/J2 on the UI PWB B1022, PL 2.10 Item 7 or CN4 on the UI PWB B1025, PL 2.15 Item 8.
3. B1025 machines only, enter diagnostics GP 1, then perform dC305 user interface tests.
4. B1022 machines only, enter diagnostics GP 1 then perform the System > Switch Test.
Install a new components as necessary:
1. UI PWB B1022, PL 2.10 Item 7.
2. UI PWB B1025, PL 2.15 Item 8.
3. Main PWB, PL 1.10 Item 3.
- Code: 04-500
- Description: Main Motor Locked RAP
04-500 The machine has detected that the main BLDC motor does not run. - Troubleshooting Guides: • Ensure the side cover assembly PL 8.10 Item 5 is closed.
Refer to Wiring Diagram 1 for B1022 Machines or Wiring Diagram 2 for B1025 Machines. Perform
the steps that follow:
1. Power off, then power on the device, GP 4.
2. Remove the toner cartridge, PL 9.10 Item 1, then remove the drum cartridge, PL 9.10 Item 2.
3. Enter dC330, code 04-100. Check the main BLDC motor (MOT04-100) runs, PL 4.10 Item 11.
4. Refer to GP 10, then check the wiring between the main BLDC motor, PL 4.10 Item 11 and the Main PWB B1022 or Main PWB B1025, PL 1.10 Item 3.
Install new components as necessary:
1. Main BLDC motor, PL 4.10 Item 11.
2. Side cover interlock switch and harness assembly, PL 1.10 Item 14.
3. Main PWB, PL 1.10 Item 3.
- Code: 04-600
- Description: Fuser Fan Locked RAP
04-600 The machine has detected that the fuser fan does not run. - Troubleshooting Guides: • Ensure the side cover assembly PL 8.10 Item 5 is closed.
• Check for contamination or blockage in the fuser fan, PL 10.10 Item 3.
Refer to Wiring Diagram 1 for B1022 Machines or Wiring Diagram 2 for B1025 Machines. Perform
the steps that follow:
1. Power off, then power on the device, GP 4.
2. Enter dC330, code 10-500. Check the fuser fan motor (MOT10-500) runs.
3. Refer to GP 10, then check the wiring between the fuser fan, PL 10.10 Item 3 and the
Main PWB B1022 or Main PWB B1025, PL 1.10 Item 3.
Install new components as necessary:
1. Install a new fuser fan, PL 10.10 Item 3.
2. Side cover interlock switch and harness assembly, PL 1.10 Item 14.
3. Main PWB, PL 1.10 Item 3.
- Code: 04-910
- Description: SMPS Fan Locked RAP
04-910 The machine has detected that the SMPS fan does not run. - Troubleshooting Guides: • Ensure the front cover PL 28.10 Item 2 and side cover assembly PL 8.10 Item 5 are closed.
• Check for contamination or blockage in the SMPS fan, PL 1.10 Item 7.
Refer to Wiring Diagram 1 for B1022 Machines or Wiring Diagram 2 for B1025 Machines. Perform
the steps that follow:
1. Power off, then power on the device, GP 4.
2. Enter dC330, code 09-500. Check the SMPS fan motor (MOT09-500) runs, PL 1.10 Item 7.
3. Check the wiring between the SMPS fan, PL 1.10 Item 7 and CN4 on the HVPS PWB, PL 1.10 Item 2.
Install a new components as necessary:
1. SMPS Fan, PL 1.10 Item 7.
2. HVPS PWB, PL 1.10 Item 2.

Solve Xerox B1022 MFP Error codes
- Code: 05-100
- Description: DADF Jam 1 RAP
05-100 The lead edge or trail edge of the document failed to actuate or deactuate the scan sensor within the correct time. - Troubleshooting Guides: Refer to Wiring Diagram B1025. Perform the steps that follow: 1. Open the DADF cover assembly, PL 5.15 Item 1. Remove any jammed paper.
2. Check the document path for damage or obstructions.
3. Check that the components that follow are clean and rotate freely. • Registration roller, PL 5.30 Item 8. • Registration roll idlers, part of the DADF cover assembly, PL 5.15 Item 1.
4. Check that the registration actuator PL 5.25 Item 4, moves freely and is not damaged.
5. Enter code 05-100. Check the document detect sensor (Q05-100). PL 5.35 Item 7.
6. Remove the DADF rear cover, PL 5.15 Item 2. Enter code 05-200. Check that the DADF motor (MOT05-200) runs, PL 5.35 Item 2 and drives the exit roller, PL 5.30 Item 7.
7. Close the DADF top cover assembly. While the DADF motor runs, stack the code 05-310 to energize the DADF registration clutch (CL05-310), PL 5.30 Item 10. Check that the registration roller, PL 5.30 Item 8 rotates.
8. Refer to GP 10 and Wiring Diagram B1025, then check the wiring between the DADF motor MOT05-200, PL 5.35 Item 2, CN3 on the DADF PWB, PL 5.15 Item 3.
9. Refer to GP 10 and Wiring Diagram B1025, then check the wiring between the DADF Regi clutch (CL05-310), PL 5.30 Item 10 and CN13 on the DADF PWB. If necessary, install a new DADF Regi clutch (CL05-310), PL 5.30 Item 10.
10. If necessary, install new components: • DADF PWB, PL 5.15 Item 3. • DADF motor MOT05-200, PL 5.35 Item 2. • DADF feed sub PL 5.20 Item 5.
- Code: 05-300
- Description: DADF Jam 3 RAP
05-300 The lead edge of the document failed to actuate the duplex sensor within the correct time in reverse mode. - Troubleshooting Guides: Refer to Wiring Diagram B1025. Perform the steps that follow:
1. Raise the DADF input tray assembly. PL 5.20 Item 4. Remove all jammed paper.
2. Check the document path for damage or obstructions.
3. Check that the components that follow are clean and rotate freely. • Exit roller, PL 5.30 Item 7. • Exit idle roller, PL 5.30 Item 18.
4. Check that the exit actuator, PL 5.30 Item 17 moves freely and is not damaged.
5. Enter dC330 code 05-170. Check the DADF exit sensor (Q05-170), PL 5.45 Item 2. If necessary, install a new DADF exit sensor (Q05-170), PL 5.45/2
6. Remove the DADF rear cover, PL 5.15 Item 2. Enter code 05-200. Check that the DADF motor (MOT05-200) runs, PL 5.35 Item 2 and drives the exit roller, PL 5.30 Item 7.
7. Enter dC330code 05-201. Check that the DADF motor (MOT05-200) runs, PL 5.35 Item 2 and drives the exit roller, PL 5.30 Item 7 in reverse.
8. Refer to GP 10 and Wiring Diagram B1025, then check the wiring between the DADF motor MOT05-200, PL 5.35 Item 2, and CN3 on the DADF PWB, PL 5.15 Item 3.
9. If necessary, install new components: • DADF PWB, PL 5.15 Item 3. • DADF motor MOT05-200, PL 5.35 Item 2. • DADF feed sub PL 5.20 Item 5.
- Code: 05-400
- Description: DADF Jam 4 RAP
05-400 The lead edge or trail edge of the document failed to actuate or deactuate the scan sensor within the correct time in reverse mode. - Troubleshooting Guides: Refer to Wiring Diagram B1025. Perform the steps that follow:
1. Open the DADF cover assembly, PL 5.15 Item 1. Remove any jammed paper.
2. Raise the DADF input tray assembly. PL 5.20 Item 4. Remove all jammed paper.
3. Check the document path for damage or obstructions.
4. Check that the following components are clean and rotate freely. • Feed roller, PL 5.30 Item 20. • SCF idle rollers, PL 5.45 Item 5. • Exit roller, PL 5.30 Item 7. • Exit idle roller, PL 5.30 Item 18.
5. Check that the document present actuator, PL 5.25 Item 5 moves freely and is not damaged.
6. Enter dC330 detect code 05-100. Check the document sensor (Q05-100). PL 5.35 Item 7.
7. Remove the DADF rear cover, PL 5.15 Item 2. Enter code 05-200. Check that the DADF motor (MOT05-200) runs, PL 5.35 Item 2 and drives the components that follow: • Exit roller, PL 5.30 Item 7. • Exit idle roller, PL 5.30 Item 18.
8. Refer to GP 10 and Wiring Diagram B1025, then check the wiring between the DADF motor MOT05-200, PL 5.35 Item 2, and CN3 on the DADF PWB, PL 5.15 Item 3.
9. If necessary, install new components: • DADF PWB, PL 5.15 Item 3. • DADF motor MOT05-200, PL 5.35 Item 2. • DADF feed sub PL 5.20 Item 5.
- Code: 05-500
- Description: DADF Jam 5 RAP
05-500 The machine has detected that the DADF or DADF top cover assembly are open during run. - Troubleshooting Guides: Refer to Wiring Diagram B1025. Perform the steps that follow:
1. Open the DADF cover assembly, PL 5.15 Item 1. Remove any jammed paper.
2. Raise the DADF input tray assembly. PL 5.20 Item 4. Remove all jammed paper.
3. Open the DADF. Check that the cover open sen 1 actuator, PL 14.10 Item 11, moves freely and is not damaged.
4. Enter dC330 code 05-400. Check the cover open sen 1 (S05-400), PL 14.10 Item 11.
5. Check the wiring between the cover open sen 1 and the main PWB. If necessary, install a new cover open sen 1, PL 14.10 Item 11.
6. Open the DADF cover assembly, PL 5.25 Item 2. Check that the cover open sensor actuator is not damaged.
7. Enter dC330 code 05-160. Check the cover open sensor (S05-160), PL 5.35 Item 7.
8. Check the wiring between the DADF cover open sensor and CN6 on the DADF PWB. If necessary, install a new DADF cover open sensor, PL 5.35 Item 7.
9. If necessary, install new components: • DADF PWB, PL 5.15 Item 3. • DADF feed sub PL 5.20 Item 5.
- Code: 05-600
- Description: DADF Jam 6 RAP
05-600 The machine has detected that a DADF sensor is actuated when the machine is switched on. - Troubleshooting Guides: Refer to Wiring Diagram B1025. Perform the steps that follow:
1. Open the DADF cover assembly, PL 5.15 Item 1. Remove any jammed paper.
2. Raise the DADF input tray assembly. PL 5.20 Item 4. Remove all jammed paper.
3. Check the document path for damage or obstructions.
4. Check that the actuators that follow move freely and are not damaged: • Registration actuator, PL 5.25 Item 4. • Document present actuator, PL 5.25 Item 5. • Exit actuator, PL 5.30 Item 17. • Rear rack gear guide, PL 5.40 Item 4. • Paper length actuator, PL 5.40 Item 8. • Scan actuator, PL 5.45 Item 6.
5. Enter dC330. Check the sensors that follow. Install new components as necessary: • Document registration sensor (Q05-130), PL 5.35 Item 7. • Document detect sensor (Q05-100), PL 5.35 Item 7. • DADF exit sensor (Q05-170), PL 5.45 Item 2. • Width sensor 1 (Q05-110), PL 5.40 Item 9. • Width sensor 2 (Q05-111), PL 5.40 Item 9. • Width sensor 2 (Q05-112), PL 5.40 Item 9. • Length sensor 1 (Q05-120), PL 5.40 Item 9. • Length sensor 2 (Q05-121), PL 5.40 Item 9. • DADF scan start sensor (Q05-140), PL 5.45 Item 2.
6. Check the wiring that follows: • Between the document registration sensor (Q05-130) and CN6 on the DADF PWB. • Between the document detect sensor (Q05-100) and CN6 on the DADF PWB. • Between the DADF exit sensor (Q05-170) and CN6 on the DADF PWB. • Between the width sensor 1 (Q05-110) and CN7 on the DADF PWB. • Between the width sensor 2 (Q05-111) and CN7 on the DADF PWB. • Between the width sensor 2 (Q05-112) and CN7 on the DADF PWB. • Between the length sensor 1 (Q05-120) and CN7 on the DADF PWB. • Between the length sensor 2 (Q05-121) and CN7 on the DADF PWB. • Between the DADF scan start sensor (Q05-140) and CN13 on the DADF PWB.
7. If necessary, install new components: • DADF PWB, PL 5.15 Item 3. • DADF feed sub PL 5.20 Item 5.
- Code: 05-900
- Description: DADF Jam 0 RAP
05-900 The lead edge of the document failed to actuate the registration sensor within the correct time. - Troubleshooting Guides: Refer to Wiring Diagram B1025. Perform the steps that follow:
1. Remove all jammed paper from the DADF input tray.
2. Open the DADF cover assembly, PL 5.25 Item 2. Check the document path for damage or obstructions.
3. Check the feed rollers, PL 5.30 Item 20. If necessary, clean the rollers.
4. DADF friction pad assembly, PL 5.30 Item 2. If necessary, install a new DADF friction pad assembly, PL 5.30 Item 2.
5. Check that the registration actuator PL 5.25 Item 4 moves freely and is not damaged.
6. Enter dC330 code 05-130. Check the document registration sensor, Q05-130, PL 5.35 Item 7.
7. Check the wiring between the document registration sensor and CN6 on the DADF PWB. If necessary, install a document registration sensor, Q05-130, PL 5.35 Item 7.
8. Enter dC330 code 05-200. Check that the DADF motor MOT05-200, PL 5.35 Item 2 runs.
9. While the DADF motor runs, stack the code 05-300 to energize the DADF pick up clutch (CL05-300). Check that the feed roll, PL 5.30 Item 20 rotates.
10. Check the wiring between the pick up clutch and CN13 on the DADF PWB.
11. Check the wiring between the DADF motor and CN3 on the DADF PWB.
12. If necessary, install new components: • DADF PWB, PL 5.15 Item 3. • DADF motor MOT05-200, PL 5.35 Item 2. • DADF feed sub PL 5.20 Item 5.
- Code: 05-920
- Description: DADF Top Cover Open RAP
05-920 The machine has detected that the DADF cover assembly is open. - Troubleshooting Guides: Refer to Wiring Diagram B1025. Perform the steps that follow:
1. Open the DADF cover assembly, PL 5.25 Item 2. Check that the DADF cover open sensor actuator on the DADF cover assembly, PL 5.15 Item 22 is not missing or damaged. If necessary, install a new DADF feed sub PL 5.20 Item 5.
2. Enter dC330 code 05-160. Check the DADF cover open sensor (Q05-160), PL 5.35 Item 7.
3. Check the wiring between the DADF cover open sensor and CN6 on the DADF PWB. If necessary, install a new DADF cover open sensor (Q05-160), PL 5.35 Item 7.
4. If necessary, install new components: • DADF PWB, PL 5.15 Item 3. • DADF feed sub PL 5.20 Item 5.
- Code: 06-100, 06-200
- Description: LSU Error RAP
06-100 The machine has detected that the LSU did not reach a ready state within the correct time.
06-200 LSU Hsync error. The machine did not detect the laser beam within the correct time. - Troubleshooting Guides: Refer to Wiring Diagram 1 for B1022 Machines or Wiring Diagram 2 for B1025 Machines. Perform the steps that follow:
1. Power off, then power on the device, GP 4.
2. Enter dC330 codes 06-100 and 06-110. Check that the LSU motor runs, PL 1.10 Item 4.
3. Refer to GP 10, then check the flat cable between the LSU and the Main PWB B1022 or Main PWB B1025.
4. If necessary, install a new LSU, PL 1.10 Item 4.
- Code: 07-110
- Description: Tray 1 Empty RAP
07-110 The machine has detected that tray 1 is empty. - Troubleshooting Guides: Refer to Wiring Diagram 1 for B1022 Machines or Wiring Diagram 2 for B1025 Machines. Perform the steps that follow:
1. Power off the device, then power on the device, GP 4.
2. Remove tray 1, PL 7.15 Item 1.
3. Enter dC330, code 07-110. Check the tray 1 paper empty sensor (Q07-110), PL 7.10 Item 6.
4. Refer to GP 10, then check the wiring between the tray 1 paper empty sensor and the Main PWB B1022 or Main PWB B1025, PL 1.10 Item 3.
Install new components as necessary:
1. Tray 1 paper empty sensor, PL 7.10 Item 6.
2. Side cover interlock switch and harness assembly, PL 1.10 Item 14.
3. Main PWB, PL 1.10 Item 3.
- Code: 07-130
- Description: Jam 0 From Tray 1 RAP
07-130 The lead edge of the paper failed to actuate the registration sensor within the correct time after paper was fed from tray 1 - Troubleshooting Guides: NOTE: The side cover assembly interlock switch PL 1.10 Item 14 must be closed to supply +24V to the motors and clutches.
Refer to Wiring Diagram 1 for B1022 Machines or Wiring Diagram 2 for B1025 Machines. Perform the steps that follow:
1. Power off the device, then power on the device, GP 4.
2. Remove tray 1, PL 7.15 Item 1. Remove any jammed paper.
3. Check the paper path for damage or obstructions.
4. Enter dC330, code 08-500. Check the registration sensor (Q08-500), PL 8.30 Item 9.
5. Check that the registration sensor actuator moves freely and is not damaged.
6. Enter dC330, code 04-100. Run the main BLDC motor, PL 4.10 Item 11.
7. While the main BLDC motor runs stack the code 08-810 T1 pick-up clutch. Check that the tray 1 roller rotates, PL 7.15 Item 14.
8. Refer to GP 10, then check the wiring between the registration sensor, main BLDC motor, pick-up clutch and the Main PWB B1022 or Main PWB B1025, PL 1.10 Item 3.
Install new components as necessary:
1. Registration sensor, PL 8.30 Item 9.
2. Tray 1 roller, PL 7.15 Item 14.
3. Main BLDC motor, PL 4.10 Item 11.
4. Tray 1 pick-up clutch, PL 4.10 Item 8.
5. Side cover interlock switch and harness assembly, PL 1.10 Item 14.
6. Main PWB, PL 1.10 Item 3.
- Code: 07-210
- Description: Paper Empty at Tray 2 RAP
07-210 The machine has detected that tray 2 is empty when the tray is full. - Troubleshooting Guides: Refer to Wiring Diagram 1 for B1022 Machines or Wiring Diagram 2 for B1025 Machines. Perform the steps that follow:
1. Power off the device, then power on the device, GP 4.
2. Remove tray 2, PL 7.20 Item 1.
3. Enter dC330, code 07-210. Check the tray 2 paper empty sensor (Q07-210), PL 7.20 Item 13.
4. Refer to GP 10, then check the wiring between the tray 2 paper empty sensor (Q07-210) and the Tray 2 PWB, PL 7.20 Item 9.
5. Refer to GP 10, then check the wiring between the tray 2 and the Main PWB B1022 or Main PWB B1025, PL 1.10 Item 3.
Install new components as necessary:
1. Tray 2 paper empty sensor, PL 7.20 Item 13.
2. Main PWB, PL 1.10 Item 3.
- Code: 07-230
- Description: Jam 0 From Tray 2 RAP
07-230 The lead edge of the paper failed to actuate the registration sensor within the correct time after paper was fed from tray 2. - Troubleshooting Guides: NOTE: The side cover assembly interlock switch PL 1.10 Item 14 must be closed to supply +24V to the motors and clutches.
Refer to Wiring Diagram 1 for B1022 Machines or Wiring Diagram 2 for B1025 Machines. Perform the steps that follow:
1. Power off the device, then power on the device, GP 4.
2. Remove tray 2, PL 7.20 Item 1. Remove any jammed paper.
3. Open the side access cover, PL 7.20 Item 5. Remove all jammed paper.
4. Check the paper path for damage or obstructions.
5. Enter dC330, code 08-500. Check the registration sensor (Q08-500), PL 8.30 Item 9.
6. Check that the registration sensor actuator moves freely and is not damaged.
7. Refer to GP 10, then check the wiring between the registration sensor and the Main PWB B1022 or Main PWB B1025, PL 1.10 Item 3.
8. Enter dC330, code 08-920. Run the tray 2 feed motor, PL 7.35 Item 1.
9. While the tray 2 motor runs stack the code 08-820 tray 2 clutch, PL 7.35 Item 6. Check that the feed roll assembly rotates, PL 7.20 Item 2.
10. Check the wiring between the tray 2 feed motor, PL 7.35 Item 1 and Tray 2 PWB, PL 7.20 Item 9.
11. Check the wiring between the Tray 2 PWB, PL 7.20 Item 9 and the Main PWB B1022 or Main PWB B1025, PL 1.10 Item 3.
Install new components as necessary:
1. Registration sensor, PL 8.30 Item 9.
2. Side cover interlock switch and harness assembly, PL 1.10 Item 14.
3. Tray 2 feed motor, PL 7.35 Item 1.
4. Tray 2 clutch, PL 7.35 Item 8.
5. Feed roll assembly, PL 7.20 Item 2.
6. Main PWB, PL 1.10 Item 3.
- Code: 07-500
- Description: Bypass Tray Faults RAP
07-500 The machine has detected a failure to feed from the bypass tray.
07-530 The registration sensor failed to actuate within the correct time after paper was fed from the bypass tray. - Troubleshooting Guides: NOTE: The side cover assembly interlock switch PL 1.10 Item 14 must be closed to supply +24V to the motors and clutches.
Refer to Wiring Diagram 1 for B1022 Machines or Wiring Diagram 2 for B1025 Machines. Perform the steps that follow:
1. Power off the device, then power on the device, GP 4.
2. Open the side cover assembly, PL 8.10 Item 5 . Check that the bypass guide area is clear and clean, PL 7.10 Item 1.
3. Check the bypass retard pad, PL 7.10 Item 2.
4. Check the operation of the bypass paper empty sensor actuator, PL 7.10 Item 8.
5. Enter dC330 code 07-510. Check the bypass paper empty sensor (Q07-510), PL 7.10 Item 6.
6. Check the wiring between the bypass paper empty sensor and the Main PWB B1022 or
Main PWB B1025, PL 1.10 Item 3.
7. Enter dC330, code 08-500. Check the registration sensor (Q08-500), PL 8.30 Item 9.
8. Check that the registration sensor actuator moves freely and is not damaged.
9. Refer to GP 10, then check the wiring between the registration sensor and the Main PWB B1022 or Main PWB B1025, PL 1.10 Item 3.
10. Enter dC330, code 04-100. Run the main BLDC motor, PL 4.10 Item 11.
11. While the main BLDC motor runs stack the code 08-800 bypass feed clutch, PL 7.10 Item
12. Check that the bypass pick-up roll rotates, PL 7.10 Item 3.
12. Refer to GP 10, then check the wiring between the Main BLDC motor, registration sensor, bypass paper empty sensor, bypass feed clutch and the Main PWB B1022 or Main PWB B1025, PL 1.10 Item 3.
Install new components as necessary:
1. Bypass paper empty sensor, PL 7.10 Item 6.
2. Bypass retard pad, PL 7.10 Item 2.
3. Registration sensor, PL 8.30 Item 9.
4. Side cover interlock switch and harness assembly, PL 1.10 Item 14.
5. Main BLDC motor, PL 4.10 Item 11.
6. Bypass feed clutch, PL 7.10 Item 12.
7. Feed roll assembly, PL 7.10 Item 3.
8. Main PWB, PL 1.10 Item 3.
- Code: 07-600
- Description: All Trays Empty RAP
07-600 The machine has detected that all paper trays are empty. - Troubleshooting Guides: Go to the relevant procedure:
• 07-110 Paper Empty at Tray 1 RAP.
• 07-210 Paper Empty at Tray 2 RAP.
• 07-500 Paper Empty at Bypass Tray RAP.
- Code: 08-100
- Description: Jam 1 RAP
08-100 The machine has detected a paper jam in the paperpath. - Troubleshooting Guides: • Check that the paper tray guides are set correctly.
• Check the media is of the correct type, GP 5.
• Ensure the size, orientation and type of media in the tray matches the media displayed in the UI menus.
• Check the fault history, then clear any current faults, GP 2.
NOTE: The side cover assembly interlock switch PL 1.10 Item 14 must be closed to supply +24V to the motors and clutches.
Refer to Wiring Diagram 1 for B1022 Machines or Wiring Diagram 2 for B1025 Machines. Perform the steps that follow:
1. Power off the device, then power on the device, GP 4.
2. Open the side cover assembly PL 8.10 Item 5. Remove any jammed paper.
3. Check the paper path for damage or obstructions.
4. Remove the paper trays, then remove any jammed paper.
5. Enter dC330, code 08-500. Check the registration sensor (Q08-500), PL 8.30 Item 9.
6. Check that the registration sensor actuator moves freely and is not damaged.
7. Refer to GP 10, then check the wiring between the registration sensor and the Main PWB B1022 or Main PWB B1025, PL 1.10 Item 3.
8. Refer to GP 10, then check the registration feed roll, PL 8.30 Item 3 and registration idler roller, PL 8.30 Item 5. If necessary clean the rollers with a water dampened lint free cloth.
9. Enter dC330, code 04-100. Run the main BLDC motor, PL 4.10 Item 11.
10. While the main BLDC motor runs stack the code 08-850 registration clutch, PL 8.30 Item 4. Check that the registration feed roll rotates, PL 8.30 Item 3.
11. Refer to GP 10, then check the wiring between the main BLDC motor, registration clutch and the Main PWB B1022 or Main PWB B1025, PL 1.10 Item 3.
12. Enter dC330, code 10-400. Run the fuser motor, PL 10.10 Item 5, then check the fuser rollers rotates.
13. Refer to GP 10, then check the wiring between the fuser motor and the Main PWB B1022 or Main PWB B1025, PL 1.10 Item 3.
14. Enter dC330, code 08-600. Check the exit sensor (Q08-600), PL 10.10 Item 6.
15. Refer to GP 10, then check the exit sensor actuator, PL 10.15 Item 1.
16. Enter dC330, code 04-200. Run the exit motor, PL 10.10 Item 4, then check the exit rollers
rotates, PL 10.20 Item 5.
17. Refer to GP 10, then check the wiring between the exit motor and the Main PWB B1022 or Main PWB B1025, PL 1.10 Item 3.
Install new components as necessary:
1. Registration sensor, PL 8.30 Item 9.
2. Registration feed roll, PL 8.30 Item 3.
3. Main BLDC motor, PL 4.10 Item 11.
4. Registration clutch, PL 8.30 Item 4.
5. Side cover interlock switch and harness assembly, PL 1.10 Item 14.
6. Fuser motor, PL 10.10 Item 5.
7. Fuser assembly, PL 10.10 Item 2.
8. Exit sensor, PL 10.10 Item 6.
9. Exit motor, PL 10.10 Item 4.
10. Exit assembly, PL 10.20 Item 1.
11. Main PWB, PL 1.10 Item 3.
- Code: 08-500
- Description: Jam 2 RAP
08-500 The machine has detected a paper jam in the fuser area. - Troubleshooting Guides: NOTE: The side cover assembly interlock switch PL 1.10 Item 14 must be closed to supply +24V to the motors and clutches.
Refer to Wiring Diagram 1 for B1022 Machines or Wiring Diagram 2 for B1025 Machines. Perform the steps that follow:
1. Power off the device, then power on the device, GP 4.
2. Open the side cover assembly PL 8.10 Item 5. Remove any jammed paper.
3. Enter dC330, code 10-400. Run the fuser motor, PL 10.10 Item 5, then check the fuser rollers rotates.
4. Refer to GP 10, then check the wiring between the fuser motor and the Main PWB B1022 or Main PWB B1025, PL 1.10 Item 3.
5. Enter dC330, code 08-600. Check the exit sensor (Q08-600), PL 10.10 Item 6.
6. Enter dC330, code 04-200. Run the exit motor, PL 10.10 Item 4, then check the exit rollers
rotates, PL 10.20 Item 5.
7. Refer to GP 10, then check the wiring between the exit motor and the Main PWB B1022 or Main PWB B1025, PL 1.10 Item 3.
Install new components as necessary:
1. Fuser motor, PL 10.10 Item 5.
2. Fuser assembly, PL 10.10 Item 2.
3. Exit sensor, PL 10.10 Item 6.
4. Exit motor, PL 10.10 Item 4.
5. Exit assembly, PL 10.20 Item 1.
6. Main PWB, PL 1.10 Item 3.
- Code: 08-600
- Description: Duplex Jam 0 RAP
08-600 The machine has detected a Jam in the duplex area - Troubleshooting Guides: NOTE: The side cover assembly interlock switch PL 1.10 Item 14 must be closed to supply +24V to the motors and clutches.
Refer to Wiring Diagram 1 for B1022 Machines or Wiring Diagram 2 for B1025 Machines. Perform the steps that follow:
1. Power off the device, then power on the device, GP 4.
2. Open the side cover assembly PL 8.10 Item 5. Remove any jammed paper.
3. Enter dC330, code 04-220. Run the exit motor in reverse, PL 10.10 Item 4, then check the exit rollers rotates, PL 10.20 Item 5.
4. Refer to GP 10, then check the wiring between the exit motor and the Main PWB B1022 or Main PWB B1025, PL 1.10 Item 3.
5. Enter dC330, code 10-400. Run the fuser motor, PL 10.10 Item 5, then check the fuser rollers rotates.
6. Refer to GP 10, then check the wiring between the fuser motor and the Main PWB B1022
or Main PWB B1025, PL 1.10 Item 3.
7. Refer to GP 10, then check the duplex drive gear, PL 4.10 Item 3, duplex drive in gear PL 8.20 Item 3 and duplex drive out gear PL 8.20 Item 2.
8. Refer to GP 10, then check the duplex drive roller, PL 8.20 Item 6 and duplex feed roll, PL 8.20 Item 1.
Install new components as necessary:
1. Fuser motor, PL 10.10 Item 5.
2. Fuser assembly, PL 10.10 Item 2.
3. Exit sensor, PL 10.10 Item 6.
4. Exit motor, PL 10.10 Item 4.
5. Exit assembly, PL 10.20 Item 1.
6. Duplex feed roller, PL 8.20 Item 1.
7. Duplex drive roller, PL 8.20 Item 6
8. Main PWB, PL 1.10 Item 3.
- Code: 09-100
- Description: Toner Low RAP
09-100 The device has detected that the toner cartridge is almost empty. The toner material may be either low or unevenly distributed within the toner cartridge. - Troubleshooting Guides: Perform the steps that follow:
1. Remove the toner cartridge, REP 9.1.
2. Gently shake the toner cartridge horizontally to distribute the toner evenly inside the cartridge.
3. Reinstall the toner cartridge, REP 9.1.
4. Ensure that a replacement toner cartridge, PL 9.10 Item 1 is in stock.
- Code: 09-200
- Description: Toner Empty RAP
09-200 The device has detected that the toner cartridge is empty. - Troubleshooting Guides: Refer to Wiring Diagram 1 for B1022 Machines or Wiring Diagram 2 for B1025 Machines. Perform the steps that follow:
1. Ensure that the toner cartridge is not empty. If necessary, install a new toner cartridge, PL 9.10 Item 1.
2. Enter dC330 code 09-600 and 09-700. Check that the toner dispense motor (MOT09-600, PL 4.10 Item 12) runs and deactuates the toner sensor (Q09-700).
3. Remove the toner cartridge, PL 9.10 Item 1 and drum cartridge, PL 9.10 Item 2. Enter dC330 code 09-600. Ensure that the toner dispense motor runs (MOT09-600) and drives the toner cartridge supply coupling/gear, PL 4.10 Item 4.
4. Check the wiring between the toner dispense motor and the Main PWB B1022 or Main PWB B1025, PL 1.10 Item 3.
5. Check the wiring between the toner cartridge connector and the Main PWB B1022 or Main PWB B1025, PL 1.10 Item 3.
6. If necessary, install a new toner cartridge, PL 9.10 Item 1. Enter dC135 HFSI and reset the toner cartridge counter
Install new components as necessary:
1. Toner dispense motor, PL 4.10 Item 12.
2. Toner cartridge, PL 9.10 Item 1.
3. Main PWB, PL 1.10 Item 3.
- Code: 09-260
- Description: Toner Dispense Motor RAP
09-260 The toner dispense motor failure. - Troubleshooting Guides: Refer to Wiring Diagram 1 for B1022 Machines or Wiring Diagram 2 for B1025 Machines. Perform the steps that follow:
1. Remove the toner cartridge, PL 9.10 Item 1 and drum cartridge, PL 9.10 Item 2. Enter dC330 code 09-600, then check that the toner dispense motor (MOT09-600) runs and drives the toner cartridge supply coupling/gear, PL 4.10 Item 12.
2. Check the wiring between the toner dispense motor (MOT09-600) and the Main PWB B1022 or Main PWB B1025, PL 1.10 Item 3.
3. Enter dC330 code 09-700, then check that the toner dispense motor senor (Q09-700) PL 4.10 Item 17.
4. Check the wiring between the toner dispense motor sensor and the Main PWB B1022 or Main PWB B1025, PL 1.10 Item 3.
Install new components as necessary:
1. Toner dispense motor, PL 4.10 Item 12.
2. Toner dispense motor sensor, PL 4.10 Item 17.
3. Main PWB, PL 1.10 Item 3.
- Code: 09-300
- Description: Drum Warning RAP
09-300 The drum cartridge is near end of life. - Troubleshooting Guides: Refer to Wiring Diagram 1 for B1022 Machines or Wiring Diagram 2 for B1025 Machines. Perform the steps that follow:
1. No immediate action is necessary. Ensure that a replacement drum cartridge, PL 9.10 Item 2 is in stock.
- Code: 09-400
- Description: Drum Cartridge RAP
09-400 The drum cartridge has reached the end of life. - Troubleshooting Guides: Perform the steps that follow:
1. Install a new drum cartridge, REP 9.2.
2. Enter dC135 HFSI then reset the drum cartridge counter.
- Code: 09-500
- Description: Toner Cartridge Not Installed RAP
09-500 The toner cartridge is not installed or the Customer Replaceable Unit Monitor (CRUM) is not making contact - Troubleshooting Guides: Refer to Wiring Diagram 1 for B1022 Machines or Wiring Diagram 2 for B1025 Machines. Perform the steps that follow:
1. Power off, then power on the device, GP 4.
2. Remove the toner cartridge, REP 9.1.
3. Check the contacts on the toner CRUM connector.
4. Reinstall the toner cartridge, REP 9.1.
5. Refer to GP 10. Check the wiring between the toner CRUM connector and the Main PWB B1022 or Main PWB B1025, PL 1.10 Item 3.
Install new components as necessary:
1. Toner cartridge, PL 9.10 Item 1. Enter dC135 HFSI then reset the toner cartridge counter.
2. Main PWB, PL 1.10 Item 3.
- Code: 09-600, 09-730
- Description: Drum Cartridge Error RAP
09-600 The drum cartridge is not installed or the Customer Replaceable Unit Monitor (CRUM) is not making contact.
09-730 The device has detected a drum cartridge error. - Troubleshooting Guides: Refer to Wiring Diagram 1 for B1022 Machines or Wiring Diagram 2 for B1025 Machines. Perform the steps that follow:
1. Power off, then power on the device, GP 4.
2. Remove the drum cartridge, REP 9.2.
3. Check the contacts on the drum CRUM connector.
4. Reinstall the drum cartridge, REP 9.2.
5. Refer to GP 10. Check the wiring between the drum cartridge connector PL 1.10 Item 16 and the Main PWB B1022 or Main PWB B1025, PL 1.10 Item 3.
6. Install a new components as necessary:
• Drum cartridge, PL 9.10 Item 2.
• Front cover switch and harness assembly, PL 1.10 Item 5.
7. Enter dC135 HFSI then reset the drum cartridge counter.
- Code: 09-700, 09-720
- Description: Toner Supply Error RAP
09-700 The device has detected an insufficient supply of toner to the drum cartridge.
09-720 The device has detected a toner supply error. - Troubleshooting Guides: Refer to Wiring Diagram 1 for B1022 Machines or Wiring Diagram 2 for B1025 Machines. Perform the steps that follow:
1. Power off, then power on the device, GP 4.
2. Remove the drum cartridge, REP 9.2.
3. Check that the tape seal on the toner cartridge has been removed.
4. Perform the 09-260 Toner Dispense Motor RAP.
5. Gently shake the toner cartridge horizontally to distribute the toner evenly inside the cartridge.
6. Reinstall the drum and toner cartridges.
7. Install a new components as necessary:
• Toner cartridge, PL 9.10 Item 1.
• Drum cartridge, PL 9.10 Item 2.
8. Enter dC135 HFSI then reset the appropriate cartridge counter.
- Code: 09-710
- Description: Image Quality Adjustment RAP
09-710 The device is performing image quality adjustments. - Troubleshooting Guides: No service actions are required. Advise the customer to wait until the calibrations have completed.
Printing is held while the adjustments are in progress, all other machine services (if
installed) are unaffected.
- Code: 09-800, 09-810
- Description: Incompatible Toner Cartridge RAP
09-800 The device has detected an incompatible toner cartridge.
09-810 The device has detected a non Xerox toner cartridge. - Troubleshooting Guides: Perform the steps that follow:
1. Remove the toner cartridge, REP 9.1.
2. Ensure that the toner cartridge is the correct toner cartridge for the device.
3. Install a new toner cartridge, PL 9.10 Item 1
4. Enter dC135 HFSI then reset the toner cartridge counter.
- Code: 09-900, 09-910
- Description: Incompatible Drum Cartridge RAP
09-900 The machine has detected an incompatible drum cartridge.
09-910 The machine has detected a non Xerox drum cartridge. - Troubleshooting Guides: Perform the steps that follow:
1. Remove the drum cartridge, REP 9.2.
2. Ensure that the drum cartridge is the correct drum cartridge for the device.
3. Install a new drum cartridge, PL 9.10 Item 2.
4. Enter dC135 HFSI then reset the drum cartridge counter.
- Code: 09-950
- Description: Transfer Roller Warning RAP
09-950 The transfer roller is near end of life. - Troubleshooting Guides: Perform the steps that follow:
1. No immediate action is necessary. Ensure that a replacement transfer roll assembly, PL 8.25 Item 5 is in stock.
- Code: 09-960
- Description: Transfer Roller End of Life RAP
09-960 The transfer roller has reached the end of life. - Troubleshooting Guides: Perform the steps that follow:
1. Install a new transfer roll assembly, PL 8.25 Item 5.
2. Enter dC135 HFSI then reset the transfer roller counter.
- Code: 09-970
- Description: Transfer Roller Error RAP
09-970 The device has detected a transfer assembly error. - Troubleshooting Guides: Refer to Wiring Diagram 1 for B1022 Machines or Wiring Diagram 2 for B1025 Machines. Perform the steps that follow:
1. Remove, then reseat the transfer roller assembly, PL 8.25 Item 5.
2. Check the transfer roller assembly for up and down movement.
3. Check the high voltage contacts between the HVPS, PL 1.10 Item 2, high voltage connector,
PL 1.10 Item 6 and the transfer roller assembly for continuity.
4. Install a new components as necessary:
• Transfer roll assembly, PL 8.25 Item 5.
• High voltage connector, PL 1.10 Item 6.
• HVPS, PL 1.10 Item 2.
- Code: 10-100, 10-200
- Description: Open Fuser Error/Low Heat Error RAP
10-100 During normal operation, the temperature of the fuser has dropped below the operating level.
10-200 The fuser has failed to reach the correct operating temperature. - Troubleshooting Guides: • Enter dC330 code 10-500 Check the fuser fan runs, PL 10.10 Item 3. If necessary perform the 04-910 Fuser Fan Locked RAP.
Refer to Wiring Diagram 1 for B1022 Machines or Wiring Diagram 2 for B1025 Machines. Perform the steps that follow:
1. Power off the device, then power on the device, GP 4.
2. Enter dC330 codes 10-200 (centre thermistor) and 10-210 (front thermistor) to verify the condition of the thermistors.
3. Check that the thermistors, PL 10.15 Item 9 and PL 10.15 Item 18 are clean and in good contact with the fuser heat roller.
4. Refer to GP 10, then check the wiring between the fuser assembly, PL 10.10 Item 2 and the SMPS, PL 1.10 Item 1.
5. Switch on the device, then check the fuser input voltage CON1 on the SMPS.
6. Refer to GP 10, then check the wiring between CON4 on the SMPS and the Main PWB B1022 or Main PWB B1025, PL 1.10 Item 3.
7. If the fault persists install new components as necessary:
• Fuser assembly, PL 10.10 Item 2
• SMPS, PL 1.10 Item 1.
• HVPS, PL 1.10 Item 2.
- Code: 10-300, 10-310
- Description: Fuser Over Temperature RAP
10-300 The temperature of the fuser has risen over the operating level.
10-310 The fuser temperature is under adjustment. - Troubleshooting Guides: • Enter dC330 code 10-500 Check the fuser fan motor runs, PL 10.10 Item 3. If necessary perform the 04-600 04-910 Fuser Fan Locked RAP.
Refer to Wiring Diagram 1 for B1022 Machines or Wiring Diagram 2 for B1025 Machines. Perform the steps that follow:
1. Power off the device, GP 4. Wait until the fuser has cooled down, then power on the device GP 4.
2. If the fault persists install a new fuser assembly, PL 10.10 Item 2.
– Get more error code list with quick guide to fix printer product, click here
– About get help with reseting Epson inkpad or others, click here
– Get more information about Epson XP 15000 troubleshooting, click here
Xerox printer reset software introduction:
Notes before resetting Xerox printer:
– Identify accurate version, serial and crum of Xerox printer.
– How to get Xerox printer model info: Click Here
– Before you continue with the reprogramming of the firmware, please make sure that the device is installed on your computer.
– It is very important that under no circumstances should you remove the chip from the cartridge while reprogramming the firmware. After you have succesfully reprogrammed the printer, remove the chip from the cartridge and store it somewhere safely (the chip – a key). In all cartridges which you are going to use in the printer, the chip has to be either removed or sealed. If you have accidently inserted a new cartridge without removing the chip, the device will be blocked. In order to unblock it, you can use the stored chip as a key which help you to unblock the printer.
– And make sure that any other devices (except mouse and keyboard), which are connected to your computer via USB or LPT ports are disconnected. It’s preferable that the computer is connected to the “UPS” (uninterruptible power source) device, because if during the reprogramming process the electricity source has any interruptions, then the reprogramming will be carried out with an error, which makes the device unable to work.
– This firmware will be installed directly to your printer. Before opening firmare link make sure that printer is turned on and connected to your computer and printer drivers are installed correctly.
Be aware that with the reprogramming of the firmware the manufacturer’s warranty goes lost!!
How To Run Firmware Fix Xerox printer
1. Connect the printer to the computer and turn it on.
2. Wait until the printer is ready for work.
3. Drag and drop *.hd to usbprns2.exe file.

4. The reprogramming process starts automatically.
5. Wait until the printer reprograms (10-20 minute) and restarts.
6. After that the reprogramming process is finished, restart the printer.
– Fix Xerox B205 Toner Empty Error, click here
Contact us to get support with Xerox B1022 MFP Error case
Telegram: https://t.me/hyperaktiv
Facebook: https://www.facebook.com/dngnm/
Or click here to get more ways.
Troubleshooting
This section contains procedures to help you locate and resolve problems. Resolve some problems by
simply restarting the printer.
R R e e s s t t a a r r t t i i n n g g t t h h e e P P r r i i n n t t e e r r
To restart the printer, refer to
Note:
If restarting the printer does not resolve the problem, refer to
and
Printer Resets or Powers Off
P P r r i i n n t t e e r r F F a a i i l l s s t t o o P P o o w w e e r r O O n n
Probable Causes
The printer is not powered on.
The power cord is not plugged into the
outlet correctly.
Something is wrong with the outlet
connected to the printer.
The printer is connected to an outlet with a
voltage or frequency that does not match
the printer specifications.
Caution:
Plug in the three-wire cord with grounding prong directly into a grounded AC outlet.
P P r r i i n n t t e e r r R R e e s s e e t t s s o o r r P P o o w w e e r r s s O O f f f f F F r r e e q q u u e e n n t t l l y y
Probable Causes
The power cord is not plugged into the outlet
correctly.
A system error occurred.
120
Xerox
®
B1022 Multifunction Printer
User Guide
Powering the Printer On or
Frequently.
Solutions
Power on the printer. For details, refer to
On or
Off.
Verify that the printer is powered down, then plug in the
power cord securely into the outlet. For details, refer to
Powering the Printer On or
• Plug in a different electrical appliance into the outlet, then
verify that the appliance operates properly.
• Try a different outlet.
Use a power source within the specifications for the printer.
For details, refer to
Off.
Off.
Powering the Printer On or
Solutions
Power off the printer. Before powering on the printer,
confirm that the power cord is plugged in correctly to
the printer and the outlet.
Power off the printer, then power it on again. If the
error persists, contact your Xerox
Printer Fails to Power On
Powering the Printer
Off.
®
representative.

ВЕРСИЯ 1,1
О
КТЯБРЬ 2018 Г.
702P06461
Многофункциональное устройство
Xerox
®
B1022
Руководство пользователя

© Корпорация Xerox, 2018 г. Все права защищены. Xerox
®
, Xerox и Design
®
являются товарными знаками
корпорации Xerox в США и других странах.
Apple
®
, AirPrint
®
, Bonjour
®
, Mac
®
и Mac OS
®
являются товарными знаками или зарегистрированными товар-
ными знаками компании Apple Inc. в США и других странах.
Служба веб-печати Google Cloud Print
™
, служба веб-почты Gmail
™
и мобильная платформа Android
™
явля-
ются товарными знаками компании Google, Inc.
HP-GL
®
, HP-UX
®
и PCL
®
являются зарегистрированными товарными знаками корпорации Hewlett-Packard в
США и других странах.
Microsoft
®
, OneDrive
®
, Windows Vista
®
, Windows
®
и Windows Server
®
являются зарегистрированными товар-
ными знаками корпорации Microsoft в США и других странах.
McAfee
®
, ePolicy Orchestrator
®
и McAfee ePO
™
являются товарными знаками или зарегистрированными то-
варными знаками компании McAfee Inc. в США и других странах.
Mopria является товарным знаком Mopria Alliance.
UNIX
®
является товарным знаком, зарегистрированным в США и других странах, с эксклюзивной лицензией
через компанию X/Open Company Limited.
Wi-Fi CERTIFIED Wi-Fi Direct
®
является товарным знаком ассоциации Wi-Fi Alliance.

Многофункциональное устройство Xerox
®
B1022
Руководство пользователя
3
1 Безопасность...................................................................................................................... 9
Уведомления по технике безопасности ......................................................................... 10
Электробезопасность ..................................................................................................... 11
Общие инструкции ................................................................................................... 11
Шнур питания ........................................................................................................... 11
Аварийное отключение электропитания ................................................................. 12
Меры безопасности при работе с лазерным оборудованием ................................. 12
Безопасность при эксплуатации .................................................................................... 13
Указания по эксплуатации ....................................................................................... 13
Выделение озона...................................................................................................... 13
Размещение принтера.............................................................................................. 14
Расходные материалы для принтера ....................................................................... 14
Техника безопасности при обслуживании..................................................................... 15
Символы на принтере..................................................................................................... 16
Контактные данные для обращения по вопросам охраны труда, техники безопасности
и охраны окружающей среды ........................................................................................ 21
2 Начало работы ................................................................................................................23
Узлы и детали принтера................................................................................................. 24
Вид спереди .............................................................................................................. 24
Вид сзади .................................................................................................................. 24
Внутренние компоненты .......................................................................................... 25
Использование стекла экспонирования .................................................................. 25
Использование опционального податчика оригиналов .......................................... 26
Панель управления .................................................................................................. 26
Информационные страницы .......................................................................................... 28
Доступ к информационным страницам и их печать ................................................ 28
Печать отчета о конфигурации с панели управления ............................................. 28
Функции администрирования ........................................................................................ 29
Xerox
®
CentreWare
®
Internet Services ....................................................................... 29
Доступ к приложению Xerox
®
CentreWare
®
Internet Services.................................... 29
Определение IP-адреса принтера ............................................................................ 29
Автоматический сбор данных .................................................................................. 30
Ассистент по обслуживанию .................................................................................... 30
Просмотр счетчиков учета и использования ........................................................... 31
Дополнительные сведения............................................................................................. 32
Установка и настройка................................................................................................... 33
Краткие сведения по установке и настройке .......................................................... 33
Выбор места установки для принтера ..................................................................... 33
Подключение принтера ............................................................................................ 33
Установка настроек сети .......................................................................................... 36
Включение на принтере режима сканирования ...................................................... 37
Режим энергосбережения ........................................................................................ 37
Установка драйвера ................................................................................................. 38
Установка принтера в качестве веб-службы WSD ................................................... 42
Mopria и Google Cloud Print....................................................................................... 42
3 Использование служб....................................................................................................45
Копирование................................................................................................................... 46

4
Многофункциональное устройство Xerox
®
B1022
Руководство пользователя
Копирование............................................................................................................. 47
Изменение настроек копирования........................................................................... 48
Выбор копирования книги ....................................................................................... 53
Копирование обложек.............................................................................................. 53
Копирование удостоверения.................................................................................... 54
Сканировать (куда) ........................................................................................................ 56
Отправка изображения сканирования на выходное устройство ............................ 56
Сканирование в общую папку на компьютере в сети.............................................. 57
Запуск сканирования c компьютера ........................................................................ 60
Сканирование на USB-накопитель........................................................................... 61
Изменение настроек сканирования ......................................................................... 61
Электронная почта ......................................................................................................... 68
Отправка изображения сканирования по электронной почте ................................ 68
USB.................................................................................................................................. 70
Сканирование на USB-накопитель........................................................................... 70
Печать с USB-накопителя ......................................................................................... 70
Адресная книга............................................................................................................... 72
Добавление контакта в адресную книгу.................................................................. 72
Импортирование записи контакта в адресную книгу.............................................. 73
Изменение и удаление контактов в адресной книге с помощью приложения
Xerox
®
CentreWare
®
Internet Services ....................................................................... 73
Статус работы................................................................................................................. 74
Проверка активных и выполненных работ печати .................................................. 74
Удаление выполняемой работы печати................................................................... 74
Статус аппарата ............................................................................................................. 75
Доступ к разделу «Инф. об аппарате» ..................................................................... 75
Печать отчета о конфигурации с панели управления ............................................. 75
Проверка уровня запаса тонера .............................................................................. 75
Проверка показаний счетчиков учета ..................................................................... 76
4 Печать.................................................................................................................................77
Краткие сведения о печати ............................................................................................ 78
Выбор параметров печати ............................................................................................. 79
Справочная система драйвера принтера ................................................................ 79
Параметры печати Windows..................................................................................... 80
Параметры печати Macintosh................................................................................... 81
Параметры печати в системе Linux .......................................................................... 81
Параметры мобильной печати................................................................................. 84
Печать с USB-накопителя ......................................................................................... 84
Функции печати .............................................................................................................. 85
Управление работами .............................................................................................. 85
Выбор параметров бумаги для печати .................................................................... 86
Масштабирование.................................................................................................... 86
Двусторонняя печать................................................................................................ 86
Печать зеркальных изображений ............................................................................ 87
Печать нескольких страниц на одном листе............................................................ 87
Качество печати ....................................................................................................... 87
Печать брошюр......................................................................................................... 87
Печать обложек........................................................................................................ 88
Печать водяных знаков в системе Windows............................................................. 89

Многофункциональное устройство Xerox
®
B1022
Руководство пользователя
5
Выбор ориентации страниц ..................................................................................... 89
Использование бумаги пользовательского формата .................................................... 91
Печатать на бумаге нестандартного размера ......................................................... 91
Указание настраиваемого размера бумаги............................................................. 91
5 Бумага и другие материалы........................................................................................95
Поддерживаемые виды бумаги...................................................................................... 96
Заказ бумаги ............................................................................................................ 96
Общие указания по вкладыванию бумаги в лотки.................................................. 96
Повреждающая принтер бумага .............................................................................. 96
Рекомендации по хранению бумаги ........................................................................ 97
Поддерживаемые типы и плотность бумаги............................................................ 98
Поддерживаемые стандартные форматы бумаги ................................................... 98
Поддерживаемые нестандартные размеры бумаги ................................................ 99
Поддерживаемые типы и плотность бумаги для автоматической двусторонней
печати ....................................................................................................................... 99
Поддерживаемые стандартные форматы бумаги для автоматической двусто-
ронней печати .......................................................................................................... 99
Поддерживаемые нестандартные форматы бумаги для автоматической дву-
сторонней печати ................................................................................................... 100
Вкладывание бумаги в лотки ....................................................................................... 101
Вкладывание бумаги в лоток 1 .............................................................................. 101
Вкладывание бумаги в опциональный лоток 2 ..................................................... 103
Вкладывание бумаги в обходной лоток................................................................. 105
6 Для обслуживания....................................................................................................... 109
Чистка принтера........................................................................................................... 110
Общие меры предосторожности ............................................................................ 110
Очистка наружных поверхностей........................................................................... 110
Чистка сканера ....................................................................................................... 110
Заказ расходных материалов ...................................................................................... 113
Когда заказывать расходные материалы.............................................................. 113
Проверка уровня тонера ........................................................................................ 113
Проверка состояния расходных материалов принтера......................................... 113
Расходные материалы............................................................................................ 114
Регулярно заменяемые модули.............................................................................. 114
Тонер-картриджи ................................................................................................... 115
Принт-картриджи ................................................................................................... 117
Вторичная переработка расходных материалов................................................... 117
Перемещение принтера ............................................................................................... 118
Проверка показаний счетчиков учета ......................................................................... 120
7 Устранение неисправностей .................................................................................... 121
Устранение общих неисправностей ............................................................................. 122
Перезагрузка принтера .......................................................................................... 122
Принтер не включается .......................................................................................... 122
Принтер часто перезагружается или отключается ................................................ 122
Документ печатается не из указанного лотка....................................................... 123
Проблемы при автоматической двусторонней печати .......................................... 123
Лоток для бумаги не закрывается ......................................................................... 123

6
Многофункциональное устройство Xerox
®
B1022
Руководство пользователя
Печать занимает слишком много времени ............................................................ 124
Работа не печатается ............................................................................................. 124
Посторонний шум в принтере ................................................................................ 125
Конденсация внутри принтера............................................................................... 125
Сообщения о состоянии тонер-картриджа ............................................................ 126
Сообщения о состоянии принт-картриджа ............................................................ 126
Застревание бумаги ..................................................................................................... 127
Предотвращение застревания бумаги ................................................................... 127
Нахождение застрявшей бумаги............................................................................ 128
Извлечение застрявшей бумаги............................................................................. 129
Устранение застревания бумаги ............................................................................ 142
Проблемы с качеством печати ..................................................................................... 144
Контроль качества печати...................................................................................... 144
Устранение проблем с качеством печати .............................................................. 144
Проблемы при копировании и сканировании ............................................................. 148
Получение помощи....................................................................................................... 149
Сообщения на панели управления ........................................................................ 149
Использование встроенных средств устранения неисправностей ....................... 149
Информационные страницы .................................................................................. 150
Online Support Assistant (Онлайновый ассистент поддержки) ............................... 151
Дополнительные сведения..................................................................................... 151
A Характеристики............................................................................................................ 153
Конфигурации и опции принтера................................................................................. 154
Доступные конфигурации ...................................................................................... 154
Стандартные функции............................................................................................ 155
Габаритные размеры и вес .......................................................................................... 157
Масса и габаритные размеры................................................................................ 157
Размеры аппаратов в стандартной конфигурации................................................ 158
Габаритные требования......................................................................................... 158
Требования к окружающей среде................................................................................ 159
Температура........................................................................................................... 159
Относительная влажность...................................................................................... 159
Высота над уровнем моря...................................................................................... 159
Электропитание............................................................................................................ 160
Напряжение и частота питания ............................................................................. 160
Энергопотребление ................................................................................................ 160
Эксплуатационные характеристики............................................................................. 161
Время разогрева принтера..................................................................................... 161
Скорость печати ..................................................................................................... 161
B Информация о соответствии стандартам ............................................................ 163
Соответствие основным стандартам............................................................................ 164
Аппарат удовлетворяет требованиям ENERGY STAR
®
........................................... 164
Правила Федеральной комиссии по связи США .................................................... 164
Европейский Союз .................................................................................................. 165
Соглашение ЕС по оборудованию для создания изображений (группа 4). Эко-
логическая информация......................................................................................... 165
Германия ................................................................................................................ 167
Правила ограничения содержания вредных веществ для Турции........................ 168

Многофункциональное устройство Xerox
®
B1022
Руководство пользователя
7
Нормативная информация для адаптера беспроводной сети 2,4 ГГц .................. 168
Ограничения на копирование ...................................................................................... 169
США ........................................................................................................................ 169
Канада .................................................................................................................... 170
Другие страны ........................................................................................................ 171
Ограничения на передачу факсов................................................................................ 172
США ........................................................................................................................ 172
Канада .................................................................................................................... 173
Европейский Союз .................................................................................................. 174
ЮАР......................................................................................................................... 174
Новая Зеландия...................................................................................................... 175
Material Safety Data Sheets (Данные по безопасности материалов)........................... 176
C Вторичная переработка и утилизация ................................................................. 177
Все страны .................................................................................................................... 178
Европейский Союз ........................................................................................................ 179
Бытовое использование ......................................................................................... 179
Профессиональное использование ........................................................................ 179
Корпоративные пользователи в Европейском Союзе............................................ 179
Утилизация за пределами Европейского Союза .................................................... 179
Символ предупреждения для аккумуляторов ....................................................... 180
Извлечение аккумуляторов.................................................................................... 180
Другие страны .............................................................................................................. 181
D Функции.......................................................................................................................... 183


Многофункциональное устройство Xerox
®
B1022
Руководство пользователя
9
1
Безопасность
Данный принтер и рекомендуемые расходные материалы разработаны с учетом строгих
требований по безопасности и прошли проверку на соответствие этим требованиям. Точное
соблюдение следующих правил обеспечит длительную и безопасную работу принтера Xerox.
Содержание главы:
• Уведомления по технике безопасности ............................................................................. 10
• Электробезопасность ......................................................................................................... 11
• Безопасность при эксплуатации ........................................................................................ 13
• Техника безопасности при обслуживании ......................................................................... 15
• Символы на принтере......................................................................................................... 16
• Контактные данные для обращения по вопросам охраны труда, техники безопасно-
сти и охраны окружающей среды ...................................................................................... 21

Уведомления по технике безопасности
Прежде чем приступать к эксплуатации принтера, внимательно ознакомьтесь с приведенны-
ми ниже указаниями. Соблюдение перечисленных указаний позволит обеспечить длитель-
ную и безопасную эксплуатацию принтера.
Принтер и расходные материалы Xerox
®
разработаны и проверены на предмет соответствия
строгим требованиям безопасности. Эти проверки включают проводимые агентствами по
безопасности испытания, утверждение и подтверждение соответствия установленным стан-
дартам по электромагнитной совместимости и охране окружающей среды.
Проверки безопасности и функционирования данного аппарата выполнялись только с ис-
пользованием материалов Xerox
®
.
Примечание. Любое несанкционированное изменение, включая добавление новых
функций или подключение внешних устройств, может повлиять на соответствие аппа-
рата сертификационным требованиям. Дополнительную информацию можно получить
в представительстве Xerox.
10
Многофункциональное устройство Xerox
®
B1022
Руководство пользователя
Безопасность

Электробезопасность
ООббщщииее ииннссттррууккццииии
ПРЕДУПРЕЖДЕНИЕ.
• Не вставляйте никаких предметов в щели и отверстия принтера. Прикосновение к
электрическим контактам или короткое замыкание могут привести к пожару или
поражению электрическим током.
• Не снимайте крышки и ограждения, закрепленные винтами, за исключением
случаев установки дополнительного оборудования и выполнения специальных
указаний. При выполнении таких операций отключайте питание принтера.
Устанавливая дополнительное оборудование, выньте вилку шнура питания из
розетки. Кроме устанавливаемого дополнительного оборудования, под этими
крышками нет компонентов, подлежащих обслуживанию пользователем.
ПРЕДУПРЕЖДЕНИЕ. Угроза вашей безопасности возникает в следующих случаях:
• Шнур питания поврежден или изношен.
• В принтер попала жидкость.
• Принтер намок.
• Принтер дымится или поверхность нагревается больше обычного.
• Принтер издает необычный шум или запах.
• Из-за принтера срабатывает автоматический выключатель, предохранитель или
другое защитное устройство.
При возникновении любой из перечисленных ситуаций выполните следующие действия:
1. Немедленно выключите принтер.
2. Выньте шнур питания из розетки.
3. Обратитесь в уполномоченное сервисное представительство.
ШШннуурр ппииттаанниияя
• Используйте шнур питания, который входит в комплект поставки принтера.
• Не используйте удлинители. Запрещается снимать и модифицировать вилку шнура
питания.
• Подключайте шнур питания напрямую к правильно заземленной электрической розетке.
Убедитесь, что шнур надежно подключен с обоих концов. Если вы не знаете, заземлена
ли розетка, попросите специалиста проверить ее.
• Не используйте вилку адаптера с заземлением для подключения принтера к сетевой
розетке без контакта заземления.
ПРЕДУПРЕЖДЕНИЕ. Правильное заземление принтера защищает от
поражения электрическим током. При неправильном использовании
электрические устройства могут представлять опасность.
• Убедитесь, что принтер подключен к розетке, обеспечивающей соответствующее
напряжение питания и мощность. В случае необходимости обсудите со специалистом
режимы питания принтера.
• Не размещайте принтер в таком месте, где на шнур питания могут случайно наступить.
Многофункциональное устройство Xerox
®
B1022
Руководство пользователя
11
Безопасность

• Не ставьте предметы на шнур питания.
• При повреждении или износе шнура питания замените его.
• Не вынимайте вилку шнура питания из розетки, когда выключатель питания находится в
положении «включено».
• Во избежание поражения электрическим током и повреждения шнура питания при
отсоединении его от розетки держитесь за вилку.
• Сетевая розетка должна быть установлена в непосредственной близости от принтера, а
доступ к ней не должен быть затруднен.
Шнур питания подключается через гнездо на задней панели принтера. Если потребуется
полностью отключить электропитание принтера, выньте вилку шнура питания из розетки.
ААввааррииййннооее ооттккллююччееннииее ээллееккттррооппииттаанниияя
При возникновении любого из следующих условий немедленно отключите питание
аппарата. Выньте вилку шнура питания из розетки. В следующих случаях необходимо
обращаться в авторизованный сервисный центр Xerox:
• Аппарат издает необычные шумы или запахи.
• Шнур питания поврежден или изношен.
• Сработал настенный автоматический выключатель, предохранитель или другие
защитные устройства.
• В принтер попала жидкость.
• Принтер намок.
• Произошло повреждение любого компонента принтера.
ММееррыы ббееззооппаассннооссттии ппррии ррааббооттее сс ллааззееррнныымм
ооббооррууддооввааннииеемм
Данный принтер соответствует стандартам для лазерного оборудования, установленным
правительственными, государственными и международными организациями, и
сертифицирован как лазерное устройство класса 1. Этот принтер не является источником
опасного излучения, поскольку луч полностью закрыт кожухами на всех этапах
эксплуатации и технического обслуживания пользователями.
Предупреждение об опасности лазера. Использование не описанных здесь
регулировок, настроек или процедур может привести к опасному воздействию
лазерного излучения.
12
Многофункциональное устройство Xerox
®
B1022
Руководство пользователя
Безопасность

Безопасность при эксплуатации
Принтер и расходные материалы разработаны с учетом строгих требований техники без-
опасности и прошли проверку на соответствие этим требованиям. Это включает проверку и
утверждение агентствами по технике безопасности, а также соответствие установленным
стандартам охраны окружающей среды.
Соблюдение вами перечисленных условий обеспечит длительную и безопасную работу
принтера.
УУккааззаанниияя ппоо ээккссппллууааттааццииии
• Не извлекайте бумагу из лотков в процессе печати.
• Не открывайте дверцы во время печати.
• Не перемещайте принтер во время печати.
• Следите за тем, чтобы руки, волосы, галстук и т. п. не попадали между роликами вывода
и подачи.
• Опасные участки принтера закрыты крышками, которые снимаются с помощью
инструмента. Не снимайте защитные крышки.
Предупреждение об опасности ожога. Металлические поверхности на участке
фьюзера нагреваются. Извлекая застрявшую бумагу на этом участке,
соблюдайте осторожность, чтобы не коснуться металлической поверхности.
ВВыыддееллееннииее ооззооннаа
В процессе обычной работы принтера выделяется озон. Количество выделяемого озона
зависит от объемов копирования. Озон тяжелее воздуха и выделяется в количествах,
недостаточных для причинения вреда здоровью. Принтер следует устанавливать в хорошо
проветриваемом помещении.
Дополнительную информацию можно получить в региональном представительстве Xerox
или по адресу www.xerox.com/environment_europe.
Многофункциональное устройство Xerox
®
B1022
Руководство пользователя
13
Безопасность

РРааззммеещщееннииее ппррииннттеерраа
• Принтер следует устанавливать на ровной, прочной и устойчивой поверхности, которая
может выдержать его вес. Сведения о весе принтера см. раздел Габаритные размеры и
вес.
• Не блокируйте и не закрывайте щели и отверстия принтера. Эти отверстия
предназначены для вентиляции и предотвращения перегрева принтера.
• Размещайте принтер таким образом, чтобы оставалось достаточно свободного места для
работы и обслуживания.
• Принтер не следует устанавливать в пыльных помещениях и пространствах.
• Принтер нельзя хранить и эксплуатировать в условиях высоких и низких температур или
влажности.
• Не размещайте принтер рядом с источником тепла.
• Не размещайте принтер в местах, где он может подвергнуться воздействию прямых
солнечных лучей, во избежание повреждения чувствительных к свету компонентов.
• Не размещайте принтер на пути потока холодного воздуха из кондиционера.
• Не размещайте принтер в местах с высоким уровнем вибрации.
• Наилучшая производительность принтера обеспечивается на высоте, указанной в
разделе Высота над уровнем моря.
РРаассххоодднныыее ммааттееррииааллыы ддлляя ппррииннттеерраа
• Используйте расходные материалы, предназначенные для данной модели принтера.
Применение неподходящих материалов может привести к ухудшению работы принтера
и возникновению опасных ситуаций.
• Выполняйте требования всех указаний, имеющихся на принтере, дополнительных
устройствах и расходных материалах или в поставляемой к ним документации.
• Храните расходные материалы в соответствии с указаниями, приведенными на их
упаковке.
• Храните расходные материалы в недоступном для детей месте.
• Не бросайте тонер, картриджи и сборники отходов в открытый огонь.
• При обращении с картриджами (такими как тонер-картриджи) соблюдайте
осторожность — берегите глаза и незащищенные участки тела. При попадании
содержимого картриджа в глаза может возникать раздражение и воспаление. Не
пытайтесь разбирать картридж — содержимое может попасть в глаза или на
незащищенные участки тела.
Внимание! Не рекомендуется использовать расходные материалы других
производителей. Гарантийные обязательства, соглашение об обслуживании и
гарантия Total Satisfaction Guarantee (Общая гарантия качества) не распространяются
на поломки, неправильную работу или снижение качества, вызванные
использованием расходных материалов других производителей или использованием
расходных материалов Xerox, не предназначенных для этого принтера. Гарантия Total
Satisfaction Guarantee (Общая гарантия качества) действует в США и Канаде. В других
регионах могут действовать иные гарантийные условия. За информацией следует
обращаться в представительство компании Xerox.
14
Многофункциональное устройство Xerox
®
B1022
Руководство пользователя
Безопасность

Техника безопасности при обслуживании
• Не выполняйте никакие операции по обслуживанию, не указанные в документации
принтера.
• Протирайте принтер сухой безворсовой тканью.
• Не сжигайте расходные материалы и регулярно заменяемые модули.
• Информация о программах утилизации расходных материалов Xerox содержится по ад-
ресу www.xerox.com/gwa.
ПРЕДУПРЕЖДЕНИЕ. Не применяйте аэрозольные очистители. При контакте с электро-
механическим оборудованием аэрозольные очистители могут быть взрыво- и
пожароопасны.
Многофункциональное устройство Xerox
®
B1022
Руководство пользователя
15
Безопасность
Символы на принтере
Знак Описание
Осторожно!
Указывается опасность, которая в случае неосторожности может привести
к тяжелой травме или даже гибели.
Предупреждение об опасности ожога
Наружная или внутренняя поверхность принтера может нагреваться. Во
избежание травм соблюдайте осторожность.
Внимание
Указывается обязательное действие, которое необходимо выполнить для
предотвращения материального ущерба.
Не касайтесь данной детали или участка принтера.
Не допускайте воздействия прямого солнечного света на принт-
картриджи.
Не сжигайте тонер-картриджи.
Не сжигайте принт-картриджи.
Не касайтесь данной детали или участка принтера.
Не используйте бумагу со скрепками, скобками и т. д.
16
Многофункциональное устройство Xerox
®
B1022
Руководство пользователя
Безопасность
Знак Описание
Не используйте бумагу со складками и загибами, скрученную и мятую
бумагу.
Не используйте бумагу для струйной печати.
Не используйте прозрачные пленки и пленки для проекторов.
Не вкладывайте бумагу, на которой уже производилась печать, или уже
использовавшуюся.
Не копируйте банкноты, гербовые и почтовые марки.
Добавьте бумагу.
Застряла бумага
Заблокировано
Разблокировано
Документ
Многофункциональное устройство Xerox
®
B1022
Руководство пользователя
17
Безопасность
Знак Описание
Бумага
WLAN
Беспроводная локальная сеть
LAN
Локальная сеть
USB
Универсальная последовательная шина
Телефонная линия
Линия модема
Открытки
Вкладывайте конверты в лоток так, чтобы клапаны находились сверху и
были закрыты.
Вкладывайте конверты в лоток так, чтобы клапаны находились сверху и
были открыты.
NFC
Ближняя бесконтактная связь
18
Многофункциональное устройство Xerox
®
B1022
Руководство пользователя
Безопасность
Знак Описание
Масса
Передача данных
Указатель направления подачи бумаги
Кнопка «Старт»
Кнопка «Стоп»
Кнопка «Приостановить печать»
Кнопка «Вход в систему/Выход из системы»
Кнопка «Справка»
Кнопка «Основные режимы»
Кнопка «Режимы»
Кнопка «Статус работы»
Кнопка «Состояние принтера»
Кнопка «Язык»
Многофункциональное устройство Xerox
®
B1022
Руководство пользователя
19
Безопасность
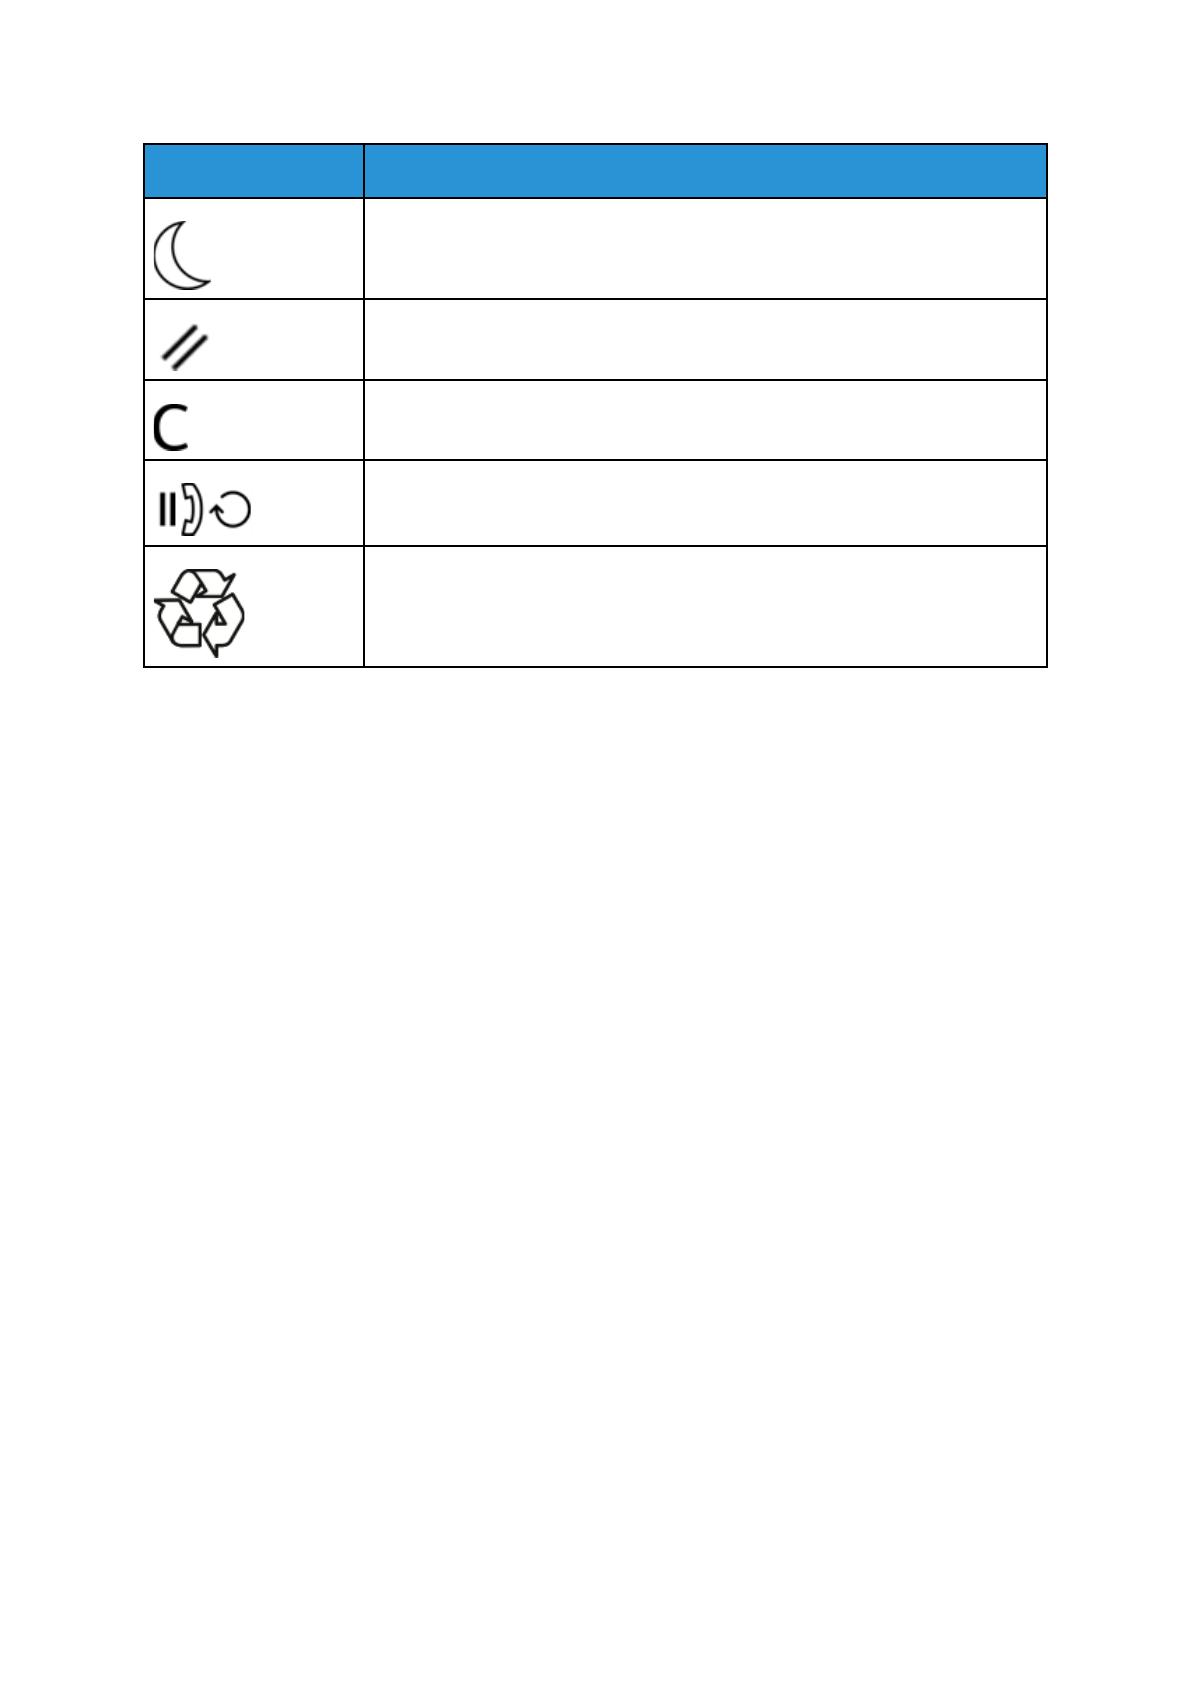
Знак Описание
Кнопка «Питание/Выход из режима сна»
Кнопка «Очистить все»
Кнопка «Очистить»
Кнопка «Пауза набора/Повторный набор»
Данный модуль пригоден для вторичной переработки. См. раздел
Вторичная переработка и утилизация.
20
Многофункциональное устройство Xerox
®
B1022
Руководство пользователя
Безопасность
/


 Доброе время суток! С данным аппаратом проблемка. Начну с предыстории: аппарат новый, пользователь возил куда-то тонер-картридж с принт-картриджем, просыпал весь девелопер из блока проявки (но впечатление что его пылесосом вычистили). Естественно шубы нормальной нет на вале и печатает неравномерными пятнами. Был куплен новый оригинальный тонер-картридж и конечно же это ситуацию не изменило (разве что разблокировало его по тонеру).
Когда аппарат попал ко мне, он печатал через раз — запускаешь на копирование или печать, он одно задание распечатывает, а при повторном задании пишет на экране «Идет печать» либо «Копирование» и ничего не происходит. При нажатии на кнопки реагирует, отменяет печать. Перезагружаешь аппарат и одно задание может распечатать, а может не печатать пока еще один-два раза не перезагрузишь.
По качеству печати (пятнам) клиенту сказал что девелопер закажем и засыпем, это не проблема, продается в Булате и ВТТ. А вот по зависаниями непонятно в чём дело. Клиент утверждает что «хоть и грязно, но вчера всё печатало без зависаний». Собственно вопрос: Может ли начать так себя вести аппарат из-за отсутствия девелопера? Также пользователь говорит что «возможно» он вынимал принт-картридж при включенном принтере, думаю не могло ли что-то из-за этого глюкнуть? К сожалению таких принт-картриджей ни у кого из клиентов нет, подкинуть проверить не получится.
Увы ближайший официальный гарантийный сервис Xerox за 500км. Сбагрить им будет проблематично)
-

lehabasoy
- Осматривается
-
![]()
![]() lehabasoy » Ср авг 12, 2020 11:02 pm
lehabasoy » Ср авг 12, 2020 11:02 pm
В общем пришёл наконец девелопер Булат для Samsung K2200/Hp M436 и был засыпан в блок проявки. Фасовка идёт 228г, всю банку и засыпал, ибо проявка была девственно чиста (возможно ее предыдущие заправщики вычистили как отработку, хотя хозяин аппарата уверяет что всю случайно просыпал). Чудесным образом все тупняки с зависаниями прошли, все задания печатает без тормозов, хотя всё равно не понял почему аппарат не выпадал в ошибку из-за отсутствия носителя, а просто зависал на заданиях. После восстановления девелопера качество отпечатка сначала было чуть темнее чем нужно (лишено полутонов, хотя клиенту так больше нравится), через примерно 150 копий полутона нормализовались и отпечатки практически идеальные. Теперь буду ждать появления совместимых чипов на тонер-картриджи и можно будет заправлять, как и ближайшего его родственника hp m436. Спасибо Goldwater за короткий, но ёмкий ответ) тему можно считать закрытой.
-
lehabasoy
- Осматривается
-
![]()
-
-
Xerox Phaser 6600 «Invalid Yellow» / «Неверный желтый»
kotya-potya в форуме Принтеры, МФУ, факсы, копиры формата A4
- 5
- 5735
3100

Пн ноя 18, 2019 8:24 pm
-
Xerox Phaser 6600 «Invalid Yellow» / «Неверный желтый»
-
-
Xerox WC 3119: «Замятие 1»
kokubenko в форуме Принтеры, МФУ, факсы, копиры формата A4
- 22
- 39603
kokubenko
Ср ноя 23, 2011 4:47 pm
-
Xerox WC 3119: «Замятие 1»
-
-
«Неисправность» финишера Xerox 7556
v1684 в форуме Принтеры, МФУ, копиры формата A3
- 21
- 13393
v1684
Ср сен 19, 2018 4:44 pm
-
«Неисправность» финишера Xerox 7556
-
-
Xerox WC3220 — Ложное замятие бумаги, Замятие 0
Romeo в форуме Принтеры, МФУ, факсы, копиры формата A4
- 25
- 11368
Romeo
Пн окт 12, 2020 7:13 pm
-
Xerox WC3220 — Ложное замятие бумаги, Замятие 0
-
-
Xerox WC 3119 без признаков «жизни»
MorZ в форуме Принтеры, МФУ, факсы, копиры формата A4
- 5
- 6943
Goldwater
Чт окт 08, 2020 11:34 pm
-
Xerox WC 3119 без признаков «жизни»
Вернуться в Принтеры, МФУ, копиры формата A3
Кто сейчас на форуме
Сейчас этот форум просматривают: нет зарегистрированных пользователей и гости: 9