
Windows
Вчера на работе устанавливал новый комп и когда выключал его пошло обновлении и у меня не было времени ждать пока все 73 пакета поставятся и я тупо его выключил (знаю что так делать нельзя, но обстоятельства и ограничение по времени диктовали другие условия и сжав пальцы крестиком и по надеясь на русское «АВОСЬ» пошел на этот рискованный шаг).
Когда включил комп, он запустился без проблем, доставились какие то обновления, потом было пару раз перезагрузок и при очередном поиске обновлений и установке вылетела вот такое окно с ошибкой:
Код 80073712 произошла неизвестная ошибка Windows Update
Причина ошибки 80073712
Когда я выключил принудительно компьютер в процессе установки обновления я повредил хранилище компонентов Windows Update и поэтому теперь не поставятся ни одно обновление на компьютер.
PS (ни в коем случае не надейтесь на АВОСь и не выключайте компьютер когда устанавливаются обновления, потому как я еще отделался легко, а мог и полностью загубить систему и пришлось все это восстанавливать или переустанавливать)
Способы решения и устранения 80073712
Способов решения данной ошибки с кодом 80073712 достаточно много и я постараюсь описать их все. Но самый легкий и 100% который вылечит эту ошибку я опишу в самом конце статьи.
Варианты исправления ошибки 80073712:
Вариант от Microsoft (1 вариант)
Скажу сразу что этот способ я не советую использовать, сразу, а только если уже ни чего не помогло!
Закройте все программы и перезагрузите компьютер.
Вставьте DVD-диск с ОС Windows в соответствующий дисковод на компьютере. Дождитесь запуска программы установки. Если установка не началась автоматически, выполните следующие действия.
При отображении соответствующего запроса укажите ключ продукта Windows.
После завершения установки перезагрузите компьютер, а затем откройте Центр обновления Windows.
Вариант от Microsoft используя утилиту DISM (2 вариант)
Данный способ очень хорош, но я его использовал всего пару раз!
В командной строке введите следующие команды. Нажимайте клавишу ВВОД после каждой команды:
DISM. exe /Online /Cleanup-image /Scanhealth
DISM. exe /Online /Cleanup-image /Restorehealth
Снова запустите Центр обновления Windows.
Удаление хранилища обновлений SoftwareDistribution (3 вариант)
Этот способ я бы выделил в разряд радикальных, но он в действительности почти всегда срабатывает
Проверка целостности файлов (4 вариант)
Данная команда эта как таблетка аспирина для человека если болит голова сначала выпей ее
Средство проверки готовности системы к обновлению от Microsoft KB947821 (5 вариант)
Этот способ самый надежный и 100% он решит Вашу проблему, но если он не помог, тогда пробуйте по пунктам со второго варианта и у Вас все получится, а если нет, то пишите мне и мы вместе разберемся с этой проблемой
PS если радость не получилось, то продуйте с варианта второго и низ!
80073712, 80073712 windows 7, 80073712 windows 7 ошибка обновления, windowsupdate 80073712, windowsupdate 80073712 windowsupdate dt000, исправить 80073712, исправить ошибку 80073712, код 80073712, код 80073712 windows 7, код ошибки 80073712, код ошибки 80073712 windows 7, код ошибки обновления 80073712, ошибка 80073712, ошибка 80073712 windows 7, ошибка windows код 80073712, ошибка обновлений 80073712, ошибка обновления windows 7 код 80073712, причины появления ошибки 80073712, центр обновлений windows 80073712

Нет похожих записей.
Помогло вот это
https://support. microsoft. com/ru-ru/help/949104/how-to-update-the-windows-update-agent-to-the-latest-version
и не смотря на то что в процессе установки вылазит ошибка 0x80073712 после перезагрузки начинает работать
Ну и плюс Вариант 5
Потом правда вылазит ошибка 0x8024402f но несколько раз кнопка повторить и начинают устанавливаться
Попробовал все варианты,- не один не избавил от проблемы..
Не помог ни один вариант.
Отказывает в команде DISM. exe /Online /Cleanup-image /Restorehealth
Не распознаёт этот параметр.
для 64 битных ссылка тут https://www. microsoft. com/ru-ru/download/confirmation. aspx? id=20858
Решил начать с последнего способа, перешел по ссылке, попал на страницу Мелкософта, Поддержка для Windows — Справка для Windows… Ну и что. Куда там дальше то тыкать? Не совет а пустышка какая-то, в топку…
С удовольствием поставил бы и 10 звёздочек, но не за что Радости не случилось..Ни один предложенный способ не помог.. Лишь 3-ий вариант на мгновение завеял победой (обновления успешно установлены), но после первой же перезагрузки всё встало на круги своя — снова красный значок с крестиком, снова некоторые обновления не установлены, снова неизвестная ошибка код 80073712. А 1-ый, не рекомендуемый вариант вообще почему-то не работает-происходит не понятный сбой.
переходим по ссылке на сайт Микрософта и скачиваем пакет под Вашу систему. А что за пакет? Система у меня windows 8.1 64.
слово ссылка залинкована на сайт Микрософт, нажмите на нее и перейдете на сайт где и скачаете нужный Ваш пакет
не работает ни один из вариантов….
Здравствуйте!
Сегодня к своему удивлению выяснил, что с июня 2014 года мой ноутбук под Windows 7 ни раз у не обновил операционку.
Надежду дала Ваша замечательная статья. Однако ни один метод мне не помог. А очень хочется вернуть жизнь в умирающее железо!
Первый способ не пробовал, поскольку у меня нет диска, т. к. у меня OEM версия.
Если Вам интересно мне помочь, то для начала надо разобраться с именем пользователя. У меня стоит имя Юзер. Когда я захожу в учётные записи, то вижу что есть только моя учётная запись. Но называюсь я уже «Юзер Администратор». Слово «Администратор стоит немного ниже, но однозначно входит с Юзером в единое окошко. Других учётных записей нет. Можно ли считать, что я заходил в командную строку как Администратор? Я пытался изменить наименование своей учётной записи, но комп этого не принял, написав мне, что пользователь с таким именем уже существует.
напишите мне на почту (в меню контакты есть мои данные) попробуем решить Вашу проблему.
80244019 Ошибка обновления windows через wsus

Регулярные обновления операционной системы помогают ликвидировать уязвимости и гарантируют поддержку ею актуальных технологий. Но во время процедуры установки обновлений могут появляться различные проблемы. Одной из наиболее частых из них является ошибка 80244019. Давайте узнаем, какими способами можно устранить указанную неисправность в Windows 7.
Причины ошибки и способы её устранения
Причинами ошибки 80244019 могут быть как вирусы, так и различные сбои внутреннего характера, которые привели к изменению настроек или к повреждению системных файлов, принимающих участие в загрузке и установке обновлений. Соответственно, и методы решения проблемы зависят от источника её возникновения. Ниже мы разберем конкретные варианты устранения изучаемой неполадки.
Способ 1: Проверка на вирусы
Одной из главных причин возникновения ошибки 80244019 является вирусное заражение. Поэтому, как только возникла данная неполадка, нужно обязательно просканировать компьютер на наличие вирусов. Даже если причина заключается в другом факторе, проверка не повредит, но если потерять время, то вредоносный код может нанести ещё больший ущерб.
Сканирование нужно выполнять не штатным антивирусом, а с помощью специальных лечащих утилит, которые не требуют установки. При этом лучше всего осуществлять процедуру или со стороннего незараженного ПК, или при помощи LiveCD/USB. Но если по каким-либо причинам вы это не можете сделать, то выполните сканирование в «Безопасном режиме». При обнаружении вируса придерживайтесь тех рекомендаций, которые появятся в окне антивирусного инструмента.

К сожалению, даже если вирус будет обнаружен и устранен, это ещё не гарантирует исчезновения ошибки, так как вредоносный код мог внести в систему изменения, которые нужно исправить. Проблема состоит в том, что мы не знаем, какие конкретно параметры следует проверить и отрегулировать, поэтому используйте все описанные ниже способы поочередно до тех пор, пока не установите, что ошибка 80244019 пропала.
Способ 2: Настройка подключения к WEB
Прежде всего, нужно удостовериться в правильности настройки подключения к web-сети. Этот вариант действий подойдет и тогда, когда первопричиной проблемы оказался не вирус, а сбой.

Далее щелкайте «Сеть и интернет».


В левой части окна выбирайте «Изменение параметров адаптера».

Из списка подключений (если их несколько) в появившемся окошке выбирайте актуальный вариант, с помощью которого вы регулярно соединяетесь со всемирной паутиной. Щелкните по нему правой кнопкой мышки (ПКМ). В перечне выберите «Свойства».

Открывается оболочка свойств соединения. Во вкладке «Сеть» выбирайте вариант «Протокол Интернета версии 4» и выделите его. Жмите «Свойства».


После выполнения указанных выше манипуляций можно проверять, возникает ли ошибка при обновлении снова или её удалось окончательно устранить.
Способ 3: Запуск служб
Одной из причин ошибки 80244019 является также отключение некоторых служб, которое может быть вызвано как вирусами, так и другими факторами. В этом случае необходимо включить деактивированные службы, а также настроить их автоматический запуск в будущем.
-
Перейдя в «Панель управления» через меню «Пуск», щелкайте «Система и безопасность».

Далее выберите вариант «Администрирование».

В отобразившемся перечне переходите по надписи «Службы».

Открывается оболочка «Диспетчера служб». В перечне элементов ищите вариант «Фоновая интеллектуальная служба…». Для облегчения поиска можете произвести выстраивание объектов в порядке расположения алфавита, щелкнув по названию столбца «Имя». Взгляните на статус службы в колонке «Состояние». Если там указано «Работает», значит, с этим элементом все в порядке и нужно переходить к следующему. Но если в этой колонке ничего не указано, то щелкните левой кнопкой мышки дважды по вышеуказанному объекту.

В открывшемся окне изменения свойств в поле «Тип запуска» из раскрывающегося перечня выберите пункт «Вручную» или «Автоматически». Далее жмите «Применить» и «OK».

Вернувшись в «Диспетчер», снова выделите название элемента и жмите «Запустить».

Будет выполнена процедура запуска выбранной службы.

После её успешного завершения напротив указанного элемента должен отобразиться статус «Работает».


После этого можно возобновить попытку обновления Windows. Если проблема заключалась в отключенных службах, то ошибка снова появляться теперь не должна.
Способ 4: Восстановление файлов системы
С указанной выше ошибкой пользователи Виндовс 7 могут столкнуться и в том случае, если на их компьютере по каким-либо причинам были повреждены системные файлы. Поэтому есть смысл выполнить соответствующую проверку и при необходимости произвести процедуру восстановления.


В перечне найдите «Командная строка» и щелкните ПКМ по указанному наименованию. В появившемся списке выбирайте «Запуск от имени администратора».

Открывается «Командная строка». Тут нам нужно будет ввести специальную команду для запуска утилиты «CheckDisk», которая и проведет сканирование и восстановление проблемных файлов. Введите:


Теперь можно будет повторить попытку обновления системы.
Как видим, несмотря на то, что основной причиной ошибки 80244019 является вирусное заражение, её могут вызвать и другие факторы. Кроме того, даже при устранении вируса довольно часто необходимо производить процедуру настройки отдельных элементов, которые он поразил. В любом случае, при появлении вышеуказанной проблемы рекомендуется, прежде всего, выполнить сканирование ПК антивирусной утилитой, а уже далее, если неисправность не исчезнет, производить попытки её устранения другими описанными в данной статье способами.
Отблагодарите автора, поделитесь статьей в социальных сетях.
Ошибка 80244019 и ошибка 84B20001 при обновлении в Windows Server 2008 R2
Ошибка 80244019 и ошибка 84B20001 при обновлении в Windows Server 2008 R2

Ошибка 80244019 при обновлении в Windows Server 2008 R2
Всем привет сегодня расскажу из-за чего появляется ошибка 80244019 и ошибка 84B20001 при обновлении в Windows Server 2008 R2 и как она решается, сразу хочу отметить, что ее повстречать вы сможете и в современных версиях операционной системы, хоть в десятке или Windows Server 2016. Решение будет везде одинаковым. Вообще странно, что данных глюк, тянется уже лет семь, и я уверен, и дальше мы его будем наблюдать, так как вирусы будут всегда, да и пользователи будут засирать систему, не менее интенсивно, чем сейчас.
Ошибка 80244019 в виндовс
Давайте разбираться, как исправить ошибку 80244019, более детально как она выглядит представлено на скриншоте, как видите у меня обе эти пакости 80244019 и 84B20001. Вообще забавная формулировка у 84B20001 (произошла неизвестная ошибка Windows Update)

Ошибка 80244019 при обновлении в Windows Server 2008 R2-01
Самые распространенные причины, из-за которых может возникать данная ошибка 80244019 и ошибка 84B20001 это:
Первое что нужно сделать это проверить работают ли службы. Для этого мы нажимаем Win+R откроется окно выполнить и вводим services. msc,

Ошибка 80244019 при обновлении в Windows Server 2008 R2-02
откроется оснастка службы. Делаем все по алфавиту и смотрим в самом низу, чтобы были запущены Центр обновления Windows и Фоновая интеллектуальная служба передачи (BITS).

Ошибка 80244019 при обновлении в Windows Server 2008 R2-03
Для этого нажмите WIN+R и введите Regedit

Если раздела не будет, то можно его создать, такое встречается, например, в Windows 8.1 и выше.

Исправляем 80244019 ошибка обновления windows 8.1
Например в Windows 8.1 нет ветки реестра WindowsUpdateAU и код 80244019 в windows 8.1 очень часто выскакивает, когда у вас зависла служба BITS, попробуйте ее перезапустить. Для этого откройте командную строку от имени администратора и введите команды:
и net stop wuauserv
net start wuauserv

Снимаем галку » Обновлять другие продукты Microsoft «
Если кто не в курсе, то существуют два типа обновлений:
Если обновление windows выдает код ошибки 80244019, то можно попробовать отключить галку «При обновлении Windows предоставить обновления для других продуктов Microsoft»
Находится она по пути (Для Windows 7 и Windows 8.1)

Вот так вот просто решается ошибка 80244019 и ошибка 84B20001 при обновлении в Windows Server 2008 R2. Обязательно проверьте, что у вас есть интернет и сервера Microsoft у вас не блокируются на внешнем firewall, про это тоже не нужно забывать.
Для других версий Windows от 7 до 10 алгоритм действий при 84B20001 и 80244019, тот же. Да прибудет с вами победа.

Материал сайта pyatilistnik. org
WSUS на базе Windows Server 2012 и выше поддерживает возможность установки на Windows 10 не только обычных обновлений безопасности и исправлений, но и крупных пакетов обновлений (в терминологии Microsoft – апгрейдов). Но прямо из коробки этот функционал не работает, такие апгрейды (в концепции Windows 10 называются Redstone ) на клиенты просто не закачиваются. Разберемся в проблеме.

Если включить эту опцию, то сервер WSUS все равно не будет загружать апгрейды, выдавая при загрузке ошибку. Чтобы сервер WSUS начал скачивать пакеты апгрейдов, нужно на WSUS сервере установить отдельное обновление: KB 3095113 (https://support. microsoft. com/en-us/kb/3095113).
Примечание. Если у вас ранее уже была активирована классификация Upgrades и выполнялась синхронизация, после установки KB 3095113 придется провести очистку базы WSUS с помощью следующих PowerShell команд:
Но это еще не все, даже после установки KB 3095113 на сервере, пакеты апгрейдов на клиентах все равно не появляются. В журналах WindowsUpdate. log на ПК с Windows 10 появляется можно найти ошибку 0x80244019:
2016/08/24 15:32:36.3654849 1064 2660 DownloadManager BITS job <84234ABB-06CE-4251-941C-281B4424EB32>failed, update >
2016/08/24 15:33:36.3658125 1064 2660 DownloadManager Progress failure bytes total = 2659650046, bytes transferred = 18574952
2016/08/24 15:33:36.3845664 1064 2660 DownloadManager Error 0x80244019 occurred while downloading update; notifying dependent calls.
В логе видна попытка закачать файл ESD (новый формат распространения образа ОС), —7C/6F5CAF07827FAE0E37739F3222603EAF38808B7C. esd с сервера. Попробуйте открыть этот URL в браузере – появится ошибка 404. Дело в том, что этот тип файлов не разрешен в настройках IIS и его передача блокируется.
Чтобы разрешить серверу WSUS передавать ESD файлы, откройте консоль Internet Information Service (IIS) Manager, перейдите на сайт WSUS Administration и выберите каталог Content. В настройках IIS выберите раздел Mime Types.

Расширение файла: .esd
Тип MIME: application/octet-stream

Совет. То же самое можно сделать командами:
cd %windir%system32inetsrv
appcmd set config /section:staticContent /+»[fileExtension=’.esd’,mimeType=’application/octet-stream’]»
Перезапустите службу IIS (iisreset) и выполните повторную синхронизацию на клиентах. Клиенты Windows 10 должны начать закачивать esd файлы и могут приступать к установке пакетов обновлений.
Источники:
https://www. nibbl. ru/windows/kod-80073712-oshibka-pri-obnovlenii. html
https://web-shpargalka. ru/80244019-oshibka-obnovlenija-windows-cherez-wsus. php
Не все фиксы, исправления и обновления для продуктов Microsoft доступны для установки в консоли Windows Server Update Services WSUS. Например, у вас в настройках может быть отключена синхронизация обновлений для определенного продукта, версии Windows или класса обновлений. Также в консоли WSUS отсутствуют обновления, которые предназначены для решения конкретной проблемы и не подразумевают массовой установки всем пользователям. Однако, если вы можете вручную добавить (импортировать) во WSUS или SCCM (Configuration Manager) любое обновление, доступное в каталоге обновлений Microsoft (Microsoft Update Catalog).
К примеру, мы хотим добавить в список обновлений WSUS отсутствующее в нем обновление KB3125574 (convenience roll-up update, позволяющий исправить проблему высокой загрузки RAM службой wuauserv и долгого поиска обновлений в Windows).
Содержание:
- Импорт обновления во WSUS с помощью Internet Explorer
- Ошибки импорта обновлений и драйверов во WSUS
- Добавление обновление во WSUS с помощью PowerShell
Импорт обновления во WSUS с помощью Internet Explorer
- Откройте консоль WSUS;
- В дереве консоли щелкните ПКМ по разделу Updates и выберите пункт Import Updates;

- После этого запустится Internet Explorer, который автоматически перейдет на страницу Microsoft Update Catalog;
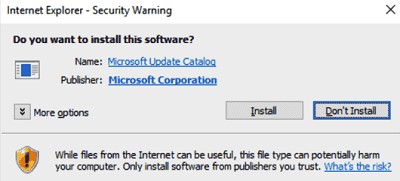
При первом посещении сайта каталога обновлений Microsoft в IE нужно будет установить специальное ActiveX расширение. Желательно также добавить сайт Microsoft Update Catalog в доверенные. Можно зарегистрировать данный ActiveX компонент командой:
regsvr32 c:WindowsSysWOW64MicrosoftUpdateCatalogWebControl.dll
- С помощью поиска найдите нужные вам обновления (KB) и добавьте их в корзину кнопкой Add (желательно добавлять во WSUS не более 20-30 обновлений за раз);
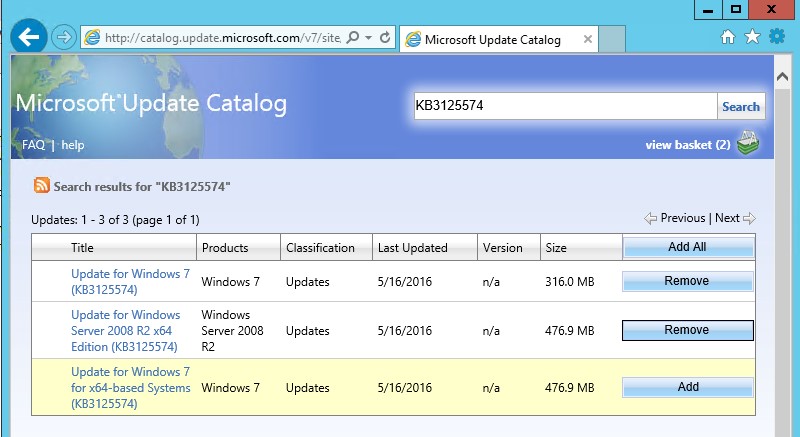
- Затем откройте корзину, нажав на ссылку View basket;
- Установите галку Import directly into Windows Server Update Services (если данная опция недоступна, проверьте что у вас имеются права администратора на сервере WSUS) и нажмите на кнопку Import;
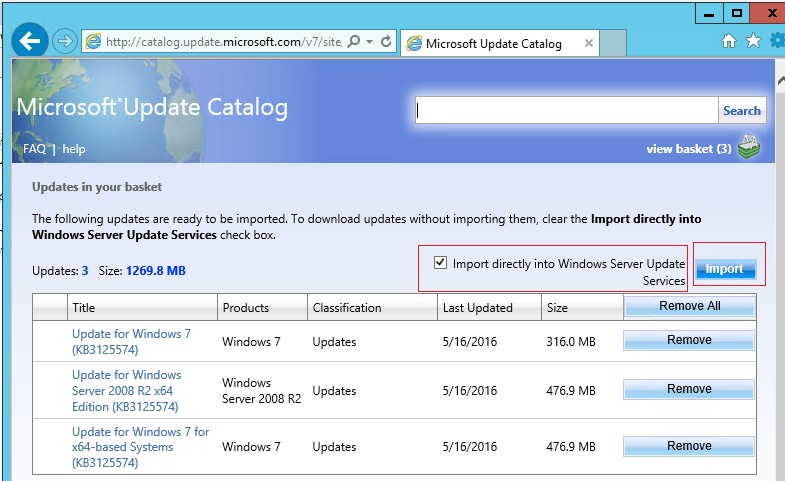
- Дождитесь окончания загрузки обновлений (если загрузка прервется, повторите ее);
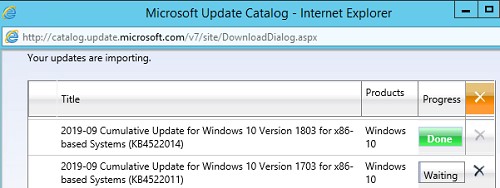
- Затем найдите добавленные вами обновления в консоли WSUS (в разделе All Updates). Одобрите установку обновлений на нужные группы компьютеров (как правило проще всего привязать компьютеры к группам WSUS через GPO).
Таким образом на WSUS сервер можно импортировать любые обновления из каталога Microsoft, в том числе драйвера, Service Pack, Feature Packs и т.д.
Ошибки импорта обновлений и драйверов во WSUS
В WSUS запущенном на Windows Server 2019/2016 при импорте обновлений вы можете столкнуться с ошибкой:
"This update cannot be imported into Windows Server Update Services. Cause: it is not compatible with your version of WSUS"
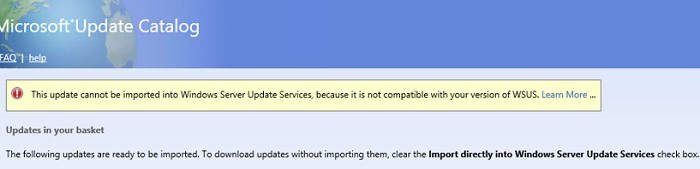
При появлении такой ошибки вам нужно вручную изменить URL адрес, который генерируется после нажатия на кнопку Import Updates. Замените в URL адресе
http://catalog.update.microsoft.com/… &Protocol=1.20
на
Protocol=1.80
.
Должна получиться примерно такая ссылка:
http://catalog.update.microsoft.com/v7/site/Home.aspx?SKU=WSUS&Version=10.0.14393.2248&ServerName=<servername>&PortNumber=8530&Ssl=False&Protocol=1.80
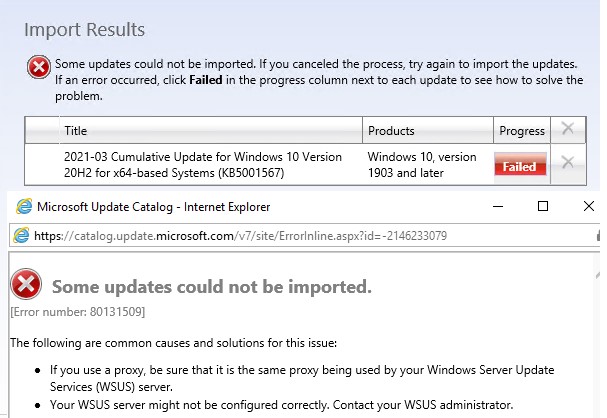
Если при импорте обновлений во WSUS появляется ошибка Failed (error number: 80131509), включите поддержку усиленного шифрования TLS 1.2 для версии .Net Framework 4 на сервере WSUS. Для этого нужно в реестре задать параметру SchUseStrongCrypto значение 1.
reg add HKEY_LOCAL_MACHINESOFTWAREMicrosoft.NETFrameworkv4.0.30319 /V SchUseStrongCrypto /T REG_DWORD /D 1
Добавление обновление во WSUS с помощью PowerShell
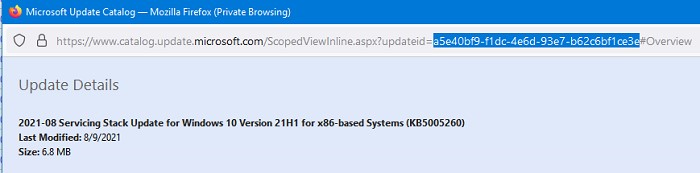
Вы можете добавить обновления на сервер WSUS с помощью PowerShell. Для этого нужно скачать файл обновления из каталога обновлений Microsoft и получить его GUID.
Найдите нужную вам KB в консоли WSUS и щёлкните по его названию. Откроется веб страница с описанием обновления. Скопируйте значение updateid, скачайте MSU файл обновления на локальный диск.
Подключитесь к серверу WSUS из консоли PowerShell:
$WsusSrv = Get-WsusServer
(если вы запустили консоль PowerShell непосредственно на сервере WSUS)
$WsusSrv = Get-WsusServer -Name msk-wsus -PortNumber 8531 –UseSsl
(если вы подключаетесь к серверу WSUS удаленно)
Теперь можно добавить скачанное обновление на WSUS. Используется следующая команда импорта:
$WsusSrv.ImportUpdateFromCatalogSite('UpdateGUID', 'Update.msu')
Например:
$WsusSrv.ImportUpdateFromCatalogSite(‘a5e40bf9-f1dc-4e6d-93e7-b62c6bf1ce3e’, c:psupdateskb5005260.msu)
Можно проверить, что обновление импортировано успешно:
Просмотреть информацию про обновление можно так:
$WsusSrv.SearchUpdates(‘kb5005260’) | fl *
При импорте обновления через PowerShell может появится ошибка:
Exception calling “ImportUpdateFromCatalogSite” with “2” argument(s): “The underlying connection was closed: An unexpected error occurred on a send.”    + CategoryInfo          : NotSpecified: (:) [], MethodInvocationException
+ FullyQualifiedErrorId : WebException
Здесь также причина в том, что PowerShell пытается установить подключение к сайту через TLS 1.0, которое блокируется сервером WSUS. Для решения проблемы нужно добавить параметр SchUseStrongCrypto на сервере WSUS (и перезагрузить его):
reg add HKEY_LOCAL_MACHINESOFTWAREMicrosoft.NETFrameworkv4.0.30319 /V SchUseStrongCrypto /T REG_DWORD /D 1
После этого импорт обновления на сервер WSUS из PowerShell будет работать корректно.
-
Partition Wizard
-
Partition Manager
- How to Fix Minecraft Install Error 0x80131509
How to Fix Minecraft Install Error 0x80131509 [Partition Manager]
By Vega | Follow |
Last Updated June 30, 2022
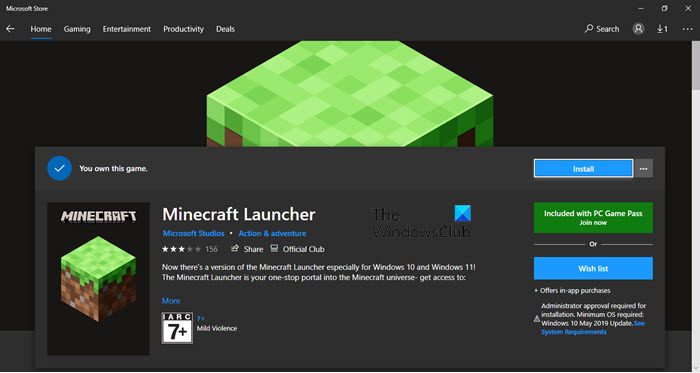
Some users reported that they saw the Minecraft install error 0x80131509 when trying to install Minecraft (Java Edition) through the latest official installer. Well, this article from MiniTool Partition Wizard offers several useful ways to fix this problem.
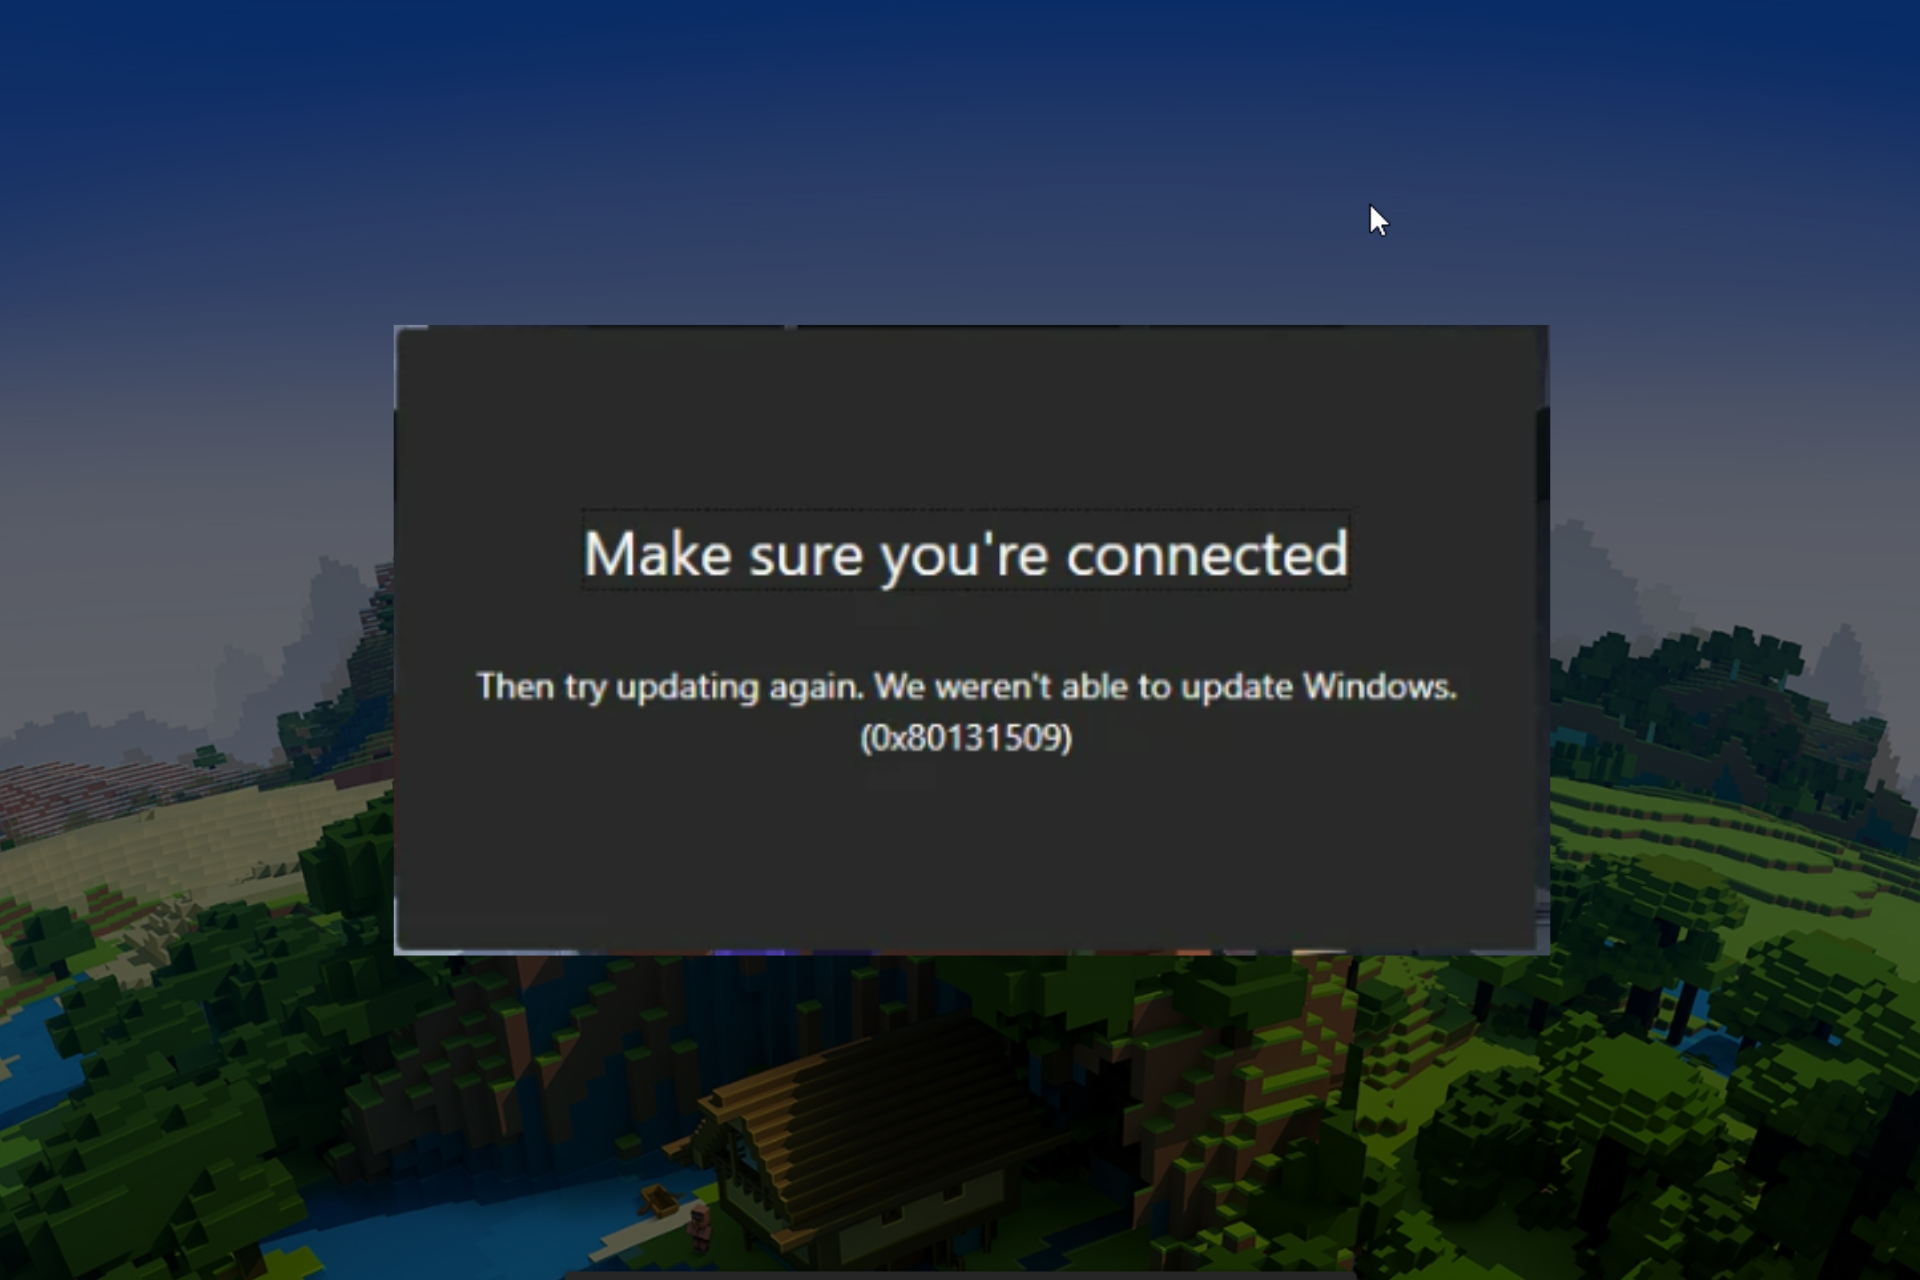
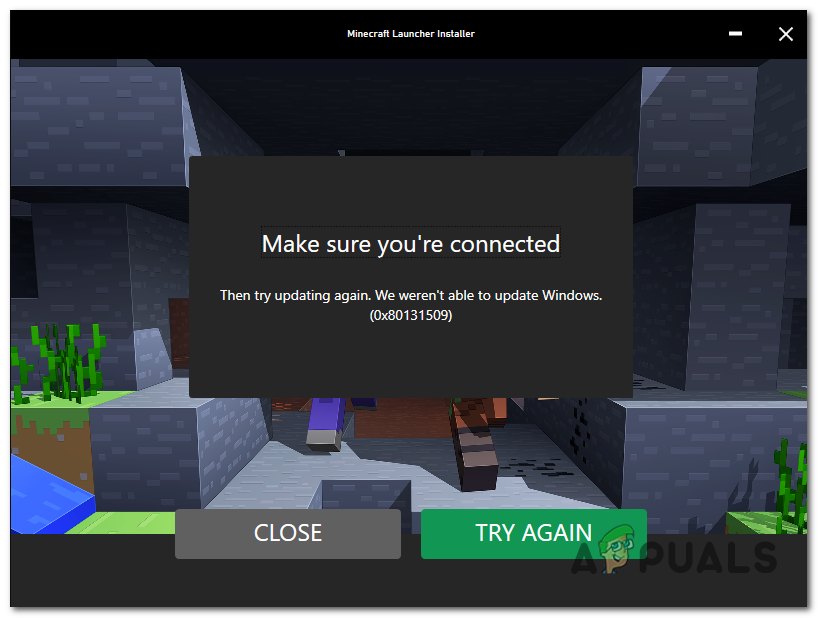
Many Windows users are unable to install Minecraft on their system and they see the following error message «Make sure you’re connected. Then try updating again. We weren’t able to update Windows. (0x80131509).” Besides that, users will see different error codes such as 0x80070424, 0x80131509, 0x80070057, etc.
So, here we put together working solutions on how to fix Minecraft install error 0x80131509. But first, take a look at the common causes of triggering errors.
What Causes Minecraft Error Code 0x80131509?
There are several reasons why Minecraft may not install correctly on your computer.
- Delayed Internet connection: The Internet connection plays the biggest role in showing this error. Files are more likely to be partially downloaded when your computer is connected to a lagging Internet connection. This can eventually lead to improper installation, which can cause problems.
- Conflicting Minecraft launcher: If you have an old launcher and when it conflicts with a newer version of the launcher, it can cause installation problems.
- Pending Windows Updates: As with any software, pending online updates can cause installation issues for the Minecraft game.
- Not signed up with an Xbox account: Incorrect sign-in or no sign-in can cause Minecraft installer error 0x80131509 to appear.
Before trying the solutions below, you should restart your computer. If it is not useful, try the following solutions.
Solution 1: Check Internet Connection
If there is a problem with your internet connection, you will not be able to download the game. Therefore, you should check whether your internet connection is enabled. If yes, you can then check the Internet speed to see whether it is fast enough to download Minecraft.
Solution 2: Reinstall Minecraft Launcher
Any outdated Minecraft Launcher may interfere with the installation process and produce Minecraft error code 0x80131509. Therefore, to uninstall the Minecraft launcher, follow the given steps.
Step 1: Press the Win + I key to open Settings. Then go to Apps > Apps & Features.
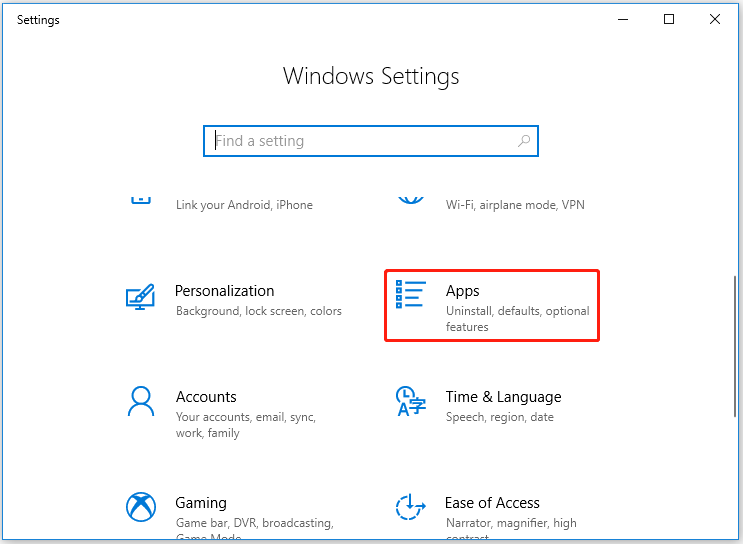
Step 2: Search for Minecraft. Then click on the three vertical dots (for Windows 11) or select the app (for Windows 10).
Step 3: Click on Uninstall.
After removing the outdated launcher from the Microsoft Store, it is best to download the latest launcher from the official Minecraft website.
Solution 3: Check Windows Update Service
Issues related to Windows Update can also be related to displaying Minecraft error code 0x80131509. The easiest fix is to complete any pending updates. To do so, here is the guide.
Step 1: Press the Win + I key to open Settings. Then select Update & Security > Windows Update.
Step 2: Click on Check for Updates. And Windows will automatically check for available newer updates for your device.
Solution 4: Run Minecraft in Compatibility Mode
After the release of the new launcher for Windows 10/11, many Minecraft players experienced Minecraft download error 0x80131509.
To get around this, you can try setting the compatibility mode to Windows 8 in the following ways.
Step 1: On your Windows 10/11 PC, download the old launcher (Windows 7/8).
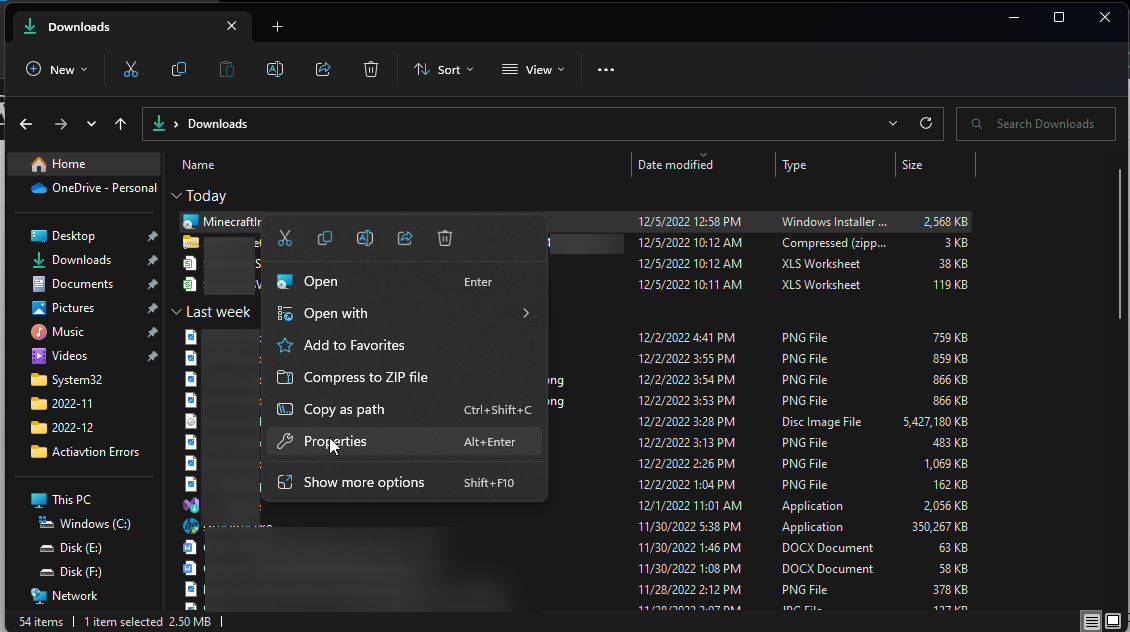
Step 2: Right-click the old launcher.exe file and select Properties from the context menu.
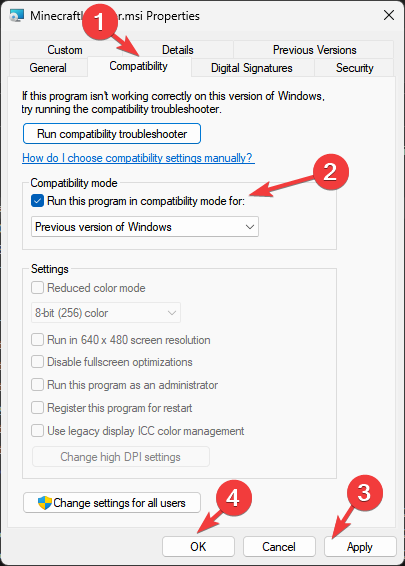
Step 3: Check the box next to Run this program in compatibility mode for on the Compatibility tab.
Step 4: Set the compatibility to Windows 8.
Solution 5: Use the Same Account on the Xbox App and Microsoft Store
You’ll need to make sure you’re using the same account to access the Xbox and Microsoft Store apps. Otherwise, you won’t be able to install the Minecraft launcher.
About The Author

Position: Columnist
Vega joined MiniTool as an editor after graduation. She enjoys helping people with computer problems, including disk management, data recovery, and more. She is constantly expanding her knowledge in related fields. And she will continue to bring more easy-to-understand professional articles to help people solve various problems on the PC.
In her daily life, Vega enjoys hanging out with friends, shopping online and listening to music. She is someone who knows how to enjoy life.

If you encountered an error 80131509 or error 800a0046 when importing updates into Windows Server Update Services (WSUS) from Microsoft Update Catalog, don’t worry. Microsoft has acknowledged some bugs that we’ll review in this article so you can find out what’s affecting you in WSUS and resolve it.
You can read this link if you want to know how to import updates manually into WSUS and SCCM. Here we will review the errors encountered when importing updates from MS Update Catalog.
Previous note bug printers – March 2021:
From Microsoft, they reported that March patches for Windows 10 created problems with printers and cause blue screens when trying to print. They have released new patches to fix this error.
- Windows 10, version 20H2 – Old Patch: (KB5000802) – New Patch: (KB5001567)
- Windows 10, Version 2004 – Old Patch: (KB5000802) – New Patch: (KB5001567)
- Windows 10, Version 1909 – Old Patch: (KB5000808) – New Patch: (KB5001566)
- Windows 10, Version 1809 – Old Patch: (KB5000822) – New Patch: (KB5001568)
- Windows 10, Version 1803 – Old Patch: (KB5000809) – New Patch: (KB5001565)
Importing out-of-band patches released on 15/03/2020 may have a “Failed“. In this guide we will review how to resolve error 80131509 and 80131509 when importing updates from MS Update Catalog.
Requirements for Importing Updates into WSUS:
- A WSUS Server with Internet Access to import updates from Microsoft and download them
- Internet Explorer with the “Microsoft Update Catalog” add-on. If you do not have it installed, you will ask us to do so during the procedure.
- Administrator permissions on the WSUS.
WSUS – Error 80131509 and 80131509 – Import Results
When importing WSUS updates we encounter the error:

Error 80131509 and error 80131509:
“Some updates could not be imported. If you canceled the process, try again to import the updates. If an error occurred, click Failed in the progress column next to each update to see how to solve the problem.”
WSUS – Some updates could not be imported – Error 80131509
If we click on “Failed” we can see more details of the error. Getting error code 80131509 and suggesting that we review the WSUS server proxy and configuration:

Error 80131509:
“Some updates could not be imported.
Error number: 80131509
The following are common causes and solutions for this issue:
- If you use a proxy, be sure that it is the same proxy being used by your Windows Server Update Services (WSUS) server.
- Your WSUS server might not be configured correctly. Contact your WSUS administrator”
WSUS Error 80131509 and 80131509 Solution
First we need to check that the proxy is properly configured and WSUS is working. In case we have reviewed it or WSUS works normally as long as it is only presenting problems now, we can perform the following method to solve the problem:
1. Open a CMD on the WSUS server as Administrator.
2. Enter the following command:
|
reg add HKEY_LOCAL_MACHINESOFTWAREMicrosoft.NETFrameworkv4.0.30319 /V SchUseStrongCrypto /T REG_DWORD /D 1 |
3. Validate that the key was successfully created in REGEDIT as follows:

4. Restart the WSUS Server.
5. Import the updates into WSUS and verify that error 80131509 or 80131509 does not happen.
Result
After you apply the registry key solution, updates are already imported successfully. When importing updates, we see the message “Done”:

And in WSUS the updates will appear within our catalog:

So far, Microsoft has not explained this issue. Although it all makes you think it’s because of an encryption that you’ve started using the Microsoft Update Catalog website that our WSUS servers weren’t ready for.
In case of news I will update this article. You can leave your doubts or other issues with MS Update Catalog and WSUS in the comments.
Passionate about IT and Microsoft technologies with more than 5 years of experience in complex environments (Banking, Congresses and Public Services). Exploring and learning about Modern Workplace every day. I write about SCCM, Windows, Microsoft Intune, Hyper-V, etc…
As described in the other thread: Because you currently have JOBS downloading for WSUS. When you import metadata from the MU catalog, the only thing you import is the METADATA. Then, just like a regular update, when you approve that update, it has to be downloaded. That download gets queued up in the list with all the rest of the updates.
I explained to you how to work around your =75= updates you’re waiting to be downloaded, as it’s highly unlikely you NEED all 75 of those updates, although a few of them you seriously needed yesterday (like MS08-067, if not already installed).
For the sake of thread consolidation, here are those instructions again:
= = = = = = = = = =
Might I suggest that if you need Forefront signature files NOW, then you UNAPPROVE all of the other updates on your WSUS Server; leave only the latest Forefront updates approved, and allow your Forefront content to be updated. Once you’ve obtained your Forefront signature files, then go back and approve other needed SECURITY updates (only). Allow the content for the NEEDED Security Updates to be downloaded. Then approve other needed CRITICAL updates (only), and allow for the content of the NEEDED Critical Updates to be downloaded. Then approve anything else that’s needed and you wish to deploy via WSUS.
Do not approve SUPERCEDED updates.
Do not approve UNNEEDED updates.
After you’ve downloaded and deployed everything that is NEEDED, then you can evaluate the interest and value in approving anything else that is not needed.
= = = = = = = = = =
One additional note I did not explicitly state in the previous post. After unapproving the updates, you’ll likely need to clear out the BITS download cache using the BITSADMIN utility.
Lawrence Garvin, M.S., MCITP:EA, MCDBA
Principal/CTO, Onsite Technology Solutions, Houston, Texas
Microsoft MVP — Software Distribution (2005-2009)
- Partition Wizard
- Partition Manager
- How to Fix Minecraft Install Error 0x80131509
How to Fix Minecraft Install Error 0x80131509 [Partition Manager]
By Vega | Follow |
Last Updated June 30, 2022
Some users reported that they saw the Minecraft install error 0x80131509 when trying to install Minecraft (Java Edition) through the latest official installer. Well, this article from MiniTool Partition Wizard offers several useful ways to fix this problem.
Many Windows users are unable to install Minecraft on their system and they see the following error message «Make sure you’re connected. Then try updating again. We weren’t able to update Windows. (0x80131509).” Besides that, users will see different error codes such as 0x80070424, 0x80131509, 0x80070057, etc.
So, here we put together working solutions on how to fix Minecraft install error 0x80131509. But first, take a look at the common causes of triggering errors.
What Causes Minecraft Error Code 0x80131509?
There are several reasons why Minecraft may not install correctly on your computer.
- Delayed Internet connection: The Internet connection plays the biggest role in showing this error. Files are more likely to be partially downloaded when your computer is connected to a lagging Internet connection. This can eventually lead to improper installation, which can cause problems.
- Conflicting Minecraft launcher: If you have an old launcher and when it conflicts with a newer version of the launcher, it can cause installation problems.
- Pending Windows Updates: As with any software, pending online updates can cause installation issues for the Minecraft game.
- Not signed up with an Xbox account: Incorrect sign-in or no sign-in can cause Minecraft installer error 0x80131509 to appear.
Before trying the solutions below, you should restart your computer. If it is not useful, try the following solutions.
Solution 1: Check Internet Connection
If there is a problem with your internet connection, you will not be able to download the game. Therefore, you should check whether your internet connection is enabled. If yes, you can then check the Internet speed to see whether it is fast enough to download Minecraft.
Solution 2: Reinstall Minecraft Launcher
Any outdated Minecraft Launcher may interfere with the installation process and produce Minecraft error code 0x80131509. Therefore, to uninstall the Minecraft launcher, follow the given steps.
Step 1: Press the Win + I key to open Settings. Then go to Apps > Apps & Features.
Step 2: Search for Minecraft. Then click on the three vertical dots (for Windows 11) or select the app (for Windows 10).
Step 3: Click on Uninstall.
After removing the outdated launcher from the Microsoft Store, it is best to download the latest launcher from the official Minecraft website.
Solution 3: Check Windows Update Service
Issues related to Windows Update can also be related to displaying Minecraft error code 0x80131509. The easiest fix is to complete any pending updates. To do so, here is the guide.
Step 1: Press the Win + I key to open Settings. Then select Update & Security > Windows Update.
Step 2: Click on Check for Updates. And Windows will automatically check for available newer updates for your device.
Solution 4: Run Minecraft in Compatibility Mode
After the release of the new launcher for Windows 10/11, many Minecraft players experienced Minecraft download error 0x80131509.
To get around this, you can try setting the compatibility mode to Windows 8 in the following ways.
Step 1: On your Windows 10/11 PC, download the old launcher (Windows 7/8).
Step 2: Right-click the old launcher.exe file and select Properties from the context menu.
Step 3: Check the box next to Run this program in compatibility mode for on the Compatibility tab.
Step 4: Set the compatibility to Windows 8.
Solution 5: Use the Same Account on the Xbox App and Microsoft Store
You’ll need to make sure you’re using the same account to access the Xbox and Microsoft Store apps. Otherwise, you won’t be able to install the Minecraft launcher.
About The Author
Position: Columnist
Vega joined MiniTool as an editor after graduation. She enjoys helping people with computer problems, including disk management, data recovery, and more. She is constantly expanding her knowledge in related fields. And she will continue to bring more easy-to-understand professional articles to help people solve various problems on the PC.
In her daily life, Vega enjoys hanging out with friends, shopping online and listening to music. She is someone who knows how to enjoy life.
Ошибка установки Minecraft 0x80131509 появляется, когда пользователи пытаются установить игру с помощью официального установщика. Эта ошибка указывает на проблему с подключением к Интернету.
Следующая проблема может быть вызвана устаревшей или поврежденной программой запуска Minecraft. Некоторые отсутствующие обновления Windows также могут быть причиной этой ошибки. Помимо этого, лаунчер может также конфликтовать с неофициальным лаунчером, установленным на вашем ПК. Minecraft, который вы пытаетесь установить, может быть недоступен для вашего ПК, если вы используете более раннюю версию Windows.
Вот список методов, которые покажут вам, как исправить ошибку установки Minecraft 0x80131509:
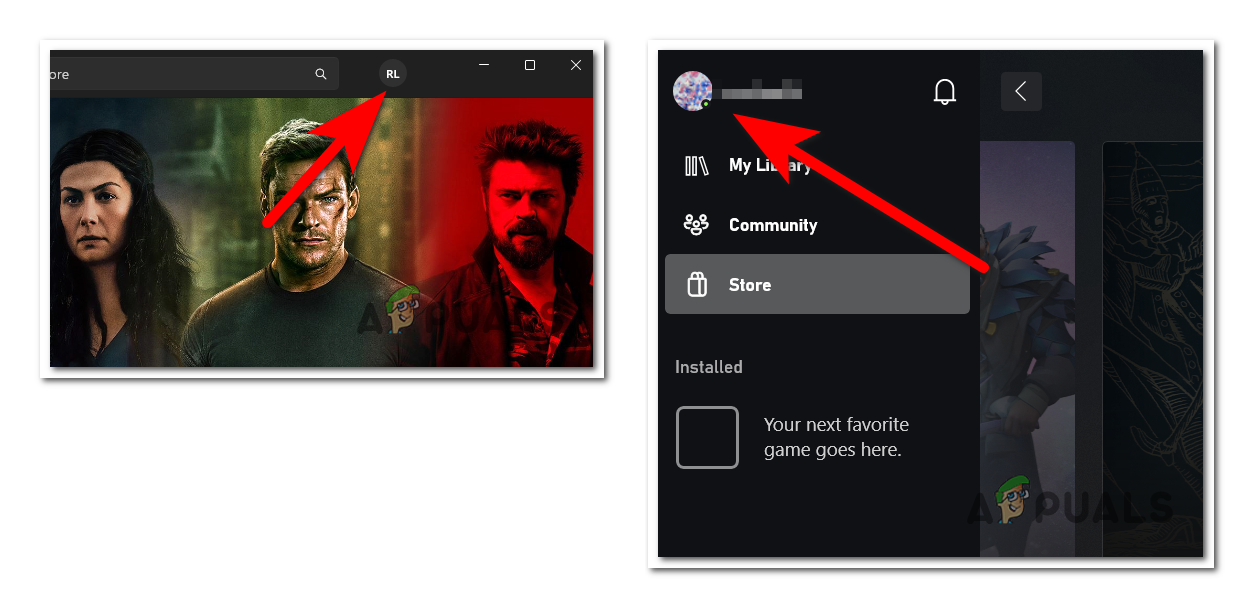
1. Войдите в приложение Xbox.
Первое, что вы можете сделать, это убедиться, что учетная запись, с которой вы вошли в приложение Xbox, совпадает с учетной записью Microsoft Store. Это может повлиять на игру, поскольку учетная запись, которую вы используете для ее установки, не совпадает с учетной записью приложения Xbox.
Откройте приложение Xbox и Microsoft Store и убедитесь, что учетная запись одинакова для обоих.
Если учетные записи не совпадают, нажмите «Выйти» и снова войдите в систему с правильной учетной записью.
После этого остается только попробовать установить игру еще раз.
Если ошибка установки Minecraft 0x80131509 все еще возникает, перейдите к следующему методу.
Следующее, что нужно сделать, это удалить любую неофициальную программу запуска Minecraft, установленную на вашем ПК. Это может вызвать проблему, поскольку официальная программа запуска конфликтует с несертифицированной. Файлы могут перекрываться, что приводит к неправильной работе программы запуска.
Перейдите в меню «Программы и компоненты», и вы увидите все программы запуска, установленные на вашем ПК. Удалите неофициальные.
Вот как вы можете это сделать:
- Нажмите клавишу Windows + R, чтобы открыть диалоговое окно «Выполнить», и введите «appwiz.cpl», затем нажмите Enter, чтобы открыть меню «Программы и компоненты».
- Затем просмотрите список приложений для неофициальных программ запуска Minecraft.
- Когда вы найдете его, щелкните его правой кнопкой мыши и выберите «Удалить».
- Следуйте инструкциям на экране, чтобы завершить процесс удаления.
- Если у вас их несколько, повторите процесс для каждой программы запуска, пока не уничтожите их все.
- Когда вы закончите, попробуйте снова установить Minecraft, используя официальный лаунчер.
Если ошибка установки Minecraft 0x80131509 все еще возникает, перейдите к следующему методу.
3. Переустановите программу запуска Minecraft с официального сайта.
Следующая проблема также может быть вызвана поврежденным установщиком. Вам следует зайти на официальный сайт и попробовать переустановить лаунчер. Если это не сработает, попробуйте установить его из Microsoft Store или приложения Xbox.
Вот руководство о том, как это сделать:
- Откройте любой браузер и зайдите на официальный сайт Майнкрафт.
- Войдите в систему, нажав кнопку Войти с помощью Microsoft.
- В своей учетной записи нажмите кнопку «Получить Minecraft» в правом верхнем углу и выберите «Компьютер».
- Затем нажмите кнопку «Загрузить», а затем нажмите кнопку «Загрузить» для Windows 10/11, чтобы подтвердить загрузку.
- Нажмите на установщик лаунчера и установите его.
- Если это не сработает, откройте Microsoft Store или приложение Xbox и найдите Minecraft.
- Когда вы найдете его, нажмите кнопку «Установить» и завершите процесс.
- Когда лаунчер установлен, попробуйте открыть игру, чтобы проверить, работает ли она.
4. Установите версию Minecraft для Windows 7/8 (если применимо).
Если вы используете более раннюю версию Windows, попробуйте загрузить более старую версию программы запуска Minecraft. Ошибка может появиться из-за того, что программа запуска, которую вы пытаетесь использовать, несовместима с вашей версией Windows.
Вы должны загрузить версию, совместимую с вашим ПК, с официального сайта Minecraft.
Вот как вы можете это сделать:
- Используя любой браузер, который вы хотите, посетите официальный сайт Майнкрафт и убедитесь, что вы вошли в свою учетную запись.
- Теперь нажмите кнопку «Получить Minecraft» в верхней правой части окна. Выберите Компьютер на следующем экране.
- Далее нажмите на кнопку Скачать.
- Прокрутите вниз, пока не увидите средство загрузки для Windows 7/8, и нажмите на него.
- Нажмите на установщик и завершите процесс.
- Откройте лаунчер, чтобы увидеть, исправлена ли ошибка
5. Обновите сборку Windows до последней версии (если применимо).
Следующее, что вы можете сделать, чтобы исправить следующую ошибку, — это проверить, есть ли какие-либо обновления Windows, которые вам не хватает. Эта проблема может возникнуть, если у вас нет одного или нескольких последних обновлений инфраструктуры Windows.
Выполните следующие действия, если вы не знаете, как обновить установку Windows:
- Нажмите клавишу Windows + R, чтобы открыть диалоговое окно «Выполнить», затем введите «ms-settings:» в строке поиска и нажмите Enter, чтобы открыть настройки Windows.
- Найдите Центр обновления Windows в левой части экрана и нажмите на него.
- Теперь установите все обновления, которые ожидают установки. Если нет, нажмите «Проверить наличие обновлений» и дождитесь завершения проверки.
- Если есть обновления, которые можно установить, обязательно сделайте это.
- Возможно, вам придется перезагрузить компьютер, чтобы применить обновления.
- Затем откройте программу запуска Minecraft и проверьте, работает ли она.
6. Загрузите все обновления игры из Microsoft Store.
Последнее, что вы можете попробовать, — это загрузить все обновления, доступные в магазине Microsoft. Даже если обновления не связаны с Minecraft, это может решить проблему, обновив компонент Windows, вызывающий проблему.
Вы можете обновить все приложения в Microsoft Store из библиотеки.
Вот руководство, которое покажет вам, как это сделать:
- Используйте панель задач для поиска и открытия Microsoft Store.
- Теперь нажмите кнопку «Библиотека», расположенную в левом нижнем углу.
- Если вы не видите доступных обновлений, нажмите кнопку «Получить обновления», чтобы найти их.
- Обязательно установите все доступные обновления.
- После этого остается только открыть программу запуска, чтобы посмотреть, исправлена ли ошибка установки Minecraft 0x80131509.
Explore these easy fixes to get rid of the issue
by Loredana Harsana
Loredana is a passionate writer with a keen interest in PC software and technology. She started off writing about mobile phones back when Samsung Galaxy S II was… read more
Published on December 5, 2022
Reviewed by
Alex Serban

After moving away from the corporate work-style, Alex has found rewards in a lifestyle of constant analysis, team coordination and pestering his colleagues. Holding an MCSA Windows Server… read more
- Often, when you install Minecraft (JAVA edition) using the latest official installer, the error comes up.
- This usually happens due to a faulty or prolonged internet connection
- This guide will discuss all the possible fixes and causes of the issue.
XINSTALL BY CLICKING THE DOWNLOAD FILE
This software will repair common computer errors, protect you from file loss, malware, hardware failure and optimize your PC for maximum performance. Fix PC issues and remove viruses now in 3 easy steps:
- Download Restoro PC Repair Tool that comes with Patented Technologies (patent available here).
- Click Start Scan to find Windows issues that could be causing PC problems.
- Click Repair All to fix issues affecting your computer’s security and performance
- Restoro has been downloaded by 0 readers this month.
Getting error 0x80131509 while installing Minecraft (JAVA edition) is more common than you think. As a result, a lot of users have complained about the issue. But don’t worry, we can fix this in no time.
In this guide, we will discuss all the fixes available right after discussing the potential causes of the issue.
What causes Minecraft install error 0x80131509?
There are a handful of reasons why you got a Minecraft to install error, and we have mentioned some of the most popular ones:
- Windows Updates – The error message could appear if the Windows update is pending. Download and install Windows updates and try to install Minecraft again.
- Slow internet connection – If you are facing internet issues or your internet is faulty, then it could cause the installation to fail, and the error code might appear.
- No Xbox Account – If you don’t have an account on Xbox or have tried to use incorrect credentials for your Xbox account, it could trigger the issue.
- Old Minecraft launcher – If you have an old launcher along with the new launcher for Minecraft, it could conflict, hence the problem.
What can I do to fix Minecraft install error 0x80131509?
Before diving into detailed troubleshooting, let us try these quick fixes to resolve the problem:
- Restart your computer
- Make sure there is no pending Windows update.
- Check if any of the Microsoft apps need updates.
- Use the same account on Microsoft Store and Xbox app.
1. Uninstall Minecraft Launcher
- Press Windows + I to get Settings.
- Go to Apps from the left pane and click Installed Apps.

- Locate the Minecraft launcher, click on three dots, and click Uninstall.
2. Repair Game servicing app & Xbox app
- Press Windows + I to open Settings.
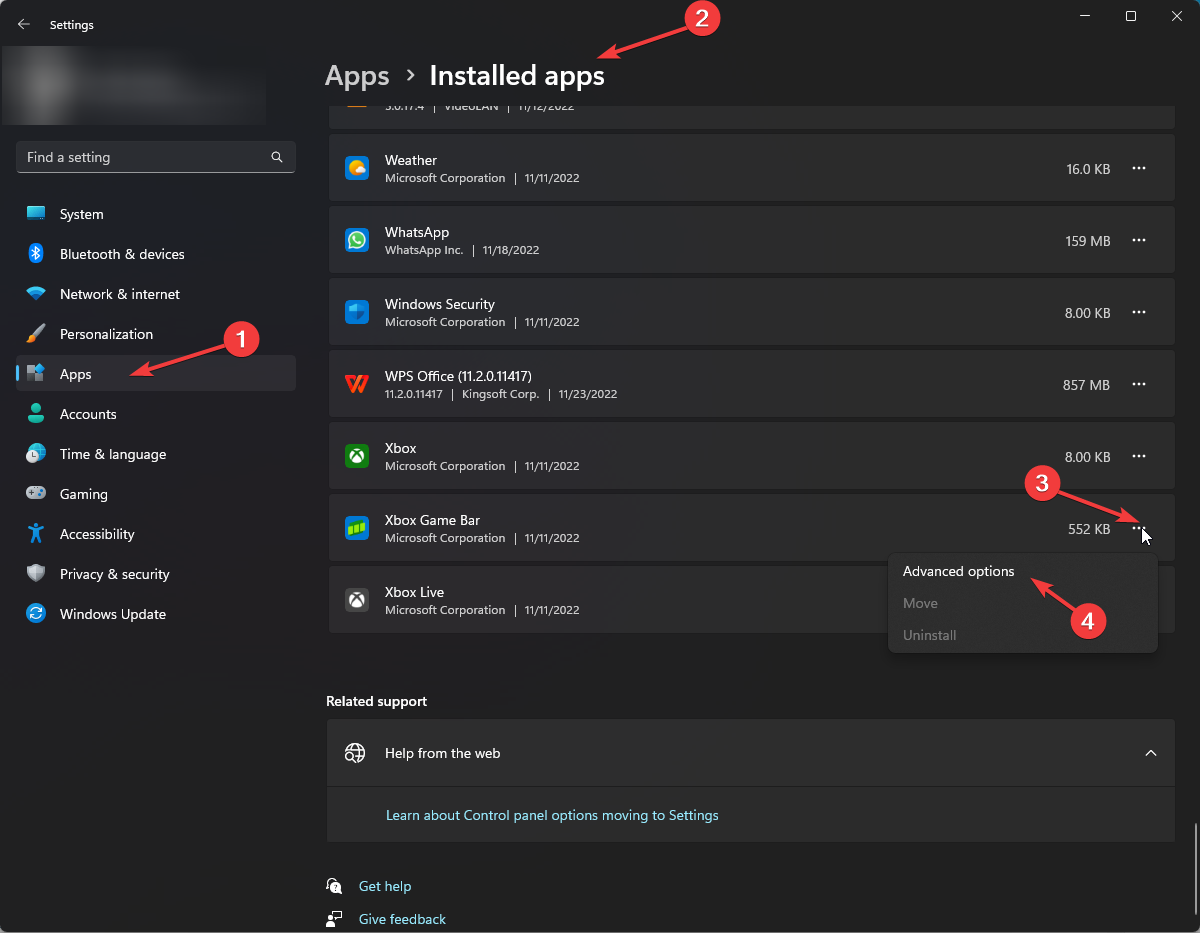
- Locate and click on Apps from the left-side pane, and click Installed Apps.
- Locate the Xbox app, click on three dots, and click Advanced options.
- On the next window, locate and click Repair.
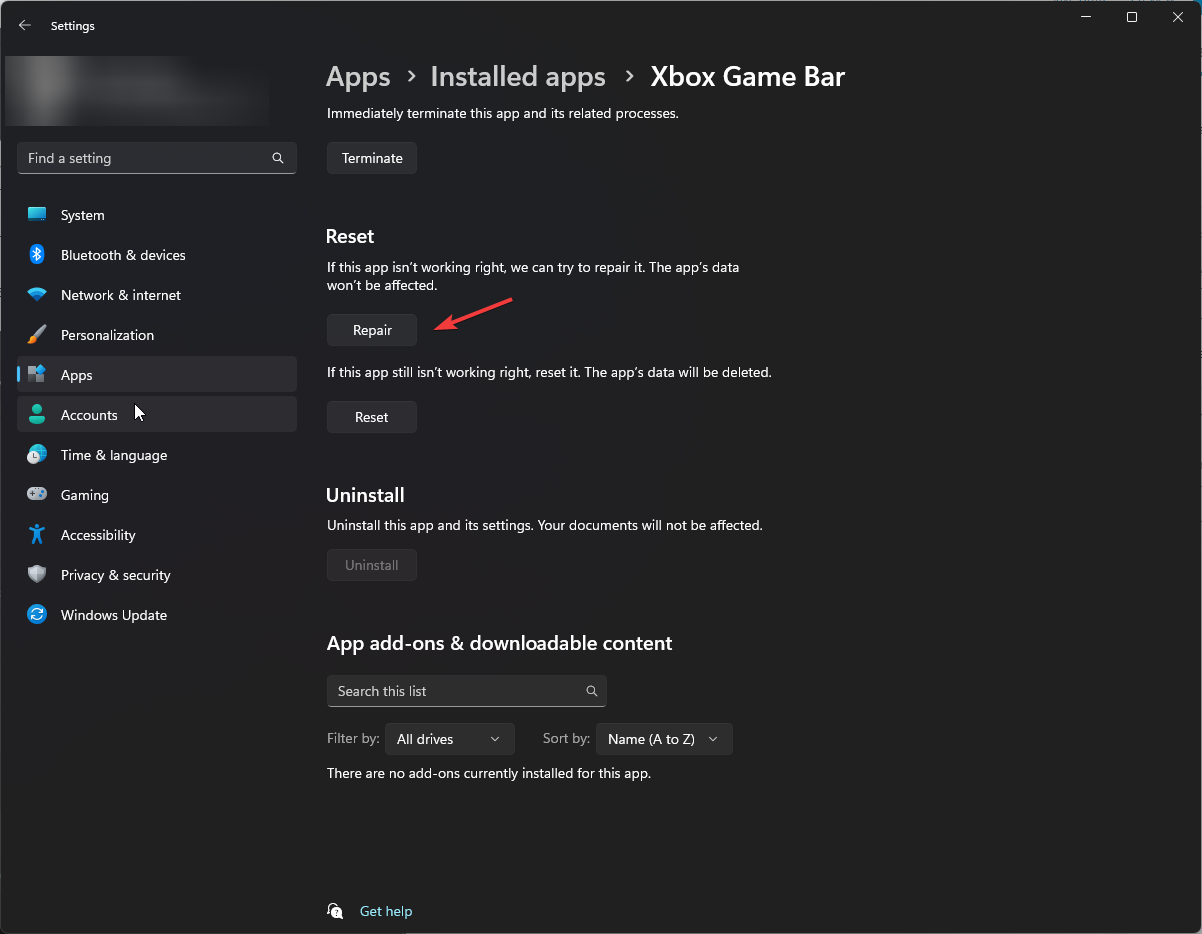
- Follow the same steps for the game servicing app to repair it.
- Fix: PUBG Keeps Crashing PC [On Startup, In-Game]
- Forza Horizon 4 0x89232001 Error: 3 Quick Ways to Fix It
3. Uninstall & Reinstall Game services
- Press Windows + X and click Terminal (Admin) to open PowerShell.
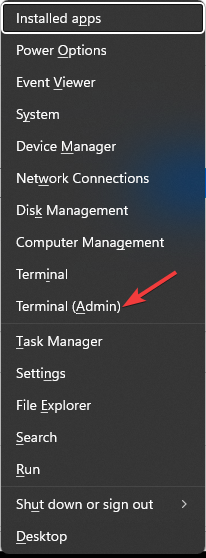
- Now type the following command and press Enter to uninstall Game services:
get-appxpackage Microsoft.GamingServices | remove-Appxpackage –allusers - Restart your computer.
- Open the Xbox Game Pass app, which will prompt you to install the gaming services again.
- Once done, try to rerun the Minecraft installer.
4. Run Minecraft in Compatibility Mode
- On Windows 11/10 computer, download the launcher compatible with Window7/8.
- Right-click on the launcher file and select Properties.
- Go to the Compatibility tab, and put a checkmark beside Run this program in compatibility mode. Now. Set the compatibility to Windows 8. Click Apply and OK.
5. Restore your OS using ISO

Tip
It is vital to back up personal files before starting the process.
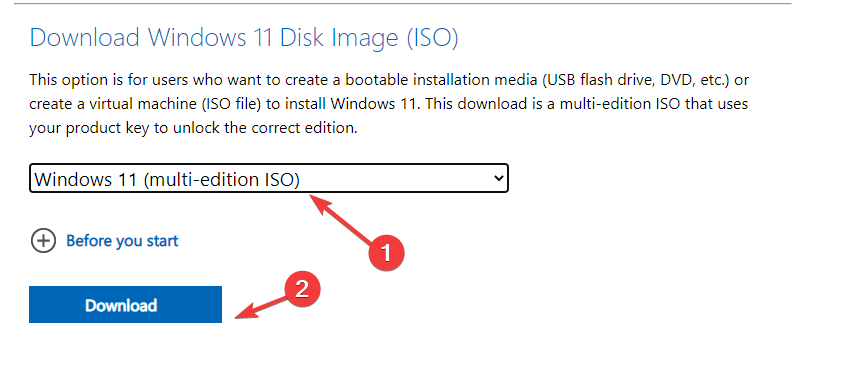
- Go to Microsoft website for Windows 11.
- Under Download Windows 11 Disk Image (ISO), select Windows 11 (multi-edition ISO).
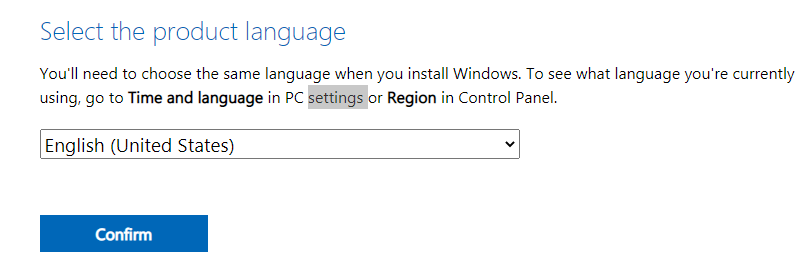
- Select the product language and click Confirm.
- Click Download and follow the on-screen prompts to complete.
So, these are methods that you need to follow to fix Minecraft install error 0x80131509. Try them and let us know which worked for you in the comments below.
Still having issues? Fix them with this tool:
SPONSORED
If the advices above haven’t solved your issue, your PC may experience deeper Windows problems. We recommend downloading this PC Repair tool (rated Great on TrustPilot.com) to easily address them. After installation, simply click the Start Scan button and then press on Repair All.
![]()
Newsletter
Are you trying to install the latest Minecraft Java edition on Windows 10 OS and getting an error code 0x80131509? Have you tried relaunching the game launcher but still can’t install the Minecraft Jave version on your computer? This article will guide you on how to fix the error with the help of easy-to-follow troubleshooting steps.
Without spending on a big marketing budget, Minecraft has become one of the most popular games worldwide by word of mouth advertisement. The game is a virtual land where players create their experiences by making their own worlds.
Minecraft has many gaming editions that you can play on various devices such as computers, Xbox, smartphones, etc. However, users who try to install the official newest version of the Minecraft Java edition on their Windows 10 computer often get the 0x80131509 error.
What is the difference between Minecraft Java and Bedrock versions?

Let’s take a look at the few differences between the Minecraft Java and Bedrock editions so that you can better understand why players are sticking with the Java editions despite the 0x80131509 error code.
Minecraft Java:
- You can download any online skin or create your skin and customize it to upload and use it in the game.
- Minecraft Java Edition is only playable on Windows, Linux, and macOS computers.
- You can download community-made mods for a variety of gameplay experiences.
- You need higher computer specifications to run the Minecraft Java edition smoothly.
- Minecraft Java players can only play with other Java edition players.
- Java edition offers many online servers and communities with variations and mods to spice up the multiplayer experience.
Minecraft Bedrock:
- Minecraft Bedrock Edition is playable on mobile, PC, and Minecraft console.
- You can buy skin packs and Add-Ons from the marketplace to change the gameplay experience.
- Bedrock players can play with players of different game editions online, except Java players.
- You can run the Minecraft Bedrock edition with a minimum system requirement and run smoother than the Java edition.
- Bedrock edition lets the player switch to a controller for mobility and has touch controls on a mobile device.
- Bedrock edition is connected to the Xbox services that offer heavily moderated parental controls.
Why do I see Minecraft Java errors?

So if you have decided to choose the Minecraft Java edition over the Bedrock one and can’t install it on your Windows 10 computer, it could be due to the following reasons.
- The automatic Windows update option is turned off.
- You are not running the latest Windows 10 build.
- Windows Java is outdated.
How do I fix Minecraft Java?

To fix Minecraft Java error code 0x80131509 on Windows 10 PC, try the following troubleshooting steps.
Restart your PC
Restarting a Windows 10 PC works like a charm for various gaming issues. Therefore, it never hurts to give your system a quick reboot. It might be enough to fix the error code.
To do this, choose the restart option from the boot menu. When the system reboots, run the Minecraft Java launcher to get rid of the install error.
Run Windows update
Sometimes you think that your Windows 10 is running on the latest version. However, if you are getting the 0x80131509 while installing Minecraft Java, your Windows 10 build is probably not up to date.
To confirm your Windows 10 version, click on the start menu on your Windows 10 desktop and type “winver” in the search box. Alternatively, press and hold the Windows key on the keyboard and press R. Afterward, type “winver” in the Run box and press Enter.
Now you can see which Windows 10 build you are running. If you are not on the latest Windows 10 build, do the following steps to ensure that your Windows 10 is always up to date.
- Click on the Start button and then navigate to Settings –> Update & Security.
- Now click on the Windows Update option and then click on Check for updates.
- Once Windows 10 is updated, click on the Advanced options and select “Automatic (recommended)” under the “Choose how updates are installed” option.
Ensure Java is updated
If you want to install the Minecraft Java edition, ensure that you have the latest Java in your Windows 10. Minecraft community and Mojang both recommend keeping the Java up to date. Doing this lets you install the game effortlessly without any error and can enhance your gaming experience.
Change compatibility mode
Many Minecraft players have unresolved issues after the release of the new launcher for Windows 10. We believe Windows 10 is doing some extra checks that fail the launcher to install the game on your PC.
Well, here is some good news for you. If you have bought the game and are not just on GamePass, you can download and install the Windows 7/8 launcher and run it on your Windows 10 PC for now. The players have been using the Windows 7/8 launcher for years, and a few users installed Minecraft Java through it on Windows 10.
However, to do it right, you need to set the compatibility mode to Windows 8 in the following way.
- Download the old launcher (Windows 7/8) on your Windows 10 PC.
- Now right-click on the old launcher .exe file and click on Properties.
- Under the compatibility tab, check the box for the “Run this program in compatibility mode for” option.
- Now set the compatibility to Windows 8 and save changes.
- Finally, run the installer and verify that you don’t see the error anymore.
Wait for the devs to fix the issue
Since the release of a new Minecraft Java launcher, it seems to have some issues on the server end. However, game developers are aware of the problem. Unfortunately, you will have to wait for devs to release a new patch for the fix.
Conclusion
Minecraft Java is an excellent game for kids to play on a Windows 10 computer. We hope you can now install the game for your kids or students on your PC by following our troubleshooting steps. Also, Malware can interfere with the game installation. Therefore, ensure that you run the antivirus program before running the Minecraft installer on your PC.
Hello,I cant login in xbox windows 10 app. I get Error 0x409 0x80131509 when i am trying login. Ответ
Hi,
Issues with signing in to the Xbox App on Windows 10 are possibly caused by a server connection error or a software conflict on your PC. To resolve your concern, we suggest that you start your computer in normal mode to disable the unnecessary apps running in the background while you are trying to sign in to the Xbox App. Here’s how:
- Press Windows + R on the keyboard.
- Type msconfig, and then click OK.
- On the General tab, click the Normal Startup, and then click OK.
- When you are prompted to restart the computer, click Restart.
If the issue persists, make sure that all the Xbox Live Services are enabled. You may follow the steps below:
- Press the Windows key on your keyboard and type Services in the search box.
- Once the Services window opens, scroll down and look for Xbox Live Auth Manager, Xbox Live Game Save, and Xbox Live Networking Service.
- You have to repeat the steps on each service. Right-click on each service and click Properties.
- Make sure that the Startup type is set to Automatic.
- If the Service status is stopped, click on Start.
- Click OK to save the settings.
After enabling the services, clear the local Xbox Identity data on your PC.
- Open the File Explorer and paste the following into the address bar to go to a specific location on your computer:%userprofile%AppDataLocalPackagesMicrosoft.XboxIdentityProvider_cw5n1h2txyewyACTokenBroker
- Delete any accounts and cache folders that you can see at this location.
- Launch the Xbox App and sign in to your account again.
Источник: https://answers.microsoft.com/ru-ru/xbox/forum/all/error-0x409-0x80131509/f1a03e5a-1b90-4a07-beb5-0567accbaf07
Несколько пользователей жаловались на получение кода ошибки 0x80131509 при попытке установить новую игру Minecraft на свои устройства. Если вы один из таких пользователей и задаетесь вопросом, что делать дальше, следуйте этому руководству до конца.
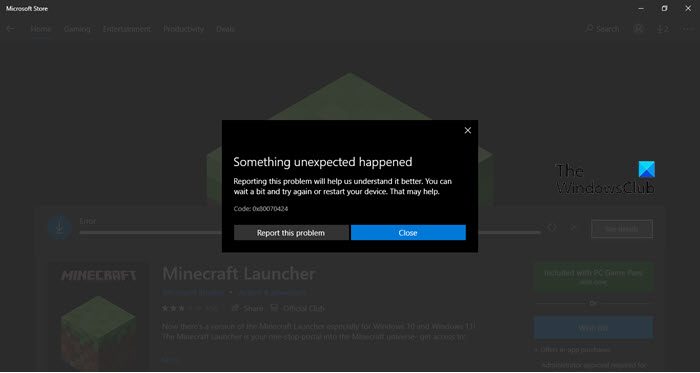
В этом руководстве мы увидим все возможные причины этой проблемы и наиболее вероятные способы ее устранения. Получив эту ошибку 0x80131509, вы также можете увидеть сообщение об ошибке, подобное следующему:
Похоже, что-то пошло не так, нам не удалось установить приложение (0x80131509)
Если вы боретесь с некоторыми другими кодами ошибок при установке игр Minecraft, все сообщение остается неизменным с очевидным изменением кода ошибки.

Почему я не могу скачать Майнкрафт?
Игры Minecraft могут не устанавливаться на ваш компьютер по нескольким причинам. Иногда вы можете получить сообщение об ошибке, поэтому найти решение будет легко. Однако бывают случаи, когда вы ничего не получаете, кроме сбоя установки по очевидным причинам.
В большинстве случаев вы должны столкнуться с проблемой, когда ваше устройство соответствует одному или нескольким из следующих условий:
- Плохое подключение к сети
- Вы не вошли в свою купленную учетную запись Xbox
- Наличие любой законной или незаконной установки Minecraft Launcher.
- Ожидающие обновления Windows
Чтобы устранить ошибку установки Minecraft 0x80131509 на ПК с Windows, попробуйте эти решения и проверьте, решают ли они эту проблему.
1]Перезагрузите Windows
Игры Minecraft могут не запускаться и отображать код ошибки 0x80131509 при наличии внутренних сбоев или конфликтов. Перезапуск Windows — это первое, что вы должны сделать для решения таких проблем. Когда вы перезагружаете свое устройство, все приложения и службы сбрасываются до состояния по умолчанию. Если проблема связана с некоторыми конфликтующими приложениями или службами, вы можете заметить, что игры Minecraft запускаются отлично.
2]Удалить Minecraft Launcher
Наличие любой устаревшей пусковой установки Minecraft также может вызвать конфликты с более новыми играми Minecraft. Итак, если вам известны какие-либо программы запуска, которые вы устанавливали ранее на свое устройство, удалите их и проверьте, решает ли это проблему. Чтобы удалить пусковую установку Minecraft, сделайте следующее —
- Щелкните правой кнопкой мыши значок Windows и выберите «Настройки».
- Щелкните «Приложения и функции».
- В следующем окне введите Minecraft в поле поиска.
- Если этот поиск действительно отображает какую-либо программу запуска, щелкните три точки рядом с ее именем и нажмите кнопку — Удалить.
- Затем появится всплывающее окно, снова нажмите «Удалить».
После удаления средства запуска обязательно перезагрузите компьютер, чтобы все оставшиеся файлы также были удалены.
3]Переустановите игры Minecraft из Microsoft Store.
Ошибка 0x80131509 также может возникнуть, если вы ранее загружали некоторые игры через Пусковая установка Minecraft. Затем, чтобы решить эту проблему, вам следует удалить программу запуска Minecraft и загрузить удаленные игры через Microsoft Store.
4]Убедитесь, что вы вошли в правильную учетную запись Xbox.
Если вы по-прежнему получаете код ошибки 0x80070424 при запуске Minecraft или играх на нем, проверьте, вошли ли вы в правильную учетную запись Microsoft или нет. Хотя это не должно быть так, это тоже может произойти.
Здесь мы указываем на покупку игры через одну учетную запись Microsoft и попытку сыграть в эту игру на другой учетной записи. Более того, аналогичный сценарий появляется, когда вы случайно / намеренно выходите из своей текущей учетной записи Microsoft и входите в другую учетную запись.
Примечание: Учетная запись Xbox, в которой вы приобрели игру, и учетную запись Microsoft.
Убедитесь, что вы используете одну и ту же учетную запись для доступа к Xbox и приложению Microsoft Store. В противном случае возникнут противоречия и вы не сможете установить лаунчер Майнкрафт. Итак, проверьте, так ли это, и решите это. Затем перезагрузите компьютер и посмотрите, сохраняется ли проблема.
5]Проверьте подключение к сети.
Плохой сетевой сигнал или низкая скорость интернета могут помешать программе запуска Minecraft загружать новые игры. Поэтому рекомендуется проверить подключение к Интернету, прежде чем загружать или покупать игру через Minecraft.
Вы даже можете проверить скорость сети, открыв несколько сайтов в браузере по умолчанию. Если все они загружаются довольно легко, проблема может быть в другом.
6]Проверьте наличие ожидающих обновлений
Иногда подобные ошибки также могут возникать, когда на вашем компьютере есть несколько ожидающих обновлений. Чтобы решить эту проблему, необходимо проверить наличие обновлений Windows и загрузить / установить все доступные.
- Сначала перейдите по указанному ниже пути.
Настройки (Win + I)> Центр обновления Windows
- На открывшемся экране нажмите кнопку — Проверить обновления.

- Если система действительно обнаруживает ожидающие обновления, загрузите / установите их на свой компьютер.
Как исправить ошибки Minecraft 0x80070424 или 0x80070057?
Ошибки Minecraft 0x80070424 или 0x80070057 также могут возникать, когда ваше устройство соответствует одной или нескольким из объясненных выше причин. Итак, мы предлагаем рассмотреть решения, описанные выше, одно за другим.
Я надеюсь, что это руководство поможет устранить ошибки установки игр Minecraft на ваш компьютер. Сообщите, работает ли какое-либо решение в вашем случае, в разделе комментариев.
Post Views: 241
A lot of Windows users were unable to install Minecraft on their system. When they try to do the same, they see the following error message.
Looks like something went wrong, We weren’t able to install the app (error code)
There are different error codes that users are seeing such as 0x80070424, 0x80131509, 0x80070057, etc. Whatever the error code is, it’s the Minecraft installation Error that you are dealing with. We have accumulated a list of solutions that you can use to resolve this.

Why won’t Minecraft install on my laptop?
If Minecraft is not installing on Windows 11/10 or you have some trouble with Minecraft Launcher, then some general fixes can be used. For example, you can restart the PC or Update OS, run Minecraft in compatibility mode, run the Minecraft installer as administrator, remove Mod files, etc. You should also start the Windows Installer Service (if it is stopped) and then try again. But, if the Minecraft installation is interrupted with some error code like 0x80070424, 0x80131509, 0x80070057, etc., then such general fixes won’t help.
Be it Laptop or Desktop, the Minecraft Installation error can occur because of many different things. Since there are different error codes, the reasons may vary a bit, more often than not, you will find some similarities. A lot of users, who are seeing the error message, already have previously installed Minecraft launcher. Other than that, some users were using different accounts for Microsoft Store and Xbox app. Whereas, some are having poor Internet speed.
However, there are some unique cases that gamers have encountered. In that case, we found that the Windows Update service is missing from their computers. This issue might have been prevalent in their computers and they were oblivious to it. We have talked about all of the reasons in detail and how you can fix them.
Before looking at the solutions to fix Minecraft Installation Error try updating your computer. Make sure that you are on the latest version and then try installing the game. If the issue persists, then try these fixes to resolve the issue.
- Restart the computer
- Delete any other Minecraft launcher
- Fix your Internet Connection
- Download from Microsoft Store
- Check Windows Update service
- Use Same account on Xbox app and Microsoft Store
Let us talk about them in detail.
1] Restart the computer
First of all, let us try the most basic solutions of them all. Some of you might have already tried it, but if you haven’t tried restarting the computer and see if the issue persists. Restarting will also close all the services that can interfere with your installer.
2] Delete any other Minecraft launcher
If you have another Minecraft launcher installed on your system, whether it’s official or unofficial. You need to remove it completely before installing Minecraft, otherwise, they will interfere in the installation process and you will see the error message along with any error code. So, go ahead and uninstall the previously installed launcher, restart your computer and check if the issue persists.
To uninstall the Minecraft launcher, follow the given steps.
- Open Settings by Win + I.
- Go to Apps > Apps & Features.
- Search for “Minecraft”.
- Click on the three vertical dots (for Windows 11) or select the app (for Windows 10).
- Then click Uninstall.
You will be asked to confirm, do that, then restart your computer, retry installing Minecraft and check if the issue persists.
3] Fix your Internet Connection
You won’t be able to download the game if there is some issue with the Internet connection. You can use an Internet Speed checker to see the bandwidth. If it’s low, then check other devices connected to the same network. If you conclude that, all of them have low bandwidth, try restarting your router and, if that doesn’t work, contact your Internet Service Provider. But, if yours is the only device with slow Internet, fix the slow Internet speed.
4] Download from Microsoft Store
If you have downloaded the application from minecraft.net and are not able to install the app, then try downloading it from microsoft.com aka Microsoft Store. Then install it and see if that works. This is not a solution, instead, it is a workaround that has worked for many users.
5] Check Windows Update service
A lot of users when trying to download the app from the Microsoft Store are seeing the same error again. Usually, the people who had the error code 0x80070424 are facing this error. Check, the following screenshot.
In this case, you need to see if the Windows Update service is missing on your computer. Open the Services app from the Start Menu, and look for Windows Update. If the service is missing, then check our guide to fix the issue.
6] Use Same Account on Xbox App and Microsoft Store
You need to make sure that you are using the same account to access Xbox and Microsoft Store app. Otherwise, there will contradictions and you won’t be able to install the Minecraft launcher. So, check if that’s the case, and resolve it. Then restart your computer and see if the issue persists.
Hopefully, you are able to resolve the issue with these solutions.
Why won’t Minecraft Java install?
If you have trouble with Minecraft Java Edition installation, then you should temporarily disable your antivirus software and then install the game. You should also disable the Firewall temporarily as these tools can cause trouble during the installation of Minecraft Java Edition.
Also Check:
- Fix Minecraft game has crashed with Exit Code 0
- Minecraft keeps crashing or freezing on PC.
A lot of Windows users were unable to install Minecraft on their system. When they try to do the same, they see the following error message.
Looks like something went wrong, We weren’t able to install the app (error code)
There are different error codes that users are seeing such as 0x80070424, 0x80131509, 0x80070057, etc. Whatever the error code is, it’s the Minecraft installation Error that you are dealing with. We have accumulated a list of solutions that you can use to resolve this.
Why won’t Minecraft install on my laptop?
If Minecraft is not installing on Windows 11/10 or you have some trouble with Minecraft Launcher, then some general fixes can be used. For example, you can restart the PC or Update OS, run Minecraft in compatibility mode, run the Minecraft installer as administrator, remove Mod files, etc. You should also start the Windows Installer Service (if it is stopped) and then try again. But, if the Minecraft installation is interrupted with some error code like 0x80070424, 0x80131509, 0x80070057, etc., then such general fixes won’t help.
Be it Laptop or Desktop, the Minecraft Installation error can occur because of many different things. Since there are different error codes, the reasons may vary a bit, more often than not, you will find some similarities. A lot of users, who are seeing the error message, already have previously installed Minecraft launcher. Other than that, some users were using different accounts for Microsoft Store and Xbox app. Whereas, some are having poor Internet speed.
However, there are some unique cases that gamers have encountered. In that case, we found that the Windows Update service is missing from their computers. This issue might have been prevalent in their computers and they were oblivious to it. We have talked about all of the reasons in detail and how you can fix them.
Before looking at the solutions to fix Minecraft Installation Error try updating your computer. Make sure that you are on the latest version and then try installing the game. If the issue persists, then try these fixes to resolve the issue.
- Restart the computer
- Delete any other Minecraft launcher
- Fix your Internet Connection
- Download from Microsoft Store
- Check Windows Update service
- Use Same account on Xbox app and Microsoft Store
Let us talk about them in detail.
1] Restart the computer
First of all, let us try the most basic solutions of them all. Some of you might have already tried it, but if you haven’t tried restarting the computer and see if the issue persists. Restarting will also close all the services that can interfere with your installer.
2] Delete any other Minecraft launcher
If you have another Minecraft launcher installed on your system, whether it’s official or unofficial. You need to remove it completely before installing Minecraft, otherwise, they will interfere in the installation process and you will see the error message along with any error code. So, go ahead and uninstall the previously installed launcher, restart your computer and check if the issue persists.
To uninstall the Minecraft launcher, follow the given steps.
- Open Settings by Win + I.
- Go to Apps > Apps & Features.
- Search for “Minecraft”.
- Click on the three vertical dots (for Windows 11) or select the app (for Windows 10).
- Then click Uninstall.
You will be asked to confirm, do that, then restart your computer, retry installing Minecraft and check if the issue persists.
3] Fix your Internet Connection
You won’t be able to download the game if there is some issue with the Internet connection. You can use an Internet Speed checker to see the bandwidth. If it’s low, then check other devices connected to the same network. If you conclude that, all of them have low bandwidth, try restarting your router and, if that doesn’t work, contact your Internet Service Provider. But, if yours is the only device with slow Internet, fix the slow Internet speed.
4] Download from Microsoft Store
If you have downloaded the application from minecraft.net and are not able to install the app, then try downloading it from microsoft.com aka Microsoft Store. Then install it and see if that works. This is not a solution, instead, it is a workaround that has worked for many users.
5] Check Windows Update service
A lot of users when trying to download the app from the Microsoft Store are seeing the same error again. Usually, the people who had the error code 0x80070424 are facing this error. Check, the following screenshot.
In this case, you need to see if the Windows Update service is missing on your computer. Open the Services app from the Start Menu, and look for Windows Update. If the service is missing, then check our guide to fix the issue.
6] Use Same Account on Xbox App and Microsoft Store
You need to make sure that you are using the same account to access Xbox and Microsoft Store app. Otherwise, there will contradictions and you won’t be able to install the Minecraft launcher. So, check if that’s the case, and resolve it. Then restart your computer and see if the issue persists.
Hopefully, you are able to resolve the issue with these solutions.
Why won’t Minecraft Java install?
If you have trouble with Minecraft Java Edition installation, then you should temporarily disable your antivirus software and then install the game. You should also disable the Firewall temporarily as these tools can cause trouble during the installation of Minecraft Java Edition.
Also Check:
- Fix Minecraft game has crashed with Exit Code 0
- Minecraft keeps crashing or freezing on PC.
The Minecraft Install error 0x80131509 appears when users try to install the game with the official installer. This error points towards an Internet connection issue.
The following issue could be caused by the Minecraft launcher being outdated or corrupted. Some missing Windows updates might also be the cause of this error. Besides this, the launcher might also conflict with an unofficial launcher that you have installed on your PC. The Minecraft you are trying to install could be unavailable for your PC if you use an earlier version of Windows.
Here is a list of methods that will show you how to fix the Minecraft Install error 0x80131509:
1. Log in to the Xbox App
The first thing you can do is to ensure that the account you are logged in with on Xbox App is the same as the Microsoft Store account. This could affect the game because the account you use to install it is not the same as the Xbox App.
Open the Xbox App and the Microsoft Store and check to see if the account is the same for both.
If the accounts are not the same, click on Sign out and log back in with the right account.
After that, the only thing left to do is try installing the game again.
If the Minecraft Install error 0x80131509 still occurs, go to the following method.
2. Uninstall Unofficial Minecraft Launchers
The next thing to do is to uninstall any unofficial Minecraft Launcher you have installed on your PC. This could trigger the issue because the official launcher conflicts with the uncertified one. Files could overlap, causing the launcher not to work properly.
Go to the Programs and Features menu, and you will see all the launchers installed on your PC. Uninstall the unofficial ones.
Here’s how you can do this:
- Press the Windows key + R to open a Run dialog box and type ‘appwiz.cpl‘, then press Enter to open the Programs and Features menu.
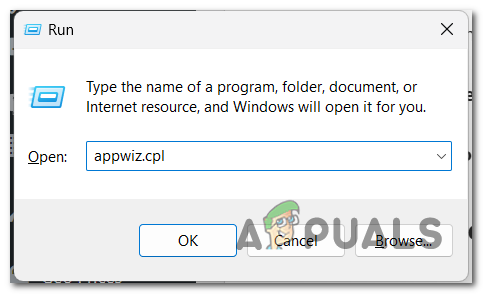
Opening the Programs and Features menu - Next, look through the list of apps for unofficial Minecraft launchers.
- When you find one, right-click on it and click on Uninstall
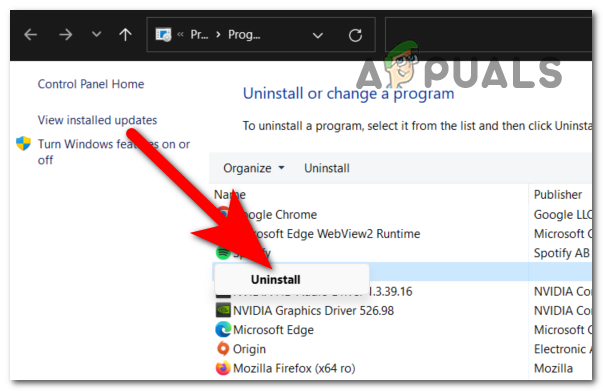
Uninstalling the unofficial Minecraft launcher - Follow the on-screen instructions to complete the uninstall process.
- If you have more than one, repeat the process on every launcher until you have eliminated all of them.
- When you are done, try installing Minecraft using the official launcher again.
If the Minecraft Install error 0x80131509 still occurs, go to the following method.
3. Reinstall Minecraft Launcher from Official Website
The following issue might also be caused by a corrupted installer. You should go to the official website and try to reinstall the launcher. If that doesn’t work, try installing it from Microsoft Store or Xbox App.
Here’s a guide on how to do this:
- Open any browser and visit the official Minecraft website.
- Log in by clicking the Sign in with Microsoft button.
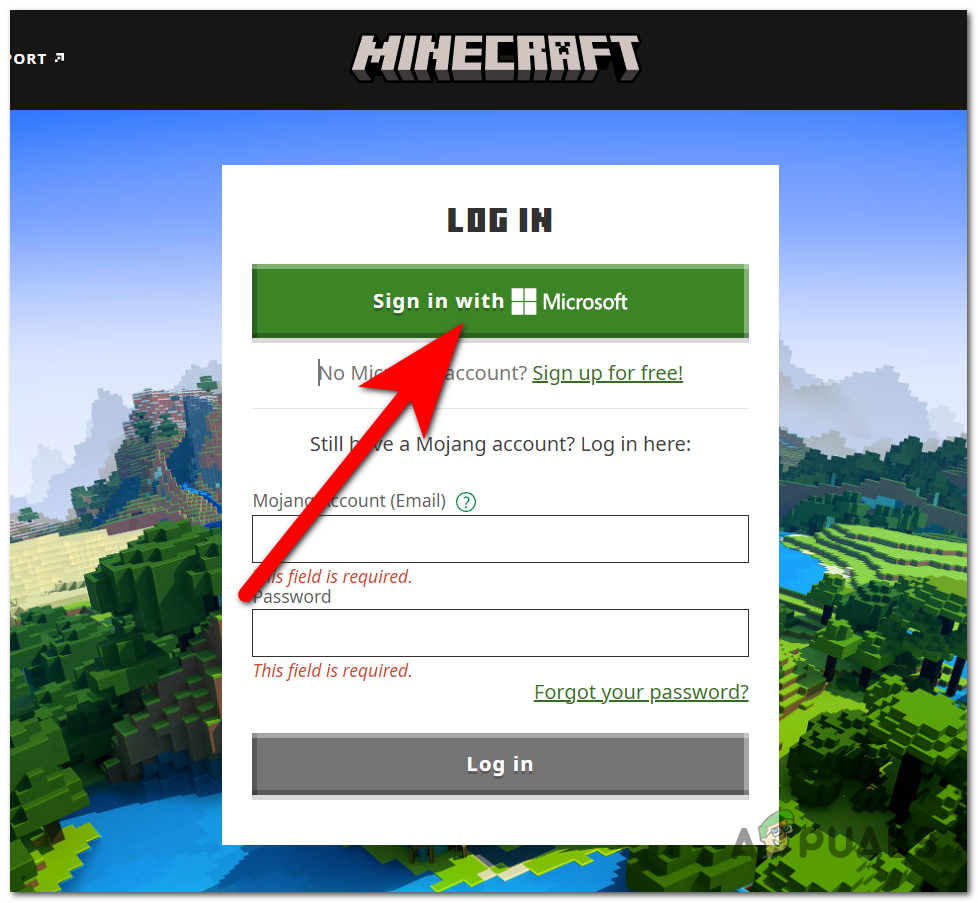
Logging in to your Minecraft account - When inside your account, click on the Get Minecraft button in the top right corner and select Computer.

Going to download the launcher - Next, click on the Download button and then click on the Download launcher for Windows 10/11 to confirm the download.
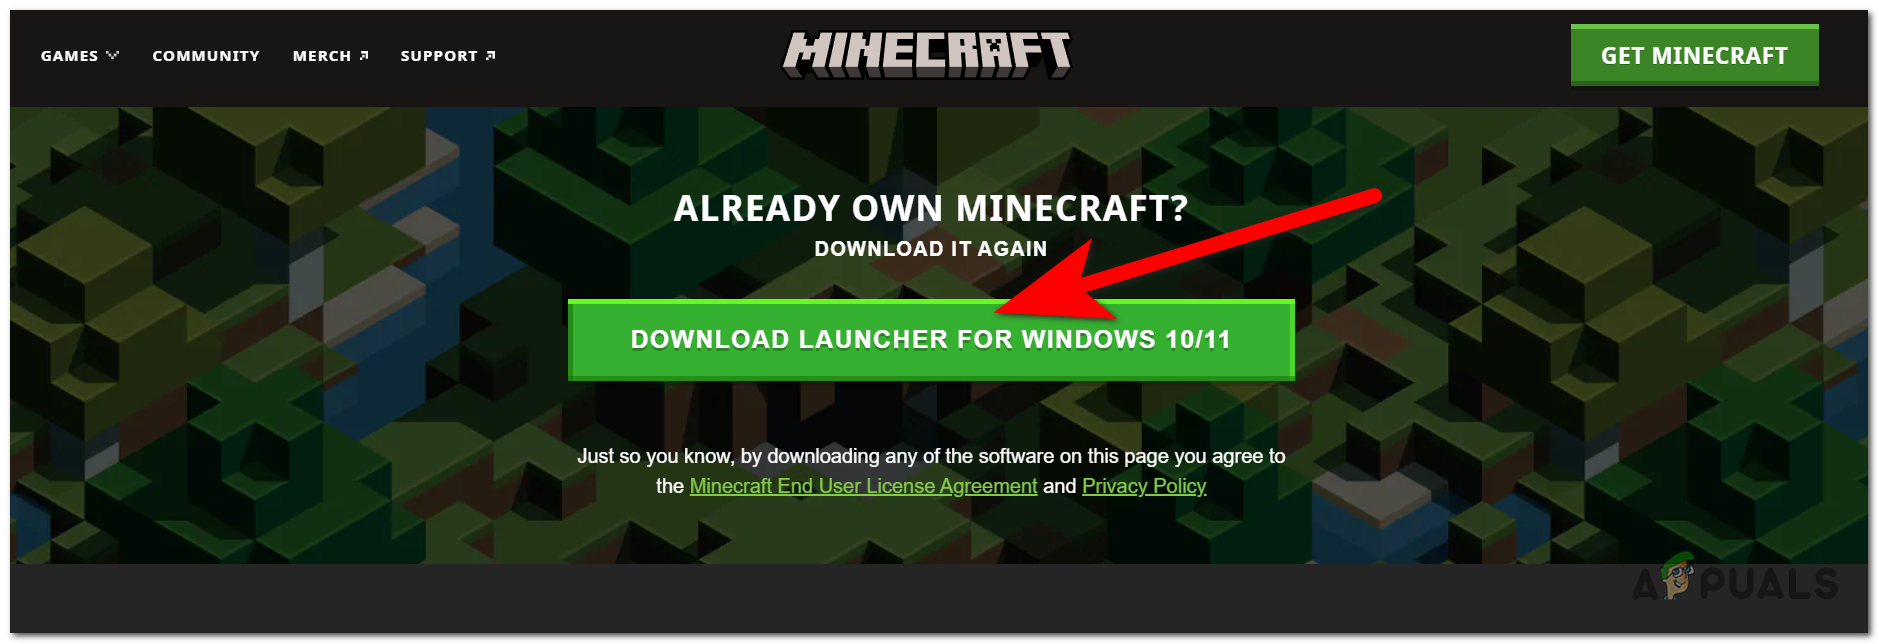
Downloading the Minecraft launcher - Click on the launcher installer and install it.
- If that doesn’t work, open the Microsoft Store or Xbox App and search for Minecraft.
- When you find it, click on the Install button and complete the process.
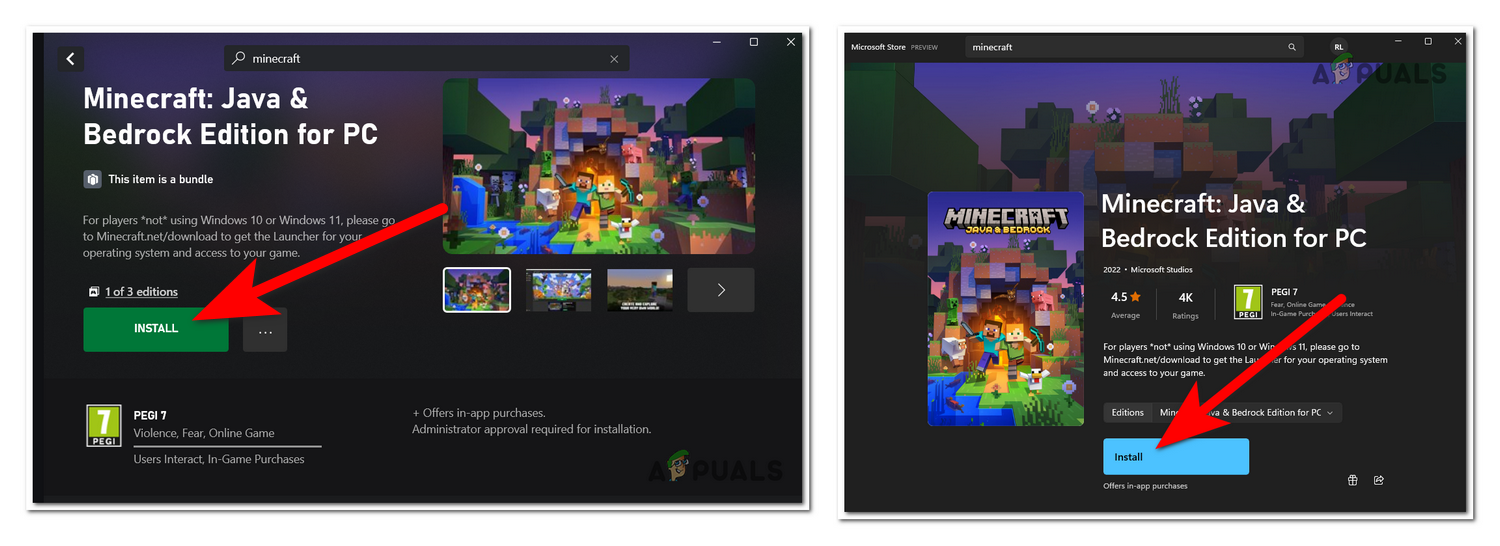
Installing the launcher from Microsoft Store or Xbox App - When the launcher is installed, try to open the game to see if it works.
4. Install Windows 7 / 8 Edition of Minecraft (if applicable)
If you are using a lower version of Windows, you should try downloading the older version of the Minecraft launcher. The error might appear because the launcher you are trying to use is incompatible with your Windows version.
You must download the version compatible with your PC from the official Minecraft site.
Here is how you can do this:
- Using any browser you want, visit the official Minecraft site and make sure you are logged in to your account.
- Now click on the Get Minecraft button from the top right side of the Window. Select Computer at the next screen.
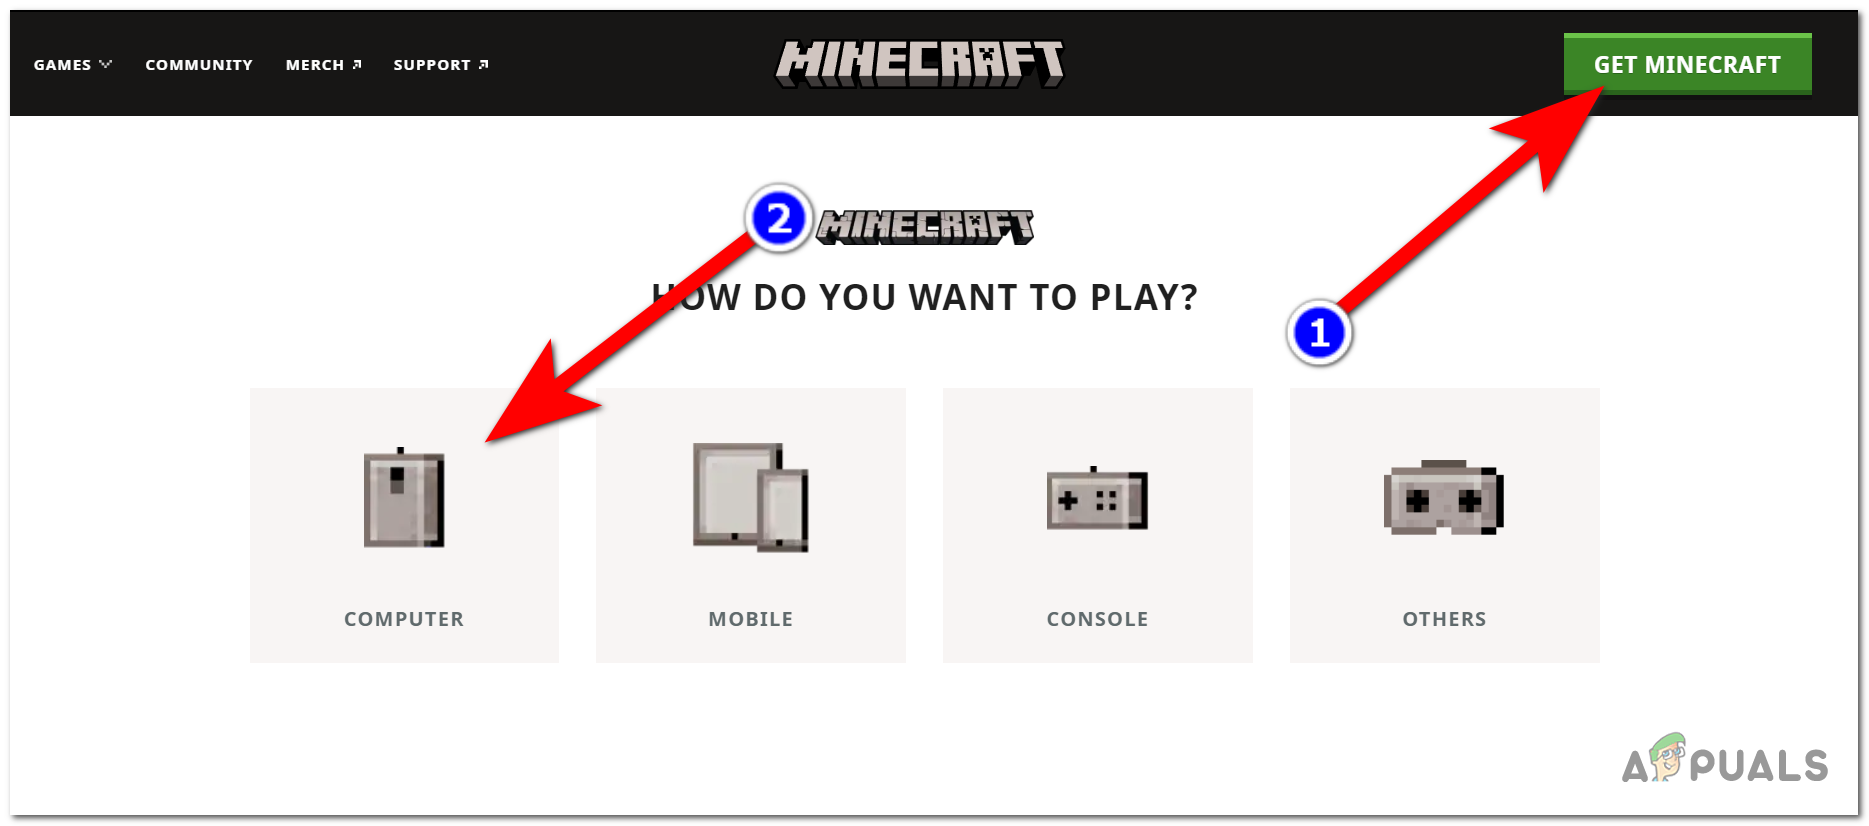
Accessing the Download menu - Next, click on the Download button.
- Scroll down until you see the Download Launcher for Windows 7/8, and click on it.
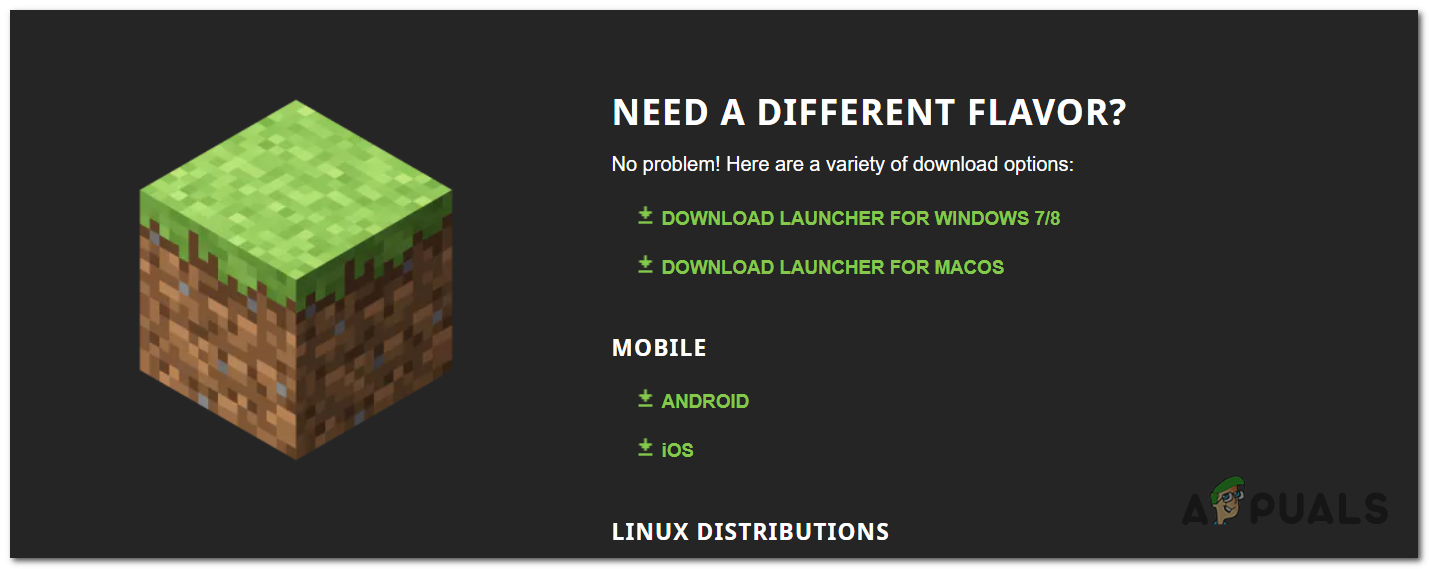
Downloading the older Minecraft version - Click on the installer and complete the process.
- Open the launcher to see if the error is fixed
5. Update Windows build to the latest version (if applicable)
The next thing you can do to fix the following error is to check to see if there are any Windows updates you are missing. This problem could happen if you don’t have one or more of the latest Windows infrastructure updates.
Follow these steps if you don’t know how to update your Windows installation:
- Press the Windows key + R to open a Run dialog box, then type “ms-settings:” in the search bar and press Enter to open Windows Settings.
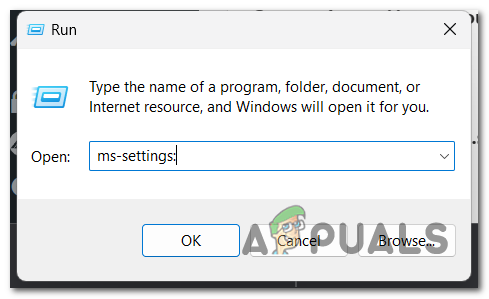
Opening the Windows Settings - Look for Windows Update on the left side of the screen and click on it.
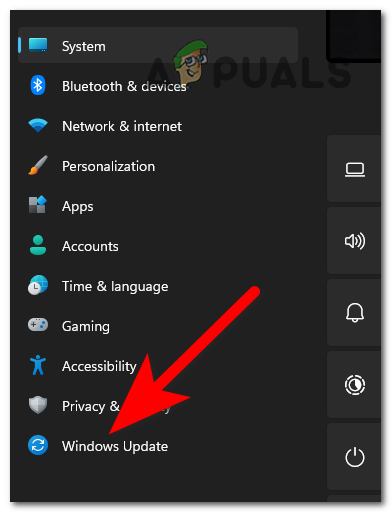
Accessing the Windows Update section - Now install any updates that are pending to be installed. If not, click Check for updates and wait until the check is done.
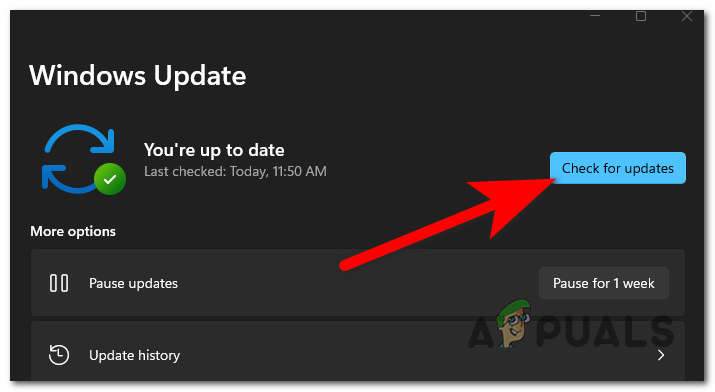
Checking for updates - If there are updates that can be installed, make sure to do so.
- You might need to restart your computer to apply the updates.
- Next, open the Minecraft launcher and test it to see if it works.
6. Download all Game upgrades from Microsoft Store
The last thing you can try is downloading all the updates available on your Microsoft Store. Even if the updates are not related to Minecraft, it might fix the problem by updating a Windows component causing the issue.
You can update all the apps on Microsoft Store from the Library.
Here’s a guide that will show you how to do it:
- Use the taskbar to search and open the Microsoft Store.
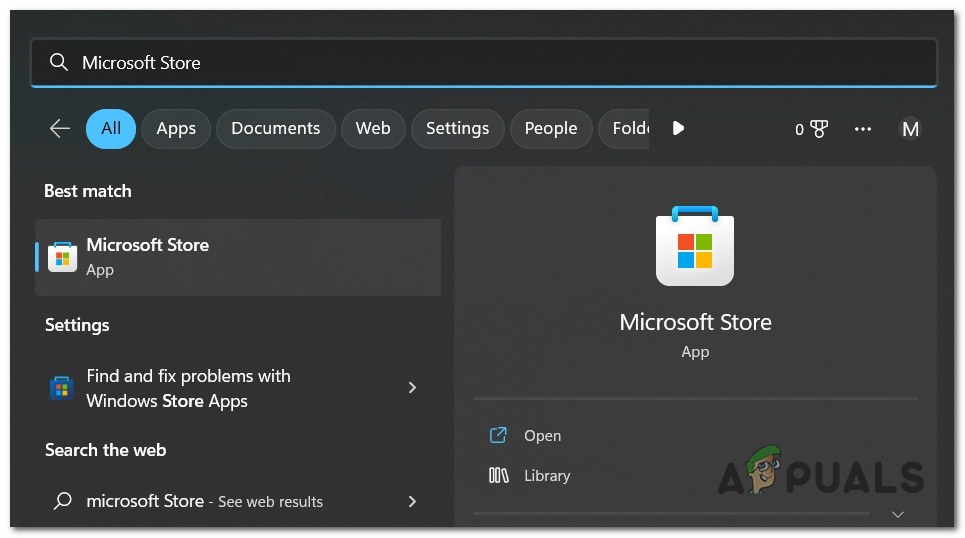
Opening the Microsoft Store - Now click on the Library button located in the bottom left corner.
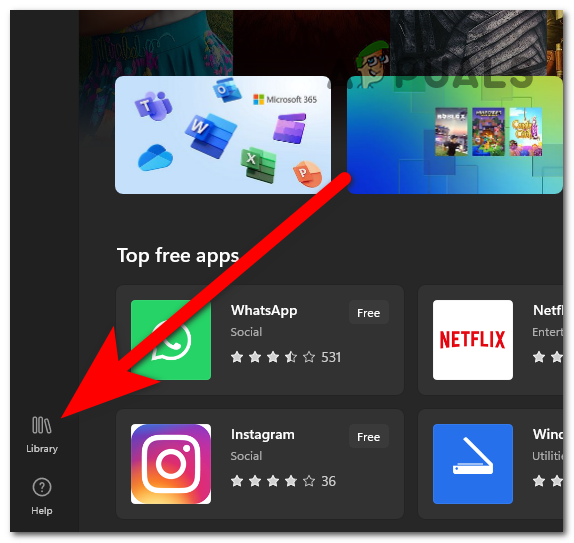
Accessing the Windows Store library - If you don’t see any available updates, click the Get updates button to scan for them.
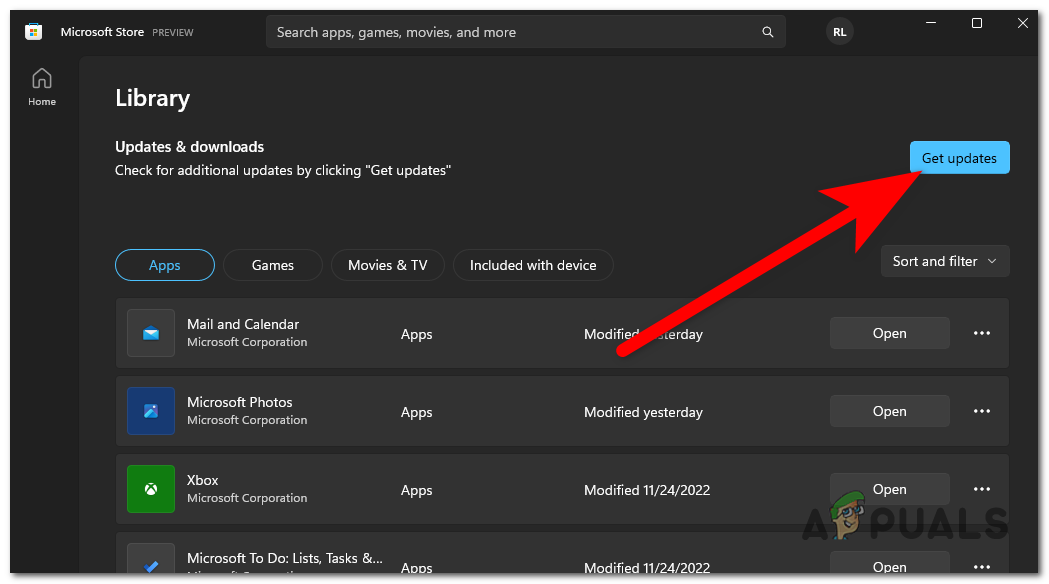
Checking for available updates - Make sure to install all of the available updates.
- After that, the only thing left is to open the launcher to see if the Minecraft Install error 0x80131509 has been fixed.

Kamil Anwar
Kamil is a certified MCITP, CCNA (W), CCNA (S) and a former British Computer Society Member with over 9 years of experience Configuring, Deploying and Managing Switches, Firewalls and Domain Controllers also an old-school still active on FreeNode.
Several users complained of getting an error code 0x80131509 when they were trying to install a new Minecraft game on their devices. If you are one such user and are wondering what to do next, follow this guide till the end.
In this tutorial, we will see all possible causes behind this issue and the most probable ways to overcome this error. Upon getting this error 0x80131509, you may see an error message as well that resembles the following –
Looks like something went wrong, We weren’t able to install the app (0x80131509)
In case you are struggling with some other error codes while installing Minecraft games, the entire message remains the same with an obvious change in the error code.

Why can I not download Minecraft?
Minecraft games may fail to install on your computer due to several reasons. Sometimes you may receive an error message, so finding a solution to that will be easy. However, there are times, when you don’t get anything except for the installation failing for some obvious reasons.
In most cases, you must be facing trouble when your device meets one or more of the below conditions –
- Poor Network connectivity
- Not signed in with your purchased Xbox account
- Presence of any legitimate or not-legit Minecraft Launcher
- Pending Windows updates
To resolve Minecraft installation error 0x80131509 on Windows PC, try out these solutions, and check if they fix this problem.
1] Reboot Windows
Minecraft games may fail to launch and display an error code 0x80131509 when there are some internal glitches or conflicts. Restarting Windows is the first thing you should do to resolve such issues. When you reboot your device, all apps and services are reset to their default state. If the problem was because of some conflicting apps or services, you might notice the Minecraft games launching perfectly fine.
2] Remove Minecraft Launcher
The presence of any outdated Minecraft launcher may also arise conflicts with the newer Minecraft games. So, if you do know of any launchers that you install previously on your device, uninstall that and check if this resolves the problem. To uninstall the Minecraft launcher, do the following –
- Right-click on the Windows icon and select Settings.
- Click “Apps and Features“.
- On the subsequent window, type Minecraft in the search field.
- If this search indeed displays any launcher, click the three dots besides its name, and hit the button – Uninstall.
- A pop-up window will appear next, hit uninstall again.
After you remove the launcher, make sure to reboot your PC so that any leftover files delete as well.
3] Reinstall Minecraft games from Microsoft Store
The error 0x80131509 might also occur if you had previously downloaded some games via Minecraft Launcher. In order to resolve this issue then, you should uninstall the Minecraft launcher and download the removed games via Microsoft Store.
4] Check if you are logged into the right Xbox account
If you are still receiving an error code 0x80070424 while launching Minecraft or playing games on it, check if you are logged into the right Microsoft account or not. Though this should not be the case, this might happen as well.
What we are pointing here is purchasing a game via one Microsoft account and trying to play that game on some other account. Moreover, a similar scenario appears when you accidentally/intentionally sign out of your current Microsoft account and log into another account.
Note: The Xbox account from where you had purchased the game and the Microsoft
You need to make sure that you are using the same account to access Xbox and Microsoft Store app. Otherwise, there will contradictions and you won’t be able to install the Minecraft launcher. So, check if that’s the case, and resolve it. Then restart your computer and see if the issue persists.
5] Check Network connectivity
Poor network signal or slow internet speed may prevent the Minecraft launcher from downloading any new games. So, it is suggested to check your internet connectivity before you proceed to download or purchase a game via Minecraft.
You may even test network speed by opening several sites on your default web browser. If all of them load quite easily, the problem may lie elsewhere.
6] Check for any pending updates
Sometimes, errors like this may also occur when there are several pending updates on your computer. To overcome this issue then, one must check for Windows updates, and download/install all the available ones.
- At first, navigate to the below path.
Settings (Win + I) > Windows Update
- On the upcoming screen, click the button –
Check for updates.

- If the system indeed reveals any pending updates, download/install that on your computer.
How to Fix Minecraft Errors 0x80070424 or 0x80070057?
The Minecraft errors 0x80070424 or 0x80070057 may also occur when your device meets one or more of the above-explained reasons. So, we suggest going through the solutions as discussed above one by one.
I hope this guide helps to resolve the Minecraft games installation errors on your computer. Let’s know if any solution works in your case in the comment section.
Lately, several users trying to install the latest Minecraft Launcher on their system received an error message “Make Sure You’re Connected” Then try updating again. We weren’t able to update Windows (0x80131509). This technical issue simply denotes that there is a problem with your internet connectivity and the system.
The most common causes of Minecraft Launcher installation error (0x80131509) are unconfigured system settings and network connectivity issues. If you are facing the same error message, then you can pursue this article to get all the solutions to tackle the same issue. Let’s move on to detailed solutions without talking further.
Fix 1: Restart the System:
So to troubleshoot the Minecraft Launcher Installation Error (0x80131509), you must first restart the system. Restarting the system will clear all existing errors and bugs and start the system freshly. We strongly recommend this trick as it has helped many users.
Fix 2: Uninstall any Unofficial/Official Minecraft Launcher:
If you have an unofficial or official Minecraft Launcher installed on your system, you will receive the Minecraft Launcher Installation Error (0x80131509) error prompt. Here you need to uninstall and reinstall the launcher from its official site. To do so,
- Firstly, go to the Start menu and select Settings.
- Inside the Settings window, click on Apps and the Apps and features option.
- Then from the list of apps, search and select Minecraft Launcher.
- Once you find one, right-click over it and select Uninstall button.
- Finally, restart the system and reinstall it from a reliable source.
Fix 3: Check Internet Connection:
As we discussed earlier, one of the main reasons for the Minecraft Launcher Installation Error (0x80131509) error is poor internet connectivity. All you have to do here is connect to an Ethernet connection instead of Wi-Fi and see the result, as well as you, need to verify the speed of your internet connectivity. If your signal strength is low, you need to contact your network service provider for further assistance.
Fix 4: Sign in using the Same Account on Xbox App and Microsoft Store:
Another solution to overcome the Minecraft Launcher Installation Error (0x80131509) error is to sign to your Xbox app and Microsoft account using the same user account. To do so,
- Firstly, launch both the Xbox app and Microsoft Store.
- Then sign out from the account, and after a few moments, log in using the same username and password.
 \"Make Sure You're Connected\": How to Fix 3")
- And sign in to the Minecraft account using the same account you used to login in Xbox app and Microsoft Store.
- Finally, try to reinstall the Minecraft Launcher and see the above discussed error is resolved for you.
Fix 5: Install Minecraft Launcher Windows 7/8 Version:
If the Minecraft Launcher Installation Error (0x80131509) error still bothers you, then you need to download the Windows 7/8 version of the launcher. This fix has helped in many user’s cases. To do so,
- Firstly, go to Minecraft official site.
- Then scroll down and click on Download for Windows 7/8 option.
 \"Make Sure You're Connected\": How to Fix 4")
- Now double-click on the downloaded file and follow the on-screen instructions to install it on your system.
- Once done, restart the system and install the launcher again.
Fix 6: Update Windows:
Sometimes the Minecraft Launcher Installation Error (0x80131509) error occurs as a result of an outdated Windows. In this scenario, you need to update your Windows to the latest updates. To do so,
- Firstly, go to the Start menu and select the Settings app.
- Inside the Settings app, select Windows Update from the left pane menu.
 \"Make Sure You're Connected\": How to Fix 5")
- Now click on the Check for update blue button to install the latest updates on your system.
- Once done, retry to install the launcher on your system.
Fix 7: Install Minecraft Launcher from Xbox app or Microsoft Store:
If you have a launcher installed from any third-party website, you may receive the Minecraft Launcher Installation Error (0x80131509) error after the latest update. The best solution here is to make sure the Minecraft launcher is installed from the Xbox app or the Microsoft Store. If not, uninstall the old launcher and install the Minecraft launcher directly from the Microsoft Store or the Xbox app.
So, these are the potential fixes for the Minecraft Launcher Installation Error (0x80131509) error. All the above solutions are tried and tested by experts so that you can use them with full confidence. However, if you have any queries or doubts after reading this article, then please leave a comment in the below-given comment box.