Здравствуйте уважаемые пользователи и знатоки 3D принтеров.
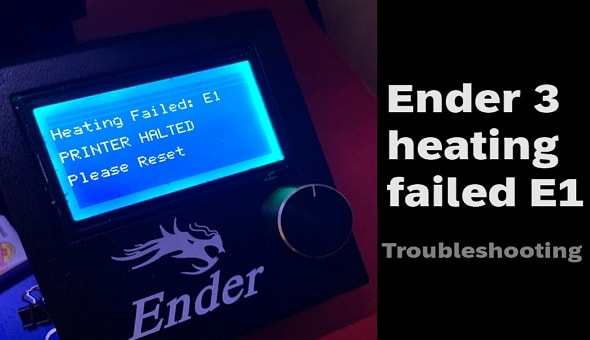
Прошу помощь зала. Стала возникать ошибка heating failed e1.
Принтер Ender 3 Marlin ver 1.0.1 плата v4.2.2 не перешивался все до начала появления ошибки было из коробки.
Почитал, покурил форумы — и перекручивал нагреватель и дополнительной изоляцией провода обмотал, фторопластом, чтобы исключить вариант замыкания.
На какое то время вроде помогло, но после печати на 8-14 часов пошли стабильные отказы.
Варианты проверять наличие сквозняков и т.д. — принтер стоит в термобоксе, так что исключено.
По советам влепил 100 Ом резистор в цепь термистора и как бабушка отшептала… На три дня.
Сейчас ошибка появляется стабильно, на старте, или после печати нескольких слоев, так что даже мелкие детали напечатать без вариантов. Более того сегодня отловил момент когда принтер ушел в ошибку в момент разогрева на температуре 160 градусов. Сегодня поставил резистор 300 Ом, и именно припаял его, конечно учитываю что характеристики после установки резистора сдвинутся — температуру снизил, подобрав ее по внешнему виду плавленного материала из сопла.
Разъемы шевелил, стекло протирал, по колесу стучал.
Скачал на www.creality.com прошивку, но там она для Ender-3Marlin2.0.6HW4.2.2BLTouchGD. Смущает «TouchGD» — мало ли чего там с точскрин экраном могли напихать в последующих версиях?
в общем эту прошивку еще не ставил — он пока на стоковой.
Работы по самонастройке PID регулятора не вел — ни разу не видел в таких советах свою модель/прошивку/мамтеринку.
В общем если кто сталкивался — подскажите что можно почитать со ссылками или дайте описание как его довести до ума. Машинка — года не отходила, а потребность в нем серьезная.
С уважением, Викторович.
Creality Ender 3 3D printer is an affordable and reliable machine, but it can experience some technical issues. One of the most common errors is when you get “Heating Failed” with an E1 error code. This means that the hot end temperature has failed to reach its set target and needs to be addressed.

Creality Ender 3 (Check Price on Amazon)
Knowing how to troubleshoot Ender 3 heating failed E1 will help keep your Ender 3 running smoothly for months to come.
What does Ender 3 heating failed E1 mean?
The E1 heating failed on Ender 3 typically indicates a problem with the heating element or temperature sensor.
When the printer is unable to reach the target temperature for the heating element, it may display the «E1» error.
This can be caused by a variety of issues, such as a faulty heating element, a problem with the temperature sensor, or an issue with the power supply or wiring.
The most common causes of this error are:
- Improper wiring or a faulty thermistor attached to the heat sink of the hot end;
- Another possibility is that there may be a loose connection between the hot end and the mainboard or even a faulty mainboard;
- If you are sure that all connections are secure, then it may be time to check if any firmware updates are available for your printer model;
- Additionally, if you are using an incorrect power supply, then this could also lead to heating issues as the printer may not be able to provide enough power for proper operation.
It is important to troubleshoot the problem to determine the cause and take appropriate action to fix it.
Ender 3 heating failed printer halted please reset — Solutions
When your Ender 3 screen shows the message «Heating failed: E1 PRINTER HALTED Please reset» you can watch this video, it will show you how to check the hotbed or heating tube heating failure without a multimeter.
Here are some steps you can try to troubleshoot the issue:
1. Check the power supply and ensure that the printer is receiving sufficient power.
2. Check the wiring to the heating element and make sure it is secure and not damaged.
3. Check the temperature sensor and make sure it is securely attached to the heating block and connected to the mainboard.
4. If you have recently installed a new heating element or temperature sensor, try removing it and re-installing it to see if that resolves the issue.
5. Check the firmware settings on your printer and make sure the correct temperature settings are configured for your heating element.
6. If none of these steps resolve the issue, you may need to replace the heating element or temperature sensor. It is also a good idea to check with the manufacturer or a technical support representative for further assistance.
Conclusion
If you’re experiencing a heating failed error on your Ender 3 printer, take a moment to troubleshoot by checking all connections related to the hot end, updating firmware if necessary, verifying that you meet all power supply requirements, and ensuring that the filament spool is loaded correctly onto the extruder motor before printing again.
Taking these steps should help prevent future errors from occurring and keep your Ender 3 running smoothly in no time!
*Many of the links are affiliate links — which means that Creality Cloud earn a small commission for each purchase — at no extra cost to you.
New issue
Have a question about this project? Sign up for a free GitHub account to open an issue and contact its maintainers and the community.
By clicking “Sign up for GitHub”, you agree to our terms of service and
privacy statement. We’ll occasionally send you account related emails.
Already on GitHub?
Sign in
to your account
Comments
Since moving to my SKR 1.3 and Marlin 2.0, i’m getting a lot of E1 Heating Failed messages, with only E0 enabled.
It normally happens when the the printer is heating and I home the printer.
I’ve tried with #define PROBING_HEATERS_OFF enabled and disabled, but I’m still getting it.
I’ve attached my configuration files.
Hopefully this will help.
Thank you.
Marlin.zip
I’m having a similar problem. I am running a SKR 1.3 and Marlin 2.0 on an Ender 3.
When I try to heat for a print with a target temp of 200 it waffles between ~188 and ~195 a couple times, then gives E1 heating failed. I only have one extruder enabled.
Config files also attached.
Thanks!
Marlin.zip
I will have an SKR 1.3 for testing soon, so I can test the thermistor readings at that time.
I was actually able to solve my issue in the past couple hours. The error saying E1 heating failed is an unfixed text error according to #12625 and should say E0.
As for the heating issue (at least my heating issue) I found this post on stackexchange recommending calibrating PID values. I found instructions here and entered the resulting values into my firmware and the problem disappeared.
Marlin has always displayed «E1» to users for the first heater even though internally it refers to it as «E0.»
Good to know. I’m new to Marlin (as of today, although I spent like 10 hours getting it to work) so that post was all I had to go on.
This issue has been automatically locked since there has not been any recent activity after it was closed. Please open a new issue for related bugs.
Hi, I have a problem with temperature swinging and with error »E1 Err: MINTEMP / E1 THERMAL RUNAWAY (PRINTER HALTED Please reset)». I have SKR 1.3 board and 2208 UART driver on Ender 3. When turn on printer temperature works like normal. Then heated to working temperature (in this time works well) when starts printing (via USB or card) temperature swings a lot (like from 150°C to 210°C in range with less than second. When printing around one hour or less, printer beeps and I got error »E1 Err: MINTEMP PRINTER HALTED Please reset» or »E1 THERMAL RUNAWAY PRINTER HALTED Please reset». And I have a second problem with speed of printings. I print around 50mm/s and one straight line prints like 50mm/s, then one random line print like 100mm/s. Can I setup this in configuration.h?
What could be a problem for both situations?
I record video from this situation (link below)
https://drive.google.com/open?id=13DBjCPzpazk-YW4d8C1iu6ngvgbPMwuV
Primmson
changed the title
E1 Err: MINTEMP / E1 THERMAL RUNAWAY (PRINTER HALTED Please reset)
[BUG] E1 Err: MINTEMP / E1 THERMAL RUNAWAY (PRINTER HALTED Please reset)
Nov 10, 2019
It looks like you have a wiring issue with the thermistor, it’s unlikely to be just electrical noise with that much deviation caused by movement so check thoroughly that all the connections are sound and that there are no breaks in the wiring.
It looks like you have a wiring issue with the thermistor, it’s unlikely to be just electrical noise with that much deviation caused by movement so check thoroughly that all the connections are sound and that there are no breaks in the wiring.
I replace termistor one month ago and then works okay. Yesterday I do PID autotune and check resistance of termistor.
did you try and replace the thermistor again?
Configurations, please
Please ZIP up your Configuration.h and Configuration_adv.h files (as
requested in the Issue template) and drop them into your next reply.
We’ll check them over and see if anything is amiss.
I have a similar problem, the «THERMAL RUNAWAY» does not appear but actually the nozzle temperature keeps going from 215 ° to 209 ° as if the stabilization of the temperature was not stable.
@Gerggg What you describe sounds like a smooth curve on the temperature graphs, thats caused by PIDs not being tuned properly and is different from the instantaneous dodgy readings shown in this issue.
A resent PR changed the PID dT, but when PIDs are loaded from EEPROM this is not taken into account, so you may need to retune or reload the defaults.
Configurations, please
Please ZIP up yourConfiguration.handConfiguration_adv.hfiles (as
requested in the Issue template) and drop them into your next reply.
We’ll check them over and see if anything is amiss.
Marlin.zip
Hi, this is my configuration. I installed SKR 1.3 board with 2208 stepper drivers (UART) and BL touch.
Sorry @Primmson but at this point I have to assume it’s a hardware issue with your printer as the temperature readings jump around instantly and by large amounts showing huge amounts of noise, I’ve asked a few others with SKR 1.3 boards and I can’t find anyone else with a similar problem.
I’m hesitant to offer you a software solution because it would just hide the underlying hardware issue not fix it and that could cause more issues.
(If I do find anything in software that could be causing this, I’l let you know .. but it’s a lot more likely its hardware.)
Hi, I connect new thermistor and now is reads ok. But I have problem with acceleration when printing. I reduce speed and acceleration on ender (not on configuration.h). When printing with speed 40mm/s works great, and then just one straight line prints with abnormal speed and acceleration. Where can I set up this? Thanks for all answers!
This issue has been automatically locked since there has not been any recent activity after it was closed. Please open a new issue for related bugs.
Проблема решена
После регистрации в группе Ender 3 на Facebook и проведения дополнительных исследований я отследил проблему до калибровки PID. По умолчанию плата не нагревала печатающую головку должным образом. Из-за того, что он приближался к концу, сработала логика теплового разгона на новой плате и все отключилось.
Чтобы решить эту проблему, принтер должен запустить автонастройку PID. Это хорошая идея, когда вы заменяете любую деталь между соплом и материнской платой. Для выполнения автонастройки вам необходимо получить доступ к консоли принтера через приложение, такое как Pronterface. Также следует соблюдать осторожность при подключении USB-кабеля к принтеру. Плата 4.2.7 подает питание на порт USB. Чтобы подключить принтер к компьютеру, вам нужно будет замаскировать контакт питания на кабеле USB (с возможностью перегорания микросхемы на плате, если вы пропустите этот шаг)
Команда Marlin для автонастройки PID: M303. После этого используйте M301, чтобы установить результаты автонастройки. И не забудьте добавить M500, чтобы сохранить настройки в EEPROM.
Я бы предложил это видео от Teaching Tech в качестве примера процесса, и < href=»https://www.youtube.com/watch?v=7mj47VjlavQ&t=681s»>это видео от 3D Print General для проведения такой же автонастройки на рабочей платформе.
Постскриптум
Важный совет по безопасности. Плата 4.2.7 потребляет больше энергии, чем старая 8-битная плата. Во время моей первой тестовой печати после калибровки PID оплавился разъем между блоком питания и материнской платой. Похоже, что провода были обжаты, а не припаяны. Это было нормально со старой платой, но с дополнительной потребляемой мощностью было слишком много. Плохой контакт привел к перегреву проводов в соединении. Это пожароопасно.
Проверьте разъем питания. снимите термоусадочную пленку и посмотрите внимательно. Если вы не видите припоя на соединении, замените его. Это стоит небольших затрат и хлопот, чтобы не испортить принтер и не вызвать возгорание.
Эти проблемы обсуждаются в этом видео Makers Muse.