Download Windows Speedup Tool to fix errors and make PC run faster
The installation of Windows 10 depends on several factors. Hardware configuration and software configuration is just a broad classification of this dependency. Any mismatch in this configuration can cause many errors. One such error is error code 0x80300002 for We couldn’t install Windows in the location you choose. The whole error states-
We couldn’t install Windows in the location you choose. Please check your media drive. Here’s more info about what happened: 0x80300002.
This error occurs due to corruption in the partition table of the drive on which the installation is in progress. It is also possible that there is corruption on the Media Device. In this article, we will be checking out how to fix it.

Some of the working methods to fix the error code 0x80300002 for Windows Installation are:
- Verify the compatibility between the BIOS and the installation media.
- Recreate all the partitions.
- Recreate the bootable USB drive.
WARNING: The steps in these processes involve the deletion of partitions. So be aware that if you have data, it would be all lost. If you can, then take a backup by connecting the hard drive to a different computer.
1] Verify the compatibility between the BIOS and the installation media
The complicated point for Windows installation is that, if your Installation media is based on GPT, you need to have a BIOS, based on UEFI. And in case you have your bootable media with MBR Partitioning, you need to have your BIOS set to Legacy.
You need to verify these parameters and check if the compatibility is satisfied. If not, you can refer our guides about toggling between UEFI and Legacy or recreate the bootable USB drive with the appropriate partitioning table from method 3.
2] Recreate all the partitions
Restart the Windows installation process, and wait till you reach the screen which says Where do you want to install Windows?
In the same screen, you have the options to delete, format, extend, create new partitions, etc. Delete all the partitions. Then use the New button to create new partitions.
Make sure you have at least one primary partition where Windows 10 can install. Continue installing Windows on the new partition.
When you create a new partition, it recreates the partition table configuration. So there is no chance of any error.
3] Recreate the bootable USB drive
There is also a possibility of corruption of data in your installation media. Create a new USB Bootable device again and start the installation process. Check if that fixes your issues.
If the second method did not work correctly, repeat the given steps after getting a new ISO image file for Windows 11/10.
Hope these fixes help you in getting rid of the error 0x880300002 for Windows Installation.
Ayush has been a Windows enthusiast since the day he got his first PC with Windows 98SE. He is an active Windows Insider since Day 1 and has been a Windows Insider MVP.
Установка Windows 10 зависит от нескольких факторов. Конфигурация оборудования и программного обеспечения – это лишь широкая классификация этой зависимости. Любое несоответствие в этой конфигурации может вызвать много ошибок. Одна из таких ошибок – код ошибки 0x80300002 для . Нам не удалось установить Windows в выбранном вами месте . Вся ошибка гласит:
Мы не смогли установить Windows в выбранном вами месте. Пожалуйста, проверьте ваш медиа-диск. Вот больше информации о том, что произошло: 0x80300002.
Эта ошибка возникает из-за повреждения таблицы разделов диска, на котором выполняется установка. Также возможно, что на устройстве мультимедиа имеется повреждение. В этой статье мы рассмотрим, как это исправить.

Содержание
- Нам не удалось установить Windows в выбранном вами месте, ошибка 0x80300002
- 1] Проверьте совместимость между BIOS и установочным носителем.
- 2] Воссоздать все разделы
- 3] Восстановите загрузочный USB-накопитель
Нам не удалось установить Windows в выбранном вами месте, ошибка 0x80300002
Вот некоторые из методов исправления ошибки 0x80300002 для установки Windows:
- Проверьте совместимость между BIOS и установочным носителем.
- Воссоздайте все разделы.
- Восстановите загрузочный USB-накопитель.
ПРЕДУПРЕЖДЕНИЕ . Шаги в этом процессе включают удаление разделов. Так что имейте в виду, что если у вас есть данные, все это будет потеряно. Если можете, сделайте резервную копию, подключив жесткий диск к другому компьютеру.
1] Проверьте совместимость между BIOS и установочным носителем.
Сложным моментом для установки Windows является то, что если ваш установочный носитель основан на GPT , вам нужно иметь BIOS на основе UEFI . И если у вас есть загрузочный носитель с MBR Partitioning, вам нужно установить в BIOS значение Legacy .
Вам необходимо проверить эти параметры и проверить, удовлетворена ли совместимость. Если нет, вы можете обратиться к нашим руководствам по переключению между UEFI и Legacy или воссоздать загрузочный USB-накопитель с соответствующей таблицей разделов из метода 3.
2] Воссоздать все разделы
Перезапустите процесс установки Windows и подождите, пока не появится экран с надписью Где вы хотите установить Windows?
На этом же экране вы можете удалить, отформатировать, расширить, создать новые разделы и т. Д. Удалить все разделы. Затем нажмите кнопку Создать, чтобы создать новые разделы.
Убедитесь, что у вас есть хотя бы один основной раздел, на который можно установить Windows 10. Продолжите установку Windows на новый раздел.
Когда вы создаете новый раздел, он воссоздает конфигурацию таблицы разделов. Так что нет никаких шансов на ошибку.
3] Восстановите загрузочный USB-накопитель
Существует также возможность повреждения данных на установочном носителе. Снова создайте новое загрузочное USB-устройство и начните процесс установки. Проверьте, исправляет ли это ваши проблемы.
Если второй метод не сработал правильно, повторите указанные шаги после получения нового файла образа ISO для Windows 10.
Надеюсь, что эти исправления помогут вам избавиться от ошибки 0x880300002 для установки Windows.
Обновлено май 2023: перестаньте получать сообщения об ошибках и замедлите работу вашей системы с помощью нашего инструмента оптимизации. Получить сейчас в эту ссылку
- Скачайте и установите инструмент для ремонта здесь.
- Пусть он просканирует ваш компьютер.
- Затем инструмент почини свой компьютер.
0x80300002 — это Ошибка установки Windows, Это означает, что существует некоторая форма повреждения в таблице разделов или разделах и что вам не разрешено устанавливать выбранный раздел.

Вы можете проверить и иногда восстановить таблицу разделов с помощью различных бесплатных инструментов, а затем восстановить разделы самостоятельно. Это не следует воспринимать легкомысленно, вы можете уничтожить жесткий диск, сделав это неправильно.
Проверьте установочный носитель
Эта ошибка также влияет на установочный носитель, что означает, что ваш носитель может быть неисправен, отсутствуют файлы или что в памяти, содержащей устанавливаемую вами операционную систему, есть проблемы.
1 Проверьте носитель DVD на наличие царапин.
2. проверьте свой DVD-плеер
3. восстановите ваш RAID-диск (поскольку вы используете 10 4x SAS RAID-диски).
Создать новый раздел

STEP 1: удалить все ранее созданные разделы и преобразовать их в нераспределенное пространство.
STEP 2: теперь вставьте установочный носитель Windows 10 и запустите процесс установки.
ШАГ 3: В процессе установки перейдите к шагу, на котором запрашивается установка раздела, просто выберите оттуда «Параметры диска» вместо выбора существующего раздела.
Обновление за май 2023 года:
Теперь вы можете предотвратить проблемы с ПК с помощью этого инструмента, например, защитить вас от потери файлов и вредоносных программ. Кроме того, это отличный способ оптимизировать ваш компьютер для достижения максимальной производительности. Программа с легкостью исправляет типичные ошибки, которые могут возникнуть в системах Windows — нет необходимости часами искать и устранять неполадки, если у вас под рукой есть идеальное решение:
- Шаг 1: Скачать PC Repair & Optimizer Tool (Windows 10, 8, 7, XP, Vista — Microsoft Gold Certified).
- Шаг 2: Нажмите «Начать сканирование”, Чтобы найти проблемы реестра Windows, которые могут вызывать проблемы с ПК.
- Шаг 3: Нажмите «Починить все», Чтобы исправить все проблемы.

ШАГ 4: Теперь с нераспределенным пространством -> создайте новый раздел.
STEP 5: завершите процесс установки.
Восстановить

- Запустите свой компьютер и войдите в систему как администратор.
- Нажмите кнопку «Пуск», выберите «Все программы», «Стандартные», «Системные инструменты» и нажмите «Восстановить систему».
- В новом окне выберите «Восстановить компьютеры в более раннее время», затем нажмите «Далее».
- Выберите последнюю точку восстановления системы из списка «В этом списке щелкните точку восстановления», затем щелкните
- Далее.
- Нажмите Далее в окне подтверждения.
- Перезагрузка компьютера после завершения восстановления.
Отключите все внешние компоненты оборудования.
Ошибка иногда может быть вызвана внешним оборудованием, подключенным к вашей системе. Некоторые пользователи сообщали, что их ошибка связана с внешним оборудованием, которое было подключено к их системе и исправлено после отключения оборудования. Поэтому сначала убедитесь, что к вашей системе не подключено никакое дополнительное оборудование, кроме установочного носителя.
Windows 10 reinstall error 0x80300002 please help!
by in techsupport
Совет экспертов: Этот инструмент восстановления сканирует репозитории и заменяет поврежденные или отсутствующие файлы, если ни один из этих методов не сработал. Это хорошо работает в большинстве случаев, когда проблема связана с повреждением системы. Этот инструмент также оптимизирует вашу систему, чтобы максимизировать производительность. Его можно скачать по Щелчок Здесь

CCNA, веб-разработчик, ПК для устранения неполадок
Я компьютерный энтузиаст и практикующий ИТ-специалист. У меня за плечами многолетний опыт работы в области компьютерного программирования, устранения неисправностей и ремонта оборудования. Я специализируюсь на веб-разработке и дизайне баз данных. У меня также есть сертификат CCNA для проектирования сетей и устранения неполадок.
Сообщение Просмотров: 1,056
Содержание
- Нам не удалось установить Windows в выбранном вами месте. Ошибка 0x80300002
- Нам не удалось установить Windows в выбранном вами месте, ошибка 0x80300002
- 1] Проверьте совместимость между BIOS и установочным носителем.
- 2] Воссоздать все разделы
- 3] Восстановите загрузочный USB-накопитель
- Исправлено: ошибка установщика Windows 0x80300002 —
- Что вызывает ошибку установщика Windows 0x80300002?
- Решение 1. Отключите любое внешнее оборудование
- Решение 2: Восстановление системы
- Решение 3. Удаление разделов
- Решение 4. Подключите жесткий диск к другому ПК
- Решение 5. Неисправное оборудование
- (Решено) Исправление ошибки установщика Windows 0x80300002
- Проверьте установочный носитель
- Создать новый раздел
- Восстановить
- Отключите все внешние компоненты оборудования.
- Исправляем ошибку 0x80300024 при установке Windows 10
- Проблема при установке windows 10. 8×80300002
Нам не удалось установить Windows в выбранном вами месте. Ошибка 0x80300002
Мы не смогли установить Windows в выбранном вами месте. Пожалуйста, проверьте ваш медиа-диск. Вот больше информации о том, что произошло: 0x80300002.
Эта ошибка возникает из-за повреждения таблицы разделов диска, на котором выполняется установка. Также возможно, что на устройстве мультимедиа имеется повреждение. В этой статье мы рассмотрим, как это исправить.

Нам не удалось установить Windows в выбранном вами месте, ошибка 0x80300002
Вот некоторые из методов исправления ошибки 0x80300002 для установки Windows:
1] Проверьте совместимость между BIOS и установочным носителем.
Вам необходимо проверить эти параметры и проверить, удовлетворена ли совместимость. Если нет, вы можете обратиться к нашим руководствам по переключению между UEFI и Legacy или воссоздать загрузочный USB-накопитель с соответствующей таблицей разделов из метода 3.
2] Воссоздать все разделы
Перезапустите процесс установки Windows и подождите, пока не появится экран с надписью Где вы хотите установить Windows?
На этом же экране вы можете удалить, отформатировать, расширить, создать новые разделы и т. Д. Удалить все разделы. Затем нажмите кнопку Создать, чтобы создать новые разделы.
Убедитесь, что у вас есть хотя бы один основной раздел, на который можно установить Windows 10. Продолжите установку Windows на новый раздел.
Когда вы создаете новый раздел, он воссоздает конфигурацию таблицы разделов. Так что нет никаких шансов на ошибку.
3] Восстановите загрузочный USB-накопитель
Существует также возможность повреждения данных на установочном носителе. Снова создайте новое загрузочное USB-устройство и начните процесс установки. Проверьте, исправляет ли это ваши проблемы.
Если второй метод не сработал правильно, повторите указанные шаги после получения нового файла образа ISO для Windows 10.
Надеюсь, что эти исправления помогут вам избавиться от ошибки 0x880300002 для установки Windows.
Источник
Исправлено: ошибка установщика Windows 0x80300002 —
Ошибка 0x80300002 часто вызывается ошибками раздела или повреждением установочного носителя Windows, из-за которого вы не сможете завершить установку Windows. Установка Windows была легкой задачей благодаря установщику Windows. Благодаря удобному интерфейсу можно установить их Windows DVD в кратчайшие сроки. Однако иногда процесс может потребовать некоторой работы, прежде чем вы сможете установить недавно установленную Windows на свой компьютер.
Ошибки установщика Windows встречаются редко и встречаются редко. Ошибки, связанные с установщиком Windows, обычно вызываются аппаратным обеспечением, подключенным к вашему ПК, и в этом случае установщик не виноват, а виноваты используемые вами носители или оборудование.
 Ошибка установщика Windows 0x80300002
Что вызывает ошибку установщика Windows 0x80300002?
Ошибки установщика Windows возникают не каждый день, но, как правило, это происходит из-за —
С учетом сказанного используйте следующие решения для решения вашей проблемы:
Решение 1. Отключите любое внешнее оборудование
Ошибка иногда может быть вызвана внешним оборудованием, подключенным к вашей системе. Несколько пользователей сообщили, что их ошибка произошла из-за внешнего оборудования, которое было подключено к их системе и было устранено после отключения оборудования. Поэтому для начала убедитесь, что к вашей системе не подключено дополнительное оборудование, кроме установочного носителя.
Решение 2: Восстановление системы
Если вы сделали какие-либо изменения до установки Windows снова, ошибка может быть вызвана из-за этого. В таком случае вам придется использовать восстановление системы. Это функция Windows, которая позволяет пользователям восстановить свою систему до точки, предшествующей возникновению ошибки. Поэтому используйте восстановление системы, а затем попробуйте установить Windows. Вот как можно восстановить вашу систему:
Решение 3. Удаление разделов
Прежде чем приступить к реализации этого решения, убедитесь, что вы создали резервную копию важной информации, хранящейся в вашей системе. Иногда ошибка может быть вызвана плохими разделами, в этом случае вам придется удалить разделы, а затем установить Windows. Вот как можно удалить ваши разделы:
Решение 4. Подключите жесткий диск к другому ПК
Еще одна вещь, которую вы можете сделать, чтобы решить эту проблему — отключить жесткий диск от вашей системы и подключить его к другому компьютеру. Помимо ошибки, это то, что вам следует делать, если вы не видите никаких разделов при запросе на системный раздел. После подключения к другой системе настройте раздел NTFS с помощью установщика Windows, а затем выполните процесс установки.
Решение 5. Неисправное оборудование
Наконец, если вышеупомянутые решения не сработали для вас, есть только одна возможная причина для этого. Что-то на вашем компьютере повреждено или обжарено. В таком случае вам придется заменить оборудование, а затем попытаться установить Windows.
Источник
(Решено) Исправление ошибки установщика Windows 0x80300002
Обновление: Перестаньте получать сообщения об ошибках и замедляйте работу своей системы с помощью нашего инструмента оптимизации. Получите это сейчас на эту ссылку

Вы можете проверить и иногда восстановить таблицу разделов с помощью различных бесплатных инструментов, а затем восстановить разделы самостоятельно. Это не следует воспринимать легкомысленно, вы можете уничтожить жесткий диск, сделав это неправильно.
Проверьте установочный носитель
Эта ошибка также влияет на установочный носитель, что означает, что ваш носитель может быть неисправен, отсутствуют файлы или что в памяти, содержащей устанавливаемую вами операционную систему, есть проблемы.
1 Проверьте носитель DVD на наличие царапин.
2. проверьте свой DVD-плеер
3. восстановите ваш RAID-диск (поскольку вы используете 10 4x SAS RAID-диски).
Создать новый раздел

STEP 1: удалить все ранее созданные разделы и преобразовать их в нераспределенное пространство.
STEP 2: теперь вставьте установочный носитель Windows 10 и запустите процесс установки.
ШАГ 3: В процессе установки перейдите к шагу, на котором запрашивается установка раздела, просто выберите оттуда «Параметры диска» вместо выбора существующего раздела.

Восстановить

Отключите все внешние компоненты оборудования.
Ошибка иногда может быть вызвана внешним оборудованием, подключенным к вашей системе. Некоторые пользователи сообщали, что их ошибка связана с внешним оборудованием, которое было подключено к их системе и исправлено после отключения оборудования. Поэтому сначала убедитесь, что к вашей системе не подключено никакое дополнительное оборудование, кроме установочного носителя.

CCNA, веб-разработчик, ПК для устранения неполадок
Я компьютерный энтузиаст и практикующий ИТ-специалист. У меня за плечами многолетний опыт работы в области компьютерного программирования, устранения неисправностей и ремонта оборудования. Я специализируюсь на веб-разработке и дизайне баз данных. У меня также есть сертификат CCNA для проектирования сетей и устранения неполадок.
Источник
Исправляем ошибку 0x80300024 при установке Windows 10
В первый раз с толкнулся с новой для себя ошибкой 0x80300024 при чистой установке Windows 10 1809 на компьютер с SSD диском.
В окне установке Windows 10 при попытке выбрать раздел диска, на который нужно установить операционную систему появляется ошибка:

В русской версии установщика Windows 10 ошибка выглядит так:

Итак, что нужно попробовать сделать при появлении этой ошибки для нормальной установки Windows:
List disk – вывод всех подключенных к компьютеру дисков (HDD/SSD/USB).
Запомните номер диска, который вы хотите очистить (проще всего идентифицировать ваши жесткие и SSD диски по их размеру).
Select Disk 0 – выберите диск, который вы хотите очистить (в моем примере номер диска 0).
Выведите список разделов: list part (Если вы увидите, что у первого раздела есть большое смешение (Offset) более 1024 Кб, вы точно на верном пути!). 
Clean — удаление структуры разделов и данных на выбранном диске.
Exit – завершите Diskpart.
Источник
Проблема при установке windows 10. 8×80300002
Для нормальной и без проблемной установки Windows надо:
1_Скачать оригинальный ISO образ с Windows программой Microsoft Windows and Office ISO Download Tool https://www.heidoc.net/joomla/technology-science/microsoft/67-microsoft-windows-and-office-iso-download-tool или через сайт TechBench by WZT (скачать оригинальную Windows). После установки актировать Re-Loader Activator https://rsload.net/soft/20414-re-loader.html и проблем с активацией не будет, но это если нет легального ключа.
3_Включаем ПК и при загрузке сразу жмём кнопку F2, заходим в меню BIOS. В разделе BOOT включаем автозагрузку с USB или DVD-ROM. Ещё меню вызова запуска автозагрузки можно вызвать путём нажатия кнопки F8 или F12 (+Fn если одна кнопка не сработает). Если стояла Windows XP и Вы хотите поставить Windows 7 и выше, то в разделе Configuration надо ОБЯЗАТЕЛЬНО переключить с IDE на SATA иначе Windows не установится.
3_Скачиваем программу Acronis Disk Director https://yadi.sk/d/ww_MZxv73PpdQ9 и записываем ISO образ на флэшку или диск.
4_Запускаем записанный Acronis Disk Director и полностью удаляем все разделы. Создаём новый том. Форматируем в NTFS, а потом делим на 2 раздела. Системный раздел C (делай 40 гигов Вам вполне хватит) надо пометить как «Активный».
5_Теперь можно вставлять флэшку с Windows и начинать установку. Только после первой перезагрузки надо снова зайти в BIOS и переключить автозагрузку с USB на HDD, а то процесс установки по новой начнётся. Если с диска, то при запуске надо быстро нажимать кнопку F8. Удачи!
Источник
Installing a Windows 10 upgrade is definitely not an easy task since the process is not always smooth sailing and you could encounter some errors when doing so. This isn’t unusual since there are various software configurations and hardware configurations as well as services it depends on in order to properly work. So if any of them malfunctions or becomes corrupted, it will affect the process which will result in errors like the error code 0x80300002. When you encounter this kind of Windows Update error, you will see the following error message on your screen:
“We couldn’t install Windows in the location you choose. Please check your media drive. Here’s more info about what happened: 0x80300002”
You can encounter this kind of error if there is corruption in the partition table of the drive where the installation is in progress. In addition, corruption on the Media device could also cause this problem. So if you encounter this error when running Windows Setup, read on as this post will guide you in fixing it.
There are several ways to resolve this issue. The first thing you can do is to verify the compatibility between the BIOS and the installation media. You could also try recreating all the partitions as well as recreating the bootable USB drive. For more detailed information, follow the given options below.
Option 1 – Check if the BIOS is compatible with the installation media
The first thing you can do to fix the error is to check if there are any compatibility issues between the BIOS and the installation media you’re using. This is actually one of the most likely reasons why you’re getting the error since this is a complicated point for the Windows installation process. If the installation media is based on GPT, then your BIOS must be based on UEFI. So if you have your bootable media with the MBR partitioning, you need to set your BIOS to Legacy.
- In the Windows Search box, type “command prompt” and from the search results that appear, right-click on Command Prompt and select the “Run as administrator” option.
- After that, execute this command: exe /convert /allowfullOS
- Now, wait until the process is completed since you can track its process on your screen.
- Once it’s done, go to Settings > Update & Security > Advanced Startup options and from there, click on Restart Now. This will restart your computer and give you advanced options.
- Next, select Troubleshoot > Advanced Options where you will see further options including System Restore, Startup Repair, Go back to the previous version, Command Prompt, System Image Recovery, and UEFI Firmware Settings.
- Now select the “Legacy” option. This will take you to the BIOS. Boot Mode is typically available under Boot > Boot Configuration. Once you’re there, set it to Legacy and then save the changes you’ve made. After that, your computer will restart.
Option 2 – Try recreating a new bootable drive
- Insert your USB drive into your PC.
- Tap the Win + R keys to open the Run dialog box and type in “cmd” and tap Enter to open the Command Prompt. Alternatively, you can also search for “cmd” in the Cortana search box to open Command Prompt.
- Once you’ve opened CMD, type in this command to open the DISPART utility – diskpart
- After that, you should see a new black and white window that would say, “DISKPART>”.
- Next, type in “list disk” in the command line and tap Enter to see the list of all the Storage devices as well as your hard disk connected to your PC. Here, you have to identify your disk’s number.
- Type in this command where “X” is the disk number you have identified and then tap Enter – disk X
- Type in this command and hit Enter to clear the table records and all the visible data on the drive – clean
- Now you have to recreate a new primary partition of the drive so you’ll have to type in this command and tap Enter right after – create part pri
- A new primary partition has been created so you have to select it by typing this command and tapping Enter – select part 1
- Now you have to format it to make it visible to normal users by typing – format fs=ntfs quick
Note: If your platform supports the Unified Extensible Firmware Interface or UEFI, replace the “NTFS” with “FAT32” in the command on Step 10.
- After that, type in this command and tap Enter after – active
- Finally, type this command and hit Enter to exit the utility – exit
- After you prepare the image for the operating system, save it to the root of your USB Storage device.
Option 3 – Try to recreate all the partitions
If none of the first two options given above worked, then you can try to recreate all the partitions instead. All you have to do is restart the Windows installation process and wait until you get to the part that says, “Where do you want to install Windows?”. From there, you will see options like delete, format, extend, create new partitions, and many more. Now you have to select the Delete all the partitions options and then use the “New” button to create new partitions. Just make sure that you have one primary partition at least where you can install Windows 10. After that, continue the installation of Windows on the new partition. Keep in mind that when you create a new partition, it also recreates the partition table configuration which means that the chances of getting an error are very unlikely.
Do You Need Help with Your Device?
Our Team of Experts May Help

Troubleshoot.Tech Experts are There for You!
GET HELP
Troubleshoot.Tech experts work with all versions of Microsoft Windows including Windows 11, with Android, Mac, and more.
Share this article:
You might also like
CalendarSpark is a browser extension developed by MindSpark. This extension allows an easy way to print or view calendar templates and make schedulers for a day/week/month/year.
This browser extension hijacks your browser home page and search engine, changing them to MyWay.com. While the extension is installed it monitors your browsing activity and collets visited websites, clicked links, and sometimes even personal information, which it later uses to display targeted unwanted ads through your browsing sessions.
While browsing the internet with this extension installed you will see additional sponsored links, ads, and sometimes even pop-up ads on websites that are not supposed to have any of these. Several anti-virus scanners have detected this extension as a Browser Hijacker, and due to its data collecting behavior, it is not recommended to keep it on your computer.
About Browser Hijackers
Browser hijackers (sometimes called hijackware) are a kind of malware that modifies web browser configuration settings without the computer owner’s knowledge or permission. These kinds of hijacks are raising at an alarming rate across the world, and they could be truly nefarious and sometimes harmful too. Browser hijacker malware is created for a number of reasons. These are generally used to force hits to a specific site, manipulating web traffic to generate ad revenue. However, it’s not that harmless. Your online safety is jeopardized and it is also extremely irritating. In a worst-case scenario, your browser could be hijacked to open up your computer system to a host of additional attacks.
Indications of browser hijack
When your browser is hi-jacked, the following could happen: your home page is reset to some unknown webpage; you get redirected to sites you never intended to visit; The default search page of the web browser is changed; unwanted new toolbars are added to your internet browser; you’ll find random pop-ups start showing on a regular basis; your internet browser starts running slowly or exhibits frequent errors; Inability to navigate to certain websites, particularly antivirus as well as other security software sites.
Exactly how browser hijacker finds its way onto your PC
Browser hijackers can enter a PC by some means or other, including via file sharing, downloads, and e-mail as well. They could also be deployed via the installation of an internet browser toolbar, add-on, or extension. A browser hijacker can be installed as a part of freeware, shareware, demoware, and pirated programs. An example of some well-known browser hijacker includes Conduit, Anyprotect, Babylon, DefaultTab, SweetPage, RocketTab, and Delta Search, but the names are regularly changing.
Browser hijackers could interrupt the user’s web surfing experience significantly, track the websites visited by users and steal sensitive information, cause problems in connecting to the net, and then finally create stability issues, causing programs and computers to freeze.
Removal
Some kinds of browser hijackers can be quickly removed from the computer by deleting malicious applications or any other recently added freeware. Regrettably, most of the software applications used to hijack an internet browser are intentionally designed to be difficult to remove or detect. Furthermore, manual removals require in-depth system knowledge and therefore can be an extremely difficult job for novice computer users.
What you can do if Virus Stops You From Downloading Antivirus?
Practically all malware is inherently dangerous, but certain types of malware do much more damage to your computer than others. Some malware sits in between your computer and your internet connection and blocks a few or all websites that you would like to check out. It will also block you from the installation of anything on your PC, especially antivirus applications. If you’re reading this article now, you might have perhaps realized that virus infection is the real cause of your blocked net connectivity. So how to proceed when you want to download and install an antivirus application like Safebytes? Although this sort of problem can be tougher to circumvent, there are some steps you can take.
Download the software in Safe Mode with Networking
In Safe Mode, you may change Windows settings, un-install or install some program, and eliminate hard-to-delete viruses and malware. In case the virus is set to load immediately when the PC starts, switching to this mode can prevent it from doing so. To boot into Safe Mode, press “F8” key on the keyboard just before Windows logo screen appears; Or after normal Windows boot up, run MSCONFIG, look over Safe Boot under Boot tab, and then click Apply. After you reboot into Safe Mode with Networking, you could download, install, as well as update the anti-malware program from there. At this point, you can run the anti-malware scan to eliminate viruses and malware without hindrance from another application.
Obtain the antivirus program using an alternate web browser
Some malware only targets particular internet browsers. If this sounds like your situation, utilize another browser as it may circumvent the virus. The best way to avoid this problem is to choose a browser that is well known for its security features. Firefox has built-in Phishing and Malware Protection to help keep you safe online.
Install and run anti-malware from the Thumb drive
Here’s yet another solution which is creating a portable USB antivirus software package that can check your system for malicious software without the need for installation. To run anti-virus from a USB drive, follow these simple steps:
1) Use another virus-free PC to download Safebytes Anti-Malware.
2) Plug in the flash drive to a USB slot on the clean computer.
3) Double-click the executable file to open the installation wizard.
4) When asked, choose the location of the USB drive as the place where you would like to store the software files. Follow activation instructions.
5) Unplug the flash drive. You may now use this portable anti-malware on the affected computer.
6) Run the Safebytes Anti-malware directly from the flash drive by double-clicking the icon.
7) Run Full System Scan to detect and clean-up up all types of malware.
SafeBytes Anti-Malware Benefits
If you are looking to install anti-malware software for your PC, there are numerous tools on the market to consider but you cannot trust blindly to anyone, irrespective of whether it is free or paid software. A few of them are great, some are decent, while some will harm your computer themselves! You need to select one that is dependable, practical, and has a strong reputation for its malware protection. While thinking about the dependable software programs, Safebytes AntiMalware is certainly the strongly recommended one.
SafeBytes anti-malware is a trusted tool that not only protects your computer system permanently but is also very user-friendly for people of all ability levels. Once you’ve got installed this software, SafeByte’s sophisticated protection system will make sure that absolutely no viruses or malicious software can seep through your personal computer.
SafeBytes has a plethora of amazing features that can help you protect your PC from malware attacks and damage. Listed below are some of the great features included in the tool.
Optimum AntiMalware Protection: Using a critically acclaimed malware engine, SafeBytes provides multilayered protection that is designed to find and eliminate viruses and malware that are concealed deep in your computer’s operating system.
Live Protection: SafeBytes offers a completely hands-free real-time protection that is set to observe, block, and wipe out all computer threats at its very first encounter. It will inspect your computer for suspicious activity regularly and its unparalleled firewall shields your computer from illegal entry by the outside world.
Faster Scan: SafeBytes Anti-Malware has got a multi-thread scan algorithm that works up to 5 times faster than any other protection software.
Website Filtering: SafeBytes checks and provides a unique safety ranking to each and every site you visit and block access to webpages known to be phishing sites, thus safeguarding you from identity theft, or known to contain malware.
Light-weight: The program is light-weight and will work silently in the background, and will not impact your computer efficiency.
Premium Support: For any technical inquiries or product assistance, you could get 24/7 professional assistance via chat and email.
Technical Details and Manual Removal (Advanced Users)
To get rid of CalendarSpark manually, navigate to the Add/Remove programs list in the Windows Control Panel and select the program you want to get rid of. For browser extensions, go to your web browser’s Addon/Extension manager and select the add-on you intend to remove or disable. You will probably also want to reset your internet browser.
In order to ensure the complete removal, manually examine your hard disk and computer registry for all of the following and remove or reset the values accordingly. But bear in mind, this is a tricky task and only computer professionals can carry it out safely. In addition, certain malicious programs are capable to defend against its deletion. Doing this malware-removal process in Safe Mode is suggested.
Files:
calendarspark.dl.myway[1].xml
%UserProfile%Local SettingsApplication DataCalendarSparkTooltab
chrome-extension_apfkjcjglfhoemadfobgcacfkdhapiab_0.localstorage-journal
%LOCALAPPDATA%CalendarSparkTooltab
http_calendarspark.dl.tb.ask.com_0.localstorage-journal
http_calendarspark.dl.tb.ask.com_0.localstorage
Calendarspark.exe 310,048 602097e5efa71f01dca1ad60ba108730
%UserProfile%Local SettingsApplication DataGoogleChromeUser DataDefaultExtensionslacjhcgjigifchcapcccoippjdnkbagj
%LOCALAPPDATA%GoogleChromeUser DataDefaultExtensionslacjhcgjigifchcapcccoippjdnkbagj
www.calendarspark[1].xml
%LOCALAPPDATA%GoogleChromeUser DataDefaultLocal Extension Settingslacjhcgjigifchcapcccoippjdnkbagj
Registry:
HKEY_CURRENT_USERSoftwareCalendarSpark
HKEY_CURRENT_USERSoftwareMicrosoftInternet ExplorerLowRegistryDOMStoragecalendarspark.com
HKEY_CURRENT_USERSoftwareMicrosoftInternet ExplorerLowRegistryDOMStoragecalendarspark.dl.myway.com
HKEY_CURRENT_USERSoftwareWow6432NodeCalendarSpark
HKEY_CURRENT_USERSoftwareGoogleChromePreferenceMACsDefaultextensions.settings, value: lacjhcgjigifchcapcccoippjdnkbagj
HKEY_LOCAL_MACHINESoftware[APPLICATION]MicrosoftWindowsCurrentVersionUninstall..Uninstaller
CalendarSparkTooltab Uninstall Internet Explorer
Read More
Installing Windows Updates in your Windows 10 computer does not always go smoothly as there are instances when you could encounter some errors along the way. One of these errors is error code 0x80244022 –WU_E_PT_HTTP_STATUS_SERVICE_UNAVAIL HTTP 503. This kind of error can be encountered when you check, download or install any updates. At the time of writing, it isn’t known yet what the exact cause of this error is. However, there are some potential fixes you can check out to fix it.
When this error occurs, you will see the following error message on your screen:
“There were some problems installing updates, but we’ll try again later. If you keep seeing this and want to search the web or contact support for information, this may help: (0x80244022).”
To fix error code 0x80244022, refer to the potential fixes provided below.
Option 1 – Disable the Proxy server
The first thing you can do is to try disabling the Proxy server as it might be the reason why you’re getting error 0x80244022 for Windows Updates. To disable the proxy server, refer to the steps below.
- Tap the Win + R keys to open the Run dialog box.
- Then type “inetcpl.cpl” in the field and hit Enter to pull up the Internet Properties.
- After that, go to the Connections tab and select the LAN settings.
- From there. Uncheck the “Use a Proxy Server” option for your LAN and then make sure that the “Automatically detect settings” option is checked.
- Now click the OK and the Apply buttons.
- Restart your PC.
Note: If you are using a third-party proxy service, you have to disable it. In addition, if you are also using a VPN, you can try to disable it as well.
Option 2 – Run the DISM tool
You can run the DISM tool as well to help fix the error code 0x80244022 during Windows Update. Using this built-in tool, you have various options such as the “/ScanHealth”, “/CheckHealth”, and “/RestoreHealth”.
- Open the Command Prompt with admin privileges.
- Then type in the following commands and make sure to hit Enter right after you type each one of them:
- Dism /Online /Cleanup-Image /CheckHealth
- Dism /Online /Cleanup-Image /ScanHealth
- exe /Online /Cleanup-image /Restorehealth
- Do not close the window if the process takes a while as it will probably take a few minutes to finish.
Option 3 – Perform a System File Checker scan
The SFC or System File Checker scan could detect and automatically repair damaged system files that could be causing error code 0x80244022 to appear when you try to update your Windows 10 computer. SFC is a built-in command utility that helps in restoring corrupted files as well as missing files. It replaces bad and corrupted system files with good system files. To run the SFC command, follow the steps given below.
- Tap Win + R to launch Run.
- Type in cmd in the field and tap Enter.
- After opening Command Prompt, type in sfc /scannow and hit Enter.
The command will start a system scan which will take a few whiles before it finishes. Once it’s done, you could get the following results:
- Windows Resource Protection did not find any integrity violations.
- Windows Resource Protection found corrupt files and successfully repaired them.
- Windows Resource Protection found corrupt files but was unable to fix some of them.
- Once done, restart your computer.
Option 4 – Try disabling the Firewall or antivirus program
Disabling the antivirus program or Firewall or any other security software installed in your computer is always a good idea you can try when the Windows Update process does not go smoothly. So before you try updating your computer again, make sure to disable the antivirus or security program and once the Windows Update is done, don’t forget to enable the antivirus program back again.
Option 5 – Try resetting the Windows Update components
- Open Command Prompt with admin privileges.
- After that, type each one of the following commands and hit Enter after you key in one after the other.
- net stop wuauserv
- net stop cryptsvc
- net stop bits
- net stop msiserver
Note: The commands you entered will stop the Windows Update components such as Windows Update service, Cryptographic services, BITS, and MSI Installer.
- After disabling WU components, you need to rename both the SoftwareDistribution and Catroot2 folders. To do that, type each one of the following commands below, and don’t forget to hit Enter after you type one command after the other.
- ren C:/Windows/SoftwareDistribution/SoftwareDistribution.old
- ren C:/Windows/System32/catroot2/Catroot2.old
- Next, restart the services you’ve stopped by entering another series of commands. Don’t forget to hit Enter after you key in one command after the other.
- net start wuauserv
- net start cryptsvc
- net start bits
- net start msiserver
- Close Command Prompt and reboot your PC.
Option 6 – Run the Windows Update Troubleshooter
You might also want to run the Windows Update Troubleshooter as it could also help in fixing Windows Update Error. To run it, go to Settings and then select Troubleshoot from the options. From there, click on Windows Update and then click the “Run the troubleshooter” button. After that, follow the next on-screen instructions and you should be good to go.
Read More
One of the most common Blue Screen of Death errors you can encounter on your Windows 10 computer is the Tcpip.sys Blue Screen error. The Tcpip.sys file is a driver file that is associated with the Transmission Control Protocol over Internet Protocol. When you see this kind of BSOD error, you may see any of the following error descriptions:
- IRQL_NOT_LESS_EQUAL
- KMODE_EXCEPTION_NOT_HANDLED
- PAGE_FAULT_IN_NONPAGED_AREA
Whichever error description you got, you need to do use the following instructions below as a reference to obliterate the Tcpip.sys Blue Screen error.
Option 1 – Run the Blue Screen Troubleshooter
The Blue Screen troubleshooter is a built-in tool in Windows 10 that helps users in fixing BSOD errors like Tcpip.sys Blue Screen error. It can be found on the Settings Troubleshooters page. To use it, refer to these steps:
- Tap the Win + I keys to open the Settings panel.
- Then go to Update & Security > Troubleshoot.
- From there, look for the option called “Blue Screen” on your right-hand side and then click the “Run the troubleshooter” button to run the Blue Screen Troubleshooter and then follow the next on-screen options. Note that you might have to boot your PC into Safe Mode.
Option 2 – Try resetting TCP/IP
In case you didn’t notice, the Tcpip.sys file is associated with the TCP/IP protocols in your computer system which is why resetting TCP/IP can help in resolving the Tcpip.sys Blue Screen of Death error especially when the TCP/IP has been modified.
- First, you need to type “command prompt” in the Windows Search bar and then right-click on the related search result and select the “Run as administrator” option to open Command Prompt.
- After that, type the following command in the elevated cmd window and hit Enter:
netsh int ip reset
- Now reboot your computer after the command has been executed and check if it helped to fix the Blue Screen error.
Option 3 – Try to rollback your Network driver
If you have updated the driver software as of late and you suddenly got this BSOD error, you might have to roll back the device driver – in other words, switch back to the previous working version. To do that, follow these steps:
- Tap the Win + R keys to launch the Run window and then type in the “devmgmt.msc” command and hit Enter to open the Device Manager window.
- Under the Device Manager, you will see a list of drivers. From there, look for the Network Adapters and expand it.
- Next, select the driver entries that are labeled appropriately other than anything in the context of the WAN Miniport.
- Then select each one of them and double click to open a new mini window.
- After that, make sure that you’re on the Driver tab and if you are not, just navigate to it then click the Roll Back Driver button to switch back to the previous version of your Network adapters.
- Now restart your computer to successfully apply the changes made.
Option 4 – Try to update the Network drivers
You might also want to try updating all your network drivers in order to fix the Tcpip.sys Blue Screen error. To do so, here’s what you have to do:
- Tap the Win + R keys to launch the Run window and then type in the “MSC” command and hit Enter to open the Device Manager window.
- Under the Device Manager, you will see a list of drivers. From there, look for the Network Adapters and expand it.
- Then right-click on each one of the Network drivers and update them all.
- Restart your PC and see if it helped in fixing the BSOD error.
Note: If updating the network drivers didn’t help in fixing the problem, you can also try to uninstall the very same drivers and restart your Windows 10 PC. After that, the system itself will reinstall the drivers you just uninstalled. Alternatively, you can also download and install the drivers from the manufacturer’s website directly.
Option 5 – Try to disable both the Antivirus program and Firewall temporarily
There are times when antivirus programs and the firewall blocks a website that they consider to be malicious or even because of false-positive effects which is why you have to disable these programs temporarily as it might be the reason why you’ve encountered the error when trying to browse the internet.
Read More
Taking information from the internet or from other sources usually involves selecting the text, copying it into the clipboard, and then pasting it into your file. In today’s modern applications pasting text will most of the time take its formating with it.

By formatting what I am talking about are parameters like font size, line breaks, hyperlinks, font styles, etc. and sometimes you do not want any of these in your file, you would like and prefer to have just plain text so you can format it as you wish.
In order to paste just plain text instead of using the CTRL + V keyboard shortcut, press CTRL + SHIFT + V instead. This shortcut will paste the only text into your file.
Shortcut and Microsoft Word
Leave it to Microsoft to make its shortcut not work in their application. In Microsoft Word, you can only use the standard CTRL + V shortcut, if you press CTRL + SHIFT + V nothing will happen. So in order to paste the only text into a word document, choose to paste special > text only
Other applications
I have tried CTRL + SHIFT + V in various applications like photoshop, illustrator, InDesign, visual studio code, slack, discord, WordPress installations, etc and only one that has not worked for me was Word and office in general so you are safe to use this trick and have desired results.
Read More
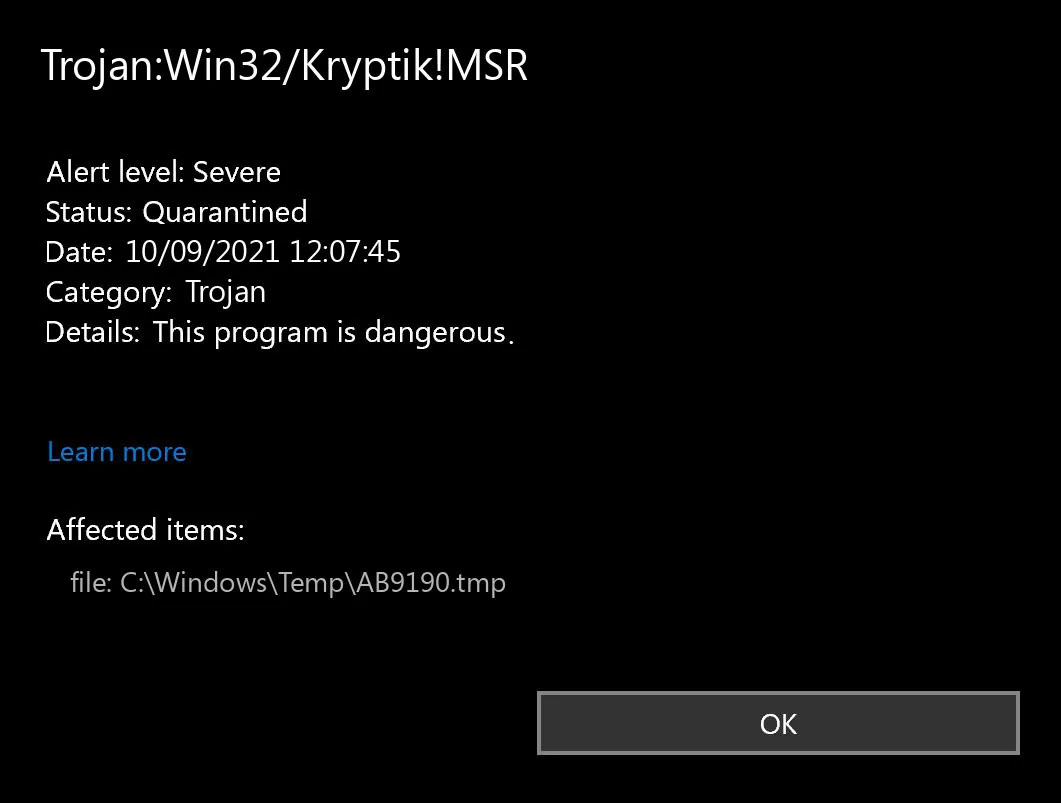
Trojan. Kryptik is a malicious computer infection known as a Trojan horse. Trojan. Kryptik can load at startup and recreate itself which makes it difficult to manually remove from the infected computer. Trojan. Kryptik can compromise the infected system by allowing a remote hacker to gain access without the user’s permission or knowledge. Trojan. Kryptik can also lead to the infection of other unknown malware parasites.
 Trojan.Kryptik creates the following registry entry or registry entries:
Directory
%ALLUSERSPROFILE%windrivgr 19.7
%LOCALAPPDATA%DsHcaJnIIz
File name without path
scaalqtw.exe
Regexp file mask
%ALLUSERSPROFILE%sqldump.exe
%APPDATA%b[NUMBERS].exe
%APPDATA%MicrosoftWindowsStart MenuProgramsStartup[RANDOM CHARACTERS].com.url
%APPDATA%Originupdate.vbe
%APPDATA%Stanfind.exe
%APPDATA%vpn gui.exe
%LOCALAPPDATA%MicrosoftWindowsSymbolswvfilters.sys
%TEMP%nvc.exe
%TEMP%system.exe
%TEMP%winsrvcs32.exe
Read More
PFN_LIST_CORRUPT Blue Screen — What is it?
PFN_LIST_CORRUPT is a blue screen of death error code. It occurs when the PFN (Page Frame Number) list becomes corrupt. The Page Frame Number is basically used by your hard drive to determine your location of each one of your files on the disk.
This error may occur when starting up the program or while using it. Blue screen of death errors occurs without any warnings. The program disrupts all of a sudden and the computer screen turns blue.
Solution
 Error Causes
PFN_LIST_CORRUPT Blue Screen error may occur due to multiple reasons. Some of the common reasons include:
- Hardware problems
- Device driver issues
- Registry problems
- Viral Infection
It is recommended to resolve the PFN_LIST_CORRUPT Blue Screen of Death error immediately without any delay virtually because this error can be quite fatal to your PC.
It can pose serious threats to your system like system freeze, crash, failure, and valuable data loss. Furthermore, if the error is related to viral infection, it can expose you to privacy issues, data breaches, and cybercrime too.
Further Information and Manual Repair
This is a critical PC error but easy to resolve. You don’t need any technical expertise to fix this error on your PC. Here are some quick and easy methods to resolve PFN_LIST_CORRUPT Blue Screen error:
Method 1: Install Compatible Device Drivers
Sometimes when new hardware is added to the PC, you need to install updated versions of the device drivers to ensure there are no incompatibility issues.
Incompatibility between the hardware and device drivers may generate PFN_LIST_CORRUPT Blue Screen of death error on your screen. To resolve, it is advisable to download and install the latest updated versions of the device drivers from the manufacturer’s website.
Method 2: Scan for Viruses
PFN_LIST_CORRUPT Blue Screen of Death error may occur due to viral infection too. Viruses and spyware enter your PC when you log on to unreliable websites and download programs from there or open phishing emails on your PC.
These viruses corrupt and damage programs and files resulting in such errors. To fix the issue, you need to install a powerful antivirus and ensure all kinds of viruses and spyware are detected and removed from your system.
Method 3: Clean and Restore the Registry
PFN_LIST_CORRUPT Blue Screen error indicates poor PC maintenance. When you don’t clean and remove unnecessary and obsolete files like junk files, bad registry keys, cookies, internet history, temporary files, and invalid entries from the registry, the registry overloads and gets damaged.
These files accumulate taking up a lot of disk space and also corrupt system files. If these files are not removed timely, it results in registry issues like a blue screen of death errors and run-time errors. To remove these files and clean the registry, you need to install a powerful registry cleaner.
Whether the underlying cause for PFN_LIST_CORRUPT Blue Screen of Death error on your PC is viral infection or registry issues, to resolve the BSOD error code in seconds download Restoro.
This is a cutting-edge and multi-functional PC fixer deployed with both an antivirus and a registry cleaner. Additional features include a system optimizer too. It is user-friendly and easy to operate. You can download it on all Windows versions without any hassle. It is safe and bug-free.
The registry cleaner feature scans and removes all unnecessary files, cleans and repairs the registry while the antivirus utility simultaneously removes all kinds of malicious software including spyware, viruses, Trojans, and malware.
Click here to download Restoro now and resolve the PFN_LIST_CORRUPT Blue Screen of Death error immediately!
Read More
Windows 10 has a UWP app for its Camera that you can use to take pictures and videos. However, if you suddenly encounter an error code 0xa00f4243 while using the Camera UWP app, then you’ve come to the right place as this post will provide some potential fixes that you can use to fix the problem.
This kind of error could be due to an outdated or corrupted driver or a third-party program. When this error appears on the Camera UWP app, you will see the following error message:
“Close other apps. It looks as though another app is already using the camera. If you need it, here’s the error code: 0xA00F4243 (0xC00D3704)”
To fix the error code: 0xA00F4243 (0xC00D3704) in the Camera UWP app, you can try to run the Windows Store Apps troubleshooter or reset the Camera app or update or reinstall the driver or apply some tweaks in the Registry Editor. In addition, you can also try checking the Windows Services or run the System File Checker.
Option 1 – Try to run the Windows Store Apps troubleshooter
The Windows 10 Store Apps Troubleshooter will help you in fixing the Camera UWP app error code: 0xA00F4243 (0xC00D3704). This is a great built-in tool from Microsoft that helps users fix any app installation issues. So this is worth a try to solve the problem. This built-in tool also helps you fix the Windows 10 Store if it isn’t working.
To use the Windows Store Apps Troubleshooter, follow the steps below.
- Tap Win + I keys again to open the Windows Settings panel.
- Go to Update & Security and then go to Troubleshoot.
- Under the Troubleshoot section, on your left-hand side, scroll down to find Window Store Apps.
- Then click on the Run the troubleshooter option and follow the on-screen instructions and then see if it fixes the problem.
Option 2 – Try to reset the Camera app to fix
As pointed out earlier, you can also reset the Camera app to fix the error. To do so, follow the steps below.
- The first thing you have to do is go to the My Pictures folder under the C: drive of the File Explorer and then delete the Camera Roll folder.
- Once you’re done, right-click on an empty area on your screen and create a new folder and name it “Camera Roll”.
- Then from the Start menu open the Settings app and select System.
- From there, navigate to the Apps and features section.
- Now go to Camera and click on the Advanced Options and click the Reset button.
Option 3 – Try to reinstall the drivers for the Camera app
You might want to reinstall the Camera drivers as it could resolve the problem. To do so, refer to these steps:
- First, boot your computer into Safe Mode.
- After that, tap the Win + R keys to launch Run.
- Type in devmgmt.msc into the box and tap Enter or click OK to open the Device Manager.
- After that, a list of device drivers will be displayed. From there, look for the driver listed under the Camera section and then, right-click on each entry of the device drivers and select the “Uninstall Device” option from the menu.
- Now restart your computer.
- After restarting your computer, go to the Settings app and Check for Updates in the Windows Update section.
Option 4 – Try to use the Registry Editor
- Tap the Win + R keys to open the Run utility and type “Regedit” in the field and hit Enter to open the Registry Editor.
- After that, navigate to this registry key: ComputerHKEY_LOCAL_MACHINESOFTWAREWOW6432NodeMicrosoftWindows Media FoundationPlatform
- Here, look for a DWORD named “EnableFrameServerMode” and if you can’t see it, just create a new DWORD by right-clicking on any empty space.
- Then select New > DWORD (32-bit) Value and name it as “EnableFrameServerMode”.
- Double click on the newly created DWORD and set its Value data to “0” and click on OK.
- Restart your computer and see if it fixes the Camera UWP app error code: 0xA00F4243 (0xC00D3704).
Option 5 – Try checking the Windows Services
Note that this option only applies to computers with Intel Hardware for the Camera.
- Tap the Win + R keys to open the Run dialog box and type “services.msc” and hit Enter to open the Services Manager.
- Next, look for the “Intel(R) RealSense(TM) Depth” service from the list of services and double click on it to open its Properties.
- After that, change its Startup Type to “Automatic” and make sure it’s running and then click on the Apply and OK buttons to save the changes made.
- Restart your computer and check if the problem has been resolved.
Option 6 – Try running System File Checker or SFC scan
System File Checker or SFC is a built-in command utility that helps in restoring corrupted files as well as missing files. It replaces bad and corrupted system files to good system files. To run the SFC command, follow the steps given below.
- Tap Win + R to launch Run.
- Type in cmd in the field and tap Enter.
- After opening Command Prompt, type in sfc /scannow
The command will start a system scan which will take a few whiles before it finishes. Once it’s done, you could get the following results:
- Windows Resource Protection did not find any integrity violations.
- Windows Resource Protection found corrupt files and successfully repaired them.
- Windows Resource Protection found corrupt files but was unable to fix some of them.
- Reboot your PC.
Read More
Mingwm10.dll Error Code — What is it?
Mingwm10.dll is a dynamic link library file. This file is associated with the gaming program called the Adventures of Tintin developed for Windows OS by Ubisoft.
Like all other DLL files, Mingwm10.dll file also contains small programs that are used to load and run this gaming program on your PC and several other programs developed by Ubisoft.
Mingwm10.dll error code may occur when this file fails to run and load the Adventures of Tintin, the game on your PC. This error may appear on your PC in different formats such as:
- «Mingwm10.dll not found.»
- «The file mingwm10.dll is missing.»
- «Cannot register mingwm10.dll.»
- «Cannot find C:WindowsSystem32mingwm10.dll.»
- «Mingwm10.dll Access Violation.»
- «Cannot start The Adventures of Tintin The Game. A required component is missing: mingwm10.dll.Please install The Adventures of Tintin The Game again.»
- «This application failed to start because mingwm10.dll was not found. Re-installing the application may fix this problem.»
Solution
Error Causes
Mingwm10.dll error code is triggered due to a plethora of reasons. These include causes like:
- Registry damage or corruption
- Viral infection
- Hardware failure
- Corrupt or missing Mingwm10.dll file
Though this error is not fatal nonetheless it is advisable to fix it promptly to ensure you are able to access your desired program successfully without any restriction.
Please note, this error can become a major PC threat as the underlying causes are registry corruption or viral infection.
Further Information and Manual Repair
Listed below are some of the best, proven, and easy DIY methods to help you resolve the Mingwm10.dll error code on your system. These are simple methods and require no technical expertise or know-how.
Method 1 — Restore the Missing File
As mentioned above DLL are shared files, there is a possibility that you accidentally deleted the Mingwm10.dll file on your system while uninstalling a program developed by Ubisoft.
In such an event, the best and the easiest way to fix the error is to check your recycle bin and restore the deleted Mingwm10.dll file on your system.
Method 2 — Download Mingwm10.dll File from a Reliable Website
If you are unable to locate the missing Mingwm10.dll file in the recycle bin, then another method to fix the issue can be to download the Mingwm10.dll file from a trusted website.
The reason why we say trusted is that viruses often enter computer systems when users download files from unreliable websites.
So, to avoid bigger problems first make sure the site you select to download the Mingwm10.dll file is authorized and trusted.
Method 3 — Update Outdated Drivers
Hardware failure is related to outdated drivers. If the cause of the Mingwm10.dll error code is hardware failure, simply update the outdated drivers to resolve.
Since the Mingwm10.dll file is used to run and load Adventures of Tintin, a gaming software program, then most probably the error is caused because of the outdated video card driver.
Therefore update it to fix the issue. For this, go to the start menu, type Device Manager in the search bar. Once it opens use the driver update wizard to make updates. The wizard will walk you through the entire process, making the driver update task easy.
Method 4 — Repair the Corrupt Registry
The registry is the part that stores all the information and activities performed on your system. From important files to obsolete files it saves everything.
If the obsolete files like the junk files, bad entries, invalid registry keys, and cookies are not removed from the registry frequently, these files accumulate in the registry and corrupt important system files like DLL files, popping error codes like Mingwm10.dll error.
To resolve, download Restoro. It is a PC Fixer embedded with a registry cleaner. The registry cleaner scans and removes all the obsolete files. It cleans the registry and the corrupted system files in just a few clicks, thereby fixing the problem.
Click here to download Restoro to resolve the Mingwm10.dll error code on your PC
Read More
TelevisionFanatic is a potentially unwanted browser hijacking extension developed by Mindspark Interactive Network. It is marketed to enjoy one-click access to local TV listings, watch recently-aired episodes of your favorite shows and viral web videos, plus TV news and show recaps. However, all of these services require registration and sensitive personal data, that is later sold/forwarded to serve ads.
Upon installation, this extension adds registry entries that allow it to run each time the computer is started. It also changed your default search engine to MyWebSearch and hijacks your default new tab behavior opening MyWebSearch instead. These search results display unwanted ads, and clutter pages with sponsored links that negatively affect your browsing experience. Multiple anti-virus scanners have detected TelevisionFanatic as a browser hijacker, and therefore it is flagged for optional removal.
About Browser Hijackers
Browser hijacking is amongst the web’s constant problems that target browsers. It’s a kind of malware program that alters your web browser’s configuration settings and redirects you to sites or pages that you had no intention of visiting. Browser hijackers could do a variety of things on your PC. It redirects you to the sponsored internet sites and injects ads on the web browser that helps its creator generate income. While it might appear naive, all browser hijackers are damaging and thus always regarded as security risks. Some browser hijackers are designed to make certain modifications beyond the browsers, like altering entries on the computer registry and letting other types of malware further damage your PC.
Browser hijacking signs and symptoms
When your browser is hijacked, the following could happen:
1. home-page is changed
2. new bookmarks pointing to porn sites have been added to your favorite pages
3. the default online search engine and/or the default browser settings are modified
4. you see unwanted new toolbars added
5. you may see many pop-up ads on your computer screen
6. your internet browser starts running slowly or displays frequent glitches
7. you are blocked to access those sites of antivirus solution providers.
Exactly how browser hijacker finds its way to your computer
Browser hijackers may use drive-by downloads or file-sharing websites or an e-mail attachment to reach a targeted PC. Many internet browser hijackings come from add-on software, i.e., browser helper objects (BHO), toolbars, or plug-ins added to web browsers to provide the extra features. Browser hijackers sneak into your pc in addition to free software application downloads that you unwittingly install alongside the original. Common examples of browser hijackers include Conduit, CoolWebSearch, Coupon Server, OneWebSearch, RocketTab, Snap.do, Delta Search, and Searchult.com.
Browser hijackers can record user keystrokes to collect potentially important information leading to privacy concerns, cause instability on systems, severely disrupt user’s browsing experience, and finally slow down the system to a stage where it will become unusable.
Removing browser hijackers
Some hijackers can be removed by uninstalling the freeware they came with or by deleting any extension you’ve recently added to your browser. However, most hijackers are hard to get rid of manually. Irrespective of how much you try to remove it, it might return over and over again. And there is no denying the very fact that manual repairs and removal can certainly be a difficult job for an inexperienced PC user. Besides, there are various risks connected with tinkering around with the system registry files.
What To Do When You Cannot Download Safebytes Anti-Malware?
Viruses can cause plenty of damage to your personal computer. Some malware sits in between your computer and your internet connection and blocks a few or all sites that you would like to visit. It might also block you from the installation of anything on your system, particularly antivirus applications. So what you should do if malicious software prevents you from downloading or installing Anti-Malware? There are some steps you can take to get around this issue.
Make use of Safe Mode to fix the issue
In Safe Mode, you may modify Windows settings, uninstall or install some software, and remove hard-to-delete viruses. In the event the malware is obstructing internet connection and affecting the computer, launching it in Safe Mode allows you to download anti-malware and run a diagnostic scan whilst limiting potential damage. To start the computer into Safe Mode, hit the “F8” key on the keyboard right before the Windows boot screen comes up; Or right after normal Windows boot up, run MSCONFIG, check the Safe Boot under Boot tab, and click Apply. Once you are in safe mode, you can attempt to download and install your anti-malware program without the hindrance of malicious software. Following installation, run the malware scanner to eliminate standard infections.
Switch over to an alternate web browser
Malicious program code could exploit vulnerabilities on a specific web browser and block access to all antivirus software websites. If you suspect that your Internet Explorer has been hijacked by malware or otherwise compromised by online hackers, the most effective thing to do would be to switch to an alternate web browser such as Firefox, Chrome, or Safari to download your favorite computer security program – Safebytes Anti-Malware.
Run anti-malware from your USB drive
Here’s another solution which is utilizing a portable USB anti-virus software that can check your system for malware without the need for installation. To run anti-virus using a thumb drive, follow these simple steps:
1) Download Safebytes Anti-Malware or Windows Defender Offline onto a clean PC.
2) Plug the USB drive into the clean PC.
3) Double-click the Setup icon of the antivirus software to run the Installation Wizard.
4) Select the drive letter of the flash drive as the location when the wizard asks you where you want to install the antivirus. Do as instructed on the screen to finish off the installation process.
5) Disconnect the flash drive. Now you can utilize this portable anti-virus on the infected computer system.
6) Double-click the anti-malware software EXE file on the pen drive.
7) Press the “Scan” button to run a full system scan and remove malware automatically.
A Look at the Best Anti-Malware Program
Do you want to download the best anti-malware program for your laptop or computer? There are many applications in the market that comes in free and paid versions for Microsoft Windows computers. A few of them are good and some are scamware applications that pretend as genuine anti-malware software waiting around to wreak havoc on your PC. You need to select one that is dependable, practical, and has a strong reputation for its malware source protection. One of the highly recommended software programs is SafeBytes Anti-Malware. SafeBytes carries a superb reputation for top-quality service, and customers seem to be happy with it.
SafeBytes anti-malware is a trustworthy tool that not only secures your computer completely but is also very user-friendly for people of all skill levels. With its outstanding protection system, this software will automatically detect and get rid of the majority of the security threats, which include adware, viruses, browser hijackers, ransomware, PUPs, and trojans.
SafeBytes anti-malware provides a plethora of enhanced features which sets it aside from all others. Let’s check out some of them below:
Anti-Malware Protection: Safebytes is built on the best virus engine within the industry. These engines will identify and remove threats even during the early stages of a malware outbreak.
Real-time Active Protection: Malware programs looking to get into the computer are discovered and stopped as and when detected by the SafeBytes active protection shields. This utility will continuously monitor your PC for suspicious activity and updates itself regularly to keep abreast of the constantly changing threat situation.
Internet Security: SafeBytes gives an instant safety rating on the pages you are about to visit, automatically blocking dangerous sites and ensuring that you are certain of your safety while browsing the web.
High-Speed Malware Scanning Engine: SafeBytes Anti-Malware has got a multi-thread scan algorithm that works up to 5 times faster than any other antivirus software.
Minimal CPU and Memory Usage: SafeBytes is well-known for its low influence on processing power and great detection rate of numerous threats. It works quietly and efficiently in the background so you’re free to use your computer or laptop at full power all of the time.
24/7 Guidance: SafeBytes provides you with 24/7 technical support, automatic maintenance, and updates for the best user experience.
Technical Details and Manual Removal (Advanced Users)
If you wish to manually remove TelevisionFanatic without the use of an automated tool, it may be possible to do so by removing the program from the Windows Add/Remove Programs menu, or in cases of browser extensions, going to the browsers AddOn/Extension manager and removing it. You will likely also want to reset your browser.
To ensure the complete removal, manually check your hard drive and registry for all of the following and remove or reset the values accordingly. Please note that this is for advanced users only and may be difficult, with incorrect file removal causing additional PC errors. In addition, some malware is capable of replicating or preventing deletion. Doing this in Safe Mode is advised.
The following files, folders, and registry entries are created or modified by TelevisionFanatic
Files:
%APPDATA%TelevisionFanatic
%PROGRAMFILES%TelevisionFanatic
%PROGRAMFILES%TelevisionFanaticEI
%PROGRAMFILES%TelevisionFanaticEITelevisionFanaticauxstb.dll
%PROGRAMFILES%TelevisionFanaticEITelevisionFanaticbar.dll
%PROGRAMFILES%TelevisionFanaticEITelevisionFanaticbarsvc.exe
%PROGRAMFILES%TelevisionFanaticEITelevisionFanaticbprtct.dll
%PROGRAMFILES%TelevisionFanaticEITelevisionFanaticbrmon.exe
%PROGRAMFILES%TelevisionFanaticEITelevisionFanaticbrstub.dll
%PROGRAMFILES%TelevisionFanaticEITelevisionFanaticdatact.dll
%PROGRAMFILES%TelevisionFanaticEITelevisionFanaticdlghk.dll
%PROGRAMFILES%TelevisionFanaticEITelevisionFanaticdyn.dll
%PROGRAMFILES%TelevisionFanaticEITelevisionFanaticfeedmg.dll
%PROGRAMFILES%TelevisionFanaticEITelevisionFanatichighin.exe
%PROGRAMFILES%TelevisionFanaticEITelevisionFanatichkstub.dll
%PROGRAMFILES%TelevisionFanaticEITelevisionFanatichtmlmu.dll
%PROGRAMFILES%TelevisionFanaticEITelevisionFanatichttpct.dll
%PROGRAMFILES%TelevisionFanaticEITelevisionFanaticidle.dll
%PROGRAMFILES%TelevisionFanaticEITelevisionFanaticieovr.dll
%PROGRAMFILES%TelevisionFanaticEITelevisionFanaticimpipe.exe
%PROGRAMFILES%TelevisionFanaticEITelevisionFanaticmedint.exe
%PROGRAMFILES%TelevisionFanaticEITelevisionFanaticmlbtn.dll
%PROGRAMFILES%TelevisionFanaticEITelevisionFanaticmsg.dll
%PROGRAMFILES%TelevisionFanaticEITelevisionFanaticPlugin.dll
%PROGRAMFILES%TelevisionFanaticEITelevisionFanaticradio.dll
%PROGRAMFILES%TelevisionFanaticEITelevisionFanaticregfft.dll
%PROGRAMFILES%TelevisionFanaticEITelevisionFanaticreghk.dll
%PROGRAMFILES%TelevisionFanaticEITelevisionFanaticregiet.dll
%PROGRAMFILES%TelevisionFanaticEITelevisionFanaticscript.dll
%PROGRAMFILES%TelevisionFanaticEITelevisionFanaticskin.dll
%PROGRAMFILES%TelevisionFanaticEITelevisionFanaticsknlcr.dll
%PROGRAMFILES%TelevisionFanaticEITelevisionFanaticskplay.exe
%PROGRAMFILES%TelevisionFanaticEITelevisionFanaticSrcAs.dll
%PROGRAMFILES%TelevisionFanaticEITelevisionFanaticSrchMn.exe
%PROGRAMFILES%TelevisionFanaticEITelevisionFanatictpinst.dll
%PROGRAMFILES%TelevisionFanaticEITelevisionFanaticuabtn.dll
%PROGRAMFILES%TelevisionFanaticEITelevisionFanaticAppIntegrator64.exe
%PROGRAMFILES%TelevisionFanaticEITelevisionFanaticAppIntegratorStub64.dll
%PROGRAMFILES%TelevisionFanaticEITelevisionFanaticBOOTSTRAP.JS
%PROGRAMFILES%TelevisionFanaticEITelevisionFanaticffxtbr.jar
%PROGRAMFILES%TelevisionFanaticEITelevisionFanaticCHROME.MANIFEST
%PROGRAMFILES%TelevisionFanaticEITelevisionFanaticCREXT.DLL
%PROGRAMFILES%TelevisionFanaticEITelevisionFanaticCrExtP64.exe
%PROGRAMFILES%TelevisionFanaticEITelevisionFanaticDPNMNGR.DLL
%PROGRAMFILES%TelevisionFanaticEITelevisionFanaticEXEMANAGER.DLL
%PROGRAMFILES%TelevisionFanaticEITelevisionFanaticHpg64.dll
%PROGRAMFILES%TelevisionFanaticEITelevisionFanaticINSTALL.RDF
%PROGRAMFILES%TelevisionFanaticEITelevisionFanaticinstallKeys.js
%PROGRAMFILES%TelevisionFanaticEITelevisionFanaticLOGO.BMP
%PROGRAMFILES%TelevisionFanaticEITelevisionFanaticNP64Stub.dll
%PROGRAMFILES%TelevisionFanaticEITelevisionFanaticT8EXTEX.DLL
%PROGRAMFILES%TelevisionFanaticEITelevisionFanaticT8EXTPEX.DLL
%PROGRAMFILES%TelevisionFanaticEITelevisionFanaticT8HTML.DLL
%PROGRAMFILES%TelevisionFanaticEITelevisionFanaticT8RES.DLL
%PROGRAMFILES%TelevisionFanaticEITelevisionFanaticT8TICKER.DLL
%PROGRAMFILES%TelevisionFanaticEITelevisionFanaticVERIFY.DLL
%PROGRAMFILES%TelevisionFanaticEITelevisionFanaticEIPlug.dll
%PROGRAMFILES%TelevisionFanaticEITelevisionFanaticEZSETP.dll
%PROGRAMFILES%TelevisionFanaticEITelevisionFanaticNP64EISb.dll
%PROGRAMFILES%TelevisionFanaticEITelevisionFanatic%APPDATA%TelevisionFanatic
%PROGRAMFILES%TelevisionFanatic
%PROGRAMFILES%TelevisionFanaticEI
%PROGRAMFILES%TelevisionFanaticEITelevisionFanaticauxstb.dll
%PROGRAMFILES%TelevisionFanaticEITelevisionFanaticbar.dll
%PROGRAMFILES%TelevisionFanaticEITelevisionFanaticbarsvc.exe
%PROGRAMFILES%TelevisionFanaticEITelevisionFanaticbprtct.dll
%PROGRAMFILES%TelevisionFanaticEITelevisionFanaticbrmon.exe
%PROGRAMFILES%TelevisionFanaticEITelevisionFanaticbrstub.dll
%PROGRAMFILES%TelevisionFanaticEITelevisionFanaticdatact.dll
%PROGRAMFILES%TelevisionFanaticEITelevisionFanaticdlghk.dll
%PROGRAMFILES%TelevisionFanaticEITelevisionFanaticdyn.dll
%PROGRAMFILES%TelevisionFanaticEITelevisionFanaticfeedmg.dll
%PROGRAMFILES%TelevisionFanaticEITelevisionFanatichighin.exe
%PROGRAMFILES%TelevisionFanaticEITelevisionFanatichkstub.dll
%PROGRAMFILES%TelevisionFanaticEITelevisionFanatichtmlmu.dll
%PROGRAMFILES%TelevisionFanaticEITelevisionFanatichttpct.dll
%PROGRAMFILES%TelevisionFanaticEITelevisionFanaticidle.dll
%PROGRAMFILES%TelevisionFanaticEITelevisionFanaticieovr.dll
%PROGRAMFILES%TelevisionFanaticEITelevisionFanaticimpipe.exe
%PROGRAMFILES%TelevisionFanaticEITelevisionFanaticmedint.exe
%PROGRAMFILES%TelevisionFanaticEITelevisionFanaticmlbtn.dll
%PROGRAMFILES%TelevisionFanaticEITelevisionFanaticmsg.dll
%PROGRAMFILES%TelevisionFanaticEITelevisionFanaticPlugin.dll
%PROGRAMFILES%TelevisionFanaticEITelevisionFanaticradio.dll
%PROGRAMFILES%TelevisionFanaticEITelevisionFanaticregfft.dll
%PROGRAMFILES%TelevisionFanaticEITelevisionFanaticreghk.dll
%PROGRAMFILES%TelevisionFanaticEITelevisionFanaticregiet.dll
%PROGRAMFILES%TelevisionFanaticEITelevisionFanaticscript.dll
%PROGRAMFILES%TelevisionFanaticEITelevisionFanaticskin.dll
%PROGRAMFILES%TelevisionFanaticEITelevisionFanaticsknlcr.dll
%PROGRAMFILES%TelevisionFanaticEITelevisionFanaticskplay.exe
%PROGRAMFILES%TelevisionFanaticEITelevisionFanaticSrcAs.dll
%PROGRAMFILES%TelevisionFanaticEITelevisionFanaticSrchMn.exe
%PROGRAMFILES%TelevisionFanaticEITelevisionFanatictpinst.dll
%PROGRAMFILES%TelevisionFanaticEITelevisionFanaticuabtn.dll
%PROGRAMFILES%TelevisionFanaticEITelevisionFanaticAppIntegrator64.exe
%PROGRAMFILES%TelevisionFanaticEITelevisionFanaticAppIntegratorStub64.dll
%PROGRAMFILES%TelevisionFanaticEITelevisionFanaticBOOTSTRAP.JS
%PROGRAMFILES%TelevisionFanaticEITelevisionFanaticffxtbr.jar
%PROGRAMFILES%TelevisionFanaticEITelevisionFanaticCHROME.MANIFEST
%PROGRAMFILES%TelevisionFanaticEITelevisionFanaticCREXT.DLL
%PROGRAMFILES%TelevisionFanaticEITelevisionFanaticCrExtP64.exe
%PROGRAMFILES%TelevisionFanaticEITelevisionFanaticDPNMNGR.DLL
%PROGRAMFILES%TelevisionFanaticEITelevisionFanaticEXEMANAGER.DLL
%PROGRAMFILES%TelevisionFanaticEITelevisionFanaticHpg64.dll
%PROGRAMFILES%TelevisionFanaticEITelevisionFanaticINSTALL.RDF
%PROGRAMFILES%TelevisionFanaticEITelevisionFanaticinstallKeys.js
%PROGRAMFILES%TelevisionFanaticEITelevisionFanaticLOGO.BMP
%PROGRAMFILES%TelevisionFanaticEITelevisionFanaticNP64Stub.dll
%PROGRAMFILES%TelevisionFanaticEITelevisionFanaticT8EXTEX.DLL
%PROGRAMFILES%TelevisionFanaticEITelevisionFanaticT8EXTPEX.DLL
%PROGRAMFILES%TelevisionFanaticEITelevisionFanaticT8HTML.DLL
%PROGRAMFILES%TelevisionFanaticEITelevisionFanaticT8RES.DLL
%PROGRAMFILES%TelevisionFanaticEITelevisionFanaticT8TICKER.DLL
%PROGRAMFILES%TelevisionFanaticEITelevisionFanaticVERIFY.DLL
%PROGRAMFILES%TelevisionFanaticEITelevisionFanaticEIPlug.dll
%PROGRAMFILES%TelevisionFanaticEITelevisionFanaticEZSETP.dll
%PROGRAMFILES%TelevisionFanaticEITelevisionFanaticNP64EISb.dll
%PROGRAMFILES%TelevisionFanaticEITelevisionFanatic%#MANIFEST#%18369B.exe
%PROGRAMFILES%TelevisionFanaticauxstb.dll
%PROGRAMFILES%TelevisionFanaticbar.dll
%PROGRAMFILES%TelevisionFanaticbarsvc.exe
%PROGRAMFILES%TelevisionFanaticbprtct.dll
%PROGRAMFILES%TelevisionFanaticbrmon.exe
%PROGRAMFILES%TelevisionFanaticbrstub.dll
%PROGRAMFILES%TelevisionFanaticdatact.dll
%PROGRAMFILES%TelevisionFanaticdlghk.dll
%PROGRAMFILES%TelevisionFanaticdyn.dll
%PROGRAMFILES%TelevisionFanaticfeedmg.dll
%PROGRAMFILES%TelevisionFanatichighin.exe
%PROGRAMFILES%TelevisionFanatichkstub.dll
%PROGRAMFILES%TelevisionFanatichtmlmu.dll
%PROGRAMFILES%TelevisionFanatichttpct.dll
%PROGRAMFILES%TelevisionFanaticidle.dll
%PROGRAMFILES%TelevisionFanaticieovr.dll
%PROGRAMFILES%TelevisionFanaticimpipe.exe
%PROGRAMFILES%TelevisionFanaticmedint.exe
%PROGRAMFILES%TelevisionFanaticmlbtn.dll
%PROGRAMFILES%TelevisionFanaticmsg.dll
%PROGRAMFILES%TelevisionFanaticPlugin.dll
%PROGRAMFILES%TelevisionFanaticradio.dll
%PROGRAMFILES%TelevisionFanaticregfft.dll
%PROGRAMFILES%TelevisionFanaticreghk.dll
%PROGRAMFILES%TelevisionFanaticregiet.dll
%PROGRAMFILES%TelevisionFanaticscript.dll
%PROGRAMFILES%TelevisionFanaticskin.dll
%PROGRAMFILES%TelevisionFanaticsknlcr.dll
%PROGRAMFILES%TelevisionFanaticskplay.exe
%PROGRAMFILES%TelevisionFanaticSrcAs.dll
%PROGRAMFILES%TelevisionFanaticSrchMn.exe
%PROGRAMFILES%TelevisionFanatictpinst.dll
%PROGRAMFILES%TelevisionFanaticuabtn.dll
%PROGRAMFILES%TelevisionFanaticAppIntegrator64.exe
%PROGRAMFILES%TelevisionFanaticAppIntegratorStub64.dll
%PROGRAMFILES%TelevisionFanaticBOOTSTRAP.JS
%PROGRAMFILES%TelevisionFanaticffxtbr.jar
%PROGRAMFILES%TelevisionFanaticCHROME.MANIFEST
%PROGRAMFILES%TelevisionFanaticCREXT.DLL
%PROGRAMFILES%TelevisionFanaticCrExtP64.exe
%PROGRAMFILES%TelevisionFanaticDPNMNGR.DLL
%PROGRAMFILES%TelevisionFanaticEXEMANAGER.DLL
%PROGRAMFILES%TelevisionFanaticHpg64.dll
%PROGRAMFILES%TelevisionFanaticINSTALL.RDF
%PROGRAMFILES%TelevisionFanaticinstallKeys.js
%PROGRAMFILES%TelevisionFanaticLOGO.BMP
%PROGRAMFILES%TelevisionFanaticNP64Stub.dll
%PROGRAMFILES%TelevisionFanaticT8EXTEX.DLL
%PROGRAMFILES%TelevisionFanaticT8EXTPEX.DLL
%PROGRAMFILES%TelevisionFanaticT8HTML.DLL
%PROGRAMFILES%TelevisionFanaticT8RES.DLL
%PROGRAMFILES%TelevisionFanaticT8TICKER.DLL
%PROGRAMFILES%TelevisionFanaticVERIFY.DLL
%PROGRAMFILES%TelevisionFanaticEIPlug.dll
%PROGRAMFILES%TelevisionFanaticEZSETP.dll
%PROGRAMFILES%TelevisionFanaticNP64EISb.dll
%PROGRAMFILES%TelevisionFanatic%#MANIFEST#%18369B.exe
%APPDATA%TelevisionFanaticauxstb.dll
%APPDATA%TelevisionFanaticbar.dll
%APPDATA%TelevisionFanaticbarsvc.exe
%APPDATA%TelevisionFanaticbprtct.dll
%APPDATA%TelevisionFanaticbrmon.exe
%APPDATA%TelevisionFanaticbrstub.dll
%APPDATA%TelevisionFanaticdatact.dll
%APPDATA%TelevisionFanaticdlghk.dll
%APPDATA%TelevisionFanaticdyn.dll
%APPDATA%TelevisionFanaticfeedmg.dll
%APPDATA%TelevisionFanatichighin.exe
%APPDATA%TelevisionFanatichkstub.dll
%APPDATA%TelevisionFanatichtmlmu.dll
%APPDATA%TelevisionFanatichttpct.dll
%APPDATA%TelevisionFanaticidle.dll
%APPDATA%TelevisionFanaticieovr.dll
%APPDATA%TelevisionFanaticimpipe.exe
%APPDATA%TelevisionFanaticmedint.exe
%APPDATA%TelevisionFanaticmlbtn.dll
%APPDATA%TelevisionFanaticmsg.dll
%APPDATA%TelevisionFanaticPlugin.dll
%APPDATA%TelevisionFanaticradio.dll
%APPDATA%TelevisionFanaticregfft.dll
%APPDATA%TelevisionFanaticreghk.dll
%APPDATA%TelevisionFanaticregiet.dll
%APPDATA%TelevisionFanaticscript.dll
%APPDATA%TelevisionFanaticskin.dll
%APPDATA%TelevisionFanaticsknlcr.dll
%APPDATA%TelevisionFanaticskplay.exe
%APPDATA%TelevisionFanaticSrcAs.dll
%APPDATA%TelevisionFanaticSrchMn.exe
%APPDATA%TelevisionFanatictpinst.dll
%APPDATA%TelevisionFanaticuabtn.dll
%APPDATA%TelevisionFanaticAppIntegrator64.exe
%APPDATA%TelevisionFanaticAppIntegratorStub64.dll
%APPDATA%TelevisionFanaticBOOTSTRAP.JS
%APPDATA%TelevisionFanaticffxtbr.jar
%APPDATA%TelevisionFanaticCHROME.MANIFEST
%APPDATA%TelevisionFanaticCREXT.DLL
%APPDATA%TelevisionFanaticCrExtP64.exe
%APPDATA%TelevisionFanaticDPNMNGR.DLL
%APPDATA%TelevisionFanaticEXEMANAGER.DLL
%APPDATA%TelevisionFanaticHpg64.dll
%APPDATA%TelevisionFanaticINSTALL.RDF
%APPDATA%TelevisionFanaticinstallKeys.js
%APPDATA%TelevisionFanaticLOGO.BMP
%APPDATA%TelevisionFanaticNP64Stub.dll
%APPDATA%TelevisionFanaticT8EXTEX.DLL
%APPDATA%TelevisionFanaticT8EXTPEX.DLL
%APPDATA%TelevisionFanaticT8HTML.DLL
%APPDATA%TelevisionFanaticT8RES.DLL
%APPDATA%TelevisionFanaticT8TICKER.DLL
%APPDATA%TelevisionFanaticVERIFY.DLL
%APPDATA%TelevisionFanaticEIPlug.dll
%APPDATA%TelevisionFanaticEZSETP.dll
%APPDATA%TelevisionFanaticNP64EISb.dll
%APPDATA%TelevisionFanatic%#MANIFEST#%18369B.exe
Registry:
Key HKLMSOFTWARETelevisionFanatic
Key HKLMSOFTWAREMicrosoftWindowsCurrentVersionUninstallTelevisionFanaticbar Uninstall Internet Explorer
Key HKLMSOFTWAREMicrosoftWindowsCurrentVersionUninstallTelevisionFanaticbar Uninstall Firefox
Key HKLMSOFTWAREMicrosoftWindowsCurrentVersionExplorerBrowser Helper Objectscb41fc95-f1b3-4797-8bb6-1012ff62abba
Key HKLMSOFTWAREMicrosoftWindowsCurrentVersionExplorerBrowser Helper Objects5d79f641-c168-40df-a32f-bacea7509e75
Key HKLMSOFTWAREClassesTelevisionFanatic.XMLSessionPlugin.1CLSID
Key HKLMSOFTWAREClassesTelevisionFanatic.XMLSessionPlugin.1
Key HKLMSOFTWAREClassesTelevisionFanatic.XMLSessionPluginCurVer
Key HKLMSOFTWAREClassesTelevisionFanatic.XMLSessionPluginCLSID
Key HKLMSOFTWAREClassesTelevisionFanatic.XMLSessionPlugin
Key HKLMSOFTWAREClassesTelevisionFanatic.UrlAlertButton.1CLSID
Key HKLMSOFTWAREClassesTelevisionFanatic.UrlAlertButton.1
Key HKLMSOFTWAREClassesTelevisionFanatic.UrlAlertButtonCurVer
Key HKLMSOFTWAREClassesTelevisionFanatic.UrlAlertButtonCLSID
Key HKLMSOFTWAREClassesTelevisionFanatic.UrlAlertButton
Key HKLMSOFTWAREClassesTelevisionFanatic.ToolbarProtector.1CLSID
Key HKLMSOFTWAREClassesTelevisionFanatic.ToolbarProtector.1
Key HKLMSOFTWAREClassesTelevisionFanatic.ToolbarProtectorCurVer
Key HKLMSOFTWAREClassesTelevisionFanatic.ToolbarProtectorCLSID
Key HKLMSOFTWAREClassesTelevisionFanatic.ToolbarProtector
Key HKLMSOFTWAREClassesTelevisionFanatic.ThirdPartyInstaller.1CLSID
Key HKLMSOFTWAREClassesTelevisionFanatic.ThirdPartyInstaller.1
Key HKLMSOFTWAREClassesTelevisionFanatic.ThirdPartyInstallerCurVer
Key HKLMSOFTWAREClassesTelevisionFanatic.ThirdPartyInstallerCLSID
Key HKLMSOFTWAREClassesTelevisionFanatic.ThirdPartyInstaller
Key HKLMSOFTWAREClassesTelevisionFanatic.SkinLauncherSettings.1CLSID
Key HKLMSOFTWAREClassesTelevisionFanatic.SkinLauncherSettings.1
Key HKLMSOFTWAREClassesTelevisionFanatic.SkinLauncherSettingsCurVer
Key HKLMSOFTWAREClassesTelevisionFanatic.SkinLauncherSettingsCLSID
Key HKLMSOFTWAREClassesTelevisionFanatic.SkinLauncherSettings
Key HKLMSOFTWAREClassesTelevisionFanatic.SkinLauncher.1CLSID
Key HKLMSOFTWAREClassesTelevisionFanatic.SkinLauncher.1
Key HKLMSOFTWAREClassesTelevisionFanatic.SkinLauncherCurVer
Key HKLMSOFTWAREClassesTelevisionFanatic.SkinLauncherCLSID
Key HKLMSOFTWAREClassesTelevisionFanatic.SkinLauncher
Key HKLMSOFTWAREClassesTelevisionFanatic.SettingsPlugin.1CLSID
Key HKLMSOFTWAREClassesTelevisionFanatic.SettingsPlugin.1
Key HKLMSOFTWAREClassesTelevisionFanatic.SettingsPluginCurVer
Key HKLMSOFTWAREClassesTelevisionFanatic.SettingsPluginCLSID
Key HKLMSOFTWAREClassesTelevisionFanatic.SettingsPlugin
Key HKLMSOFTWAREClassesTelevisionFanatic.ScriptButton.1CLSID
Key HKLMSOFTWAREClassesTelevisionFanatic.ScriptButton.1
Key HKLMSOFTWAREClassesTelevisionFanatic.ScriptButtonCurVer
Key HKLMSOFTWAREClassesTelevisionFanatic.ScriptButtonCLSID
Key HKLMSOFTWAREClassesTelevisionFanatic.ScriptButton
Key HKLMSOFTWAREClassesTelevisionFanatic.RadioSettings.1CLSID
Key HKLMSOFTWAREClassesTelevisionFanatic.RadioSettings.1
Key HKLMSOFTWAREClassesTelevisionFanatic.RadioSettingsCurVer
Key HKLMSOFTWAREClassesTelevisionFanatic.RadioSettingsCLSID
Key HKLMSOFTWAREClassesTelevisionFanatic.RadioSettings
Key HKLMSOFTWAREClassesTelevisionFanatic.Radio.1CLSID
Key HKLMSOFTWAREClassesTelevisionFanatic.Radio.1
Key HKLMSOFTWAREClassesTelevisionFanatic.RadioCurVer
Key HKLMSOFTWAREClassesTelevisionFanatic.RadioCLSID
Key HKLMSOFTWAREClassesTelevisionFanatic.Radio
Key HKLMSOFTWAREClassesTelevisionFanatic.PseudoTransparentPlugin.1CLSID
Key HKLMSOFTWAREClassesTelevisionFanatic.PseudoTransparentPlugin.1
Key HKLMSOFTWAREClassesTelevisionFanatic.PseudoTransparentPluginCurVer
Key HKLMSOFTWAREClassesTelevisionFanatic.PseudoTransparentPluginCLSID
Key HKLMSOFTWAREClassesTelevisionFanatic.PseudoTransparentPlugin
Key HKLMSOFTWAREClassesTelevisionFanatic.MultipleButton.1CLSID
Key HKLMSOFTWAREClassesTelevisionFanatic.MultipleButton.1
Key HKLMSOFTWAREClassesTelevisionFanatic.MultipleButtonCurVer
Key HKLMSOFTWAREClassesTelevisionFanatic.MultipleButtonCLSID
Key HKLMSOFTWAREClassesTelevisionFanatic.MultipleButton
Key HKLMSOFTWAREClassesTelevisionFanatic.HTMLPanel.1CLSID
Key HKLMSOFTWAREClassesTelevisionFanatic.HTMLPanel.1
Key HKLMSOFTWAREClassesTelevisionFanatic.HTMLPanelCurVer
Key HKLMSOFTWAREClassesTelevisionFanatic.HTMLPanelCLSID
Key HKLMSOFTWAREClassesTelevisionFanatic.HTMLPanel
Key HKLMSOFTWAREClassesTelevisionFanatic.HTMLMenu.1CLSID
Key HKLMSOFTWAREClassesTelevisionFanatic.HTMLMenu.1
Key HKLMSOFTWAREClassesTelevisionFanatic.HTMLMenuCurVer
Key HKLMSOFTWAREClassesTelevisionFanatic.HTMLMenuCLSID
Key HKLMSOFTWAREClassesTelevisionFanatic.HTMLMenu
Key HKLMSOFTWAREClassesTelevisionFanatic.FeedManager.1CLSID
Key HKLMSOFTWAREClassesTelevisionFanatic.FeedManager.1
Key HKLMSOFTWAREClassesTelevisionFanatic.FeedManagerCurVer
Key HKLMSOFTWAREClassesTelevisionFanatic.FeedManagerCLSID
Key HKLMSOFTWAREClassesTelevisionFanatic.FeedManager
Key HKLMSOFTWAREClassesTelevisionFanatic.DynamicBarButton.1CLSID
Key HKLMSOFTWAREClassesTelevisionFanatic.DynamicBarButton.1
Key HKLMSOFTWAREClassesTelevisionFanatic.DynamicBarButtonCurVer
Key HKLMSOFTWAREClassesTelevisionFanatic.DynamicBarButtonCLSID
Key HKLMSOFTWAREClassesTelevisionFanatic.DynamicBarButton18369B.exe
%PROGRAMFILES%TelevisionFanaticauxstb.dll
%PROGRAMFILES%TelevisionFanaticbar.dll
%PROGRAMFILES%TelevisionFanaticbarsvc.exe
%PROGRAMFILES%TelevisionFanaticbprtct.dll
%PROGRAMFILES%TelevisionFanaticbrmon.exe
%PROGRAMFILES%TelevisionFanaticbrstub.dll
%PROGRAMFILES%TelevisionFanaticdatact.dll
%PROGRAMFILES%TelevisionFanaticdlghk.dll
%PROGRAMFILES%TelevisionFanaticdyn.dll
%PROGRAMFILES%TelevisionFanaticfeedmg.dll
%PROGRAMFILES%TelevisionFanatichighin.exe
%PROGRAMFILES%TelevisionFanatichkstub.dll
%PROGRAMFILES%TelevisionFanatichtmlmu.dll
%PROGRAMFILES%TelevisionFanatichttpct.dll
%PROGRAMFILES%TelevisionFanaticidle.dll
%PROGRAMFILES%TelevisionFanaticieovr.dll
%PROGRAMFILES%TelevisionFanaticimpipe.exe
%PROGRAMFILES%TelevisionFanaticmedint.exe
%PROGRAMFILES%TelevisionFanaticmlbtn.dll
%PROGRAMFILES%TelevisionFanaticmsg.dll
%PROGRAMFILES%TelevisionFanaticPlugin.dll
%PROGRAMFILES%TelevisionFanaticradio.dll
%PROGRAMFILES%TelevisionFanaticregfft.dll
%PROGRAMFILES%TelevisionFanaticreghk.dll
%PROGRAMFILES%TelevisionFanaticregiet.dll
%PROGRAMFILES%TelevisionFanaticscript.dll
%PROGRAMFILES%TelevisionFanaticskin.dll
%PROGRAMFILES%TelevisionFanaticsknlcr.dll
%PROGRAMFILES%TelevisionFanaticskplay.exe
%PROGRAMFILES%TelevisionFanaticSrcAs.dll
%PROGRAMFILES%TelevisionFanaticSrchMn.exe
%PROGRAMFILES%TelevisionFanatictpinst.dll
%PROGRAMFILES%TelevisionFanaticuabtn.dll
%PROGRAMFILES%TelevisionFanaticAppIntegrator64.exe
%PROGRAMFILES%TelevisionFanaticAppIntegratorStub64.dll
%PROGRAMFILES%TelevisionFanaticBOOTSTRAP.JS
%PROGRAMFILES%TelevisionFanaticffxtbr.jar
%PROGRAMFILES%TelevisionFanaticCHROME.MANIFEST
%PROGRAMFILES%TelevisionFanaticCREXT.DLL
%PROGRAMFILES%TelevisionFanaticCrExtP64.exe
%PROGRAMFILES%TelevisionFanaticDPNMNGR.DLL
%PROGRAMFILES%TelevisionFanaticEXEMANAGER.DLL
%PROGRAMFILES%TelevisionFanaticHpg64.dll
%PROGRAMFILES%TelevisionFanaticINSTALL.RDF
%PROGRAMFILES%TelevisionFanaticinstallKeys.js
%PROGRAMFILES%TelevisionFanaticLOGO.BMP
%PROGRAMFILES%TelevisionFanaticNP64Stub.dll
%PROGRAMFILES%TelevisionFanaticT8EXTEX.DLL
%PROGRAMFILES%TelevisionFanaticT8EXTPEX.DLL
%PROGRAMFILES%TelevisionFanaticT8HTML.DLL
%PROGRAMFILES%TelevisionFanaticT8RES.DLL
%PROGRAMFILES%TelevisionFanaticT8TICKER.DLL
%PROGRAMFILES%TelevisionFanaticVERIFY.DLL
%PROGRAMFILES%TelevisionFanaticEIPlug.dll
%PROGRAMFILES%TelevisionFanaticEZSETP.dll
%PROGRAMFILES%TelevisionFanaticNP64EISb.dll
%PROGRAMFILES%TelevisionFanatic%APPDATA%TelevisionFanatic
%PROGRAMFILES%TelevisionFanatic
%PROGRAMFILES%TelevisionFanaticEI
%PROGRAMFILES%TelevisionFanaticEITelevisionFanaticauxstb.dll
%PROGRAMFILES%TelevisionFanaticEITelevisionFanaticbar.dll
%PROGRAMFILES%TelevisionFanaticEITelevisionFanaticbarsvc.exe
%PROGRAMFILES%TelevisionFanaticEITelevisionFanaticbprtct.dll
%PROGRAMFILES%TelevisionFanaticEITelevisionFanaticbrmon.exe
%PROGRAMFILES%TelevisionFanaticEITelevisionFanaticbrstub.dll
%PROGRAMFILES%TelevisionFanaticEITelevisionFanaticdatact.dll
%PROGRAMFILES%TelevisionFanaticEITelevisionFanaticdlghk.dll
%PROGRAMFILES%TelevisionFanaticEITelevisionFanaticdyn.dll
%PROGRAMFILES%TelevisionFanaticEITelevisionFanaticfeedmg.dll
%PROGRAMFILES%TelevisionFanaticEITelevisionFanatichighin.exe
%PROGRAMFILES%TelevisionFanaticEITelevisionFanatichkstub.dll
%PROGRAMFILES%TelevisionFanaticEITelevisionFanatichtmlmu.dll
%PROGRAMFILES%TelevisionFanaticEITelevisionFanatichttpct.dll
%PROGRAMFILES%TelevisionFanaticEITelevisionFanaticidle.dll
%PROGRAMFILES%TelevisionFanaticEITelevisionFanaticieovr.dll
%PROGRAMFILES%TelevisionFanaticEITelevisionFanaticimpipe.exe
%PROGRAMFILES%TelevisionFanaticEITelevisionFanaticmedint.exe
%PROGRAMFILES%TelevisionFanaticEITelevisionFanaticmlbtn.dll
%PROGRAMFILES%TelevisionFanaticEITelevisionFanaticmsg.dll
%PROGRAMFILES%TelevisionFanaticEITelevisionFanaticPlugin.dll
%PROGRAMFILES%TelevisionFanaticEITelevisionFanaticradio.dll
%PROGRAMFILES%TelevisionFanaticEITelevisionFanaticregfft.dll
%PROGRAMFILES%TelevisionFanaticEITelevisionFanaticreghk.dll
%PROGRAMFILES%TelevisionFanaticEITelevisionFanaticregiet.dll
%PROGRAMFILES%TelevisionFanaticEITelevisionFanaticscript.dll
%PROGRAMFILES%TelevisionFanaticEITelevisionFanaticskin.dll
%PROGRAMFILES%TelevisionFanaticEITelevisionFanaticsknlcr.dll
%PROGRAMFILES%TelevisionFanaticEITelevisionFanaticskplay.exe
%PROGRAMFILES%TelevisionFanaticEITelevisionFanaticSrcAs.dll
%PROGRAMFILES%TelevisionFanaticEITelevisionFanaticSrchMn.exe
%PROGRAMFILES%TelevisionFanaticEITelevisionFanatictpinst.dll
%PROGRAMFILES%TelevisionFanaticEITelevisionFanaticuabtn.dll
%PROGRAMFILES%TelevisionFanaticEITelevisionFanaticAppIntegrator64.exe
%PROGRAMFILES%TelevisionFanaticEITelevisionFanaticAppIntegratorStub64.dll
%PROGRAMFILES%TelevisionFanaticEITelevisionFanaticBOOTSTRAP.JS
%PROGRAMFILES%TelevisionFanaticEITelevisionFanaticffxtbr.jar
%PROGRAMFILES%TelevisionFanaticEITelevisionFanaticCHROME.MANIFEST
%PROGRAMFILES%TelevisionFanaticEITelevisionFanaticCREXT.DLL
%PROGRAMFILES%TelevisionFanaticEITelevisionFanaticCrExtP64.exe
%PROGRAMFILES%TelevisionFanaticEITelevisionFanaticDPNMNGR.DLL
%PROGRAMFILES%TelevisionFanaticEITelevisionFanaticEXEMANAGER.DLL
%PROGRAMFILES%TelevisionFanaticEITelevisionFanaticHpg64.dll
%PROGRAMFILES%TelevisionFanaticEITelevisionFanaticINSTALL.RDF
%PROGRAMFILES%TelevisionFanaticEITelevisionFanaticinstallKeys.js
%PROGRAMFILES%TelevisionFanaticEITelevisionFanaticLOGO.BMP
%PROGRAMFILES%TelevisionFanaticEITelevisionFanaticNP64Stub.dll
%PROGRAMFILES%TelevisionFanaticEITelevisionFanaticT8EXTEX.DLL
%PROGRAMFILES%TelevisionFanaticEITelevisionFanaticT8EXTPEX.DLL
%PROGRAMFILES%TelevisionFanaticEITelevisionFanaticT8HTML.DLL
%PROGRAMFILES%TelevisionFanaticEITelevisionFanaticT8RES.DLL
%PROGRAMFILES%TelevisionFanaticEITelevisionFanaticT8TICKER.DLL
%PROGRAMFILES%TelevisionFanaticEITelevisionFanaticVERIFY.DLL
%PROGRAMFILES%TelevisionFanaticEITelevisionFanaticEIPlug.dll
%PROGRAMFILES%TelevisionFanaticEITelevisionFanaticEZSETP.dll
%PROGRAMFILES%TelevisionFanaticEITelevisionFanaticNP64EISb.dll
%PROGRAMFILES%TelevisionFanaticEITelevisionFanatic%#MANIFEST#%18369B.exe
%PROGRAMFILES%TelevisionFanaticauxstb.dll
%PROGRAMFILES%TelevisionFanaticbar.dll
%PROGRAMFILES%TelevisionFanaticbarsvc.exe
%PROGRAMFILES%TelevisionFanaticbprtct.dll
%PROGRAMFILES%TelevisionFanaticbrmon.exe
%PROGRAMFILES%TelevisionFanaticbrstub.dll
%PROGRAMFILES%TelevisionFanaticdatact.dll
%PROGRAMFILES%TelevisionFanaticdlghk.dll
%PROGRAMFILES%TelevisionFanaticdyn.dll
%PROGRAMFILES%TelevisionFanaticfeedmg.dll
%PROGRAMFILES%TelevisionFanatichighin.exe
%PROGRAMFILES%TelevisionFanatichkstub.dll
%PROGRAMFILES%TelevisionFanatichtmlmu.dll
%PROGRAMFILES%TelevisionFanatichttpct.dll
%PROGRAMFILES%TelevisionFanaticidle.dll
%PROGRAMFILES%TelevisionFanaticieovr.dll
%PROGRAMFILES%TelevisionFanaticimpipe.exe
%PROGRAMFILES%TelevisionFanaticmedint.exe
%PROGRAMFILES%TelevisionFanaticmlbtn.dll
%PROGRAMFILES%TelevisionFanaticmsg.dll
%PROGRAMFILES%TelevisionFanaticPlugin.dll
%PROGRAMFILES%TelevisionFanaticradio.dll
%PROGRAMFILES%TelevisionFanaticregfft.dll
%PROGRAMFILES%TelevisionFanaticreghk.dll
%PROGRAMFILES%TelevisionFanaticregiet.dll
%PROGRAMFILES%TelevisionFanaticscript.dll
%PROGRAMFILES%TelevisionFanaticskin.dll
%PROGRAMFILES%TelevisionFanaticsknlcr.dll
%PROGRAMFILES%TelevisionFanaticskplay.exe
%PROGRAMFILES%TelevisionFanaticSrcAs.dll
%PROGRAMFILES%TelevisionFanaticSrchMn.exe
%PROGRAMFILES%TelevisionFanatictpinst.dll
%PROGRAMFILES%TelevisionFanaticuabtn.dll
%PROGRAMFILES%TelevisionFanaticAppIntegrator64.exe
%PROGRAMFILES%TelevisionFanaticAppIntegratorStub64.dll
%PROGRAMFILES%TelevisionFanaticBOOTSTRAP.JS
%PROGRAMFILES%TelevisionFanaticffxtbr.jar
%PROGRAMFILES%TelevisionFanaticCHROME.MANIFEST
%PROGRAMFILES%TelevisionFanaticCREXT.DLL
%PROGRAMFILES%TelevisionFanaticCrExtP64.exe
%PROGRAMFILES%TelevisionFanaticDPNMNGR.DLL
%PROGRAMFILES%TelevisionFanaticEXEMANAGER.DLL
%PROGRAMFILES%TelevisionFanaticHpg64.dll
%PROGRAMFILES%TelevisionFanaticINSTALL.RDF
%PROGRAMFILES%TelevisionFanaticinstallKeys.js
%PROGRAMFILES%TelevisionFanaticLOGO.BMP
%PROGRAMFILES%TelevisionFanaticNP64Stub.dll
%PROGRAMFILES%TelevisionFanaticT8EXTEX.DLL
%PROGRAMFILES%TelevisionFanaticT8EXTPEX.DLL
%PROGRAMFILES%TelevisionFanaticT8HTML.DLL
%PROGRAMFILES%TelevisionFanaticT8RES.DLL
%PROGRAMFILES%TelevisionFanaticT8TICKER.DLL
%PROGRAMFILES%TelevisionFanaticVERIFY.DLL
%PROGRAMFILES%TelevisionFanaticEIPlug.dll
%PROGRAMFILES%TelevisionFanaticEZSETP.dll
%PROGRAMFILES%TelevisionFanaticNP64EISb.dll
%PROGRAMFILES%TelevisionFanatic%#MANIFEST#%18369B.exe
%APPDATA%TelevisionFanaticauxstb.dll
%APPDATA%TelevisionFanaticbar.dll
%APPDATA%TelevisionFanaticbarsvc.exe
%APPDATA%TelevisionFanaticbprtct.dll
%APPDATA%TelevisionFanaticbrmon.exe
%APPDATA%TelevisionFanaticbrstub.dll
%APPDATA%TelevisionFanaticdatact.dll
%APPDATA%TelevisionFanaticdlghk.dll
%APPDATA%TelevisionFanaticdyn.dll
%APPDATA%TelevisionFanaticfeedmg.dll
%APPDATA%TelevisionFanatichighin.exe
%APPDATA%TelevisionFanatichkstub.dll
%APPDATA%TelevisionFanatichtmlmu.dll
%APPDATA%TelevisionFanatichttpct.dll
%APPDATA%TelevisionFanaticidle.dll
%APPDATA%TelevisionFanaticieovr.dll
%APPDATA%TelevisionFanaticimpipe.exe
%APPDATA%TelevisionFanaticmedint.exe
%APPDATA%TelevisionFanaticmlbtn.dll
%APPDATA%TelevisionFanaticmsg.dll
%APPDATA%TelevisionFanaticPlugin.dll
%APPDATA%TelevisionFanaticradio.dll
%APPDATA%TelevisionFanaticregfft.dll
%APPDATA%TelevisionFanaticreghk.dll
%APPDATA%TelevisionFanaticregiet.dll
%APPDATA%TelevisionFanaticscript.dll
%APPDATA%TelevisionFanaticskin.dll
%APPDATA%TelevisionFanaticsknlcr.dll
%APPDATA%TelevisionFanaticskplay.exe
%APPDATA%TelevisionFanaticSrcAs.dll
%APPDATA%TelevisionFanaticSrchMn.exe
%APPDATA%TelevisionFanatictpinst.dll
%APPDATA%TelevisionFanaticuabtn.dll
%APPDATA%TelevisionFanaticAppIntegrator64.exe
%APPDATA%TelevisionFanaticAppIntegratorStub64.dll
%APPDATA%TelevisionFanaticBOOTSTRAP.JS
%APPDATA%TelevisionFanaticffxtbr.jar
%APPDATA%TelevisionFanaticCHROME.MANIFEST
%APPDATA%TelevisionFanaticCREXT.DLL
%APPDATA%TelevisionFanaticCrExtP64.exe
%APPDATA%TelevisionFanaticDPNMNGR.DLL
%APPDATA%TelevisionFanaticEXEMANAGER.DLL
%APPDATA%TelevisionFanaticHpg64.dll
%APPDATA%TelevisionFanaticINSTALL.RDF
%APPDATA%TelevisionFanaticinstallKeys.js
%APPDATA%TelevisionFanaticLOGO.BMP
%APPDATA%TelevisionFanaticNP64Stub.dll
%APPDATA%TelevisionFanaticT8EXTEX.DLL
%APPDATA%TelevisionFanaticT8EXTPEX.DLL
%APPDATA%TelevisionFanaticT8HTML.DLL
%APPDATA%TelevisionFanaticT8RES.DLL
%APPDATA%TelevisionFanaticT8TICKER.DLL
%APPDATA%TelevisionFanaticVERIFY.DLL
%APPDATA%TelevisionFanaticEIPlug.dll
%APPDATA%TelevisionFanaticEZSETP.dll
%APPDATA%TelevisionFanaticNP64EISb.dll
%APPDATA%TelevisionFanatic%#MANIFEST#%18369B.exe
Key HKLMSOFTWARETelevisionFanatic
Key HKLMSOFTWAREMicrosoftWindowsCurrentVersionUninstallTelevisionFanaticbar Uninstall Internet Explorer
Key HKLMSOFTWAREMicrosoftWindowsCurrentVersionUninstallTelevisionFanaticbar Uninstall Firefox
Key HKLMSOFTWAREMicrosoftWindowsCurrentVersionExplorerBrowser Helper Objectscb41fc95-f1b3-4797-8bb6-1012ff62abba
Key HKLMSOFTWAREMicrosoftWindowsCurrentVersionExplorerBrowser Helper Objects5d79f641-c168-40df-a32f-bacea7509e75
Key HKLMSOFTWAREClassesTelevisionFanatic.XMLSessionPlugin.1CLSID
Key HKLMSOFTWAREClassesTelevisionFanatic.XMLSessionPlugin.1
Key HKLMSOFTWAREClassesTelevisionFanatic.XMLSessionPluginCurVer
Key HKLMSOFTWAREClassesTelevisionFanatic.XMLSessionPluginCLSID
Key HKLMSOFTWAREClassesTelevisionFanatic.XMLSessionPlugin
Key HKLMSOFTWAREClassesTelevisionFanatic.UrlAlertButton.1CLSID
Key HKLMSOFTWAREClassesTelevisionFanatic.UrlAlertButton.1
Key HKLMSOFTWAREClassesTelevisionFanatic.UrlAlertButtonCurVer
Key HKLMSOFTWAREClassesTelevisionFanatic.UrlAlertButtonCLSID
Key HKLMSOFTWAREClassesTelevisionFanatic.UrlAlertButton
Key HKLMSOFTWAREClassesTelevisionFanatic.ToolbarProtector.1CLSID
Key HKLMSOFTWAREClassesTelevisionFanatic.ToolbarProtector.1
Key HKLMSOFTWAREClassesTelevisionFanatic.ToolbarProtectorCurVer
Key HKLMSOFTWAREClassesTelevisionFanatic.ToolbarProtectorCLSID
Key HKLMSOFTWAREClassesTelevisionFanatic.ToolbarProtector
Key HKLMSOFTWAREClassesTelevisionFanatic.ThirdPartyInstaller.1CLSID
Key HKLMSOFTWAREClassesTelevisionFanatic.ThirdPartyInstaller.1
Key HKLMSOFTWAREClassesTelevisionFanatic.ThirdPartyInstallerCurVer
Key HKLMSOFTWAREClassesTelevisionFanatic.ThirdPartyInstallerCLSID
Key HKLMSOFTWAREClassesTelevisionFanatic.ThirdPartyInstaller
Key HKLMSOFTWAREClassesTelevisionFanatic.SkinLauncherSettings.1CLSID
Key HKLMSOFTWAREClassesTelevisionFanatic.SkinLauncherSettings.1
Key HKLMSOFTWAREClassesTelevisionFanatic.SkinLauncherSettingsCurVer
Key HKLMSOFTWAREClassesTelevisionFanatic.SkinLauncherSettingsCLSID
Key HKLMSOFTWAREClassesTelevisionFanatic.SkinLauncherSettings
Key HKLMSOFTWAREClassesTelevisionFanatic.SkinLauncher.1CLSID
Key HKLMSOFTWAREClassesTelevisionFanatic.SkinLauncher.1
Key HKLMSOFTWAREClassesTelevisionFanatic.SkinLauncherCurVer
Key HKLMSOFTWAREClassesTelevisionFanatic.SkinLauncherCLSID
Key HKLMSOFTWAREClassesTelevisionFanatic.SkinLauncher
Key HKLMSOFTWAREClassesTelevisionFanatic.SettingsPlugin.1CLSID
Key HKLMSOFTWAREClassesTelevisionFanatic.SettingsPlugin.1
Key HKLMSOFTWAREClassesTelevisionFanatic.SettingsPluginCurVer
Key HKLMSOFTWAREClassesTelevisionFanatic.SettingsPluginCLSID
Key HKLMSOFTWAREClassesTelevisionFanatic.SettingsPlugin
Key HKLMSOFTWAREClassesTelevisionFanatic.ScriptButton.1CLSID
Key HKLMSOFTWAREClassesTelevisionFanatic.ScriptButton.1
Key HKLMSOFTWAREClassesTelevisionFanatic.ScriptButtonCurVer
Key HKLMSOFTWAREClassesTelevisionFanatic.ScriptButtonCLSID
Key HKLMSOFTWAREClassesTelevisionFanatic.ScriptButton
Key HKLMSOFTWAREClassesTelevisionFanatic.RadioSettings.1CLSID
Key HKLMSOFTWAREClassesTelevisionFanatic.RadioSettings.1
Key HKLMSOFTWAREClassesTelevisionFanatic.RadioSettingsCurVer
Key HKLMSOFTWAREClassesTelevisionFanatic.RadioSettingsCLSID
Key HKLMSOFTWAREClassesTelevisionFanatic.RadioSettings
Key HKLMSOFTWAREClassesTelevisionFanatic.Radio.1CLSID
Key HKLMSOFTWAREClassesTelevisionFanatic.Radio.1
Key HKLMSOFTWAREClassesTelevisionFanatic.RadioCurVer
Key HKLMSOFTWAREClassesTelevisionFanatic.RadioCLSID
Key HKLMSOFTWAREClassesTelevisionFanatic.Radio
Key HKLMSOFTWAREClassesTelevisionFanatic.PseudoTransparentPlugin.1CLSID
Key HKLMSOFTWAREClassesTelevisionFanatic.PseudoTransparentPlugin.1
Key HKLMSOFTWAREClassesTelevisionFanatic.PseudoTransparentPluginCurVer
Key HKLMSOFTWAREClassesTelevisionFanatic.PseudoTransparentPluginCLSID
Key HKLMSOFTWAREClassesTelevisionFanatic.PseudoTransparentPlugin
Key HKLMSOFTWAREClassesTelevisionFanatic.MultipleButton.1CLSID
Key HKLMSOFTWAREClassesTelevisionFanatic.MultipleButton.1
Key HKLMSOFTWAREClassesTelevisionFanatic.MultipleButtonCurVer
Key HKLMSOFTWAREClassesTelevisionFanatic.MultipleButtonCLSID
Key HKLMSOFTWAREClassesTelevisionFanatic.MultipleButton
Key HKLMSOFTWAREClassesTelevisionFanatic.HTMLPanel.1CLSID
Key HKLMSOFTWAREClassesTelevisionFanatic.HTMLPanel.1
Key HKLMSOFTWAREClassesTelevisionFanatic.HTMLPanelCurVer
Key HKLMSOFTWAREClassesTelevisionFanatic.HTMLPanelCLSID
Key HKLMSOFTWAREClassesTelevisionFanatic.HTMLPanel
Key HKLMSOFTWAREClassesTelevisionFanatic.HTMLMenu.1CLSID
Key HKLMSOFTWAREClassesTelevisionFanatic.HTMLMenu.1
Key HKLMSOFTWAREClassesTelevisionFanatic.HTMLMenuCurVer
Key HKLMSOFTWAREClassesTelevisionFanatic.HTMLMenuCLSID
Key HKLMSOFTWAREClassesTelevisionFanatic.HTMLMenu
Key HKLMSOFTWAREClassesTelevisionFanatic.FeedManager.1CLSID
Key HKLMSOFTWAREClassesTelevisionFanatic.FeedManager.1
Key HKLMSOFTWAREClassesTelevisionFanatic.FeedManagerCurVer
Key HKLMSOFTWAREClassesTelevisionFanatic.FeedManagerCLSID
Key HKLMSOFTWAREClassesTelevisionFanatic.FeedManager
Key HKLMSOFTWAREClassesTelevisionFanatic.DynamicBarButton.1CLSID
Key HKLMSOFTWAREClassesTelevisionFanatic.DynamicBarButton.1
Key HKLMSOFTWAREClassesTelevisionFanatic.DynamicBarButtonCurVer
Key HKLMSOFTWAREClassesTelevisionFanatic.DynamicBarButtonCLSID
Key HKLMSOFTWAREClassesTelevisionFanatic.DynamicBarButton18369B.exe
%APPDATA%TelevisionFanaticauxstb.dll
%APPDATA%TelevisionFanaticbar.dll
%APPDATA%TelevisionFanaticbarsvc.exe
%APPDATA%TelevisionFanaticbprtct.dll
%APPDATA%TelevisionFanaticbrmon.exe
%APPDATA%TelevisionFanaticbrstub.dll
%APPDATA%TelevisionFanaticdatact.dll
%APPDATA%TelevisionFanaticdlghk.dll
%APPDATA%TelevisionFanaticdyn.dll
%APPDATA%TelevisionFanaticfeedmg.dll
%APPDATA%TelevisionFanatichighin.exe
%APPDATA%TelevisionFanatichkstub.dll
%APPDATA%TelevisionFanatichtmlmu.dll
%APPDATA%TelevisionFanatichttpct.dll
%APPDATA%TelevisionFanaticidle.dll
%APPDATA%TelevisionFanaticieovr.dll
%APPDATA%TelevisionFanaticimpipe.exe
%APPDATA%TelevisionFanaticmedint.exe
%APPDATA%TelevisionFanaticmlbtn.dll
%APPDATA%TelevisionFanaticmsg.dll
%APPDATA%TelevisionFanaticPlugin.dll
%APPDATA%TelevisionFanaticradio.dll
%APPDATA%TelevisionFanaticregfft.dll
%APPDATA%TelevisionFanaticreghk.dll
%APPDATA%TelevisionFanaticregiet.dll
%APPDATA%TelevisionFanaticscript.dll
%APPDATA%TelevisionFanaticskin.dll
%APPDATA%TelevisionFanaticsknlcr.dll
%APPDATA%TelevisionFanaticskplay.exe
%APPDATA%TelevisionFanaticSrcAs.dll
%APPDATA%TelevisionFanaticSrchMn.exe
%APPDATA%TelevisionFanatictpinst.dll
%APPDATA%TelevisionFanaticuabtn.dll
%APPDATA%TelevisionFanaticAppIntegrator64.exe
%APPDATA%TelevisionFanaticAppIntegratorStub64.dll
%APPDATA%TelevisionFanaticBOOTSTRAP.JS
%APPDATA%TelevisionFanaticffxtbr.jar
%APPDATA%TelevisionFanaticCHROME.MANIFEST
%APPDATA%TelevisionFanaticCREXT.DLL
%APPDATA%TelevisionFanaticCrExtP64.exe
%APPDATA%TelevisionFanaticDPNMNGR.DLL
%APPDATA%TelevisionFanaticEXEMANAGER.DLL
%APPDATA%TelevisionFanaticHpg64.dll
%APPDATA%TelevisionFanaticINSTALL.RDF
%APPDATA%TelevisionFanaticinstallKeys.js
%APPDATA%TelevisionFanaticLOGO.BMP
%APPDATA%TelevisionFanaticNP64Stub.dll
%APPDATA%TelevisionFanaticT8EXTEX.DLL
%APPDATA%TelevisionFanaticT8EXTPEX.DLL
%APPDATA%TelevisionFanaticT8HTML.DLL
%APPDATA%TelevisionFanaticT8RES.DLL
%APPDATA%TelevisionFanaticT8TICKER.DLL
%APPDATA%TelevisionFanaticVERIFY.DLL
%APPDATA%TelevisionFanaticEIPlug.dll
%APPDATA%TelevisionFanaticEZSETP.dll
%APPDATA%TelevisionFanaticNP64EISb.dll
%APPDATA%TelevisionFanatic%APPDATA%TelevisionFanatic
%PROGRAMFILES%TelevisionFanatic
%PROGRAMFILES%TelevisionFanaticEI
%PROGRAMFILES%TelevisionFanaticEITelevisionFanaticauxstb.dll
%PROGRAMFILES%TelevisionFanaticEITelevisionFanaticbar.dll
%PROGRAMFILES%TelevisionFanaticEITelevisionFanaticbarsvc.exe
%PROGRAMFILES%TelevisionFanaticEITelevisionFanaticbprtct.dll
%PROGRAMFILES%TelevisionFanaticEITelevisionFanaticbrmon.exe
%PROGRAMFILES%TelevisionFanaticEITelevisionFanaticbrstub.dll
%PROGRAMFILES%TelevisionFanaticEITelevisionFanaticdatact.dll
%PROGRAMFILES%TelevisionFanaticEITelevisionFanaticdlghk.dll
%PROGRAMFILES%TelevisionFanaticEITelevisionFanaticdyn.dll
%PROGRAMFILES%TelevisionFanaticEITelevisionFanaticfeedmg.dll
%PROGRAMFILES%TelevisionFanaticEITelevisionFanatichighin.exe
%PROGRAMFILES%TelevisionFanaticEITelevisionFanatichkstub.dll
%PROGRAMFILES%TelevisionFanaticEITelevisionFanatichtmlmu.dll
%PROGRAMFILES%TelevisionFanaticEITelevisionFanatichttpct.dll
%PROGRAMFILES%TelevisionFanaticEITelevisionFanaticidle.dll
%PROGRAMFILES%TelevisionFanaticEITelevisionFanaticieovr.dll
%PROGRAMFILES%TelevisionFanaticEITelevisionFanaticimpipe.exe
%PROGRAMFILES%TelevisionFanaticEITelevisionFanaticmedint.exe
%PROGRAMFILES%TelevisionFanaticEITelevisionFanaticmlbtn.dll
%PROGRAMFILES%TelevisionFanaticEITelevisionFanaticmsg.dll
%PROGRAMFILES%TelevisionFanaticEITelevisionFanaticPlugin.dll
%PROGRAMFILES%TelevisionFanaticEITelevisionFanaticradio.dll
%PROGRAMFILES%TelevisionFanaticEITelevisionFanaticregfft.dll
%PROGRAMFILES%TelevisionFanaticEITelevisionFanaticreghk.dll
%PROGRAMFILES%TelevisionFanaticEITelevisionFanaticregiet.dll
%PROGRAMFILES%TelevisionFanaticEITelevisionFanaticscript.dll
%PROGRAMFILES%TelevisionFanaticEITelevisionFanaticskin.dll
%PROGRAMFILES%TelevisionFanaticEITelevisionFanaticsknlcr.dll
%PROGRAMFILES%TelevisionFanaticEITelevisionFanaticskplay.exe
%PROGRAMFILES%TelevisionFanaticEITelevisionFanaticSrcAs.dll
%PROGRAMFILES%TelevisionFanaticEITelevisionFanaticSrchMn.exe
%PROGRAMFILES%TelevisionFanaticEITelevisionFanatictpinst.dll
%PROGRAMFILES%TelevisionFanaticEITelevisionFanaticuabtn.dll
%PROGRAMFILES%TelevisionFanaticEITelevisionFanaticAppIntegrator64.exe
%PROGRAMFILES%TelevisionFanaticEITelevisionFanaticAppIntegratorStub64.dll
%PROGRAMFILES%TelevisionFanaticEITelevisionFanaticBOOTSTRAP.JS
%PROGRAMFILES%TelevisionFanaticEITelevisionFanaticffxtbr.jar
%PROGRAMFILES%TelevisionFanaticEITelevisionFanaticCHROME.MANIFEST
%PROGRAMFILES%TelevisionFanaticEITelevisionFanaticCREXT.DLL
%PROGRAMFILES%TelevisionFanaticEITelevisionFanaticCrExtP64.exe
%PROGRAMFILES%TelevisionFanaticEITelevisionFanaticDPNMNGR.DLL
%PROGRAMFILES%TelevisionFanaticEITelevisionFanaticEXEMANAGER.DLL
%PROGRAMFILES%TelevisionFanaticEITelevisionFanaticHpg64.dll
%PROGRAMFILES%TelevisionFanaticEITelevisionFanaticINSTALL.RDF
%PROGRAMFILES%TelevisionFanaticEITelevisionFanaticinstallKeys.js
%PROGRAMFILES%TelevisionFanaticEITelevisionFanaticLOGO.BMP
%PROGRAMFILES%TelevisionFanaticEITelevisionFanaticNP64Stub.dll
%PROGRAMFILES%TelevisionFanaticEITelevisionFanaticT8EXTEX.DLL
%PROGRAMFILES%TelevisionFanaticEITelevisionFanaticT8EXTPEX.DLL
%PROGRAMFILES%TelevisionFanaticEITelevisionFanaticT8HTML.DLL
%PROGRAMFILES%TelevisionFanaticEITelevisionFanaticT8RES.DLL
%PROGRAMFILES%TelevisionFanaticEITelevisionFanaticT8TICKER.DLL
%PROGRAMFILES%TelevisionFanaticEITelevisionFanaticVERIFY.DLL
%PROGRAMFILES%TelevisionFanaticEITelevisionFanaticEIPlug.dll
%PROGRAMFILES%TelevisionFanaticEITelevisionFanaticEZSETP.dll
%PROGRAMFILES%TelevisionFanaticEITelevisionFanaticNP64EISb.dll
%PROGRAMFILES%TelevisionFanaticEITelevisionFanatic%#MANIFEST#%18369B.exe
%PROGRAMFILES%TelevisionFanaticauxstb.dll
%PROGRAMFILES%TelevisionFanaticbar.dll
%PROGRAMFILES%TelevisionFanaticbarsvc.exe
%PROGRAMFILES%TelevisionFanaticbprtct.dll
%PROGRAMFILES%TelevisionFanaticbrmon.exe
%PROGRAMFILES%TelevisionFanaticbrstub.dll
%PROGRAMFILES%TelevisionFanaticdatact.dll
%PROGRAMFILES%TelevisionFanaticdlghk.dll
%PROGRAMFILES%TelevisionFanaticdyn.dll
%PROGRAMFILES%TelevisionFanaticfeedmg.dll
%PROGRAMFILES%TelevisionFanatichighin.exe
%PROGRAMFILES%TelevisionFanatichkstub.dll
%PROGRAMFILES%TelevisionFanatichtmlmu.dll
%PROGRAMFILES%TelevisionFanatichttpct.dll
%PROGRAMFILES%TelevisionFanaticidle.dll
%PROGRAMFILES%TelevisionFanaticieovr.dll
%PROGRAMFILES%TelevisionFanaticimpipe.exe
%PROGRAMFILES%TelevisionFanaticmedint.exe
%PROGRAMFILES%TelevisionFanaticmlbtn.dll
%PROGRAMFILES%TelevisionFanaticmsg.dll
%PROGRAMFILES%TelevisionFanaticPlugin.dll
%PROGRAMFILES%TelevisionFanaticradio.dll
%PROGRAMFILES%TelevisionFanaticregfft.dll
%PROGRAMFILES%TelevisionFanaticreghk.dll
%PROGRAMFILES%TelevisionFanaticregiet.dll
%PROGRAMFILES%TelevisionFanaticscript.dll
%PROGRAMFILES%TelevisionFanaticskin.dll
%PROGRAMFILES%TelevisionFanaticsknlcr.dll
%PROGRAMFILES%TelevisionFanaticskplay.exe
%PROGRAMFILES%TelevisionFanaticSrcAs.dll
%PROGRAMFILES%TelevisionFanaticSrchMn.exe
%PROGRAMFILES%TelevisionFanatictpinst.dll
%PROGRAMFILES%TelevisionFanaticuabtn.dll
%PROGRAMFILES%TelevisionFanaticAppIntegrator64.exe
%PROGRAMFILES%TelevisionFanaticAppIntegratorStub64.dll
%PROGRAMFILES%TelevisionFanaticBOOTSTRAP.JS
%PROGRAMFILES%TelevisionFanaticffxtbr.jar
%PROGRAMFILES%TelevisionFanaticCHROME.MANIFEST
%PROGRAMFILES%TelevisionFanaticCREXT.DLL
%PROGRAMFILES%TelevisionFanaticCrExtP64.exe
%PROGRAMFILES%TelevisionFanaticDPNMNGR.DLL
%PROGRAMFILES%TelevisionFanaticEXEMANAGER.DLL
%PROGRAMFILES%TelevisionFanaticHpg64.dll
%PROGRAMFILES%TelevisionFanaticINSTALL.RDF
%PROGRAMFILES%TelevisionFanaticinstallKeys.js
%PROGRAMFILES%TelevisionFanaticLOGO.BMP
%PROGRAMFILES%TelevisionFanaticNP64Stub.dll
%PROGRAMFILES%TelevisionFanaticT8EXTEX.DLL
%PROGRAMFILES%TelevisionFanaticT8EXTPEX.DLL
%PROGRAMFILES%TelevisionFanaticT8HTML.DLL
%PROGRAMFILES%TelevisionFanaticT8RES.DLL
%PROGRAMFILES%TelevisionFanaticT8TICKER.DLL
%PROGRAMFILES%TelevisionFanaticVERIFY.DLL
%PROGRAMFILES%TelevisionFanaticEIPlug.dll
%PROGRAMFILES%TelevisionFanaticEZSETP.dll
%PROGRAMFILES%TelevisionFanaticNP64EISb.dll
%PROGRAMFILES%TelevisionFanatic%#MANIFEST#%18369B.exe
%APPDATA%TelevisionFanaticauxstb.dll
%APPDATA%TelevisionFanaticbar.dll
%APPDATA%TelevisionFanaticbarsvc.exe
%APPDATA%TelevisionFanaticbprtct.dll
%APPDATA%TelevisionFanaticbrmon.exe
%APPDATA%TelevisionFanaticbrstub.dll
%APPDATA%TelevisionFanaticdatact.dll
%APPDATA%TelevisionFanaticdlghk.dll
%APPDATA%TelevisionFanaticdyn.dll
%APPDATA%TelevisionFanaticfeedmg.dll
%APPDATA%TelevisionFanatichighin.exe
%APPDATA%TelevisionFanatichkstub.dll
%APPDATA%TelevisionFanatichtmlmu.dll
%APPDATA%TelevisionFanatichttpct.dll
%APPDATA%TelevisionFanaticidle.dll
%APPDATA%TelevisionFanaticieovr.dll
%APPDATA%TelevisionFanaticimpipe.exe
%APPDATA%TelevisionFanaticmedint.exe
%APPDATA%TelevisionFanaticmlbtn.dll
%APPDATA%TelevisionFanaticmsg.dll
%APPDATA%TelevisionFanaticPlugin.dll
%APPDATA%TelevisionFanaticradio.dll
%APPDATA%TelevisionFanaticregfft.dll
%APPDATA%TelevisionFanaticreghk.dll
%APPDATA%TelevisionFanaticregiet.dll
%APPDATA%TelevisionFanaticscript.dll
%APPDATA%TelevisionFanaticskin.dll
%APPDATA%TelevisionFanaticsknlcr.dll
%APPDATA%TelevisionFanaticskplay.exe
%APPDATA%TelevisionFanaticSrcAs.dll
%APPDATA%TelevisionFanaticSrchMn.exe
%APPDATA%TelevisionFanatictpinst.dll
%APPDATA%TelevisionFanaticuabtn.dll
%APPDATA%TelevisionFanaticAppIntegrator64.exe
%APPDATA%TelevisionFanaticAppIntegratorStub64.dll
%APPDATA%TelevisionFanaticBOOTSTRAP.JS
%APPDATA%TelevisionFanaticffxtbr.jar
%APPDATA%TelevisionFanaticCHROME.MANIFEST
%APPDATA%TelevisionFanaticCREXT.DLL
%APPDATA%TelevisionFanaticCrExtP64.exe
%APPDATA%TelevisionFanaticDPNMNGR.DLL
%APPDATA%TelevisionFanaticEXEMANAGER.DLL
%APPDATA%TelevisionFanaticHpg64.dll
%APPDATA%TelevisionFanaticINSTALL.RDF
%APPDATA%TelevisionFanaticinstallKeys.js
%APPDATA%TelevisionFanaticLOGO.BMP
%APPDATA%TelevisionFanaticNP64Stub.dll
%APPDATA%TelevisionFanaticT8EXTEX.DLL
%APPDATA%TelevisionFanaticT8EXTPEX.DLL
%APPDATA%TelevisionFanaticT8HTML.DLL
%APPDATA%TelevisionFanaticT8RES.DLL
%APPDATA%TelevisionFanaticT8TICKER.DLL
%APPDATA%TelevisionFanaticVERIFY.DLL
%APPDATA%TelevisionFanaticEIPlug.dll
%APPDATA%TelevisionFanaticEZSETP.dll
%APPDATA%TelevisionFanaticNP64EISb.dll
%APPDATA%TelevisionFanatic%#MANIFEST#%18369B.exe
Key HKLMSOFTWARETelevisionFanatic
Key HKLMSOFTWAREMicrosoftWindowsCurrentVersionUninstallTelevisionFanaticbar Uninstall Internet Explorer
Key HKLMSOFTWAREMicrosoftWindowsCurrentVersionUninstallTelevisionFanaticbar Uninstall Firefox
Key HKLMSOFTWAREMicrosoftWindowsCurrentVersionExplorerBrowser Helper Objectscb41fc95-f1b3-4797-8bb6-1012ff62abba
Key HKLMSOFTWAREMicrosoftWindowsCurrentVersionExplorerBrowser Helper Objects5d79f641-c168-40df-a32f-bacea7509e75
Key HKLMSOFTWAREClassesTelevisionFanatic.XMLSessionPlugin.1CLSID
Key HKLMSOFTWAREClassesTelevisionFanatic.XMLSessionPlugin.1
Key HKLMSOFTWAREClassesTelevisionFanatic.XMLSessionPluginCurVer
Key HKLMSOFTWAREClassesTelevisionFanatic.XMLSessionPluginCLSID
Key HKLMSOFTWAREClassesTelevisionFanatic.XMLSessionPlugin
Key HKLMSOFTWAREClassesTelevisionFanatic.UrlAlertButton.1CLSID
Key HKLMSOFTWAREClassesTelevisionFanatic.UrlAlertButton.1
Key HKLMSOFTWAREClassesTelevisionFanatic.UrlAlertButtonCurVer
Key HKLMSOFTWAREClassesTelevisionFanatic.UrlAlertButtonCLSID
Key HKLMSOFTWAREClassesTelevisionFanatic.UrlAlertButton
Key HKLMSOFTWAREClassesTelevisionFanatic.ToolbarProtector.1CLSID
Key HKLMSOFTWAREClassesTelevisionFanatic.ToolbarProtector.1
Key HKLMSOFTWAREClassesTelevisionFanatic.ToolbarProtectorCurVer
Key HKLMSOFTWAREClassesTelevisionFanatic.ToolbarProtectorCLSID
Key HKLMSOFTWAREClassesTelevisionFanatic.ToolbarProtector
Key HKLMSOFTWAREClassesTelevisionFanatic.ThirdPartyInstaller.1CLSID
Key HKLMSOFTWAREClassesTelevisionFanatic.ThirdPartyInstaller.1
Key HKLMSOFTWAREClassesTelevisionFanatic.ThirdPartyInstallerCurVer
Key HKLMSOFTWAREClassesTelevisionFanatic.ThirdPartyInstallerCLSID
Key HKLMSOFTWAREClassesTelevisionFanatic.ThirdPartyInstaller
Key HKLMSOFTWAREClassesTelevisionFanatic.SkinLauncherSettings.1CLSID
Key HKLMSOFTWAREClassesTelevisionFanatic.SkinLauncherSettings.1
Key HKLMSOFTWAREClassesTelevisionFanatic.SkinLauncherSettingsCurVer
Key HKLMSOFTWAREClassesTelevisionFanatic.SkinLauncherSettingsCLSID
Key HKLMSOFTWAREClassesTelevisionFanatic.SkinLauncherSettings
Key HKLMSOFTWAREClassesTelevisionFanatic.SkinLauncher.1CLSID
Key HKLMSOFTWAREClassesTelevisionFanatic.SkinLauncher.1
Key HKLMSOFTWAREClassesTelevisionFanatic.SkinLauncherCurVer
Key HKLMSOFTWAREClassesTelevisionFanatic.SkinLauncherCLSID
Key HKLMSOFTWAREClassesTelevisionFanatic.SkinLauncher
Key HKLMSOFTWAREClassesTelevisionFanatic.SettingsPlugin.1CLSID
Key HKLMSOFTWAREClassesTelevisionFanatic.SettingsPlugin.1
Key HKLMSOFTWAREClassesTelevisionFanatic.SettingsPluginCurVer
Key HKLMSOFTWAREClassesTelevisionFanatic.SettingsPluginCLSID
Key HKLMSOFTWAREClassesTelevisionFanatic.SettingsPlugin
Key HKLMSOFTWAREClassesTelevisionFanatic.ScriptButton.1CLSID
Key HKLMSOFTWAREClassesTelevisionFanatic.ScriptButton.1
Key HKLMSOFTWAREClassesTelevisionFanatic.ScriptButtonCurVer
Key HKLMSOFTWAREClassesTelevisionFanatic.ScriptButtonCLSID
Key HKLMSOFTWAREClassesTelevisionFanatic.ScriptButton
Key HKLMSOFTWAREClassesTelevisionFanatic.RadioSettings.1CLSID
Key HKLMSOFTWAREClassesTelevisionFanatic.RadioSettings.1
Key HKLMSOFTWAREClassesTelevisionFanatic.RadioSettingsCurVer
Key HKLMSOFTWAREClassesTelevisionFanatic.RadioSettingsCLSID
Key HKLMSOFTWAREClassesTelevisionFanatic.RadioSettings
Key HKLMSOFTWAREClassesTelevisionFanatic.Radio.1CLSID
Key HKLMSOFTWAREClassesTelevisionFanatic.Radio.1
Key HKLMSOFTWAREClassesTelevisionFanatic.RadioCurVer
Key HKLMSOFTWAREClassesTelevisionFanatic.RadioCLSID
Key HKLMSOFTWAREClassesTelevisionFanatic.Radio
Key HKLMSOFTWAREClassesTelevisionFanatic.PseudoTransparentPlugin.1CLSID
Key HKLMSOFTWAREClassesTelevisionFanatic.PseudoTransparentPlugin.1
Key HKLMSOFTWAREClassesTelevisionFanatic.PseudoTransparentPluginCurVer
Key HKLMSOFTWAREClassesTelevisionFanatic.PseudoTransparentPluginCLSID
Key HKLMSOFTWAREClassesTelevisionFanatic.PseudoTransparentPlugin
Key HKLMSOFTWAREClassesTelevisionFanatic.MultipleButton.1CLSID
Key HKLMSOFTWAREClassesTelevisionFanatic.MultipleButton.1
Key HKLMSOFTWAREClassesTelevisionFanatic.MultipleButtonCurVer
Key HKLMSOFTWAREClassesTelevisionFanatic.MultipleButtonCLSID
Key HKLMSOFTWAREClassesTelevisionFanatic.MultipleButton
Key HKLMSOFTWAREClassesTelevisionFanatic.HTMLPanel.1CLSID
Key HKLMSOFTWAREClassesTelevisionFanatic.HTMLPanel.1
Key HKLMSOFTWAREClassesTelevisionFanatic.HTMLPanelCurVer
Key HKLMSOFTWAREClassesTelevisionFanatic.HTMLPanelCLSID
Key HKLMSOFTWAREClassesTelevisionFanatic.HTMLPanel
Key HKLMSOFTWAREClassesTelevisionFanatic.HTMLMenu.1CLSID
Key HKLMSOFTWAREClassesTelevisionFanatic.HTMLMenu.1
Key HKLMSOFTWAREClassesTelevisionFanatic.HTMLMenuCurVer
Key HKLMSOFTWAREClassesTelevisionFanatic.HTMLMenuCLSID
Key HKLMSOFTWAREClassesTelevisionFanatic.HTMLMenu
Key HKLMSOFTWAREClassesTelevisionFanatic.FeedManager.1CLSID
Key HKLMSOFTWAREClassesTelevisionFanatic.FeedManager.1
Key HKLMSOFTWAREClassesTelevisionFanatic.FeedManagerCurVer
Key HKLMSOFTWAREClassesTelevisionFanatic.FeedManagerCLSID
Key HKLMSOFTWAREClassesTelevisionFanatic.FeedManager
Key HKLMSOFTWAREClassesTelevisionFanatic.DynamicBarButton.1CLSID
Key HKLMSOFTWAREClassesTelevisionFanatic.DynamicBarButton.1
Key HKLMSOFTWAREClassesTelevisionFanatic.DynamicBarButtonCurVer
Key HKLMSOFTWAREClassesTelevisionFanatic.DynamicBarButtonCLSID
Key HKLMSOFTWAREClassesTelevisionFanatic.DynamicBarButton18369B.exe
Key HKLMSOFTWARETelevisionFanatic
Key HKLMSOFTWAREMicrosoftWindowsCurrentVersionUninstallTelevisionFanaticbar Uninstall Internet Explorer
Key HKLMSOFTWAREMicrosoftWindowsCurrentVersionUninstallTelevisionFanaticbar Uninstall Firefox
Key HKLMSOFTWAREMicrosoftWindowsCurrentVersionExplorerBrowser Helper Objectscb41fc95-f1b3-4797-8bb6-1012ff62abba
Key HKLMSOFTWAREMicrosoftWindowsCurrentVersionExplorerBrowser Helper Objects5d79f641-c168-40df-a32f-bacea7509e75
Key HKLMSOFTWAREClassesTelevisionFanatic.XMLSessionPlugin.1CLSID
Key HKLMSOFTWAREClassesTelevisionFanatic.XMLSessionPlugin.1
Key HKLMSOFTWAREClassesTelevisionFanatic.XMLSessionPluginCurVer
Key HKLMSOFTWAREClassesTelevisionFanatic.XMLSessionPluginCLSID
Key HKLMSOFTWAREClassesTelevisionFanatic.XMLSessionPlugin
Key HKLMSOFTWAREClassesTelevisionFanatic.UrlAlertButton.1CLSID
Key HKLMSOFTWAREClassesTelevisionFanatic.UrlAlertButton.1
Key HKLMSOFTWAREClassesTelevisionFanatic.UrlAlertButtonCurVer
Key HKLMSOFTWAREClassesTelevisionFanatic.UrlAlertButtonCLSID
Key HKLMSOFTWAREClassesTelevisionFanatic.UrlAlertButton
Key HKLMSOFTWAREClassesTelevisionFanatic.ToolbarProtector.1CLSID
Key HKLMSOFTWAREClassesTelevisionFanatic.ToolbarProtector.1
Key HKLMSOFTWAREClassesTelevisionFanatic.ToolbarProtectorCurVer
Key HKLMSOFTWAREClassesTelevisionFanatic.ToolbarProtectorCLSID
Key HKLMSOFTWAREClassesTelevisionFanatic.ToolbarProtector
Key HKLMSOFTWAREClassesTelevisionFanatic.ThirdPartyInstaller.1CLSID
Key HKLMSOFTWAREClassesTelevisionFanatic.ThirdPartyInstaller.1
Key HKLMSOFTWAREClassesTelevisionFanatic.ThirdPartyInstallerCurVer
Key HKLMSOFTWAREClassesTelevisionFanatic.ThirdPartyInstallerCLSID
Key HKLMSOFTWAREClassesTelevisionFanatic.ThirdPartyInstaller
Key HKLMSOFTWAREClassesTelevisionFanatic.SkinLauncherSettings.1CLSID
Key HKLMSOFTWAREClassesTelevisionFanatic.SkinLauncherSettings.1
Key HKLMSOFTWAREClassesTelevisionFanatic.SkinLauncherSettingsCurVer
Key HKLMSOFTWAREClassesTelevisionFanatic.SkinLauncherSettingsCLSID
Key HKLMSOFTWAREClassesTelevisionFanatic.SkinLauncherSettings
Key HKLMSOFTWAREClassesTelevisionFanatic.SkinLauncher.1CLSID
Key HKLMSOFTWAREClassesTelevisionFanatic.SkinLauncher.1
Key HKLMSOFTWAREClassesTelevisionFanatic.SkinLauncherCurVer
Key HKLMSOFTWAREClassesTelevisionFanatic.SkinLauncherCLSID
Key HKLMSOFTWAREClassesTelevisionFanatic.SkinLauncher
Key HKLMSOFTWAREClassesTelevisionFanatic.SettingsPlugin.1CLSID
Key HKLMSOFTWAREClassesTelevisionFanatic.SettingsPlugin.1
Key HKLMSOFTWAREClassesTelevisionFanatic.SettingsPluginCurVer
Key HKLMSOFTWAREClassesTelevisionFanatic.SettingsPluginCLSID
Key HKLMSOFTWAREClassesTelevisionFanatic.SettingsPlugin
Key HKLMSOFTWAREClassesTelevisionFanatic.ScriptButton.1CLSID
Key HKLMSOFTWAREClassesTelevisionFanatic.ScriptButton.1
Key HKLMSOFTWAREClassesTelevisionFanatic.ScriptButtonCurVer
Key HKLMSOFTWAREClassesTelevisionFanatic.ScriptButtonCLSID
Key HKLMSOFTWAREClassesTelevisionFanatic.ScriptButton
Key HKLMSOFTWAREClassesTelevisionFanatic.RadioSettings.1CLSID
Key HKLMSOFTWAREClassesTelevisionFanatic.RadioSettings.1
Key HKLMSOFTWAREClassesTelevisionFanatic.RadioSettingsCurVer
Key HKLMSOFTWAREClassesTelevisionFanatic.RadioSettingsCLSID
Key HKLMSOFTWAREClassesTelevisionFanatic.RadioSettings
Key HKLMSOFTWAREClassesTelevisionFanatic.Radio.1CLSID
Key HKLMSOFTWAREClassesTelevisionFanatic.Radio.1
Key HKLMSOFTWAREClassesTelevisionFanatic.RadioCurVer
Key HKLMSOFTWAREClassesTelevisionFanatic.RadioCLSID
Key HKLMSOFTWAREClassesTelevisionFanatic.Radio
Key HKLMSOFTWAREClassesTelevisionFanatic.PseudoTransparentPlugin.1CLSID
Key HKLMSOFTWAREClassesTelevisionFanatic.PseudoTransparentPlugin.1
Key HKLMSOFTWAREClassesTelevisionFanatic.PseudoTransparentPluginCurVer
Key HKLMSOFTWAREClassesTelevisionFanatic.PseudoTransparentPluginCLSID
Key HKLMSOFTWAREClassesTelevisionFanatic.PseudoTransparentPlugin
Key HKLMSOFTWAREClassesTelevisionFanatic.MultipleButton.1CLSID
Key HKLMSOFTWAREClassesTelevisionFanatic.MultipleButton.1
Key HKLMSOFTWAREClassesTelevisionFanatic.MultipleButtonCurVer
Key HKLMSOFTWAREClassesTelevisionFanatic.MultipleButtonCLSID
Key HKLMSOFTWAREClassesTelevisionFanatic.MultipleButton
Key HKLMSOFTWAREClassesTelevisionFanatic.HTMLPanel.1CLSID
Key HKLMSOFTWAREClassesTelevisionFanatic.HTMLPanel.1
Key HKLMSOFTWAREClassesTelevisionFanatic.HTMLPanelCurVer
Key HKLMSOFTWAREClassesTelevisionFanatic.HTMLPanelCLSID
Key HKLMSOFTWAREClassesTelevisionFanatic.HTMLPanel
Key HKLMSOFTWAREClassesTelevisionFanatic.HTMLMenu.1CLSID
Key HKLMSOFTWAREClassesTelevisionFanatic.HTMLMenu.1
Key HKLMSOFTWAREClassesTelevisionFanatic.HTMLMenuCurVer
Key HKLMSOFTWAREClassesTelevisionFanatic.HTMLMenuCLSID
Key HKLMSOFTWAREClassesTelevisionFanatic.HTMLMenu
Key HKLMSOFTWAREClassesTelevisionFanatic.FeedManager.1CLSID
Key HKLMSOFTWAREClassesTelevisionFanatic.FeedManager.1
Key HKLMSOFTWAREClassesTelevisionFanatic.FeedManagerCurVer
Key HKLMSOFTWAREClassesTelevisionFanatic.FeedManagerCLSID
Key HKLMSOFTWAREClassesTelevisionFanatic.FeedManager
Key HKLMSOFTWAREClassesTelevisionFanatic.DynamicBarButton.1CLSID
Key HKLMSOFTWAREClassesTelevisionFanatic.DynamicBarButton.1
Key HKLMSOFTWAREClassesTelevisionFanatic.DynamicBarButtonCurVer
Key HKLMSOFTWAREClassesTelevisionFanatic.DynamicBarButtonCLSID
Key HKLMSOFTWAREClassesTelevisionFanatic.DynamicBarButton
Read More
Blizzard is one of the most beloved game company which brought some of the most and greatest titles in PC gaming. Blizzard has released its own launcher in which you can launch games, sadly sometimes launcher does not want to work and fails to connect.
If this happens to you be sure to:
-
Reset your network devices to make sure your router hasn’t become flooded with data.
Power cycling your modem and router allows them to reset and re-establish a connection to your ISP. Follow these steps to completely power cycle the devices in your network connection:Note: If your modem has a battery backup, you will need to take the battery out or use the reset button on the modem.
- Shut down all computers connected to the modem/router.
- Power down and unplug the modem and the router if you’re using one.
- Allow to sit for 60 seconds unplugged.
- Plug in and turn on the modem and router, and allow them to completely boot up until the front panel connection lights on the modem show a steady connection.
- Start the computer and allow it to completely boot up.
-
If you’re using a wireless connection, optimize your internet connection to rule out a connection issue.
If you’re experiencing issues with your low-speed or wireless internet connection, follow the steps below to troubleshoot the problem.
-
Try plugging your computer directly into your modem.
- Shut down other programs that access the internet, such as other games or download programs.
- Satellite, mobile phone, and WiMax internet connections are not stable connections and may cause further connection issues when playing Blizzard games. If possible, consider switching to a more stable connection.
-
-
Update your drivers and operating system to resolve any compatibility issues.
Out-of-date drivers and operating systems can cause a variety of issues and are one of the first things to check when a game is having problems. The instructions below will help you check and update your drivers.
- Even new computers can have out-of-date drivers and operating systems because updates are released routinely.
- Some games and programs might run fine on a system with old drivers, but outdated drivers can still create technical issues with specific games or programs.
- Check our supported video cards articles to make sure your hardware is compatible:
- World of Warcraft
- Hearthstone
- StarCraft II
- Diablo III
- Heroes of the Storm
- Overwatch
Refer to the steps below to update drivers and software for your operating system.
-
Release and renew your IP and flush your DNS to resolve any network conflicts.
- While on the desktop, press Windows Key and type CMD.
- Right-click Command Prompt and select Run as administrator.
- Type ipconfig /release in the command prompt.
- Wait a few seconds for a reply that the IP address has been released.
- Type ipconfig /renew in the command prompt.
- Wait a few seconds for a reply that the IP address has been re-established.
- Type ipconfig /flushdns in the command prompt.
- Close the command prompt and attempt to make a connection.
-
Close all other applications to resolve software conflicts and free up resources.
Before trying the steps below, close unnecessary programs and restart your computer.
Identify Problematic Startup Items
- Press Ctrl+Shift+Esc to open the Task Manager.
- Click More Details.
- Select the Startup tab.
- Right-click on each item and select Disable.
- Restart the computer.
If this resolves the issue, enable the startup application one at a time to determine which one is causing the problem. You will need to restart between each application you enable.
Note: To re-enable startup applications, follow steps 1-4 and select Enable.
-
Delete the Battle.net Tools folder to automatically rebuild outdated or corrupt files.
- Close Blizzard processes.
- Press Ctrl + Shift + Esc to bring up the Task Manager.
- Click the Processes tab.
- Select all Agent, Blizzard Battle.net desktop app, and game processes, and click End Process.
- Navigate to the folder containing the Battle.net directory:
- Press Windows Key + R to open the Run dialogue.
- Type C:ProgramData into the Open field and press Enter.
- Delete the Battle.net folder.
- Run Battle.net and update the game to see if the issue persists.
If the error persists after you try these steps, another program may be causing the problem. Restart your computer and delete the Battle.net folder one more time.
Note: The above steps may cause the Blizzard Battle.net desktop app to forget game install locations. If your games can’t be found, you will see Install on the Blizzard Battle.net desktop app game tab instead of Play. To find your installation, click Locate this game or run the game launcher.
- Close Blizzard processes.
Read More
![]()
Copyright © 2023, ErrorTools. All Rights Reserved
Trademark: Microsoft Windows logos are registered trademarks of Microsoft. Disclaimer: ErrorTools.com is not affiliated with Microsoft, nor claims direct affiliation.
The information on this page is provided for information purposes only.
![]()