В 2018 году множество владельцев видеокарт Radeon столкнулись с неожиданным сюрпризом от программистов AMD, в виде сообщения об ошибке: Radeon Settings version and Driver version do not match. Please try again after updating to the lastest version(s), которое выводится при попытке открыть панель управления, чтобы изменить те или иные настройки видеокарты.
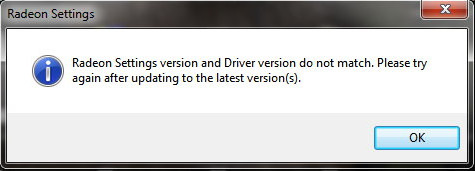
Сервис Google Translate услужливо подсказывает, что проблема заключается в несовпадении версии драйвера с настройками программного обеспечения и предлагает обновить видеодрайвер до новейшей версии.
Скажу сразу, никакие действия, направленные на обновление видеодрайвера ошибку не исправят. Автор этого руководства лично пробовал неоднократное полное удаление видеодрайвера в безопасном режиме с помощью утилиты Display Driver Uninstaller и последующую установку более ранних версий 18-й линейки, вплоть до 18.2.1 — ошибка сохранялась. Устанавливать более древние версии драйверов я считаю нецелесообразным, поэтому предлагаю потратить небольшое количество времени и раз и навсегда устранить эту ошибку.
0. Обновляем имеющийся драйвер
Перед всеми «танцами с бубном» я рекомендую все же скачать с сайта AMD актуальную версию видеодрайвера для вашей модели видеокарты и операционной системы и обновить имеющийся.
В глубине души меня не оставляет надежда, что разработчики одумаются и исправят эту ошибку. С другой стороны, если она сохранится, то лучше исправлять её в самой свежей версии, чем пытаться наладить работу устаревшего драйвера.
1. Запускаем редактор реестра
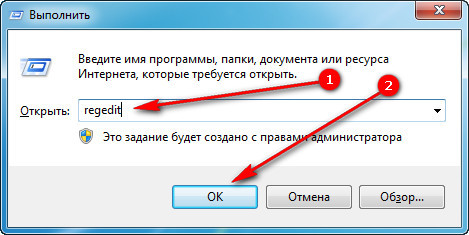
Для этого одновременно кратковременно нажимаем сочетание клавиш Win + R (если вы не знаете, Win это клавиша, на которой изображен логотип Windows).
В открывшемся окне Выполнить, вводим команду regedit и нажимаем кнопку OK.
2. Исправляем неверное значение в реестре.
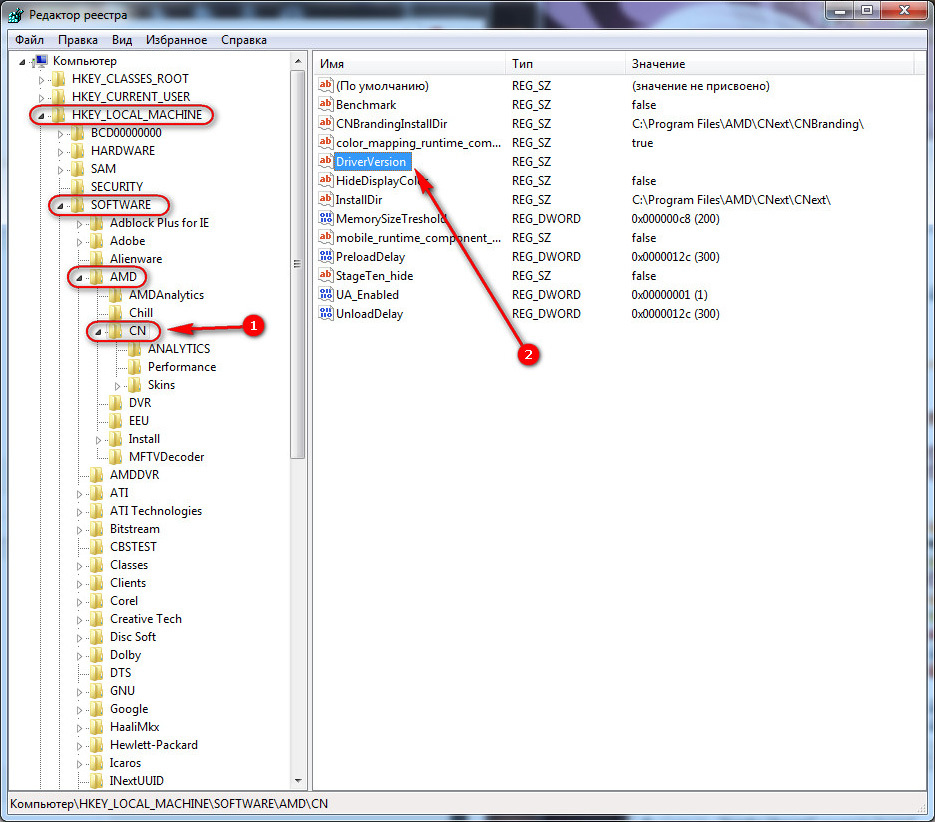
В редакторе реестра последовательно открываем ветку (папку):
HKEY_LOCAL_MACHINE → SOFTWARE → AMD → CN
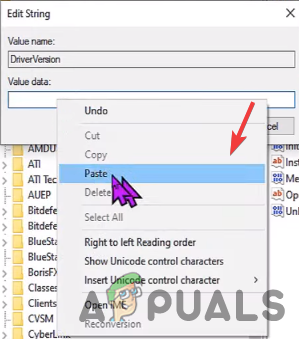
Внутри этой ветки (папки) находим параметр DriverVersion у которого необходимо удалить значение. Для этого делаем по имени параметра двойной клик мышью, удаляем значение в открывшемся окне и сохраняем измененное (пустое) значение.
После этого закрываем редактор реестра.
3. Применяем исправления
Для того чтобы исправления вступили в силу необходимо перезапустить процесс RadeonSettings.exe. Самый простой способ это сделать — перезагрузить компьютер.
После перезагрузки кликните по экрану правой клавишей мыши и в выпадающем меню выберите пункт AMD Radeon Settings, панель управления видеокартой откроется без ошибок.
В последнее время сообщество AMD беспокоит ошибка, связанная с ее известным программным обеспечением. Пользователи сообщают о несовпадении версий программного обеспечения и драйверов Radeon. и вот как это исправить.
Многие сообщают, что «Версии программного обеспечения и драйверов Radeon не совпадают». ошибка впервые появилась, когда они установили последнюю версию драйвера с веб-сайта. Основной причиной такой ошибки, как следует из названия, может быть проблема с конфликтом между драйверами. Когда установлены два разных драйвера, один с веб-сайта, а другой самой Windows, конфликт между ними вызывает такие проблемы. Кроме того, простой причиной этого может быть то, что ваша Windows обновила драйверы, но Radeon остался в старых версиях.
В любом случае, решение этой проблемы довольно простое. Итак, следуйте инструкциям и получите максимальную отдачу от исправлений и решений, которые мы собрали для вас, и заставьте Radeon Software работать в кратчайшие сроки.
Исправление 1: сопоставление реестра драйверов с помощью редактора реестра
Как упоминалось ранее, причиной ошибки, скорее всего, могут быть разные версии драйверов. Возможно, в вашем реестре AMD Radeon есть версия драйвера, не совпадающая с установленной версией.
Редактор реестра позволяет вам изменить версию драйвера на текущую установленную, но с этим связана предосторожность. Необходимо и обязательно выполнять это исправление осторожно, так как любой промах или неуклюжее действие может даже привести к потере ваших данных. Кроме того, вы можете даже достичь точки, когда вам потребуется переустановить ОС. Вот шаги для выполнения этого исправления:
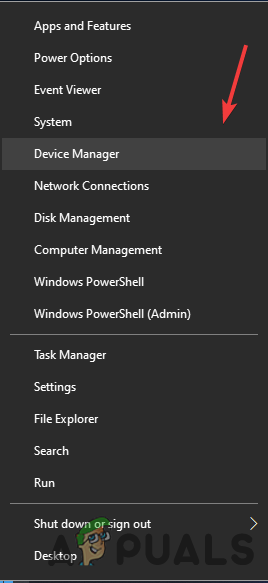
- Щелкните правой кнопкой мыши на «Пуск» и найдите в списке пункт «Диспетчер устройств».
- После этого, когда появится окно, найдите «Видеоадаптеры» в списке устройств и щелкните по нему.
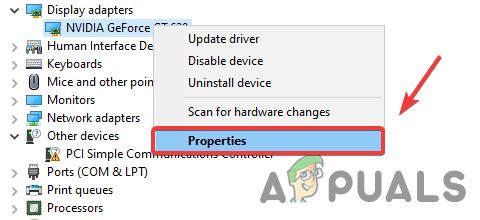
- Под ним появится ваш графический драйвер. Итак, щелкните его правой кнопкой мыши и откройте «Свойства».
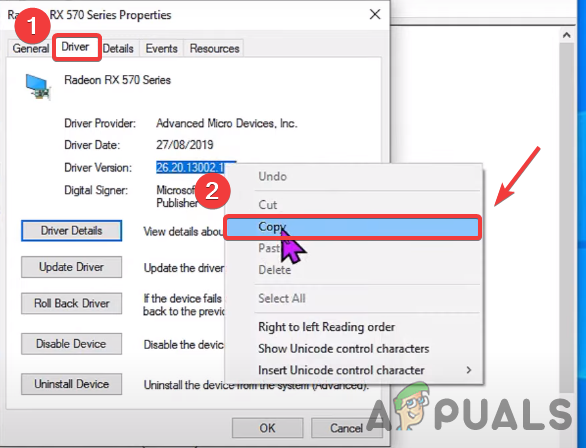
- Далее вверху найдите раздел «Драйвер» и откройте его.
- Найдите версию драйвера и скопируйте ее в буфер обмена.
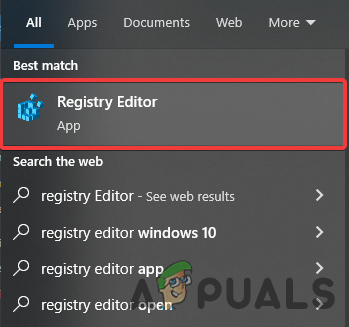
- В строке поиска в меню «Пуск» найдите «Редактор реестра».
- Когда откроется редактор, перейдите к расположению ниже:
- Когда откроется расположение, найдите «DriverVersion» и дважды щелкните его.
- В поле «Значение» вставьте скопированная ранее версия драйвера.
- Нажмите “ОК”, закройте редактор и перезагрузите компьютер.
- После завершения перезагрузки проверьте, исчезла ли проблема.
HKEY_LOCAL_MACHINESOFTWAREAMDCN
Исправление 2: переустановите графический драйвер
Еще один метод устранения проблем конфликтов между двумя драйвера – начать с чистого листа. Другими словами, переустановка ваших драйверов после удаления предыдущих устранит конфликт версий.
- Во-первых, необходимо полностью удалить графические драйверы. Для этого выполните следующие действия:
- Вместо Диспетчера устройств будет использоваться DDU. Итак, нажмите на эту ссылку, чтобы загрузить его:
- Когда загрузка завершится, откройте меню «Пуск» и нажмите «Питание».
- Удерживайте клавишу Shift и нажмите «Сброс».
- Появится экран параметров. Здесь найдите «Устранение неполадок».
- Нажмите «Устранение неполадок», а затем «Дополнительные параметры».
- В окне найдите «Параметры запуска» и откройте его.
- Там вы найдет вариант перезагрузки. Щелкните ее, и Windows перезагрузится в безопасном режиме.
- Когда откроется безопасный режим, перейдите в папку для загрузки и извлеките ZIP-файл DDU, который вы загрузили ранее.
- После извлечения запустите приложение DDU.
- Выберите тип устройства в верхняя правая часть окна.
- Найдите папку Clean & Перезагрузите и щелкните по нему.
- После завершения у вас не будет драйверов. Итак, следуйте инструкциям ниже, чтобы установить графический драйвер с программным обеспечением Radeon.
- Сначала снова установите программное обеспечение Radeon по этой ссылке.
- Откройте программное обеспечение после завершения загрузки.
- Как только вы откроете его, программное обеспечение начнет обнаруживать графическую карту.
- По завершении обнаружения нажмите кнопку «Установить» и дождитесь завершения.
- После этого посмотрите, устранена ли проблема или нет.
>
>
Это все, что касается наших исправлений ошибки Radeon Software and Driver Versions Do Not Match. Если вы сталкиваетесь с ошибками и проблемами, связанными с другими компьютерными играми или с вашим ПК, посетите наш центр часто встречающихся ошибок ПК и способов их устранения.
The error arises on the screen when you install the latest driver from the website, then your Windows reinstalled the older version, which Windows seems to be the newest. In simple words, it is a conflict between the drivers which you and Windows installed. It popups with an error message “Radeon Software and Driver versions do not match. Please try again after updating to the latest version“.
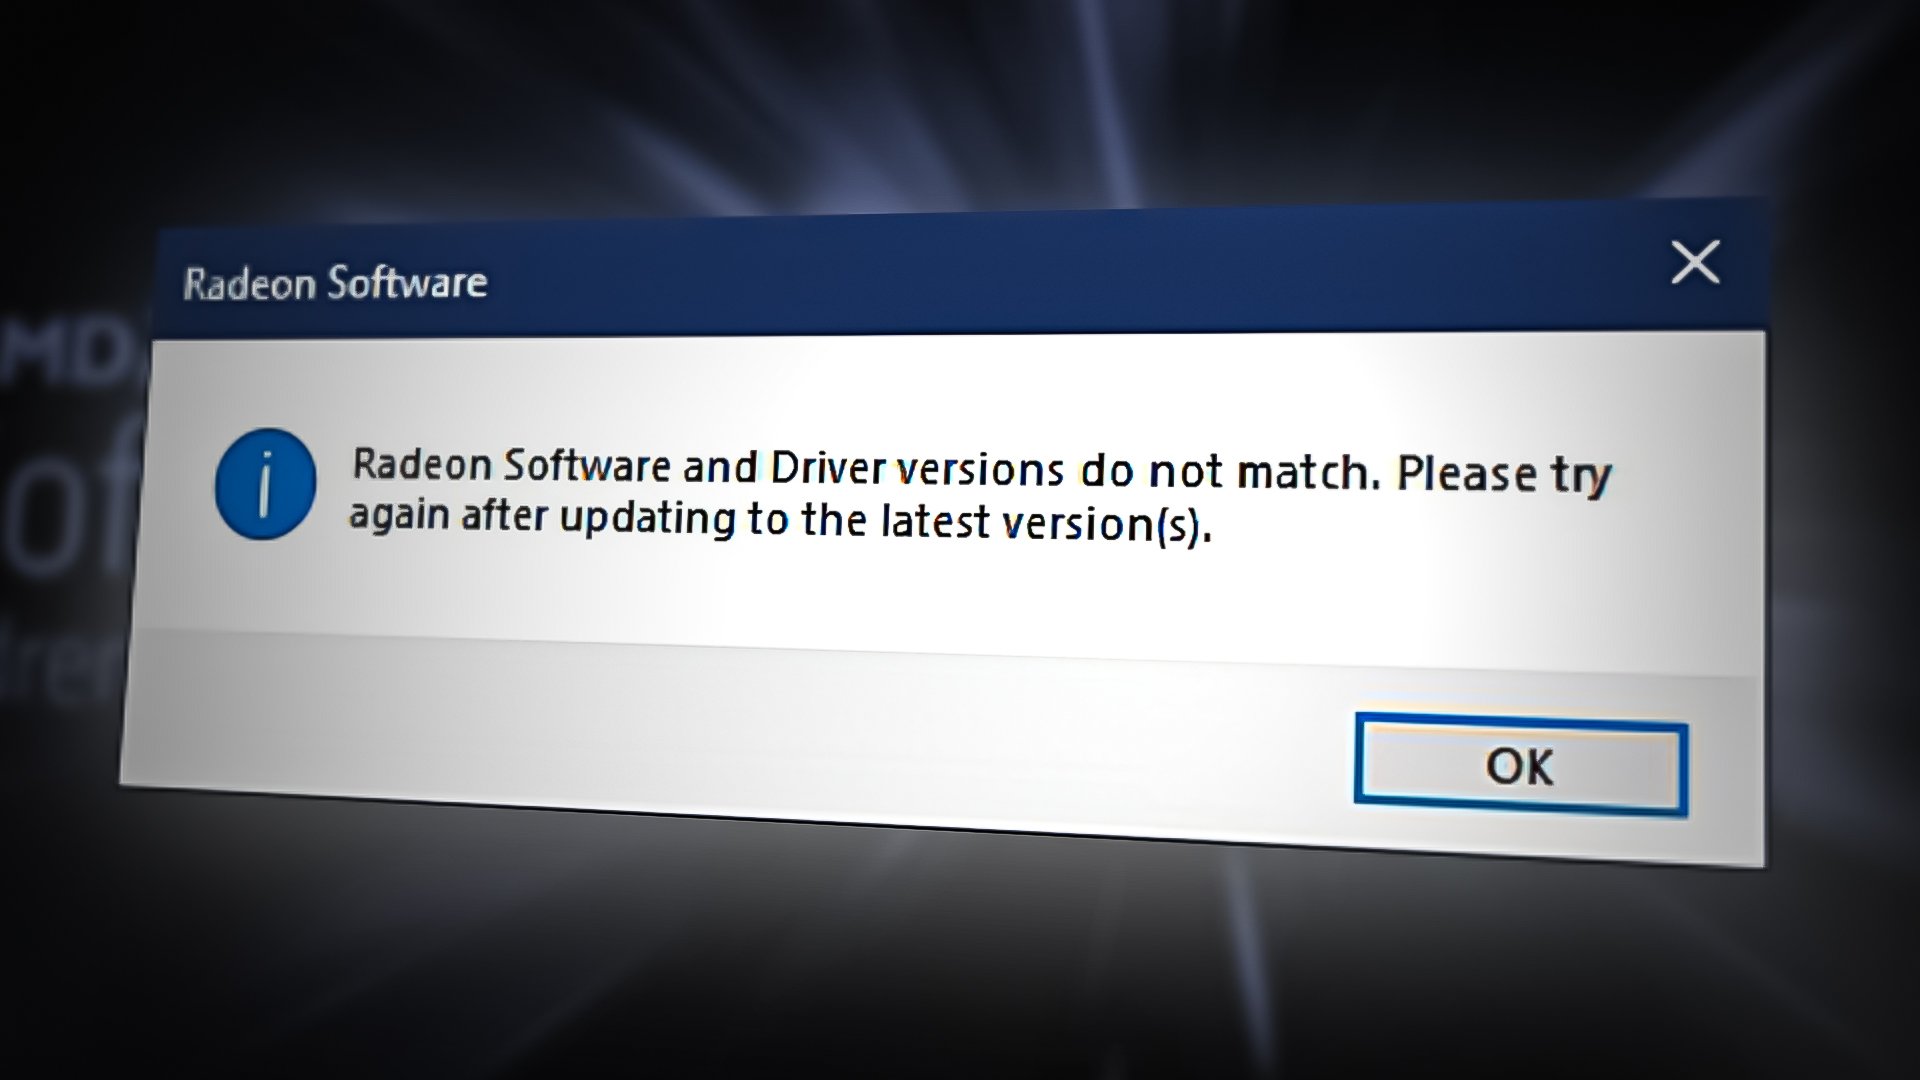
Some more reasons can trigger Error: Radeon software and drivers don’t match. One of the main is when your Windows got updated with the latest driver, but Radeon software did not update, and you have the latest driver with the old Radeon software.
let’s have a look into the potential solutions
1. Match Driver Version Using Registry Editor
The installed Graphics Driver Version may not be the same as in the AMD Radeon Registry. Therefore you have to change the driver version to the current driver version.
Note: Be careful when using Registry Editor because if you do the wrong thing, you could lose your essential data and also, serious problems might arrive that could require a reinstallation of the Windows operating system. Just follow the instruction mentioned below.
Below are the steps to match the graphics driver version:-
- Right-click on the Start Menu button and select Device Manager
Select Device Manager - Once the device manager opened, right-click on your graphics driver and select Properties
Opening Graphics Driver Properties - Go to the Driver tab, and copy the Graphics Driver Version
Copy Driver Version - Once done, type Registry Editor in the search bar
Open Registry Editor - Open the registry editor, and navigate to the following location
HKEY_LOCAL_MACHINESOFTWAREAMDCN
- Once you are at the location, double click on DriverVersion
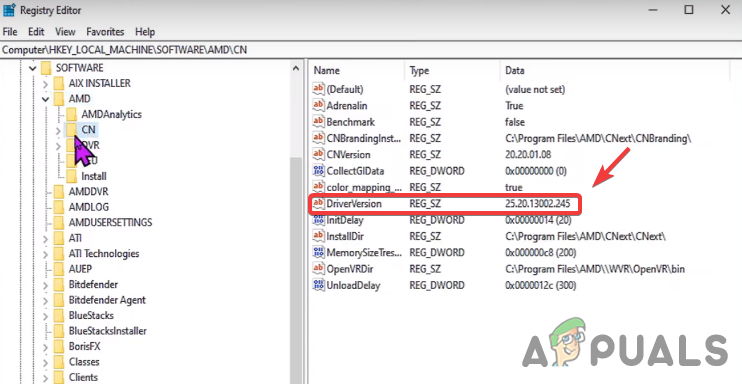
Edit Driver Version - Paste the copied driver version and press Ok
Paste the Driver Version - Close the registry editor and restart your computer for changes to take effect then check for Error: Radeon software and drivers don’t match.
2. Disable Driver Update from Group Policy Editor
As we mentioned above, Windows update graphics driver automatically and they could conflict with the drivers that you installed on your system and it might become the cause for this error. So the best approach is to disable driver update from the Group Policy Editor so your graphics driver will never update unless you change the group policy. Here is how you can do this.
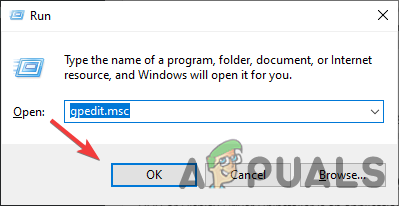
- Open Local Group Policy Editor. For that press the Windows + R keys on the keyboard to open the Run Program
- Once the Run Program is opened, type gpedit.msc in the box and press Enter to open Local Group Policy Editor
Launching Group Policy Editor - Navigate to the following location
Computer Configuration/Administrative Templates/Windows Components/Windows Update
- On the right pane, double click on the setting named Do not include drivers with Windows Updates to open it
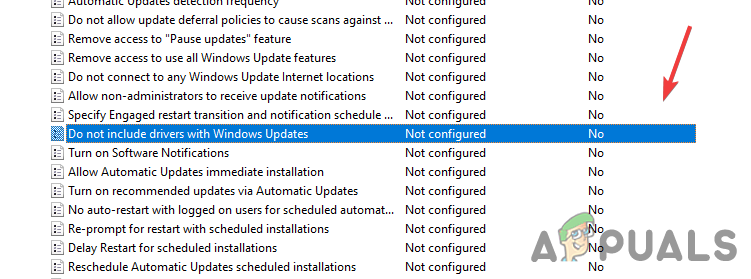
Open Windows Update Setting - Now select Enable button from the left and press OK to apply the changes
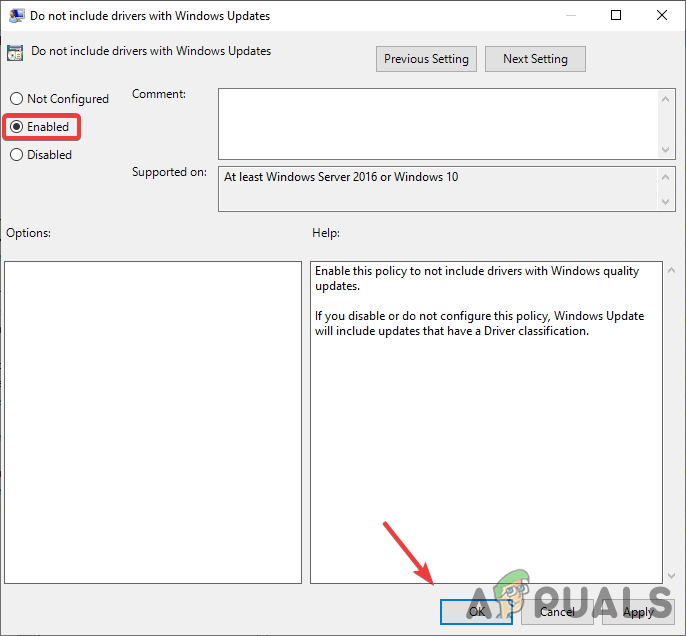
Enable this Policy to not Include Drivers with Windows Quality Updates - Once done, restart your computer for the settings to take effect
- Reinstall your graphics driver by following the below steps.
3. Reinstall Graphics Driver
The main culprit for this error is to mismatch the graphics driver version with the Radeon software. Reinstalling the graphics driver completely from the computer will fix the error.
3.1 Uninstall Graphics Driver Using DDU (Optional)
DDU or Display Driver Uninstaller is an application which is used to uninstall computer drivers completely from the system without any leftover behind. You can use device manager instead of DDU but for the accurate result, we recommend DDU over device manager.
- Go to the following link to download Display Driver Uninstaller
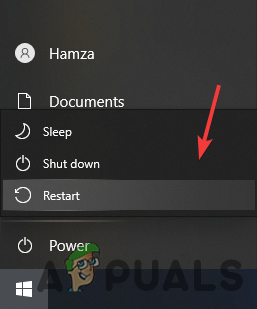
- Once the download is finished, click the Start Menu then click the Power button
- Hold the Shift key and select Restart from the listed option
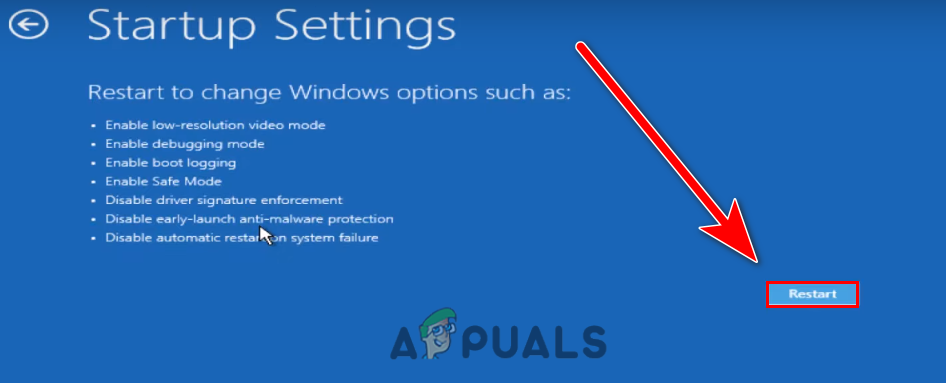
Restart PC to Open Windows in Safe Mode - You will be redirected to the options screen, navigate to Troubleshoot>Advanced option>Startup Settings
- Click Restart from the bottom right and wait for the Windows to load up in Safe Mode
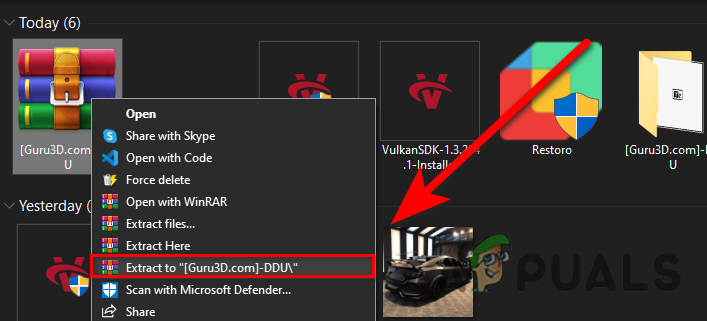
Click Restart - Once the safe mode is opened, go to the Downloads, Extract the DDU folder then navigate into it
Extract DDU Folder - Double click on the application and click Extract
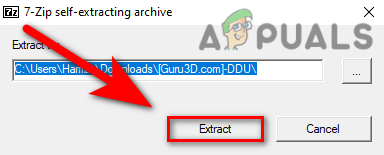
Extracting DDU - Navigate to the extracted folder, and run the DDU Application
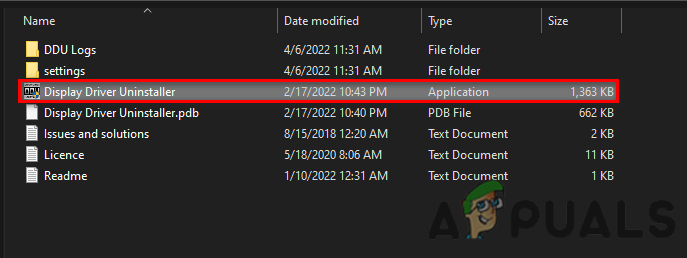
Open DDU Application to Extract - Select Device type from the top right then click on Clean & restart
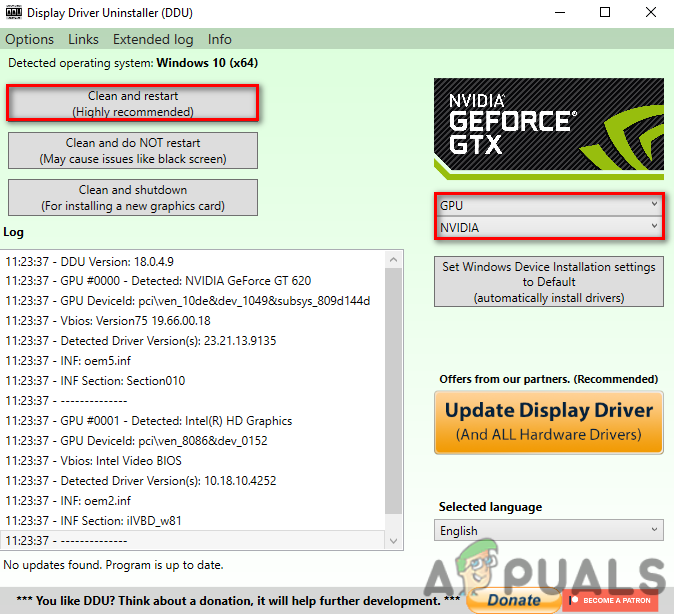
Click Clean and Restart
3.2 Install Graphics Driver with Radeon Software
Now its time to install the AMD Radeon Software follow further instructions:-
- Go to the following link and download AMD Radeon software
- Once the download is finished, open the AMD Radeon Installer
- It will start detecting your graphics card, once it is finished click the Install button and check if the error persists.
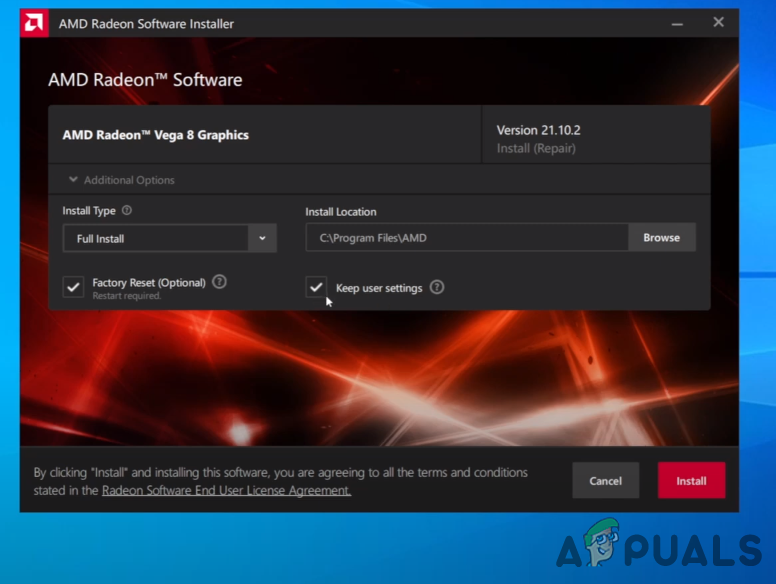
Installing Graphics Driver
4. Roll Back Graphics Driver
Instead of updating and reinstalling the graphics driver, you can Roll Back the graphics driver to an older version which might help you to get rid of the Error: Radeon software and drivers don’t match.
Below are the instruction to Roll back the graphics driver:-
- Right-click Start Menu and select Device Manager
Select Device Manager - Once the page load up, right-click on your graphics driver under Display adapters
- Select Properties from the list of options
Opening Graphics Driver Properties - Go to the Driver tab, and click on Roll Back Driver
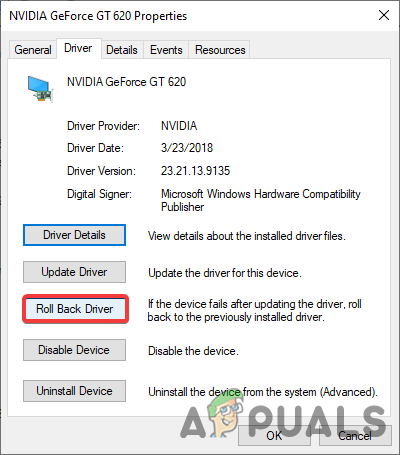
Roll Back Graphics Driver - Select the radio button named My apps don’t work with this driver and click Yes
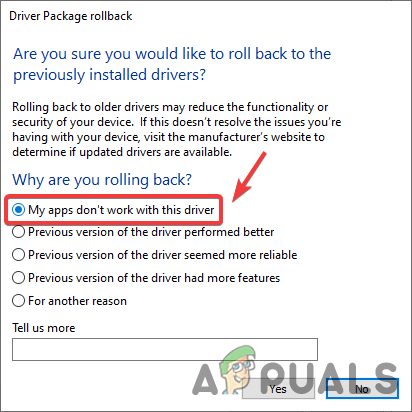
Select My App Don’t Work with this Driver - Once done, check if the error is fixed.
5. Use System Restore
We can also use System Restore to return a computer in a previous state without installing Windows operating system. If you have created a Restore Point then this will help you otherwise you can skip to the last solution. Here is how you can do this.
- Open Run Program by pressing the Windows + R keys at the same time
- Once the program is opened, type sysdm.cpl and press Enter
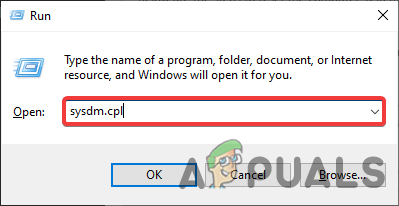
Open System Properties - Go to the System Protection from the top, and click System Restore
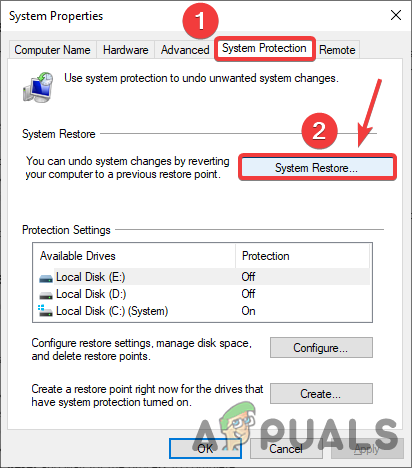
Click System Restore - Click Next and select the Restore Point that you have created recently
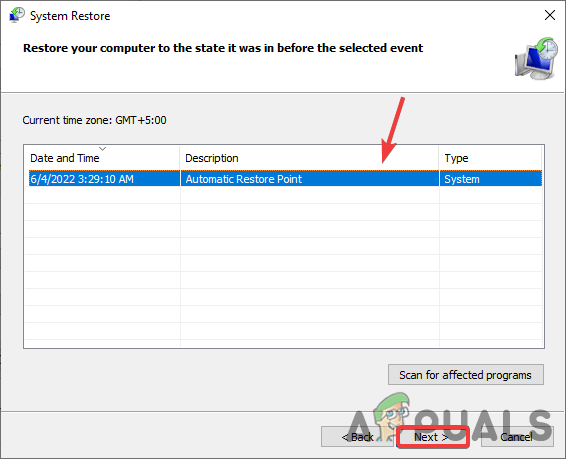
Select Restore Point - Again click Next and click Finish to confirm the restore action
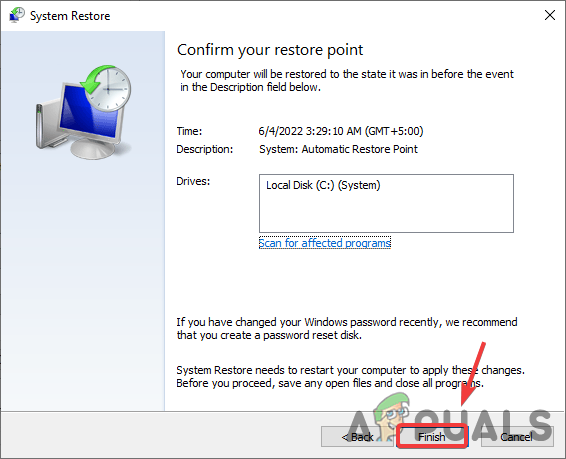
Click Finish - Once it is finished, install the graphics driver by following the above method and check for Error: Radeon software and drivers don’t match.
6. Reset Windows without Losing Data
If the above methods didn’t work, you may need to reset your Windows to the default. This will uninstall all the drivers and corrupt files. Keep in mind you will not lose your Precious Data.
Below are the steps to reset the computer system:-
- Click Start Menu, and type Reset this PC
- Open the settings, and click on Get started button

Click Get Started - Choose the option named keep my files
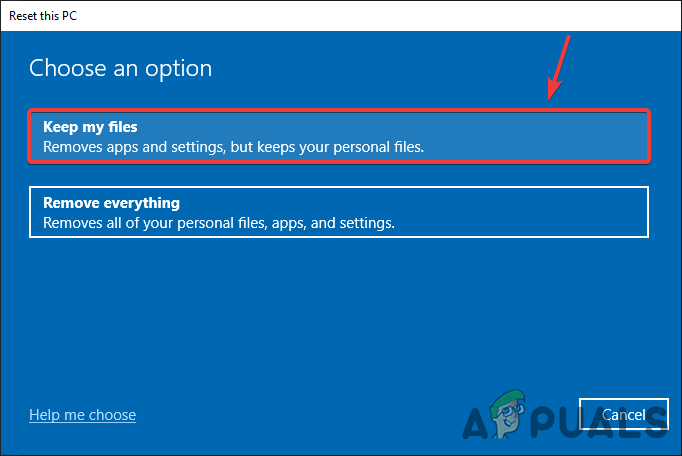
Click Keep My Files - Click Local reinstall and press Next
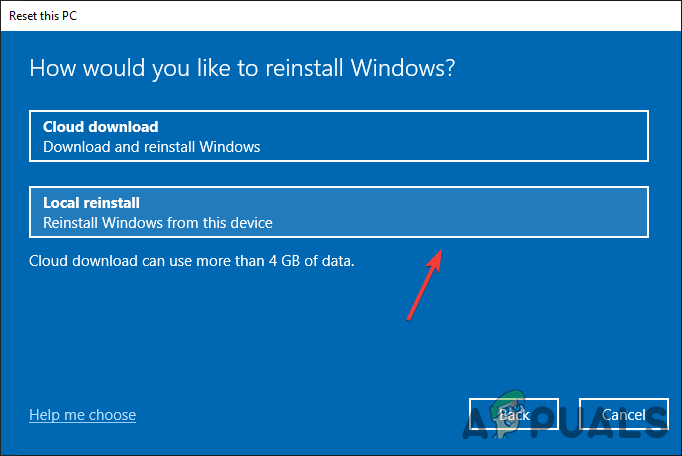
Click Local Reinstall - Click Reset and wait for the process to complete
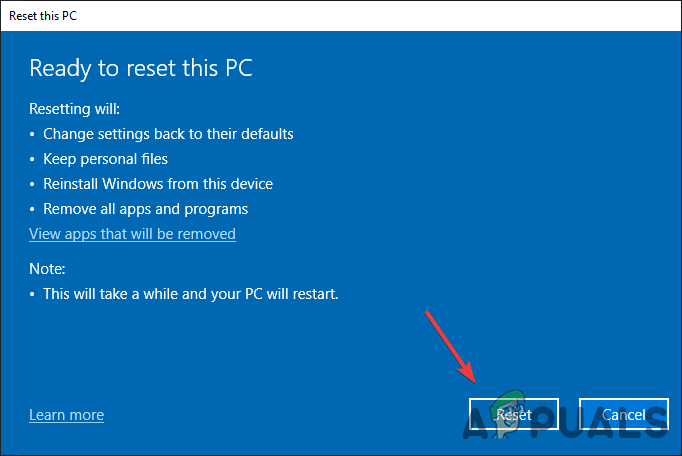
Click Reset - Once done, install the graphics driver as mentioned in the above step.

Hamza Mohammad Anwar
Hamza Mohammad Anwar is an intermediate JavaScript web developer with a focus on developing high-performance applications using MERN technologies. His skill set includes expertise in ReactJS, MongoDB, Express NodeJS, and other related technologies. Hamza is also a Google IT Certified professional, which highlights his competence in IT support. As an avid problem-solver, he recreates errors on his computer to troubleshoot and find solutions to various technical issues.
Are AMD Radeon settings not opening correctly for you? If you are an AMD desktop/laptop user then there is a chance that you must have seen the error message “Radeon software and driver versions do not match” while launching the Radeon Software or trying to update the Radeon graphics on your computer. Don’t worry you are not alone in this there are a number of people facing the exact same problem. So, let’s talk about how to repair this and keep it from happening again.
Read Also: 2 Ways To Repair Programs And Apps In Windows 11
Why Are You Facing This Issue?
The main reason for this error is that the ADM Radeon software and the AMD graphics drivers are incompatible. In simple words, the Radeon settings software and the driver version of the graphics card are different from one another.
If you recently switched from Windows 10 to Windows 11, you will likely face this issue. And the reason is when we update our OS, the software/applications do not get updated along with the OS update. This brings about software/applications compatibility issues with the new OS.
Read Also: Systweak Software Updater Review
Seems difficult? Not to worry. Just follow the below-mentioned methods to fix it once and for all.
Fix Radeon Settings and Driver Versions Do Not Match Error
We can try a few debugging techniques as driver version mismatch is the root of the problem. Starting with the Radeon settings application itself, let’s troubleshoot.
1. Update Your AMD Radeon Application
Version incompatibility is among the most frequent factors that cause the issue to arise. This issue will often occur if the version of your driver and the version of Radeon software are out of sync. For the application to work with the drivers, you must reinstall it with the most recent version.

- Follow the instructions to download & install it.
- Then, restart your computer and launch the application to determine if the problem still exists.
Read Also: How To Check For Missing Drivers Using Automatic Driver Updater Software?
2. Use AMD Auto Detect Tool
As an alternative, Radeon Software can be downloaded from the “AMD Drivers and Support” page. The AMD Auto-Detect And Install for Windows 10/11 tool will allow you to download Radeon Software if it determines that your GPU and operating system are compatible. This handy AMD utility recognizes the operating system you’re using and the appropriate driver for your CPU and display adapter.
- Click on this link and download and install the setup file of the Auto-Detect tool.

- When finished, run the utility and follow the instructions to replace the outdated drivers with the appropriate ones.
3. Update The Graphics Driver
Now when you updated your Radeon settings app with the AMD Auto-Detect tool, it is time to update your graphics driver. To do so follow the below-mentioned steps:

- A pop-up Window will appear, now click on the “Driver’ tab and tap on “Update Driver.”

- Then adhere to the directions to complete the process.
- Now restart your computer and try to run the AMD graphics software to check whether the error message is gone.
Read Also: 8 Best Driver Updater Software For Windows 11, 10, 8, 7
For the sake of safety & compatibility issues, you should update your PC’s drivers at regular intervals. And if you’re someone like me, then you should definitely need a good driver updater tool. For this, I suggest you Advanced Driver Updater. Designed & Developed by Systweak Software, the Advanced Driver Updater is an industry-leading driver updater you can trust.


And with its “Scan Schedule” module which you can find in the “Settings” option from the dashboard of the app, you can create a customized plan for updating your PC drivers according to your will. There are lots of options to customize your driver scan, take a look at yourself:
And if talk about software then you can check these 10 Best Software Updaters for Windows 10, 8,7. So that you can cover both fronts (Software & hardware) with ease.
To Wrap This Up
So, if you follow this tutorial guide step-by-step, I can bet you can easily remove this “Radeon settings and drivers version do not match” error with no difficulty. And if you still have any questions reading this then let us know in the comments below. And for more such troubleshooting guides and tips & tricks related to (Windows, Android, iOS, and macOS) follow us on Facebook, Instagram, and YouTube.
Workaround.
Open regedit and this path HKEY_LOCAL_MACHINESOFTWAREAMDCN
Edit «DriverVersion» string, just make it blank, erase the value. Press OK. Reboot PC.

Error should go away but as negative effect: Alt + R and Alt + Z overlay hotkeys might not work but you can open Radeon Software via right mouse click context menu.
P.S. If you install stable Radeon Software which comes with previous drivers and update driver to the latest version (without latest Radeon Software if something broken there) via Windows Device Manager (.inf file), you will get the same error and it’s can be fixed the same «regedit way» too.