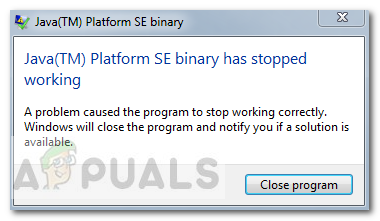
Some users have been reporting receiving the “Java(TM) Platform SE binary has stopped working” error when running various Java-based applications. Typically, this error message is accompanied by general unresponsive periods that can be stopped by clicking the Close program button.
Note: The issue is not exclusive to Windows 10 and is frequently reported on Windows 8. There is no apparent link between the build number and this type of error.
Most of the time, the issue is occurring due to a video card driver conflict with the Java environment. However, this behavior will not happen with every Java-based application – only a handful of programs are reported by users to crash with the “Java(TM) Platform SE binary has stopped working” error. Minecraft is by far the most frequently reported application that crashes with this particular error message.
If you’re currently struggling with the same issue, this article will provide you with some troubleshooting strategies. Below you have a couple of methods that other users in a similar situation have used to resolve the “Java(TM) Platform SE binary has stopped working” error. Please follow the troubleshooting guides below in order until you encounter a repair strategy that takes care of the error. Let’s begin!
Method 1: Update GPU card drivers
The most common scenario in which the “Java(TM) Platform SE binary has stopped working” error occurs is when there’s a conflict between the Java Environment and your graphics card driver.
Since most video driver issues that we’re causing this issue have been fixed by GPU manufacturers, you can probably take care of the issue by simply updating your dedicated GPU drivers to the latest version.
Each major GPU manufacturer has some kind of software that will automatically detect your GPU model and install the latest version of the required graphics card driver. Here are the tools capable of doing this according to your GPU manufacturer:
- Nvidia
- Radeon
- Intel
Once your graphics drivers have been updated, reboot your computer and see if the issue has been resolved at the next startup. If you are still prevented from opening certain Java-based applications by the “Java(TM) Platform SE binary has stopped working” error, move down to Method 2.
Method 2: Reinstall all Java SE Related applications
If the first method wasn’t effective in resolving the issue, let’s see if we’ll have better luck by reinstalling the whole Java environment. Some users have reported that the issue was automatically resolved one they uninstalled their current Java environment and then installed the latest Java version from the official download page.
Here’s a quick guide through the whole thing:
- Press Windows key + R to open up a Run box. Then, type “appwiz.cpl” and hit Enter to open the Programs and Features window.
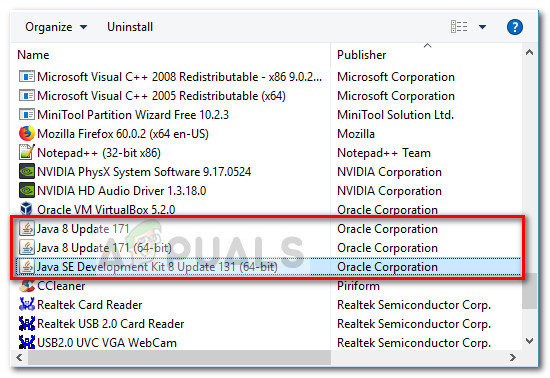
- Scroll down through the application list and uninstall every Java entry that you can find by right-clicking on each entry and choosing Uninstall.
- Once every entry has been uninstalled, reboot your computer.
- At the next startup, visit this link (here) and click on the Free Java Download button to re-install the Java Environment. You’ll be prompted to restart again at the end of this process.
- Once your PC boots back again, see if you are able to open Java-based applications without the “Java(TM) Platform SE binary has stopped working” error. If you’re still seeing the same error message, move down to the final method.
Method 3: Running the application after a Clean Boot
Several users have managed to get their Java-based programs to start while performing a Clean boot. A clean boot will eliminate most software and driver conflicts since it starts the system with a minimal set of drivers and startup programs.
If you find that the “Java(TM) Platform SE binary has stopped working” error doesn’t occur after you do a Clean boot, it’s clear that some of the startup programs and services that were excluded by the Clean boot procedure are to blame for it. Once you confirm this, you should systematically uninstall each suspected software until you eliminate the conflict.
To make things clearer, here’s a quick guide on how to perform a clean boot and identify the startup program that is causing the issue:
- Press Windows key + R to open up a Run box. Next, type “msconfig” and hit Enter to open the System Configuration menu.
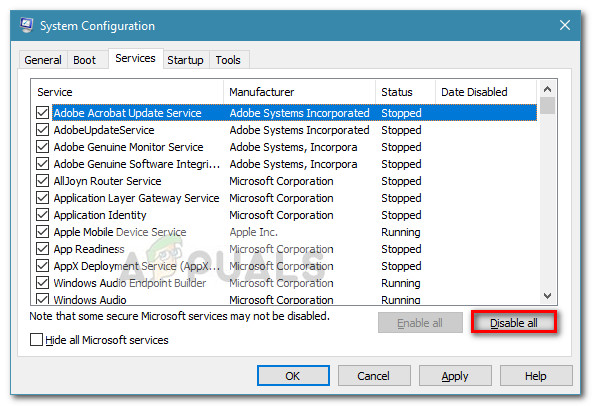
- Inside the System Configuration window, navigate to the Services tab and click the Disable all button. Then, hit Apply to save the changes.
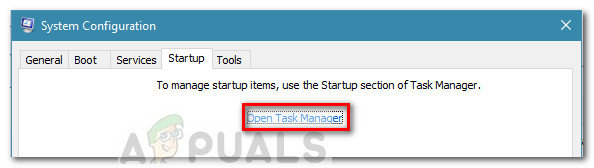
- Next, move to the Startup tab and click on the Open Task Manager.
- In the Startup tab of Task Manager, select each startup item that has the Status set to Enabled and click the Disable button below.

- Once every unnecessary startup process has been disabled, close Task Manager and restart your computer.
- At the next startup, see if the applications open without the “Java(TM) Platform SE binary has stopped working” error. If everything is working normally now, continue with the next steps below.
- Systematically re-enable each startup item and service by reverse-engineering the steps above until the issue resurfaces. Once you identify your culprit, uninstall the application and restart the machine again.
- Use steps 1 to 3 to return to the Services and Startup tabs and re-enable the rest of the services that were previously disabled.
Method 4: Modify the Windows Error Reporting File
Whenever a Windows application crashes, a WER file is created, which contains valuable information that can help you analyze why the crash happened. While software vendors have to sign up for Microsoft’s Winqual service to access the crash data from their customers, admins can access it by opening the .wer files, which are simple text files that Windows stores at different locations. In some cases, the problem description will help you to understand why an application crashed. However, it is often only the developer who will really understand the contents of the .wer file. But, you can’t go wrong having a look at these files before you decide whether you want to enable or disable Windows Error Reporting (if you are worried that confidential data will be sent to third parties). Furthermore, you can also send the files to the support service of your software or hardware vendor in the hope that they can figure out what went wrong.
In Windows 7, Windows Error Reporting files can be stored in a subfolder somewhere deep down in the ProgramData or User directory. The name of the subfolder is simply WER, and the file extension is .wer. You can use Windows Search or another desktop search tool to locate them all. However, the information in these .wer files can also be accessed through the Windows Action Center (Control PanelSystem and SecurityAction Center).
The Java(TM) Platform SE binary has stopped working error can be rectified by tweaking these Windows Error Reporting files and for doing so proceed to the steps indexed below to get rid of this issue:
- Locate the Windows Event Reporting log it is usually located in the following location.
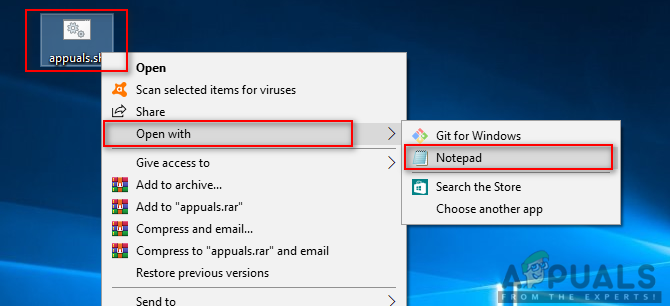
C:usersusernameAppDataLocalMicrosoftWindowsWERReportArchive. - Right-click on the “.WER” file and select “Open With”. After that, open it with “Wordpad” or “Notepad”.
Opening file with Notepad - Navigate to the end of the file to AppPath. It displays the location of the Java.exe file that caused the error. (For example – D:myappsubfolderocxjrebin).
- Navigate to this location and isolate the file that was listed to be the cause of the error.
- Right-click the java.exe file, and select Properties to open the properties for this application.
- Click the “Compatibility tab”, and select the “Change Settings for all Users” option if it is available.
- Clear the “Compatibility mode” checkboxes and select the “Run this program in compatibility mode for:” option and from the dropdown menu choose another version of Windows, preferably older than your current one.
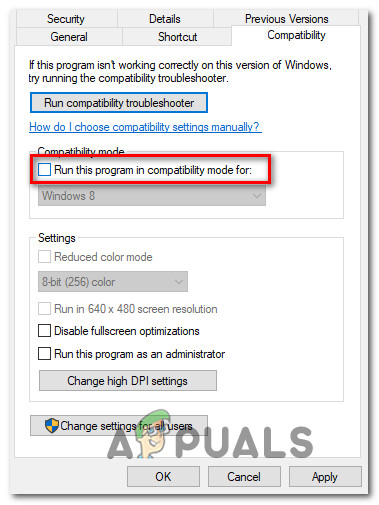
Running the program in compatibility mode - Click OK to close the JAVA Properties window.
- Log out from Web Interface or from the services site and log-on again.
- Try to launch the application that you were trying to launch beforehand and check to see if it works correctly.
Method 5: Launch Sessions with Java Web Start
If the solution stated above does not resolve the issue, users can work around the error by launching sessions with a system-installed version of Java Web Start rather than the Blackboard Collaborate Launcher application. Instructions to do so are listed below, but users are also encouraged to contact Collaborate support for further assistance.
Windows 7 / 8 Users:
- Press the “Windows” + “R” to open the Run prompt and paste the following command inside it, press “Enter” to execute it, and open the associate file.
control /name Microsoft.DefaultPrograms /page pageFileAssoc
Opening Run Prompt
Note: This will start the Associate a file type or protocol with a program.
- Select the entry for .collab from the list and click the Change program button.
- The “Open with” window will appear and from there you will see a listing for Java(TM) Web Start Launcher in this window, select it and click “OK”.
- Afterward, proceed to step number 7 and if there is no listing for Java(TM) Web Start Launcher in this window, proceed to step number 3.
- Click the “More Apps” link and scroll to the bottom of the list and click on the “Look for another app on this PC”.
- Navigate to the Java directory on your computer and remember that for most systems, this will be one of the following:
C:Program FilesJavajre1.8.0_111bin
C:Program Files (x86)Javajre1.8.0_111bin
*Note that the number following "jre" above will vary depending on your installed version of Java.
- Now, select the “.exe” file and click on the “Open” button
- Lastly, launch a Collaborate Web Conferencing session and test the application sharing feature and hopefully, the issue would’ve been resolved by now.
Windows 10 Users:
- Close any Collaborate session or recording windows.
- Press “Windows” + “R” to open the Run prompt.
- Type in “Control Panel” and press “Enter” to launch the classic control panel interface.
Accessing the Classic Control Panel interface - Inside the Windows Control Panel, click on the “Program and Features” option.
- Check the list of programs to ensure that “Java” is already installed on the system. If it isn’t installed, please download and install Java from java.com before proceeding.
- Download a new Collaborate meeting or recording file but don’t launch the file yet.
- Locate the meeting or recording “.COLLAB” file in your Downloads
- Right-click on the file and choose “Open with” then click “Choose another app”.
- If you see Java (TM) Web Start Launcher in this list (you may need to click More apps to expand the list), select it and check the box that says “Always use this app to open .collab files” then click the OK
- If Java (TM) Web Start Launcher is not in the list, check the box that says Always use this app to open .collab files then click Look for another app on this PC.
- Navigate to the following location:
C:program filesjavajreXXXbin
XXX represents a number that will vary based on the version of Java installed on the computer, for example: jre1.8.0_221.
- Select the file named “.exe” and click Open.
- Going forward, all “.COLLAB” files will open using Java Web Start rather than the Blackboard Collaborate Launcher
- Launch a Collaborate session or recording to test the application sharing functionality.
Method 6: Run System In Safe Mode
Some users have reported that they were able to fix this issue after re-starting their system in Safe Mode. They reported that the problem was caused by a monitor process that was corrupting installation files while the installation process was executed. The problem is in the monitoring tool called “Logitech Process Monitor” (lvprcsrv.exe). Please make sure that you are not running this or any other processes monitoring tool. Hence, running in safe mode will disable all of the processes that could interfere in the running of Java. Follow the steps stated below to run your system in a Safe Mode:
- Click the Start button and select the Power icon.
- Hold down the Shift key and click Restart.
- A menu will appear. Select Troubleshoot > Advanced Options > Startup Settings.
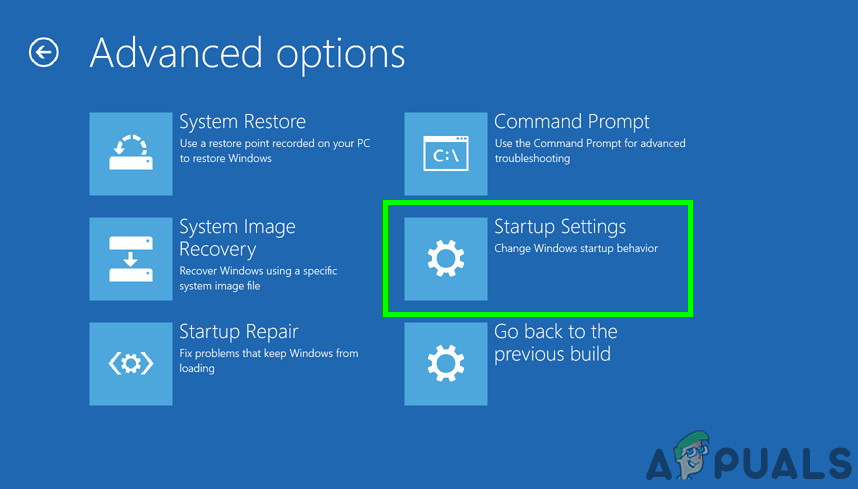
Startup Settings in Advanced Options - Click the Restart button and your computer will reboot, presenting you with the menu shown below.
- Now, press 4 to select Enable Safe Mode (or 5 to select Enable Safe Mode with Networking if you need to use the Internet).
- Your computer will then boot in safe mode.
To start in safe mode (Windows 7 and earlier):
- Turn on or restart your While it’s booting up, hold down the F8 key before the Windows logo appears.
- A menu will appear. You can then release the F8 key. Use the arrow keys to highlight Safe Mode(or Safe Mode with Networking if you need to use the Internet to solve your problem), then press Enter.

Selecting the “Safe Mode With Networking” option - Your computer will then boot in safe mode.
To start in safe mode on a Mac:
- Turn on or restart your computer. While it’s booting up, hold down the Shift key before the Apple logo appears. Once the logo appears, you can release the Shift key.
- Your computer will then boot in safe mode.
Method 7: Re-Install Minecraft
Most of the people fixed this issue by re-installing Minecraft on their respective systems because an incompatible version or any glitch of Minecraft can cause this error.
- Press “Windows” + “R” to open the Run prompt.
- Type in “appwiz.cpl” and press “Enter” to open the App Manager Window.

Type appwiz.cpl and Press Enter to Open Installed Programs List - Inside the app manager, scroll down and right-click on the “Minecraft” application.
- Select “Uninstall” from the list and then follow the on-screen instructions to remove the application from your computer.

Uninstalling Using Application Manager - Repeat the process above for any instance of the application.
- Afterward, to install the game, navigate here to download the game client. You can download the game client even if you don’t own the game, but you will only be able to play the demo mode. After downloading the client, double-click the icon to run it.
- Follow the on-screen instructions to fully install this application on your computer.
Please note that a Minecraft purchase is tied to your account (email address) and not a device. As such, you can download and install Minecraft: Java Edition on as many computers as you want. To log in, use your email address and password (or username and password if you have an older account). Please make sure that you are connected to the internet, as the game will automatically download additional files the first time. After you have installed Minecraft and stored your account credentials, it’s possible to play with or without an internet connection.
Method 8: Configure Environmental Variables
Many operating systems use environment variables to pass configuration information to applications. As properties in the Java platform, environment variables are key/value pairs, where both the key and the value are strings. After the latest Windows update, a glitch might arise that provokes the Java(TM) Platform SE binary has stopped working issue. Therefore, in this step, we will be resetting the Environmental Variables.
- Press “Windows” + “R” to open the Run prompt.
- Type in “Control Panel” and press “Enter” to open the classical control panel interface.
- In the control panel, click on the “View By:” option and select the “Large Icons” option from the list.

Viewing Control Panel using Large Icons - Click on the “System” option and select the “Advanced System Settings” from the list of available options in the next window.
- Select the “Advanced” tab from the top and then click on “Environment Variables” on the bottom of the screen.
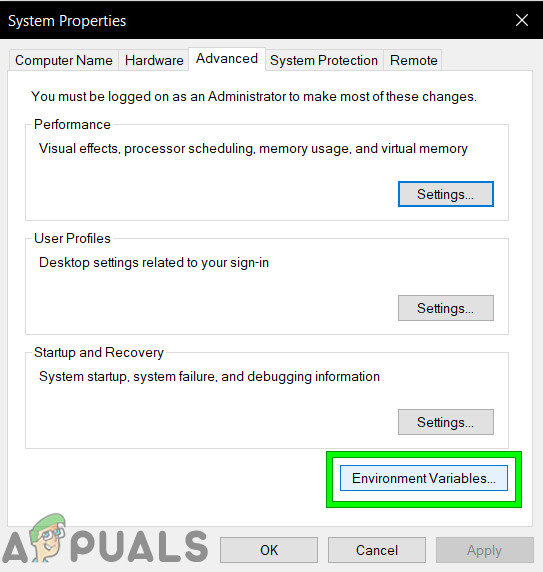
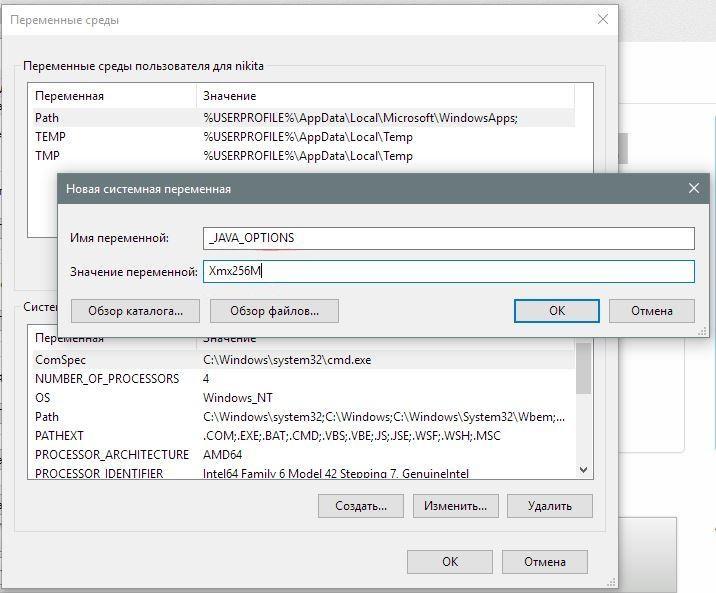
Click on Environmental Variables - Next, click the “New” button under “System variables” option to open the next window.
- Enter “_JAVA_OPTIONS” in the Variable name text box.
- Type “-Xmx256M” in the Variable value box.
- Save your changes and click on “OK” to exit the system variables window.
- After doing so, click on the “OK” button again to exit out of this window entirely.
- Now that the process is completed, check to see if the error message still persists.
Method 9: Remove Older Java Versions (Using Script)
Keeping old versions of Java on your system presents a serious security risk. Uninstalling older versions of Java from your system ensures that Java applications will run with the latest security and performance improvements on your system. Copy the code present below and save it as Remove_old_java_versions.ps1 at the {PackageShare}Scripts folder.
Note: This package checks for both 32-bit and 64-bit installed versions of Java, and silently uninstalls any old versions leaving behind only the newest and as this is just a simple Powershell script, it can also be run on its own. Keep one thing in mind that the script is a little slow as enumerating the WMI class Win32_Product takes a long time.
#This script is used to remove any old Java versions, and leave only the newest.

#Original author: mmcpherson

#Version 1.0 - created 2015-04-24

#Version 1.1 - updated 2015-05-20

#            - Now also detects and removes old Java non-update base versions (i.e. Java versions without Update #)

#            - Now also removes Java 6 and below, plus added ability to manually change this behaviour.

#            - Added uninstall default behaviour to never reboot (now uses msiexec.exe for uninstall)

#Version 1.2 - updated 2015-07-28

#            - Bug fixes: null array and op_addition errors.

# IMPORTANT NOTE: If you would like Java versions 6 and below to remain, please edit the next line and replace $true with $false

$UninstallJava6andBelow = $true

#Declare version arrays

$32bitJava = @()

$64bitJava = @()

$32bitVersions = @()

$64bitVersions = @()
#Perform WMI query to find installed Java Updates

if ($UninstallJava6andBelow) {

    $32bitJava += Get-WmiObject -Class Win32_Product | Where-Object {

        $_.Name -match "(?i)Java((TM))*sd+(sUpdatesd+)*$"

    }

    #Also find Java version 5, but handled slightly different as CPU bit is only distinguishable by the GUID

    $32bitJava += Get-WmiObject -Class Win32_Product | Where-Object {

        ($_.Name -match "(?i)J2SEsRuntimesEnvironmentsd[.]d(sUpdatesd+)*$") -and ($_.IdentifyingNumber -match "^{32")

    }

} else {

    $32bitJava += Get-WmiObject -Class Win32_Product | Where-Object {

        $_.Name -match "(?i)Java(((TM) 7)|(sd+))(sUpdatesd+)*$"

    }

}
#Perform WMI query to find installed Java Updates (64-bit)

if ($UninstallJava6andBelow) {

    $64bitJava += Get-WmiObject -Class Win32_Product | Where-Object {

        $_.Name -match "(?i)Java((TM))*sd+(sUpdatesd+)*s[(]64-bit[)]$"

    }

    #Also find Java version 5, but handled slightly different as CPU bit is only distinguishable by the GUID

    $64bitJava += Get-WmiObject -Class Win32_Product | Where-Object {

        ($_.Name -match "(?i)J2SEsRuntimesEnvironmentsd[.]d(sUpdatesd+)*$") -and ($_.IdentifyingNumber -match "^{64")

    }

} else {

    $64bitJava += Get-WmiObject -Class Win32_Product | Where-Object {

        $_.Name -match "(?i)Java(((TM) 7)|(sd+))(sUpdatesd+)*s[(]64-bit[)]$"

    }

}
#Enumerate and populate array of versions

Foreach ($app in $32bitJava) {

    if ($app -ne $null) { $32bitVersions += $app.Version }

}

#Enumerate and populate array of versions

Foreach ($app in $64bitJava) {

    if ($app -ne $null) { $64bitVersions += $app.Version }

}

#Create an array that is sorted correctly by the actual Version (as a System.Version object) rather than by value.

$sorted32bitVersions = $32bitVersions | %{ New-Object System.Version ($_) } | sort

$sorted64bitVersions = $64bitVersions | %{ New-Object System.Version ($_) } | sort

#If a single result is returned, convert the result into a single value array so we don't run in to trouble calling .GetUpperBound later

if($sorted32bitVersions -isnot [system.array]) { $sorted32bitVersions = @($sorted32bitVersions)}

if($sorted64bitVersions -isnot [system.array]) { $sorted64bitVersions = @($sorted64bitVersions)}

#Grab the value of the newest version from the array, first converting

$newest32bitVersion = $sorted32bitVersions[$sorted32bitVersions.GetUpperBound(0)]

$newest64bitVersion = $sorted64bitVersions[$sorted64bitVersions.GetUpperBound(0)]


Foreach ($app in $32bitJava) {

    if ($app -ne $null)

    {

        # Remove all versions of Java, where the version does not match the newest version.

        if (($app.Version -ne $newest32bitVersion) -and ($newest32bitVersion -ne $null)) {

           $appGUID = $app.Properties["IdentifyingNumber"].Value.ToString()

           Start-Process -FilePath "msiexec.exe" -ArgumentList "/qn /norestart /x $($appGUID)" -Wait -Passthru

           #write-host "Uninstalling 32-bit version: " $app

        }

    }

}

Foreach ($app in $64bitJava) {

    if ($app -ne $null)

    {

        # Remove all versions of Java, where the version does not match the newest version.

        if (($app.Version -ne $newest64bitVersion) -and ($newest64bitVersion -ne $null)) {

        $appGUID = $app.Properties["IdentifyingNumber"].Value.ToString()

           Start-Process -FilePath "msiexec.exe" -ArgumentList "/qn /norestart /x $($appGUID)" -Wait -Passthru

           #write-host "Uninstalling 64-bit version: " $app

        }

    }

}
Method 10: Clear Java Cache
One of the things that can cause this error is the Java cache that stays on your computer even after you removed and reinstalled the software. The first thing we would recommend would be to delete these temporary files via your Java Control Panel which you can get to by following the steps stated below:
Find the Java Control Panel – Java 7 Update 40 (7u40) and later versions:
Starting with Java 7 Update 40, you can find the Java Control Panel through the Windows Start menu.
- Launch the Windows Start menu
- Click on Programs(All Apps on Windows 10)
- Find the Java program listing
- Click Configure Java to launch the Java Control Panel
Find the Java Control Panel – Versions below 7u40:
Windows 10:
- Press “Windows” + “R” to open the Run prompt and type in “Control Panel”.
- In the Windows Control Panel, click on Programs.
- Click on the Java icon to open the Java Control Panel.
Windows 8:
- Press “Windows” + “R” to open the Run prompt and type in “Control Panel”.
- Press Windows logo key + W to open the Search charm to search settings
OR
Drag the Mouse pointer to the bottom-right corner of the screen, then click on the Search - In the search box enter Java Control Panel
- Click on the Java icon to open the Java Control Panel.
Windows 7, Vista:
- Press Windows + R to open the Run prompt.
- Type in “Control Panel” in the run prompt and press “Enter” to launch it.
Accessing the Classic Control Panel interface - In the Control Panel, search for “Java Control Panel”
- Launch the control panel from the list of searches.
An alternate method of launching the Java Control Panel:
- Press “Windows” + “R” to open the Run prompt.
Opening Run Prompt - Type in the following lines in the Run prompt depending upon your system.
Windows 32-bit OS: c:Program FilesJavajre7binjavacpl.exe
Windows 64-bit OS: c:Program Files (x86)Javajre7binjavacpl.exe
- This should launch the Java Control Panel.
Clear Cache:
Now that you have launched the Java Control Panel, we will be moving on towards actually clearing the Cache. For that:
- Click on the “General” tab and then select the “Settings” option under the “Temporary Internet Files” heading.
- Click on the “Delete Files” button in the next window that appears.
- Check all the options in the next window to make sure that all the cache gets cleared.
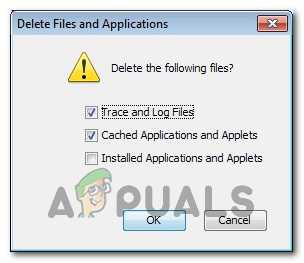
Checking all Options - Click on “OK” to start the clearing process.
by Matthew Adams
Matthew is a freelancer who has produced a variety of articles on various topics related to technology. His main focus is the Windows OS and all the things… read more
Updated on January 19, 2022
- Users can’t open Java programs when the Java(TM) Platform SE binary error arises.
- Updating graphics card drivers is one of the confirmed fixes for this issue.
- Check out our thorough Software section for more useful guides, tips, and tricks on this topic.
- You can find many more software-troubleshooting articles at our Fix Hub.

There are lots of Java-based software for Windows. The Java(TM) Platform SE binary error is one that arises for some users when they try to open Java-based programs. When that error arises, users can’t open Java-based programs. The full error message states:
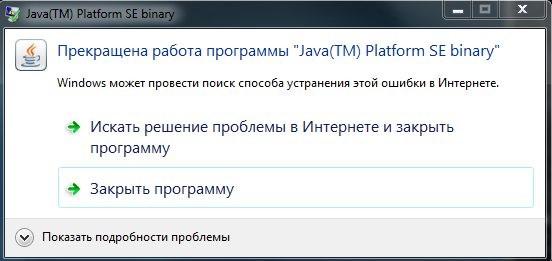
Java(TM) Platform SE binary has stopped working. A problem caused the program to stop working correctly. Windows will close the program and notify you if a solution is available.
Scroll down to explore the most efficient solutions to this annoying issue.
How can I fix the Java(TM) Platform SE binary error?
1. Update your graphics card driver
The Java(TM) Platform SE binary error can often appear due to the Java Environment conflicting with outmoded graphics card drivers.
We recommend that you use a specialized driver updater to solve this problem easily. It is a very powerful but easy-to-use software that ensures that your drivers will always be updated to the latest version available.
The best part about using dedicated software to update all your drivers is the fact that the process only requires you to click the mouse a couple of times.
The software will start scanning your system as soon as you open it. If its scan lists your graphics adapter, select the checkbox for it, and update it without hassle.
2. Reinstall Java
- Press the Windows key + R keyboard shortcut to open the Run dialog.
- Type appwiz.cpl in Run’s text box. Then click OK to open the uninstaller for Windows.

- Next, type Java in the search box.
- Select it and click Uninstall.
- Restart Windows after you’ve uninstalled all listed Java entries in Programs and Features.
- Click the Java Download button on the Java website to save the installer for the latest version.
- Open the Java setup window to install Java Environment.
- Restart Windows after installing Java.
3. Configure environment variables
- Open the Windows search utility with the Windows key + S keyboard shortcut.
- Input system info in your search box.
- Click System to open the window in the shot directly below.

- Click Advanced system settings to open a System Properties window.
- Click Environment Variables on the System Properties window’s Advanced tab.

- Next, click the New button under System variables to open the window shown directly below.

- Enter _JAVA_OPTIONS in the Variable name text box.
- Type -Xmx256M in the Variable value box.
- Click OK to close the New System Variable window.
- Press the OK button on the Environment Variables window.
4. Clean boot Windows
- Open the Run window.
- Enter msconfig in Run’s Open box and click OK to open MSConfig.

- First, click the Selective startup radio button.
- Uncheck the selected Load startup items option.
- Select both Load system services and Use original boot configuration checkboxes.
- Select the Hide all Microsoft services option on the Services tab.

- Click Disable all to stop the third-party services listed.
- Press the Apply button.
- Click OK to close the window.
- Click Restart on the dialog box that opens.
- Then try running Java software the error arises for after the restart.
Those are some of the most widely confirmed fixes for the Java(TM) Platform SE binary error. That doesn’t mean they’re entirely guaranteed resolutions for everyone, but they’ll probably fix the issue for most users.
![]()
Игроки в Minecraft и некоторые другие компьютерные игры могут столкнуться с ошибкой «Прекращена работа Java TM Platform SE binary», из-за которой игра не запускается. Сбой появляется периодически или постоянно, но всегда доставляет неудобства геймерам. В чем же причина появления данной ошибки?
Причины ошибки «Прекращена работа Java TM Platform SE binary»
Чаще всего с этой ошибкой сталкиваются игроки в Майнкрафт. Она появляется при запуске игры при помощи лаунчера или произвольно в процессе игры, приводя к вылету. Причины обычно в битых драйверах, совместимости разрядности Java и Windows, конфликте видеокарт или установке непроверенных модов. В редких случаях ошибка проявляется при сбивании графических настроек в игре.
Вообще Java в операционной системе Windows представляет собой плагин, обеспечивающий работу приложений и скриптов в браузере, написанных на данном языке программирования.
Давайте разберемся, что нужно сделать, чтобы избавиться от этой ошибки…
Проверка совместимости
После появления ошибки «Прекращена работа Java TM Platform SE binary» при запуске Майнкрафта или других игр и приложений для начала проверьте наличие расширения Java на компьютере. Обычно плагин устанавливается вместе с Windows, поэтому какая-нибудь версия обязательно должна быть установлена. В противном случае, нужно скачать плагин с официального сайта Java и установить.
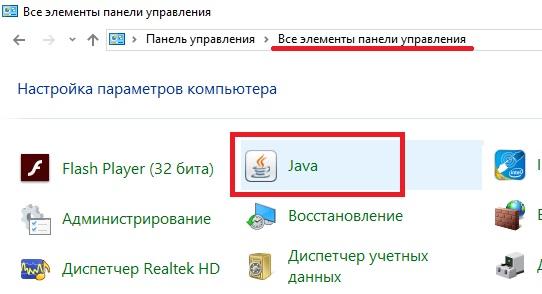
Также рекомендуем узнать разрядность плагина Java на ПК и сравнить ее с разрядностью Windows. Сделать это можно, открыв «Панель управления» и выбрав «Все элементы панели управления». Найдите в списке Java и:
- если рядом не будет никаких приписок, у вас версия плагина с разрядностью х64;
- если в скобках есть отметка «32 бита», в системе установлен плагин с разрядностью х32.

Также перейдите из «Панели управления» в «Систему» и посмотрите разрядность операционной системы.
Автор считает, что эти материалы могут вам помочь:
Ошибка «Прекращена работа Java TM Platform SE binary» из-за видеокарты
Графический движок игры – еще одна причина появления ошибки. Избавиться от нее можно при помощи правильных настроек. Перейдите в раздел «Система» через «Панель управления» и откройте «Дополнительные параметры системы». Из вкладки «Дополнительно» перейдите в «Переменные среды» и под нижним полем нажмите кнопку «Создать». Имя переменной должно быть «_JAVA_OPTIONS» (без кавычек), а значение «Xmx256M» (тоже без кавычек).
Запустите лаунчер игры и перейдите в Настройки видео. Переведите в положение Off переключатели следующих настроек:
- VSync;
- VBos;
- Smooth Lighting.
Дополнительно нужно переключить графику на Fancy. Найдите значение FOV и измените его на Normal (70). После этих манипуляций попробуйте запустить игру – ошибка должна исчезнуть.
Дополнительные рекомендации
Есть еще пара хитростей, помогающих быстро убрать ошибку «Прекращена работа Java TM Platform SE binary» в Minecraft. Попробуйте обновить драйверы видеокарты, скачав их с официального сайта AMD или nVidia, в зависимости от типа платы – AMD или Nvidia соответственно.
Иногда причиной ошибки становится конфликт со встроенной видеокартой на ПК. Попробуйте отключить ее и перезагрузить компьютер. Сделать это можно в «Диспетчере устройств», нажав правой кнопкой по интегрированной видеокарте и выбрав в меню пункт «Отключить».
Каждый раз, когда вы делитесь этой статьей в социальной сети, ее автор становится немного счастливее! Пожалуйста нажмите на одну из кнопок выше!
Attention Before you read this post, I highly recommend you check out my resources page for access to the tools and services I use to not only maintain my system but also fix all my computer errors, by clicking here!
This particular problem usually arises when users launch a Java-based game. For example, when playing Minecraft, a lot of users have been receiving the dialog, “Java Platform SE binary has stopped working.” When this happens, the application becomes unresponsive, and clicking the “close program” button will usually close the application window with little to no resistance from the application itself.

Below is a detailed example of the error:
“Java(TM) Platform SE binary has stopped working”
Problem signature:
Problem Event Name: BEX
Application Name: jxpiinstall.exe
Application Version: 6.0.250.6
Application Timestamp: 4da70acd
Fault Module Name: StackHash_f431
Fault Module Version: 0.0.0.0
Fault Module Timestamp: 00000000
Exception Offset: 002d75a8
Exception Code: c0000005
Exception Data: 00000008
OS Version: 6.1.7601.2.1.0.768.3
Locale ID: 1033
Additional Information 1: f431
Additional Information 2: f431682ce05f4d70f55d03cf5819bc75
Additional Information 3: 7dd0
Additional Information 4: 7dd0eb487f6a81a743be9f9a34b49f0c
This specific problem is related to the program being used by the game (Oracle’s Java), and has nothing to do with a user’s hardware (even if they are low-spec enough to run the game) or operating system.
Oracle has many known errors including stack trace, which, most of the time, is an error related to the ten or so lines of so-called stack trace of method invocation. Another Oracle-related error that can be commonly associated with games is Java Native Library (JNI) Errors, which happens when the program uses a native library from a 3rd-party API like JOGL, which cannot be found in the native library search paths. A Java Native Library has several non-Java library codes in file type of .dll in Windows, and .so in Linux.
Java was originally designed to have as few implementation dependencies as possible. As such, it was intended to let developers “WORA” or Write Once, Run Anywhere, meaning that software compiled with java code can run on all platforms that support Java without the need to be tweaked. Because of this very reason, developers are mainly using Java to create games that can run on both land-based gaming establishments systems and online.
One of the most prominent gaming developers that uses Java on all of its digital content is Gaming Realms, which holds the proprietary rights to the Slingo casino platform. The company has several independent projects for Java developers, which was mentioned on Stack Overflow, including the support for cross-platform development and working on the development of new JavaScript based webGL games. But despite the expertise and experience of Gaming Realms in developing web applications that support Java, the programming language continues to evolve with complications thanks to 3rd-party software, particularly companies that offer Java updates as well as graphics card program upgrades.
Reinstall Java
If you see the “Java Platform SE binary has stopped working” notification, try reinstalling Java. If you’re going to install Java on RPM-based Linux programs such as red Hat and SuSE, don’t forget to use an RPM binary file (.rpm) in the system location. You must be in root to perform this installation.
Update or Rollback your Driver
However, if this doesn’t fix the problem, you need to check whether or not the issue is coming from your video card.
In some cases, the problem can be traced back to a video card’s driver that results in Java crashing. If so, the solution is to either perform an update on your driver (if there’s a newer version) or perform a rollback.
If you’re running Windows, here’s how you can rollback your driver:
Windows XP:
– Click Start
– Click Control Panel
– Click Performance and Maintenance. Under that, choose System
– Select the Hardware Tab
– Click Device Manager
– Select Display Adapters
– Select your Graphics Card
– Select the Driver Tab
– Click on Roll Back Driver
Windows Vista, 7, or higher:
– Click Start
– Click Control Panel
– Windows Vista: Click System and Maintenance and then System
– Windows 7: Click System and then Security
– Click Device Manager
– Select Display Adapters
– Select your Graphics Card
– Select the Driver Tab
– Select Roll Back Driver
If you need to roll back your driver on Linux, here’s what you should do:
– Open the text-only console by pressing Ctrl + Alt + F1
– At the login, input your Username and Password
– Now that you are logged in to the text-only console, you can access the terminal commands
– First, remove the driver
– Below is an example if you have an Nvidia driver:
– sudo apt-get purge nvidia*
You need to reboot the system after doing this. To reboot it, run the command “sudo reboot.” After you reboot it, Ubuntu will be reverting back to using the Nouveau display driver, which is an open source software. Use the keyboard shortcut Ctrl + Alt + F7 to exit the console without rebooting your PC.
Ubuntu has an internal driver utility that helps users choose between the correct drivers for the graphics card. You can always revert back to this whenever a 3rd-party graphics card like Nvidia doesn’t work, not only in this case when you need to rollback the driver because the SE Binary has stopped working.
Unfortunately, there’s no way to rollback a video card’s driver if you’re using a Mac.
Issue with MPLAB 3.51
If a Java reinstallation or driver update/rollback doesn’t solve the issue, the application you’re trying to run may be using MPLAB 3.51. Take note that MPLAB 3.51 comes with Java 8. Therefore, you need to perform some manual configuration. Here’s what needs to be done:
Changes on Mplab_ide.conf in C:Program Files (x86)MicrochipMPLABXv3.51mplab_ideetc
In the default_options below: -J-Xmx1024m was -J-Xmx4079.
default_options=”-J-Dcrownking.stream.verbosity=very-quiet -J-Xss2m -J-Xms256m -J-Xmx1024m -J-Dapple.awt.graphics.UseQuartz=true -J-XX:+CMSClassUnloadingEnabled -J-Dapt.limit.expanded.params=1000 -J-Dplugin.manager.check.interval=EVERY_STARTUP -J-Dsun.java2d.noddraw=true -J-Dorg.netbeans.modules.extbrowser.UseDesktopBrowse=true”
# jdkhome=”C:Program Files (x86)MicrochipMPLABXv3.51sysjavajre1.8.0_91”
jdkhome=”C:Program Files (x86)MicrochipMPLABXv3.51sysjavajre1.8.0_121”
Finally, copy Java into a folder jre1.8.0_121
From C:Program Files (x86)MicrochipMPLABXv3.51sysjava
To C:Program Files (x86)MicrochipMPLABXv3.51sysjava
Take note that the fix also works without copying the Java directory. The file mplab_ide.conf points to Java 8…121 directory in the standard Java location, and not the MPLAB Java installation location. The first method, which is copying the Java directory, is a better solution because that way, you can update Java on your computer without having to amend the mplab_ide.conf file.
With these fixes, hopefully, you can prevent the “Java Platform SE binary has stopped working” notification from appearing again.
Are you looking for a way to repair all the errors on your computer?

If the answer is Yes, then I highly recommend you check out Advanced System Repair Pro.
Which is the leading registry cleaner program online that is able to cure your system from a number of different ailments such as Windows Installer Errors, Runtime Errors, Malicious Software, Spyware, System Freezing, Active Malware, Blue Screen of Death Errors, Rundll Errors, Slow Erratic Computer Performance, ActiveX Errors and much more. Click here to check it out NOW!
Updated June 2023: Stop these error messages and fix common problems with this tool. Get it now at this link
- Download and install the software.
- It will scan your computer for problems.
- The tool will then fix the issues that were found.

The “Java Platform SE Binary has stopped working” is not an exclusive Windows 10 problem, many Windows 8 users have also reported this problem. What can you do if you encounter this problem? Try these methods provided by IR Cache.
The problem is always accompanied by an error message stating that “the Java Platform SE binary has stopped working”. The problem has caused the program to stop working properly. Windows will close the program and let you know when a solution is available.
This usually happens when you try to open some Java applications and the program you are trying to run stops responding, which you can stop by clicking the “Close Program” button.
If you are looking for a solution to this problem, you have come to the right place. Read the following and you will be able to fix it.
What is the cause of the “Java SE platform binary has stopped working” problem?

In most cases, the problem is caused by a conflict between the video card driver and the Java environment. However, this behavior does not happen with all Java-based applications – only a few programs are reported to end with the “Java(TM) Platform SE Binary has stopped working” error. Minecraft is by far the most common application with this error message.
The most common scenario for the “Java(TM) Platform SE binary has stopped working” error is a conflict between the Java environment and your graphics card driver.
Since most of the graphics driver problems causing this problem have been fixed by the GPU manufacturers, you can probably solve the problem by simply updating the drivers for your particular GPU to the latest version.
Some users report that the problem is caused by a monitoring process that corrupts the installation files during the installation process. The problem is with a monitoring tool called Logitech Process Monitor (lvprcsrv.exe).
One of the causes of this error is the Java cache, which remains on your computer even after uninstalling and reinstalling the software. If you encounter the same problem, you can find some troubleshooting strategies in this article by IR Cache.
Here are some methods that other users have used in a similar situation to fix the “Java(TM) Platform SE binary has stopped working” error. Please follow the troubleshooting guides below in order until you find a repair strategy that fixes the error.
Updated: June 2023
This tool is highly recommended to help you fix your error. Plus, this tool offers protection against file loss, malware, and hardware failures, and optimizes your device for maximum performance. If you already have a problem with your computer, this software can help you fix it and prevent other problems from recurring:
- Step 1 : Install the PC Repair and Optimizer Tool. (Windows 10, 8, 7, XP, Vista).
- Step 2 : Click Start Scan to determine what problems you are experiencing with your computer.
- Step 3 : Click Repair Allto resolve all problems.


Restart Windows
- Open the Run window.
- Type MSConfig in the Open from Run field and click OK to open MSConfig.
- First, click the Selective Run radio button.
- Uncheck Load startup objects.
- Check both Load System Services and Use Original Boot Configuration.
- On the Services tab, select Hide all Microsoft services.
- Click Disable All to stop the listed third-party services.
- Click Apply.
- Click OK to close the window.
- In the dialog box that opens, click Restart.
- Then try to start the Java program in which the error occurred after restarting.
Reinstall Java
- Press the Windows + R key combination to open the Run dialog box.
- Type Appwiz.CPL in the Run text box. Then click OK to open the uninstaller for Windows.
- Then type Java in the search box.
- Select it, and then click Uninstall.
- Restart Windows after uninstalling all Java entries listed under Programs and Features.
- Click the Java download button on the Java website to register the latest installer version.
- Open the Java Setup window to install the Java environment.
- Restart Windows after Java is installed.
Setting Environment Variables
- Open Windows search utility with Windows keyboard shortcut + S.
- Type system info in the search box.
- Click on System to open the window shown in the figure below.
- Click on Advanced System Settings to open the system properties window.
- On the Advanced tab of the System Properties window, click on Environment Variables.
- Then click New under System Variables to open the window shown below.
- Enter _JAVA_OPTIONS in the Variable Name text box.
- Enter -Xmx256M in the Variable Value text box.
- Click OK to close the New System Variable window.
- Click OK in the Environment Variables window.
APPROVED: To fix Windows errors, click here.
Frequently Asked Questions
In many cases, it may be due to a graphics driver problem that causes the Java application to fail on a Windows computer. To solve this problem, check the graphics driver installed on your system and update it accordingly.
If the «Java Platform SE binary stops working» problem recurs, it is possible that your video card driver is outdated or corrupt, and there is a conflict between the Java environment and the driver. You should update your video card driver and then see if the problem goes away.
The Java Platform on the PC allows you to run Java applications, websites, and games that need to run in a virtual Java environment, so Java takes up part of the CPU. If you remove it, Java-based websites, applications, and games will not work properly, which is not recommended.
You need to right-click on the JAR file and select Open With from the context menu. Click Select another application, and then select Open with Java(TM) Platform SE Binary. Select the Always to use this application to open the JAR files check box. Click the OK button to close the menu.
Post Views: 1,233