
Ошибка error occurred during initialization of vm (ошибка при инициализации виртуальной машины) связана с Java. А именно виртуальной машине не хватает выделяемой памяти. Эта проблема чаще всего возникает в среде разработки Eclipse и в играх на java, таких как minecraft, lineage 2 и т.п. Итак, как исправить эту проблему:
Необходимо увеличить объем памяти для ВМ. Для этого перейдите в настройки: Панель управления — Java Control panel. Вкладка Java и нажмите кнопку View. В появшемся окне, вкладке use нам нужна ячейка runtime parameters. В эту ячейку необходимо вписать сколько выделить памяти.
Если у вас 32-bit система, укажите
-Xincgc -Xmx768M
Больший объем указывать смысла нет.
Если у вас 64-bit система, введите
-Xms2G -Xmx4G

Такой параметр означает, что будет выделено от 2 до 4 гигобайт памяти. Внимание! Не устанавливайте весь объем памяти, что у вас есть на компьютере. Оставьте примерно 35% для нужд системы.
Как увеличить объем памяти для игр?
В параметрах игры найдите параметр JVM Arguments. В Minecraft это выглядит так:

В это поле так же необхоимо вписать значение выделяемой памяти.
Запуск игр и программ, использующих Java, может окончиться неудачей — выдачей уведомления с ошибкой error occurred during initialization of vm. Причина — недостаточный объем памяти для виртуальной Java-машины.
Решение ошибки
Для увеличения этого объема выполняйте следующее:
- откройте Java Control Panel;
- перейдите в раздел Java и нажмите на View;
- измените значение в столбце Runtime Parameters;
- для 32-х битных ОС введите значение -Xincgc -Xmx1G;
- для 64-х битных ОС введите -Xms1G -Xmx4G.
Таким образом вы установите новые объемы памяти, выделяемой для нужд Java. Иногда еще нужно указать аналогичные объемы и в настройках приложения, запуск которого помрачается ошибкой error occurred during initialization of vm.
Sometimes, this error indicates that physical memory and swap on the server actually are fully utilized!
I was seeing this problem recently on a server running RedHat Enterprise Linux 5.7 with 48 GB of RAM. I found that even just running
java -version
caused the same error, which established that the problem was not specific to my application.
Running
cat /proc/meminfo
reported that MemFree and SwapFree were both well under 1% of the MemTotal and SwapTotal values, respectively:
MemTotal:     49300620 kB
MemFree:        146376 kB
...
SwapTotal:     4192956 kB
SwapFree:         1364 kB
Stopping a few other running applications on the machine brought the free memory figures up somewhat:
MemTotal:     49300620 kB
MemFree:       2908664 kB
...
SwapTotal:     4192956 kB
SwapFree:      1016052 kB
At this point, a new instance of Java would start up okay, and I was able to run my application.
(Obviously, for me, this was just a temporary solution; I still have an outstanding task to do a more thorough examination of the processes running on that machine to see if there’s something that can be done to reduce the nominal memory utilization levels, without having to resort to stopping applications.)
Перейти к контенту
Ошибка error occurred during initialization of vm (ошибка при инициализации виртуальной машины) связана с Java. А именно виртуальной машине не хватает выделяемой памяти. Эта проблема чаще всего возникает в среде разработки Eclipse и в играх на java, таких как minecraft, lineage 2 и т.п. Итак, как исправить эту проблему:
Необходимо увеличить объем памяти для ВМ. Для этого перейдите в настройки: Панель управления — Java Control panel. Вкладка Java и нажмите кнопку View. В появшемся окне, вкладке use нам нужна ячейка runtime parameters. В эту ячейку необходимо вписать сколько выделить памяти.
Если у вас 32-bit система, укажите
-Xincgc -Xmx768M
Больший объем указывать смысла нет.
Если у вас 64-bit система, введите
-Xms2G -Xmx4G
Такой параметр означает, что будет выделено от 2 до 4 гигобайт памяти. Внимание! Не устанавливайте весь объем памяти, что у вас есть на компьютере. Оставьте примерно 35% для нужд системы.
Как увеличить объем памяти для игр?
В параметрах игры найдите параметр JVM Arguments. В Minecraft это выглядит так:
В это поле так же необхоимо вписать значение выделяемой памяти.
Was trying to install a module using maven in IntelliJ IDEA. It threw the following error on doing so
Error occurred during initialization of VM
Could not reserve enough space for object heap
Could not create the Java virtual machine.
[INFO] ------------------------------------------------------------------------
[ERROR] BUILD FAILURE
[INFO] ------------------------------------------------------------------------
[INFO] There are test failures.
My questions are:
- Is this due to the VM size settings in idea/bin/vmoptions file? Will increasing it make any difference?
- If so, how do I do it? Since I don’t have the necessary privileges to edit the file, is there an other option to change it from IntelliJ rather than editing the file?
- If not possible will it be really worth requesting for admin priv for changing it?
Edit: Current vmoptions file contents (using Intellij IDEA 8.1.4 )
-Xms32m
-Xmx256m
-XX:MaxPermSize=150m
-ea
Kara
6,06516 gold badges51 silver badges57 bronze badges
asked Nov 4, 2012 at 15:41
7
There are two sides to this.
-
If you’re using a 32-bit JVM and have 4GB or more memory, then you may be running into an issue with non-contiguous Java memory. The solution there would be to switch over to a 64-bit JVM.
-
If you’re using a 64-bit JVM already, then increase the amount of memory you use when running your application. Here are some numbers:
-Xms128m
-Xmx512m
-XX:MaxPermSize=300m
-ea
answered Nov 4, 2012 at 17:34
MakotoMakoto
103k27 gold badges188 silver badges224 bronze badges
2
There are two files in the Intellij installation directory idea.exe.vmoptions and idea64.exe.vmoptions.
I was changing the wrong file for a while to increase the memory and could not get it to work.
Open the appropriate file and increase the memory as mentioned in the previous answer to solve this problem.
answered Jun 9, 2015 at 21:59
An IllusionAn Illusion
7691 gold badge10 silver badges23 bronze badges
First of all, I have a box with 8gb of ram, so I doubt total memory is the issue.
This application is running fine on machines with 6gb or less.
I am trying to reserve 3GB of space using -Xmx3G under «VM Arguments» in Run Configurations in Eclipse.
Every time I try to reserve more than 1500mb, I get this error:
“Error occurred during initialization of VM; Could not reserve enough space for object heap” using -Xmx3G
What is going on here?
asked Feb 16, 2012 at 0:37
4
Could it be that you’re using a 32-bit jvm on that machine?
answered Feb 16, 2012 at 0:46
LaurentLaurent
9305 silver badges9 bronze badges
8
Here is how to fix it:
Go to Start->Control Panel->System->Advanced(tab)->Environment Variables->System
Variables->New:
Variable name: _JAVA_OPTIONS
Variable value: -Xmx512M

Variable name: Path
Variable value: ;C:Program FilesJavajre6bin;F:JDKbin;
Change this to your appropriate path.
Adnan
2,9113 gold badges22 silver badges35 bronze badges
answered May 7, 2015 at 1:07
![]()
Mohamed AdelMohamed Adel
1,97016 silver badges23 bronze badges
2
This is actually not an Eclipse-specific issue; it’s a general
Java-on-Windows issue. It’s because of how the JVM allocates memory on
Windows; it insists on allocating a contiguous chunk of memory, which
often Windows can’t provide, even if there are enough separate chunks to
satisfy the allocation request.
There are utilities that will try to help Windows «defrag» its memory,
which would, in theory, help this situation; but I’ve not really tried
them in earnest so can’t speak to their effectiveness.
One thing that I’ve heard sometimes that might help is to reboot Windows
and, before starting any other apps, launch the Java app that needs the
big chunk of memory. If you’re lucky, Windows won’t have fragmented its
memory space yet and Java will get the contiguous block that is asks for.
Somewhere out on the interwebs there are more technical explanations and
analyses of this issue, but I don’t have any references handy.
I did find this, though, which looks helpful: https://stackoverflow.com/a/497757/639520
answered Feb 16, 2012 at 1:32
![]()
E-RizE-Riz
30.7k9 gold badges92 silver badges132 bronze badges
1
First the JRE of 32bits can’t use more ~1.5Gb of ram. So if you want more, use a 64bits JRE.
Second, When a new JVM starts, this sum the -Xmx property of the all JVM that are running, and check if there is enough memory left on the system to run at their own -Xmx, if is not enough then the error occurs.
answered Jun 26, 2012 at 5:56
![]()
Daniel De LeónDaniel De León
12.9k5 gold badges85 silver badges72 bronze badges
I was using Liferay with Tomcat server from eclipse IDE.
I was stuck with this same error on click on server start up.
Double click on server from eclipse.
it open up Server Overview page. Updated memory arguments from -Xmx1024m -XX:MaxPermSize=256m to -Xmx512m -XX:MaxPermSize=256m.
Then it was working for me.
answered Dec 24, 2013 at 10:35
PrathapPrathap
1711 silver badge3 bronze badges
1
Make sure that Eclipse is actually running the same JVM you think it’s running. If you use java in your web browser ever, you likely have a 32-bit version floating around too that might be taking precedence if it installed or updated lately.
To be absolutely sure, I recommend adding these two lines to your eclipse.ini file at the top:
-vm
C:/Java/jdk1.6.0_27/bin
…where on my machine C:/Java/jdk1.6.0_27/bin where the JVM I know is 64-bit is located. Be sure to have the bin folder there.
(As a bonus, on Windows 7, this also allows you to actually «pin the tab» which is why I had to do this for my own usage)
answered Feb 16, 2012 at 2:11
Adam RoferAdam Rofer
5,8211 gold badge14 silver badges11 bronze badges
5
This is the issue of Heap size. Edit your .bat (Batch file). It might be showing Heap size 1024. Change it to 512 Then it should work.
answered Oct 12, 2012 at 9:10
Just put # symbol in front of org.gradle.jvmargs=-Xmx1536m in gradle.properties
# org.gradle.jvmargs=-Xmx1536m
lczapski
3,9163 gold badges14 silver badges31 bronze badges
answered Nov 25, 2019 at 14:57
1
I also had the same problem while using Eclipse which was 32 bit and the JVM used by it was 64 bit.
When I routed the Eclipse to 32 bit JVM then it worked
answered Aug 11, 2014 at 16:09
![]()
AKsAKs
1,67714 silver badges17 bronze badges
I know that i am a bit late, but here my answer comes:
I just installed the Java online Version from Oracle(not the offline 64-Bit one).
After having added the JAVA_HOME ENV variable, it just worked!
Hope I could help
answered Aug 27, 2020 at 17:02
![]()
LarsLars
1,1635 silver badges25 bronze badges
Probably you are trying wrong options anyways.
I got a similar error with supporting error log:
Java HotSpot(TM) Client VM warning: ignoring option PermSize=32M; support was removed in 8.0
Java HotSpot(TM) Client VM warning: ignoring option MaxPermSize=128M; support was removed in 8.0
Im my case, the software did not support java 8 yet(script was using old JVM arguments) but I had had java 8 by default.
answered Jan 15, 2015 at 19:50
MatevaMateva
7761 gold badge8 silver badges27 bronze badges
One of the reason for this issue is no memory available for Tomcat to start. Try to delete the unwanted running software from windows and restart the eclipse and tomcat.
answered Dec 25, 2015 at 16:23
Solution is simple. No need to go deep into this issue.
If you are running on 64bit machine then follow below steps:
- Unistall 32 bit java first (check in C:Program Files (x86) for its existence)
- Install the newer version JDK kit 64 bit (includes JRE)
- Set the environment path (To avoid conflict error if you have two different 64bit JRE)
- Check in command prompt by typing javac command.
- Restart / Done
You can have two different Java installed but don’t forgot to set path.
answered Jan 7, 2021 at 15:54
Please set JAVA_OPTS=-Xms256m -Xmx512m in environment variables, it should solve the issue, it worked for me.
answered Aug 12, 2021 at 7:45
Find out if you are using a 32bit version or 64bit version of Java. To know that use the command
java -version
The 3rd line of the output should give you if it 32bit or 64bit.

If it is 32bit uninstall and install a 64bit version.
answered Apr 8, 2022 at 2:04
First of all, I have a box with 8gb of ram, so I doubt total memory is the issue.
This application is running fine on machines with 6gb or less.
I am trying to reserve 3GB of space using -Xmx3G under «VM Arguments» in Run Configurations in Eclipse.
Every time I try to reserve more than 1500mb, I get this error:
“Error occurred during initialization of VM; Could not reserve enough space for object heap” using -Xmx3G
What is going on here?
asked Feb 16, 2012 at 0:37
4
Could it be that you’re using a 32-bit jvm on that machine?
answered Feb 16, 2012 at 0:46
LaurentLaurent
9305 silver badges9 bronze badges
8
Here is how to fix it:
Go to Start->Control Panel->System->Advanced(tab)->Environment Variables->System
Variables->New:
Variable name: _JAVA_OPTIONS
Variable value: -Xmx512M

Variable name: Path
Variable value: ;C:Program FilesJavajre6bin;F:JDKbin;
Change this to your appropriate path.
Adnan
2,9113 gold badges22 silver badges35 bronze badges
answered May 7, 2015 at 1:07
![]()
Mohamed AdelMohamed Adel
1,97016 silver badges23 bronze badges
2
This is actually not an Eclipse-specific issue; it’s a general
Java-on-Windows issue. It’s because of how the JVM allocates memory on
Windows; it insists on allocating a contiguous chunk of memory, which
often Windows can’t provide, even if there are enough separate chunks to
satisfy the allocation request.
There are utilities that will try to help Windows «defrag» its memory,
which would, in theory, help this situation; but I’ve not really tried
them in earnest so can’t speak to their effectiveness.
One thing that I’ve heard sometimes that might help is to reboot Windows
and, before starting any other apps, launch the Java app that needs the
big chunk of memory. If you’re lucky, Windows won’t have fragmented its
memory space yet and Java will get the contiguous block that is asks for.
Somewhere out on the interwebs there are more technical explanations and
analyses of this issue, but I don’t have any references handy.
I did find this, though, which looks helpful: https://stackoverflow.com/a/497757/639520
answered Feb 16, 2012 at 1:32
![]()
E-RizE-Riz
30.7k9 gold badges92 silver badges132 bronze badges
1
First the JRE of 32bits can’t use more ~1.5Gb of ram. So if you want more, use a 64bits JRE.
Second, When a new JVM starts, this sum the -Xmx property of the all JVM that are running, and check if there is enough memory left on the system to run at their own -Xmx, if is not enough then the error occurs.
answered Jun 26, 2012 at 5:56
![]()
Daniel De LeónDaniel De León
12.9k5 gold badges85 silver badges72 bronze badges
I was using Liferay with Tomcat server from eclipse IDE.
I was stuck with this same error on click on server start up.
Double click on server from eclipse.
it open up Server Overview page. Updated memory arguments from -Xmx1024m -XX:MaxPermSize=256m to -Xmx512m -XX:MaxPermSize=256m.
Then it was working for me.
answered Dec 24, 2013 at 10:35
PrathapPrathap
1711 silver badge3 bronze badges
1
Make sure that Eclipse is actually running the same JVM you think it’s running. If you use java in your web browser ever, you likely have a 32-bit version floating around too that might be taking precedence if it installed or updated lately.
To be absolutely sure, I recommend adding these two lines to your eclipse.ini file at the top:
-vm
C:/Java/jdk1.6.0_27/bin
…where on my machine C:/Java/jdk1.6.0_27/bin where the JVM I know is 64-bit is located. Be sure to have the bin folder there.
(As a bonus, on Windows 7, this also allows you to actually «pin the tab» which is why I had to do this for my own usage)
answered Feb 16, 2012 at 2:11
Adam RoferAdam Rofer
5,8211 gold badge14 silver badges11 bronze badges
5
This is the issue of Heap size. Edit your .bat (Batch file). It might be showing Heap size 1024. Change it to 512 Then it should work.
answered Oct 12, 2012 at 9:10
Just put # symbol in front of org.gradle.jvmargs=-Xmx1536m in gradle.properties
# org.gradle.jvmargs=-Xmx1536m
lczapski
3,9163 gold badges14 silver badges31 bronze badges
answered Nov 25, 2019 at 14:57
1
I also had the same problem while using Eclipse which was 32 bit and the JVM used by it was 64 bit.
When I routed the Eclipse to 32 bit JVM then it worked
answered Aug 11, 2014 at 16:09
![]()
AKsAKs
1,67714 silver badges17 bronze badges
I know that i am a bit late, but here my answer comes:
I just installed the Java online Version from Oracle(not the offline 64-Bit one).
After having added the JAVA_HOME ENV variable, it just worked!
Hope I could help
answered Aug 27, 2020 at 17:02
![]()
LarsLars
1,1635 silver badges25 bronze badges
Probably you are trying wrong options anyways.
I got a similar error with supporting error log:
Java HotSpot(TM) Client VM warning: ignoring option PermSize=32M; support was removed in 8.0
Java HotSpot(TM) Client VM warning: ignoring option MaxPermSize=128M; support was removed in 8.0
Im my case, the software did not support java 8 yet(script was using old JVM arguments) but I had had java 8 by default.
answered Jan 15, 2015 at 19:50
MatevaMateva
7761 gold badge8 silver badges27 bronze badges
One of the reason for this issue is no memory available for Tomcat to start. Try to delete the unwanted running software from windows and restart the eclipse and tomcat.
answered Dec 25, 2015 at 16:23
Solution is simple. No need to go deep into this issue.
If you are running on 64bit machine then follow below steps:
- Unistall 32 bit java first (check in C:Program Files (x86) for its existence)
- Install the newer version JDK kit 64 bit (includes JRE)
- Set the environment path (To avoid conflict error if you have two different 64bit JRE)
- Check in command prompt by typing javac command.
- Restart / Done
You can have two different Java installed but don’t forgot to set path.
answered Jan 7, 2021 at 15:54
Please set JAVA_OPTS=-Xms256m -Xmx512m in environment variables, it should solve the issue, it worked for me.
answered Aug 12, 2021 at 7:45
Find out if you are using a 32bit version or 64bit version of Java. To know that use the command
java -version
The 3rd line of the output should give you if it 32bit or 64bit.
If it is 32bit uninstall and install a 64bit version.
answered Apr 8, 2022 at 2:04
- HowTo
- Java Howtos
- Error Occurred During Initialization of …

This tutorial demonstrates the Error occurred during initialization of VM java/lang/noclassdeffounderror: java/lang/object error in Java.
Error Occurred During Initialization of VM java/lang/noclassdeffounderror: java/lang/object
The Error occurred during initialization of VM java/lang/noclassdeffounderror: java/lang/object occurs when systems get confused when running Java. This occurs when we run Java as an environment variable, but running Java from its directory will work properly.
Whenever Error occurred during initialization of VM java/lang/noclassdeffounderror: java/lang/object occurs, Java is installed properly, and the correct path is set for the environment variables.
The reasons for this error are ambiguous, but some solutions can be applied in different scenarios. The reasons include:
- When we updated the Java Development Kit (JDK) but forgot to update the Java Runtime Environment (JRE). In the recent versions, JRE is included in the JDK, so we don’t have to install it separately.
- When an unknown application has copied
java.exefiles to the Windows directory, and Windows start running Java from the Windows directory, this error will occur when the supportive files are not found.
The error looks like this when we run Java in the CMD:
Error occurred during initialization of VM
java/lang/noclassdeffounderror: java/lang/object
Running Eclipse
Usually, when this error stops Eclipse from initializing. The Eclipse problem can be solved following the steps below.
-
Go to the Eclipse directory.
-
Open the
eclipse.inifile. -
Add the following lines with your path to the
inifile before thevmargs:
-vm
C:Program FilesJavajdk1.7.0_10binjavaw.exe
Save the eclipse.ini file and run Eclipse.
Check the Windows Directory
If the Error Occurred During Initialization of VM java/lang/noclassdeffounderror: java/lang/object error is occurring, then you should follow some steps to know the ambiguous reasons:
- Go to the Windows directory.
- Check if you can find the
exefile from Java. - These files are copied by an application on Windows.
- Deleting these files may solve the problem.
- Finding the application is not easy, but you can check all the applications running Java.

Sheeraz is a Doctorate fellow in Computer Science at Northwestern Polytechnical University, Xian, China. He has 7 years of Software Development experience in AI, Web, Database, and Desktop technologies. He writes tutorials in Java, PHP, Python, GoLang, R, etc., to help beginners learn the field of Computer Science.
LinkedIn
Facebook
Related Article — Java JVM
Related Article — Java Error

Minecraft has a special place in every true gamer’s heart, but most would agree that the game is far from problem-free.
Although Minecraft users encounter a few bugs and errors here and there while playing, some of the problems happen outside of the game as well, or in this case, while attempting to launch it.
In this guide, we’ll talk about the infamous “Error occurred during initialization of VM” problem, and the good news is that we know exactly how to fix it.
Here’s what you need to know.
The Problem Explained
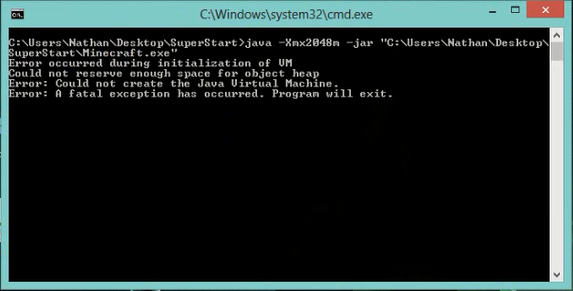
Users reported seeing this issue right after starting Minecraft through the launcher, as usual. The problem consists of the game not starting, and the user is presented with the following message: “Error occurred during initialization of VM”, as shown in the image below.

Then, the program exists and the game doesn’t launch, which leaves users confused and sometimes even concerned, as the last sentence in the error prompt mentions a fatal exception followed by immediate termination of the program.
Fortunately, this error isn’t as serious as it sounds, and the reason it happens is that the Virtual Machine doesn’t have enough memory allocated for it to properly start, and changing that is not a difficult process.
We know exactly how to solve this issue, and you will too after reading the content in the sections below.
Let’s get right into it.
Fix 1: Ensure You Have The Right Java Version Installed

One of the most common fixes for the Minecraft “Error occurred during Initialization of Virtual Machine” issue is to ensure you are running the right Java version for your system.
This has been suggested in a popular Stack Overflow thread covering the problem, as well as in a few other places, such as this Reddit thread.
The issue here is that you may have a 64-bit operating system yet have the 32-bit Java installed on your PC, and the best way to solve that is by installing the correct Java version.
However, before you get into that, we recommend confirming the above statement, and you can do so by following the steps below:
- Press Windows + E on your keyboard at the same time. This will open the Windows File Explorer.
- Right-click anywhere in an empty area and choose Properties from the list of options.
- Look for the information listed under the System category to see if your operating system is 32-bit or 64-bit, as shown in the image below.

If it’s 64-bit, which is most likely the case, you need to make sure you also have the right Java version installed, which is also the 64-bit one.
To do that, you first need to uninstall your current Java version from your system and ensure there are no leftover files.
This is what a Reddit user commented on a thread made by another user who faced the same Minecraft error due to having the wrong Java version installed on their PC.

You can uninstall your current Java version through the Apps & Features section in Windows 10. Here’s what the process looks like step-by-step:
- Press Windows + S simultaneously on your keyboard to open the search box. In it, type Apps & Features, and then press Enter on your keyboard to initiate the search.
- Within the Apps & Features panel, search for Java, click on it, and choose Uninstall.
- When the process is complete, open the Program Files folder on your computer (which is by default located on your C Drive) and search for the Java folder. Manually delete it by right-clicking it and choosing Delete.
- Although not always mandatory, we recommend restarting your computer after the uninstall.
Now that you’ve successfully uninstalled Java from your computer, it’s time to re-download the correct version for your OS type from the official Java website.
Once you install the 64-bit version of Java, we recommend rebooting your PC once again. When it’s finally back up and running, launch Minecraft and see if the error persists.
For many users, this method solved the problem, given there weren’t any other issues, such as the one where the VM doesn’t get enough allocated memory for it to run properly. We cover that in the next section below, so make sure to check it out if the problem is still not fixed.
Fix 2: Allocate More Ram To The Java Virtual Machine

Another very common fix for this problem is allocating more memory to the Java Virtual Machine. Although it sounds like a daunting task at first, it’s not that difficult to do, and we’ll show you exactly what steps you need to take.
Let’s take a look.
- Press Windows + R on your keyboard to open the Windows Run panel.
- In it, type in sysdm.cpl and press Enter on your keyboard, as shown in the image below.

- In the window that opened, click Advanced at the top.

- Click Environment Variables at the bottom-right corner of the window.

- Under the System Variables section, click on New, as shown in the image below.

- Within the “Variable name” field, type in “_JAVA_OPTIONS” and in the “Variable value” field, type in “-XmX512M”, then finish by clicking the OK button at the bottom. This means that you’ve just successfully allocated 512MB of RAM to Java. You can increase this number to 1024M or more.
You can also take a look at this helpful video tutorial that covers the entire process from beginning to end if the text-based explanation is not clear enough.
Note: You can also use the short command (such as “-mx512m) if you see no success with the one listed in step #6, as some users reported that it made a difference for them, although they’re the same commands, just one shorter than the other.
Note: You can allocate more memory to the Java Virtual Machine than we did in the example above, but be careful as some users reported that a very high number can also cause it not to work, especially with the 32-bit version of Java.

Now that you’ve successfully allocated more memory to your Java Virtual Machine, the problem should no longer be there when you’re trying to launch the game.
Conclusion
Now you know more about the VM Minecraft error and how to allocate more RAM to the Java Virtual Machine, which should be enough to fix the issue with Minecraft not launching for good.
The methods listed in the guide above helped many users, and hopefully, they’ll help you too and ensure you have a non-interrupted gameplay experience.