Вы можете столкнуться с проблемой «connection refused no further information» при попытке присоединиться к серверу Minecraft. Эта проблема — одна из наиболее распространенных проблем в Minecraft. Как только вы столкнетесь с ней, используйте описанные в этой статье методы для устранения ошибки.
Способ 1: Выполните перезагрузку

Простой перезапуск может помочь вам решить множество мелких сбоев и ошибок. Поэтому, если вы не знаете, как исправить ошибку «connection refused no further information» в Minecraft, вы можете попробовать перезагрузить компьютер, чтобы посмотреть, была ли проблема именно в этом. Кроме того, вам также следует перезагрузить маршрутизатор, чтобы улучшить подключение к Интернету и избежать возможных проблем с сетью.
Способ 2: Разрешите Minecraft в брандмауэре
Файрволл Windows может распознать процесс подключения к серверу как угрозу и заблокировать процесс. Это тоже может вызывать данную проблему. Чтобы избежать этого, рекомендуется добавить Minecraft в качестве исключения в брандмауэр.
Способ 3: Удалите конфликтующие программы
Если у вас установлены программы, у которых возникает конфликт с Minecraft, то, скорее всего, появится сообщение об ошибке. В этом случае вы можете попытаться избавиться от проблемы, удалив весь неподходящий софт. После удаления перезагрузите компьютер, чтобы проверить, устранена ли ошибка.
Способ 4: Добавьте IP-адрес и порт перед подключением к серверу
Чтобы устранить проблему «connection refused no further information», вы должны проверить и добавить правильный IP-адрес и порт для Minecraft.
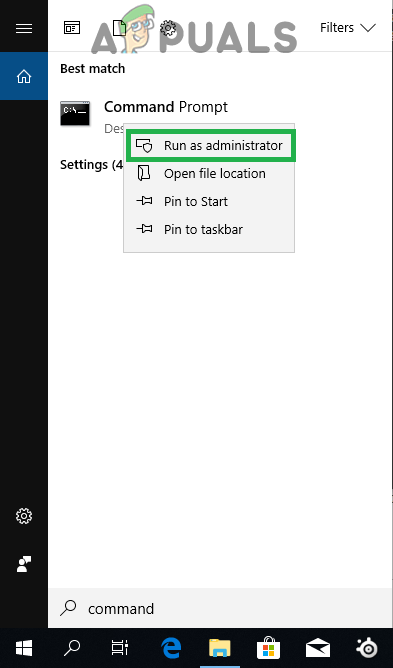
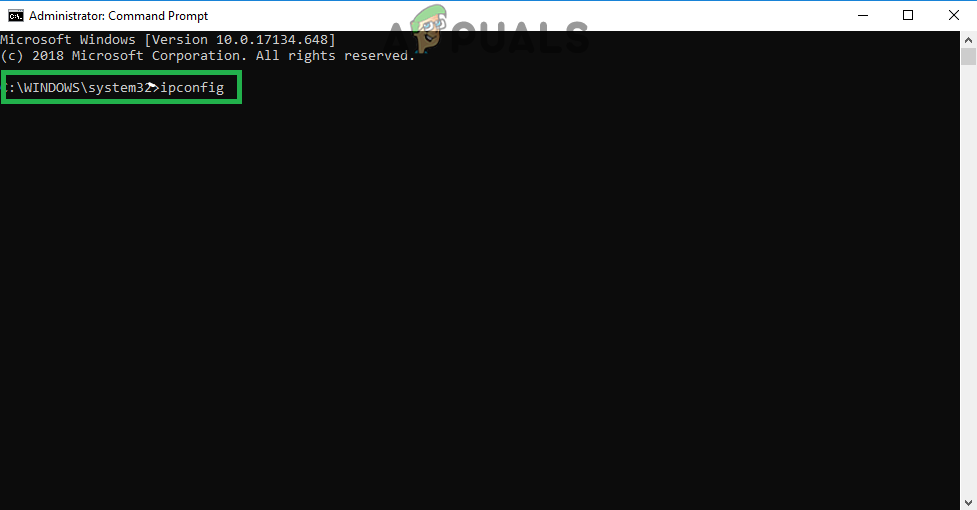
Шаг 1: Запустите командную строку от имени администратора. Затем введите ipconfig и нажмите Enter, чтобы просмотреть конфигурацию IP. Вам нужно записать свой IPv4-адрес.
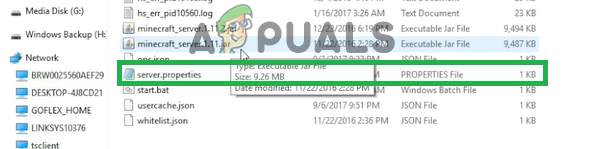
Шаг 2: Нажмите Windows+E, чтобы открыть проводник, а затем перейдите в папку Minecraft Server.
Шаг 3: Откройте текстовый документ Server.properties, чтобы узнать порт сервера.
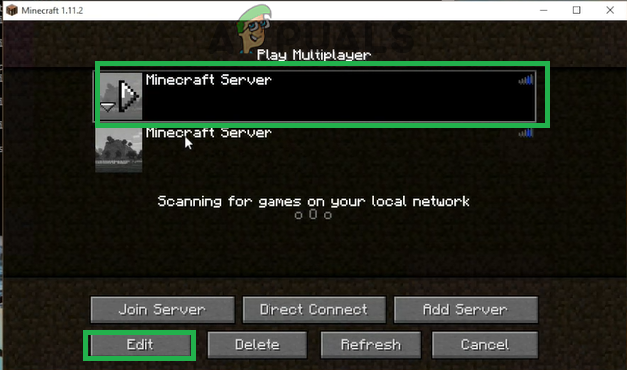
Шаг 4: После этого откройте Minecraft и перейдите в «Play Multiplayer».
Шаг 5: Выберите сервер Minecraft, к которому вы хотите присоединиться, и нажмите «Изменить».
Шаг 6: В следующем окне убедитесь, что адрес сервера совпадает с адресом IPv4 и портом сервера, которые вы записали ранее.
Шаг 7: Наконец, нажмите «Готово», а затем «Обновить», чтобы применить изменения.
Способ 5: Обновите Java
Minecraft использует java для правильной работы. Если java в вашей системе устарела, вы можете столкнуться с этой проблемой. Таким образом, необходимо обновить Java, чтобы решить ошибку. Для этого перейдите в папку Java в проводнике Windows и дважды щелкните «Проверить наличие обновлений» внутри этой папки. Затем нажмите «Обновить сейчас» на вкладке «Обновление» во всплывающем окне.
Quite recently a lot of reports have been coming in of users encountering the error “io.netty.channel.AbstractChannel$AnnotatedConnectException: Connection refused: no further information” while trying to connect to a server. This error is not limited to a single server and persists across all of them.
What Causes the Connection Refused Error?
After receiving numerous reports from multiple users we investigated the issue and devised a set of solutions that solved the problem for most of the users. Also, we looked into the reasons due to which the error is triggered and listed them below. For that:
- IP issue: In some cases, the problem is caused due to the wrong IP address or the port listed while trying to connect to a server. The IP address along with the correct port is used to forward your connection to the server and connection is established once the server approves. Unless you are using a static IP address, that is quite rare, the IP address assigned to you by the ISP changes from time to time, and multiple users might be allocated the same IP address. Therefore, the IP address needs to be edited from time to time.
- Firewall: Also it is possible that the Windows Firewall that you are using might be blocking your connection to the server. Both the Java files and the game directory is to be added to the exclusion list of the Windows Firewall in order for the game to connect to the server properly.
- Outdated Java: Minecraft requires the Java software to be updated to the latest version in order for it to work properly. If the Java is outdated on your device and the launcher has been updated to the latest version it might cause conflicts with certain elements of the game and prevent proper connection to the server.
- Incompatible Software: There is a list of software that is not compatible with Minecraft and causes issues if they are installed on the computer on which you are trying to connect to the server. Minecraft has an official list of software that is not compatible with the game and causes conflicts.
Now that you have a basic understanding of the nature of the issue we will move on towards the solutions. It is recommended that you try these solutions in the specific order in which they are provided to ensure that no conflicts occur.
Power-Cycle your Network
Whenever the internet router is reset the IP address that is provided by the ISP is changed unless you are using a static IP address. Therefore, in this step, we will be reinitializing the internet settings and the DNS cache by completely power cycling the Internet Router. For that:
- Disconnect the power from the internet router.

Disconnecting Power cord - Wait for 5 minutes and reconnect the power.
- When internet access is granted try to connect to the server and check to see if the issue persists.
Reset your Network Configurations
Your Windows Network configurations can also be a culprit here, as it’s possible that your Network settings are configured incorrectly. For resetting network configurations, follow the steps below:-
- Search for the Command Prompt in the Windows Search bar then click “run as administrator”.
Running Command Prompt - Once the Command Prompt window is opened, type the following commands one by one:-
ipconfig /flushdns
ipconfig /release
ipconfig /renew
netsh winsock reset
netsh int ip reset
- Restart your computer and check to see if the issue persists.
Add Exception in Firewall
It is possible that the Windows Firewall that you are using might be blocking your connection to the server. Therefore, in this step, we will be adding an exception in the Firewall for some executables in the Minecraft folder that need internet access. For that:
- Click on the start menu and select the Settings icon.
- In the Settings, click on the “Updates & Security” option.
- Select the “Windows Security” from the left pane and select the “Firewall & Network Protection” option.
- Scroll down and select the “Allow an App through Firewall” option.
- Click on “Change Settings” and select “Yes” on the warning prompt.
- Select the “Allow another app” from the options and click on “Browse“
- Navigate to the game installation directory and select the game and the launcher executable.
- Now repeat the above process again and this time navigate to the directory where you have the Minecraft servers installed.
- Open the “Maxwell” folder and then the “MinecraftServer” folder.
- Now allow both the Java executables located inside the folder in the same way.
- Now repeat the process again and instead of clicking “Allow another app” after selecting the “change” option simply scroll down the list of apps available and allow all the “Java Platform SE Binary” options through both the “Private” and “Public” networks.
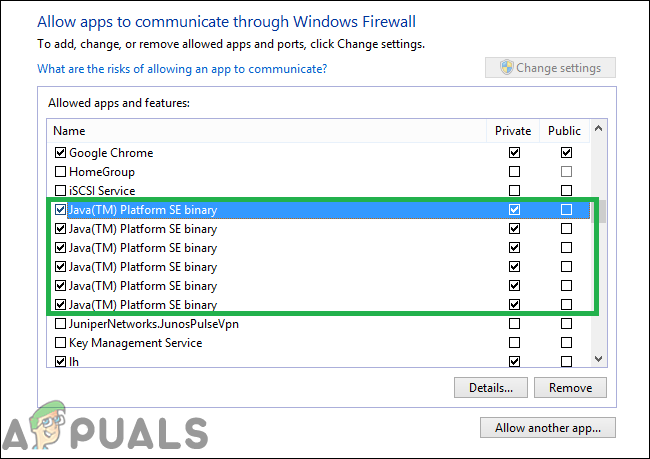
The applications that need to be allowed through the firewall - Open the Minecraft launcher, try to connect to the server, and check to see if the issue persists.
Allowing an application through the firewall
Add the IP address and Port Before Connecting
If the IP address that you are using is not a static one, it will change every couple of days or whenever the Internet Connection is reset. Therefore, in this step, we are going to be checking the IP address and the correct port for the game and add it to the Minecraft Launcher. For that:
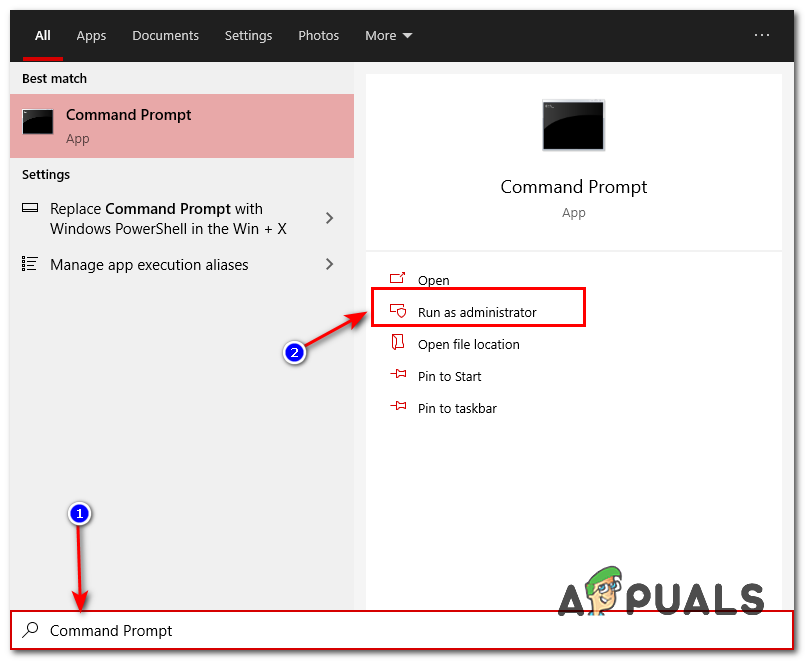
- Click on the search bar on the Windows toolbar and type in “Command Prompt“.
- Right–click on the icon and select “Run as Administrator“.
Right-clicking on the Command Prompt icon and selecting Run as Administrator - Type in “ipconfig” and note down the “IPV4 Address“.
Typing in ipconfig in the command prompt - Also, Navigate to the “Minecraft Servers folder>Maxwell (some random numbers)> MinecraftServer” and open the “Server Properties” text document.
Opening the “Server Properties” text document and noting down the server port - Note down the “Server Port” listed there. In our case it was “25565” it should be similar in most cases however in some it is not.
- Now open up Minecraft and navigate to the “Play Multiplayer” option.
- Select the server which you want to join by clicking on it and select “Edit” from the below options.
Clicking on the server and selecting “Edit” - The server name can be according to your preference but the “Address” needs to be the IPV4 address that we noted and the port number for example “XXX.XXX.X.X:25565” the “25565” is the port number and it may vary.
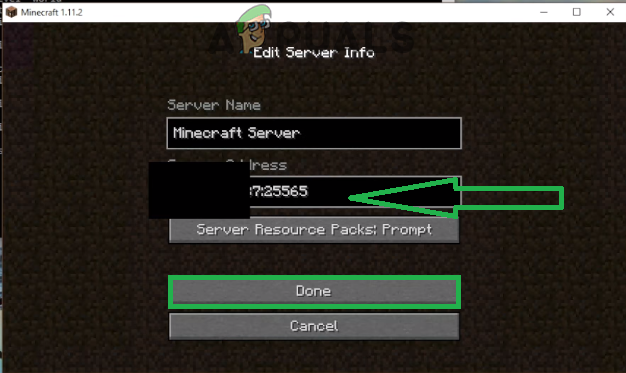
Editing the Server Address and clicking on Done - Click on “Done“, click on “Refresh” and check to see if the issue persists.
Note: There are some applications that are generally incompatible with certain elements of Minecraft and cause issues with it. The list of applications is available here. If these are installed on the computer on which the server is running from or on your computer you will continue to face issues with the game.
Check for Port Filtering
We came across numerous instances where users were accidentally filtering ports. Even though the port forwarding was working alright, the filtering automatically nullifies it and you will not be able to connect to Minecraft servers.
Here, what you can do is check your router’s and your local machine’s network configurations and make sure that port filtering isn’t turned on and if it is, the correct ports are being filtered.
Check ISP Network Access
If none of the above methods work, you should check your ISP’s network access. ISPs sometimes block network access to specific domains and don’t allow you to go through. Contact your ISP and verify that internet access isn’t indeed blocked.
Furthermore, you can also change your internet connection to your smartphone’s 3G and see how that works out for you. If it does, it probably means that your ISP is blocking you and you need to change your network.
If Minecraft is working with the Mobile Data it means that your ISP is blocking the connection. If that’s the case please contact your ISP to get your issue resolved.

Kevin Arrows
Kevin Arrows is a highly experienced and knowledgeable technology specialist with over a decade of industry experience. He holds a Microsoft Certified Technology Specialist (MCTS) certification and has a deep passion for staying up-to-date on the latest tech developments. Kevin has written extensively on a wide range of tech-related topics, showcasing his expertise and knowledge in areas such as software development, cybersecurity, and cloud computing. His contributions to the tech field have been widely recognized and respected by his peers, and he is highly regarded for his ability to explain complex technical concepts in a clear and concise manner.
Some Minecraft users are not able to join a server. The issue is not limited to a particular server but is experienced across the board. The following is the exact error message that the victims are seeing.
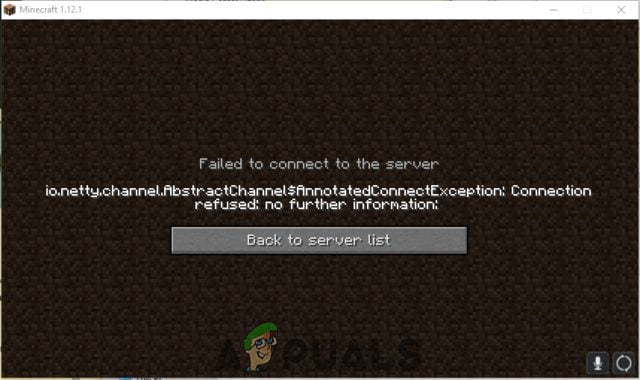
Failed to connect to the server
io.netty.channel.AbstractChannel$AnnotatedConnectException: Connection refused: no further information:

Now, let us see what you need to do to resolve Connection refused: no further information on Minecraft.
Why does it say Connection refused No further information?
The error code in question means that Minecraft is not able to create a connection to the server. The problem can occur because of various things. Usually, the reason is network glitches. Your network protocols or the network devices can have some issues that we are oblivious of, but the good news is, that they can be resolved. Other than that, there are some other reasons such as a firewall blocking Minecraft. So, you should go to the troubleshooting guide and resolve the issue.
Failed to connect to the server, Connection refused, No further information Minecraft error
If you are seeing Connection refused: no further information on Minecraft, try the following solutions to resolve the issue.
- Restart your computer and network devices
- Allow Minecraft Server through Firewall
- Reset Network Protocols
- Disable Mods
- Check Port Filtering
- Update Java
Let us talk about them in detail.
1] Restart your computer and network devices
First up, we need to try and restart all the devices that are responsible for handling your network. So, go ahead and restart your computer first. If that doesn’t help, go ahead and restart the router and if possible, your modem. Follow the prescribed steps to restart your router.
- Turn off your Router and remove all the cables.
- Wait for 30 seconds.
- Plug your router back and restart it.
Now, check if the issue persists.
Related: Failed to connect to the server, Not Authenticated with Minecraft.net
2] Allow Minecraft Server through your Firewall
Your antivirus can block you from accessing your server. Usually, it’s the server that’s blocked, but it’s a good option to add the Minecraft launcher to the exception as well. So, if you have a third-party antivirus, just whitelist the app, Windows Defender users can allow the app through the firewall.
Related: Could not Connect, Outdated Server error in Minecraft
3] Reset Network Protocols
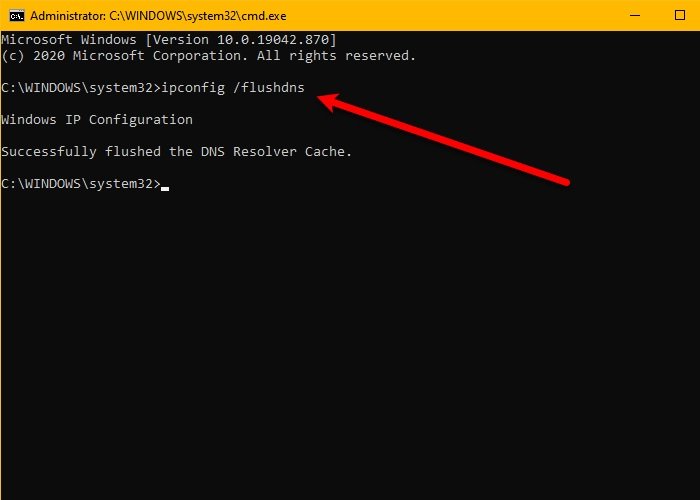
The issue can be a result of a glitch in your network protocols. To reset the protocols, we are going to run some commands, so, open Command Prompt as an administrator and run the following commands.
ipconfig /flushdns
ipconfig /release
ipconfig /renew
netsh winsock reset
netsh int ip reset
After running the commands, close cmd and try connecting to the Minecraft server.
Related: Minecraft unable to connect to world
4] Disable Mods
You may also see the error code in question because of a corrupted mod. Since we are not sure which one is the culprit here, you should disable all of them at once and then try enabling them one by one. If you see the error code after disabling a particular mod, removing it will resolve the issue for you.
5] Check Port Filtering
You need to check whether you are accidentally filtering ports. Port filtering will revert back the Port Forwarding and stop you from connecting to the server. So, disable Port Filtering and then try connecting to the server. Hopefully, this will do the job for you.
6] Update Java
Java is crucial for Minecraft, we are pretty sure you are well aware of this. You need to make sure that Java is up-to-date. So, go ahead and update the Java Runtime Environment. Then, check if the issue persists.
Hopefully, you are able to resolve the issue with these solutions.
Also Read: Minecraft keeps crashing or freezing
What does IO Netty channel AbstractChannel AnnotatedConnectException Connection refused No further information?
The error code basically means that the connection is not established between your Minecraft client and the server you were trying to connect to. This issue, more often than not, is nothing but a network issue. You should try and execute the solutions mentioned here and see if it works.
That’s it!
Read Next: OH NO, Something went wrong Minecraft error.

This guide will help you troubleshoot the Connection refused: no further information error message that you may get when you try to join your server!
🔌 First Steps 🔌
Please make sure that you are trying to connect to your server using the right server IP! Use IP:PORT to add your server to your client. (example: 192.0.0.1:26876)
You can find your IP and Port on your main Multicraft page.
Here is our guide for getting access to your Multicraft panel if needed.
📜 Check If the Issue Is on Your Server’s End or Not 📜
First, go to your Multicraft and check if your server is running or not. This error message can pop up if you try to join your server when it is stopped.
Here is our guide for getting access to your Multicraft panel if needed.
To check if your server is running please verify the following:
— See if your server is producing logs in the Console.
— See if your Memory and CPU bars are fluctuating or not.
— Check if your server Status is set to Online or not.
If the server is up and running but you still get this error, then the issue is on your client (PC) end and you need to try troubleshooting it.
🔩 Troubleshooting the Issue on Your Client (PC) End 🔩
This error usually happens when your Firewall is not allowing the traffic to your X.X.X.jar file located in C:UsersuserAppDataRoaming.minecraftversions<version>.
(Simply, the version you are trying to use)
To fix this problem, you can temporarily disable your Firewall.
To disable your Firewall go to:
Control Panel
System and Security
Windows Firewall (or just type “Firewall” in your Start Menu Search Box)
Then, on the left, you can Disable the Firewall in Turn Windows Defender Firewall ON or OFF.
Once disabled, you can try to join your server.
We recommend you turn your Firewall back ON after testing it. If you leave your Firewall OFF, malicious programs will be able to get access to your whole computer.
If the error isn’t fixed, you can whitelist (allow) your Minecraft to bypass the Firewall. You will need to allow Java(TM) Platform SE Binary.
If it’s still not working, try and whitelist the Minecraft Jar that you play. For this, you just need to find Allow another program… then select your current Minecraft Version. If you can’t find it, you will have to manually search for the jar file of your Minecraft Version.
To find your Minecraft Version folder please do the following:
Press the Windows button and type run, then press Enter.
Type in the box that appears the following, then press Enter: %appdata%.minecraft
Click on the version folder, then on the folder with the same name as the version that you play, and whitelist 1.XX.X.jar (example: 1.12.2.jar).

If it’s still not working, many other factors can cause this. If you can’t fix the problem, please try using a different Minecraft Version.
Example: If you are playing on 1.12.2, just try to connect with 1.12. If you are playing on 1.8.2, just try to connect with 1.8.8.
If you are not able to get into your server even after all those steps, please contact us on live chat or via the ticket system.
❕ Useful Links ❕
— Connection Timed Out — An Existing Connection Was Forcibly Closed by the Remote Host.
— How to Connect to Your Server Using FileZilla
— How to Check Your Server Performance
Updated on: 08/26/2022
-
Partition Wizard
-
Partition Magic
- [Fixed] Minecraft Connection Refused No Further Information?
By Yamila | Follow |
Last Updated January 12, 2023
It’s possible for you to run into the “connection refused no further information” issue while trying to join a Minecraft server. Here, this post from MiniTool Partition Wizard provides several solutions to the issue. Once you meet the issue, you can follow them to fix it.
The java.net connectexception connection refused no further information issue is one of the most common issues on Minecraft. Once you run into this issue, you can follow the methods in this post to work it out.
Method 1: Perform a Restart
In general, a simple restart can help you solve plenty of minor glitches and bugs. Therefore, when you are suffering from the “Minecraft connection refused no further information” issue, you can try restarting your PC to see if the issue can be resolved. Besides, you should also restart your router to improve your Internet connection, avoiding possible network issues.
If the error persists after you restart your system and router, you need to consider fixing this issue with other solutions.
Method 2: Allow Minecraft Through Firewall
Windows Firewall may recognize the process of connecting to the server as a threat and block you from doing this. That’s why you experience the “Minecraft server connection refused no further information” issue. To avoid this case, it’s recommended that you add Minecraft as an exception to Firewall.
This post can help you allow Minecraft Launcher, Minecraft servers, and Java through Firewall: How to Allow or Block a Program Through Firewall Windows 10
Method 3: Uninstall Incompatible Software
If you have installed certain programs that are incompatible with Minecraft, you are likely to receive the error message: java.net connectexception connection refused no further information. In this case, you can try to get rid of this issue by deleting all the incompatible software. You can click here to find out the known incompatible software.
You can follow this guide to uninstall the target software: Top 7 Effective Ways to Uninstall Programs/Apps on Windows 11
After you delete all the incompatible programs, restart your PC to see if the error is resolved.
Method 4: Add IP Address and Port Before Connecting to the Server
To repair the “Minecraft server connection refused no further information” issue, you should check and add the right IP address & port for Minecraft.
Step 1: Run Command Prompt as an administrator. Then type ipconfig in the panel and press Enter to view your IP configuration. You need to note down your IPv4 address.
Step 2: Press Windows + E to open File Explorer and then navigate to the Minecraft Server folder.
Step 3: Open the Server.properties text document to find out Server Port.
Step 4: After that, open Minecraft and go to Play Multiplayer.
Step 5: Select the Minecraft Server you want to join and then click Edit.
Step 6: In the next window, ensure the Server Address is matched with the IPv4 address and Server Port you have noted down before.
Step 7: Finally, click Done and then Refresh to execute the pending changes.
Method 5: Update Java
Minecraft relies on java to run properly. If the java on your system is outdated, you may get stuck in the “Minecraft connection refused no further information” issue. So, you ought to keep java updated to avoid this issue.
To do this, go to the Java folder in Windows Explorer and double-click Check For Updates inside this folder. Then click Update Now under the Update tab in the pop-up window.
All these methods summarized in this post are feasible. When you are bothered by the “Minecraft connection refused no further information” issue, you can try these methods to fix it. If you have any other solutions to this issue, you can share them with us in the comment part below.
Do you have difficulty managing your partitions and disks on the PC? Well, MiniTool Partition Wizard is an excellent helper that enables you to perform various operations on your partitions and disks more easily and safely. If you want to obtain more information on this program, you can visit its official website.
About The Author

Position: Columnist
Yamila is a fan of computer science. She can solve many common issues for computer users by writing articles with simple and clear words. The very aspect that she is good at is partition management including create partition, format partition, copy disk and so on.
When she is free, she enjoys reading, doing some excerpts, listening to music and playing games.