010-331, 010-333 Over Temperature Fail RAP
BSD-ON: BSD 10.2 Fusing Heat Control (1 of 2)
010-331 Fuser thermistor detected temperature monitor AD value that is the specified value or more 10 consecutive times.
010-333 Fuser NC sensor detected a temperature that is the specified value or more 10 consecutive times.
Initial Actions
WARNING: Ensure that the electricity to the machine is switched off while performing tasks that do not need electricity. Refer to GP 10. Disconnect the power cord. Electricity can cause death or injury. Moving parts can cause injury.
• Remove the fuser. Check whether foreign substances or paper is wound around the heat roll.
• Ensure J416 on the drive PWB is securely connected.
Procedure
Perform the steps that follow:
1. Install new components as necessary:
• LVPS, PL 1.10 Item 3.
• Fuser, PL 10.05 Item 2.
• Drive PWB, PL 1.10 Item 4.
• ESS PWB, PL 3.10 Item 6.
2. To clear this fault, first remove the cause, then reset the value of NVM location 744-002 (Error Detection Flag) to 0. Switch off, then switch on the machine, GP 10.
NOTE: The relationship between the displayed value and the sensor that detected the high temperature error is as follows:
• 0: Normal.
• 1: High temperature error of heat roll nc sensor.
• 2: High temperature error of heat roll thermistor.
• 3: Abnormal temperature increase of heat roll NC sensor, heat roll thermistor.
• 4: Hardware high temperature error of heat roll thermistor.
**This RAP is from Xerox Service Manual. All brand names and trademarks are their respective owner’s property.**
You may be also interested in below toner and drum chip (CRUM) for Xerox VersaLink C7020, C7025, C7030, C7000.
Toner Chip (For North America and West Europe Region):
• 106R03741 106R03744 106R03743 106R03742
• 106R03757 106R03760 106R03759 106R03758
• 106R03737 106R03740 106R03739 106R03738
Toner Chip (For South America and East Europe Region):
• 106R03749 106R03752 106R03751 106R03750
• 106R03745 106R03748 106R03747 106R03746
• 106R03765 106R03768 106R03767 106R03766
Toner Chip (For Metered Machine):
• 106R03733 106R03736 106R03735 106R03734
Drum Chip:
• 113R00780 113R00782
View Full Version : Xerox 7132 error 010-333

Custom Search
copytechusa
02-23-2009, 11:57 PM
Hi everybody,
I have a Xerox 7132 giving me an error code 010-333, I already replace the fuser with a fuser from another machine and I reset the fuser under supplies, but I’m still getting the code.
I really need some help.
Thanks.
xeroxsharp
02-24-2009, 06:18 AM
Hi everybody,
I have a Xerox 7132 giving me an error code 010-333, I already replace the fuser with a fuser from another machine and I reset the fuser under supplies, but I’m still getting the code.
I really need some help.
Thanks.
Ensure that NVM location 744-004 is set to zero (0). If the problem continues, replace the Fuser Unit
copytechusa
02-24-2009, 01:24 PM
Ensure that NVM location 744-004 is set to zero (0). If the problem continues, replace the Fuser Unit
Thanks for your reply.
I already check that and is set to zero (0) and I also change the fuser with a fuser from another machine that was working and I still have the same code.
The code is still there.
Please help, I’ve been dealing with this for over a week.
Thanks.
xeroxsharp
02-24-2009, 02:23 PM
Thanks for your reply.
I already check that and is set to zero (0) and I also change the fuser with a fuser from another machine that was working and I still have the same code.
The code is still there.
Please help, I’ve been dealing with this for over a week.
Thanks.
Follow 010-333 Fuser Center Thermistor Overtemp RAP (pws://file/xerox/edoc/wc7132/chtml/svc.elan.0000254964.htm)first to check all elements without replacing parts at this point if not needed.
Check NVM location 744-004. If value is different than 0 (like a 3), set it back to 0.
Before replacing any parts; Insure that the NVM sheet is present and filled. Initialise the MCU Section 6 / Diagnostics (Others) Initialize NVM (pws://file/xerox/edoc/wc7132/chtml/svc.elan.0000038377.htm), select IOT.
If problem comes back, per Note in the RAP replace Fuser Assembly PL 7.1 item 10 (pws://file/xerox/edoc/wc7132/chtml/svc.elan.PL7.1.htm).
Per RAP, If the problem persists, replace the Power Unit PL 11.1 item 7 (pws://file/xerox/edoc/wc7132/chtml/svc.elan.PL11.1.htm). If the problem persists, replace the MCU PWB PL 11.1 item 22 (pws://file/xerox/edoc/wc7132/chtml/svc.elan.PL11.1.htm).
Access Diagnostic Routines.
<LI id=svc.elan.0000097953>Enter UI Diagnostics (Entering UI Diagnostics in UI Diagnostic Mode (pws://file/xerox/edoc/wc7132/chtml/svc.elan.0000010122.htm)).
Access Diagnostic Routines (Accessing Diagnostic Routines in UI Diagnostic Mode (pws://file/xerox/edoc/wc7132/chtml/svc.elan.0000010122.htm)).
<LI id=svc.elan.0000038408>Select Maintenance/Diagnostics.
<LI id=svc.elan.0000038412>Select Initialize NVM.
<LI id=svc.elan.0000038421>Select the desired item, then press the Start button.
After initialization is complete, use the data accumulated in Initial Actions to restore the machine to its previous configuration
XeroxTechBrazil
03-03-2009, 05:43 AM
See Attached File
rAhMzKi
05-27-2009, 10:54 AM
What is NVM? where can I locate that?
I have the same problem and I’m hoping I can solve this by setting the NVM to 0.
Thank you.
TechMate
06-01-2009, 04:24 AM
Hi everybody,
I have a Xerox 7132 giving me an error code 010-333, I already replace the fuser with a fuser from another machine and I reset the fuser under supplies, but I’m still getting the code.
I really need some help.
Thanks.
Replace the fuser unit with a NEW (now used) and reset nvm 744-004 to 0. Some xerox machines don’t clear fuser error codes without replacing the fuser with a new unit. If problem still persists, then it could be a faulty low voltage power supply (LVPS) which means, you need a xerox tech to fix it 
abdou
06-04-2009, 10:43 PM
FIRST CHECK THE VOLAGE SUPPLIES FROM THE LVPS YOU MUST FIND 220V OR 110V IN THE PIN J5-3 AND J5-4 IN LVPS, IF YOU WILL NOT FIND THIS VOLTAGE REMPLACE LVPS
IF THE VOLTAGE FOND ? CHECK THE VOLTAGE FROM THE FUSER CONNECTOR YOU MEST FIND 22V IN TNE PIN 3 AND 6 IF YOU WILL NOT FIND THE VOLTAGE VERIFIE an open circuit or a short circuit FROM THE LVPS TO FUSER CONNECTOR IF ALL DOES OK REMPLACE MCU PWB
mayorg
01-22-2016, 11:01 AM
am also having that same problem but i dont know how to clear the error code and how to get to the nvm please can anyone teach me that please
Custom Search
Powered by vBulletin® Version 4.2.5 Copyright © 2023 vBulletin Solutions Inc. All rights reserved.
Xerox 7125 Work Centre Printer Error 010-333 – By Tauseef Ahmad
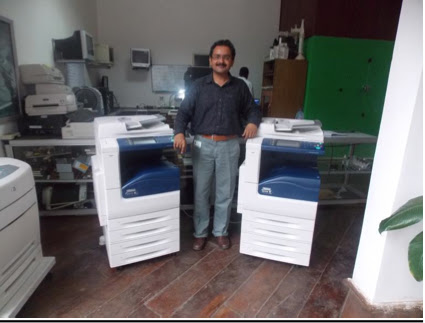
We imported and supplied 2 pcs of Xerox Printers to a high profile client recently.
These machines were 110v as they were imported from the USA and therefore we purchased 2000W Step-up/Step-down transformers from the local market and informed the client to plug in the machines through the transformers since the Liberian Electricity grid is on 220v.
A few days later we got a call from the client complaining that both the machines were not working and was showing error code 010-333.
We asked the client to send the machines to our workshop for diagnostics and repairs.
We realised that this error code is caused when the fuser detects an abnormal temperature (overheats). The machine automatically shuts down and shows error code 010-333 on start-up.
Solution: The first thing that should be done is resolve the root cause of the problem. We realised that the 2000W step-up/step-down transformer was not big enough to handle this machine. We decided to get a 5000W transformer in replacement. This is how we ascertained this:
Power (Watts) = I (current) x E (Voltage). In our case current is 220v and the machine is a 15A machine. Therefore going by this we would require220x15 = 3300W minimum power for this machine. We were using only 2000W earlier which caused the problem. The 5000W would be more than enough in this case.
Now that we have resolved the root cause the next thing to do is to reset the NVM on the machine. These are the steps to follow:
1) Turn on power to the Xerox machine
2) After it boots completely, press and hold the “0” button on the
machine’s keypad for about 5 seconds, then while keeping the “0”
button pressed, press on the “start” button.
3) A splash screen appears where you have to enter the CE
passcode and Maintenance passcode. The default CE passcode is 6789 and the default Maintenance passcode is 1111. (In case you have changed the passcode earlier then use the changed passcode for maintenance.)
4) Then press Machine Status>Tools>Features>Maintenance/ Diagnostics> NVM Read/Write>Chain Link> 744-248>Current Value> If other than 0 then change to 0 and SAVE!
The machine reboots automatically and the error should disappear and the machine should work normally. In case this does not work then the fuser needs to be replaced.