When I execute this command:
pip3 install opencv-python
I get the following error:
  Installing build dependencies ... error                            ERROR: Command errored out with exit status 1:
   command: /usr/bin/python3 /usr/lib/python3/dist-packages/pip install --ignore-installed --no-user --prefix /tmp/pip-build-env-z4c_sn6u/overlay --no-warn-script-location --no-binary :none: --only-binary :none: -i https://pypi.org/simple -- setuptools wheel scikit-build cmake pip 'numpy==1.11.3; python_version=='"'"'3.5'"'"'' 'numpy==1.13.3; python_version=='"'"'3.6'"'"'' 'numpy==1.14.5; python_version=='"'"'3.7'"'"'' 'numpy==1.17.3; python_version>='"'"'3.8'"'"''       cwd: None
  Complete output (22 lines):
  Ignoring numpy: markers 'python_version == "3.5"' don't match your environment
  Ignoring numpy: markers 'python_version == "3.6"' don't match your environment
  Ignoring numpy: markers 'python_version == "3.7"' don't match your environment
  Collecting setuptools
    Downloading setuptools-49.6.0-py3-none-any.whl (803 kB)
  Collecting wheel
    Downloading wheel-0.35.0-py2.py3-none-any.whl (24 kB)
  Collecting scikit-build
    Using cached scikit_build-0.11.1-py2.py3-none-any.whl (72 kB)
  Collecting cmake
    Using cached cmake-3.18.0.tar.gz (28 kB)
      ERROR: Command errored out with exit status 1:
       command: /usr/bin/python3 -c 'import sys, setuptools, tokenize; sys.argv[0] = '"'"'/tmp/pip-install-95tsmt_u/cmake/setup.py'"'"'; __file__='"'"'/tmp/pip-install-95tsmt_u/cmake/setup.py'"'"';f=getattr(tokenize, '"'"'open'"'"', open)(__file__);code=f.read().replace('"'"'rn'"'"', '"'"'n'"'"');f.close();exec(compile(code, __file__, '"'"'exec'"'"'))' egg_info --egg-base /tmp/pip-install-95tsmt_u/cmake/pip-egg-info
           cwd: /tmp/pip-install-95tsmt_u/cmake/
      Complete output (5 lines):
      Traceback (most recent call last):
        File "<string>", line 1, in <module>
        File "/tmp/pip-install-95tsmt_u/cmake/setup.py", line 7, in <module>
          from skbuild import setup
      ModuleNotFoundError: No module named 'skbuild'
      ----------------------------------------
  ERROR: Command errored out with exit status 1: python setup.py egg_info Check the logs for full command output.
  ----------------------------------------
ERROR: Command errored out with exit status 1: /usr/bin/python3 /usr/lib/python3/dist-packages/pip install --ignore-installed --no-user --prefix /tmp/pip-build-env-z4c_sn6u/overlay --no-warn-script-location --no-binary :none: --only-binary :none: -i https://pypi.org/simple -- setuptools wheel scikit-build cmake pip 'numpy==1.11.3; python_version=='"'"'3.5'"'"'' 'numpy==1.13.3; python_version=='"'"'3.6'"'"'' 'numpy==1.14.5; python_version=='"'"'3.7'"'"'' 'numpy==1.17.3; python_version>='"'"'3.8'"'"'' Check the logs for full command output.
Same when I tried to install ecapture, I am using the latest python version
![]()
yatu
85.6k12 gold badges83 silver badges136 bronze badges
asked Aug 14, 2020 at 9:56
![]()
4
Try to upgrade your pip with
pip install --upgrade pip
and then run the
pip install opencv-python
answered Aug 14, 2020 at 10:03
GautamrkGautamrk
1,1049 silver badges12 bronze badges
0
Installation and Usage guide on pypi web site says
Pip install fails with ModuleNotFoundError: No module named ‘skbuild’?
Since opencv-python version 4.3.0.*, manylinux1 wheels were replaced by manylinux2014 wheels. If your pip is too old, it will try to use the new source distribution introduced in 4.3.0.38 to manually build OpenCV because it does not know how to install manylinux2014 wheels. However, source build will also fail because of too old pip because it does not understand build dependencies in pyproject.toml. To use the new manylinux2014 pre-built wheels (or to build from source), your pip version must be >= 19.3.
Please upgrade pip with
pip install --upgrade pip
answered Aug 14, 2020 at 10:05
8
I was facing this similar situation:
Dockerfile:
FROM nvidia/cuda:10.0-cudnn7-runtime-ubuntu18.04

RUN apt-get update -y
RUN apt-get install -y vim curl iputils-ping python3-dev python3-pip libsm6
libxext6 libxrender-dev python3.6
RUN pip3 install -r /requirements.txt
...
requirements.txt:
...
opencv-python
...
Upon running docker-compose up &, I was receiving this error:
 Traceback (most recent call last):
   File "<string>", line 1, in <module>
   File "/tmp/pip-build-acog3xol/opencv-python/setup.py", line 9, in <module>
     import skbuild
 ModuleNotFoundError: No module named 'skbuild'
I tried the suggested solutions of upgrading pip3 but was getting the same problem.
What worked for me was fixing the opencv-python version in requirements.txt. Previously, it was pulling version 4.4.0.40. I instead changed requirements.txt to:
...
opencv-python==4.2.0.34
...
![]()
Dharman♦
30.5k22 gold badges84 silver badges133 bronze badges
answered Aug 16, 2020 at 17:41
user1145925user1145925
9713 gold badges13 silver badges24 bronze badges
1
Try this :
pip3 install cmake —user
pip3 install —upgrade pip —user
pip3 install opencv-python —user
answered Aug 14, 2020 at 10:07
0
If you go to the opencv-python PyPi page they will give troubleshooting tips for common errors. See opencv-python 4.4.0.40
The error you’re encountering is:
ModuleNotFoundError: No module named 'skbuild'
The fix for this is listed under the FAQ as follows:
Q: Pip install fails with ModuleNotFoundError: No module named 'skbuild'?
Since opencv-python version 4.3.0.*, manylinux1 wheels were replaced by manylinux2014 wheels. If your pip is too old, it will try to use the new source distribution introduced in 4.3.0.38 to manually build OpenCV because it does not know how to install manylinux2014 wheels. However, source build will also fail because of too old pip because it does not understand build dependencies in pyproject.toml. To use the new manylinux2014 pre-built wheels (or to build from source), your pip version must be >= 19.3. Please upgrade pip with pip install --upgrade pip.
TLDR:
pip install --upgrade pip
answered Aug 14, 2020 at 10:06
![]()
2
Python 3.8 was not working for me too. Now installing using Python 3.7, and it looks ok though still in progress:
python3.7 -m pip install opencv-python==4.3.0.38
Patrick
1,0262 gold badges10 silver badges31 bronze badges
answered Aug 14, 2020 at 13:25
1
Use Python 3.7.6 this is the most stable version. there are many things that don’t install on 3.8.
answered Aug 14, 2020 at 10:07
1
you need to install sbuild via pip. you can follow the below command.
It worked on my pc.
python3 -m pip install scikit-build
Best of Luck for you.
answered Nov 6, 2020 at 18:23
Deepak RajDeepak Raj
4423 silver badges14 bronze badges
I’ve been trying to install both OpenCV and cv2 from both Pycharm and from the terminal as suggested using:
pip install --user opencv
pip install --user cv2
but I’m getting the following error for them:
Collecting opencv
  Could not find a version that satisfies the requirement opencv (from versions: )
No matching distribution found for opencv
and
Collecting cv2
  Could not find a version that satisfies the requirement cv2 (from versions: )
No matching distribution found for cv2
How can I fix these and install the packages properly? I’m using python 3.4.
asked Jun 12, 2016 at 15:54
1
You are getting those errors because opencv and cv2 are not the python package names.
These are both included as part of the opencv-python package available to install from pip.
If you are using python 2 you can install with pip:
pip install opencv-python
Or use the equivilent for python 3:
pip3 install opencv-python
After running the appropriate pip command your package should be available to use from python.
answered Jan 31, 2018 at 1:40
Ryan GuestRyan Guest
6,0202 gold badges32 silver badges39 bronze badges
3
This the correct command that you need to install opencv
pip install opencv-python
if you get any error when you are trying to install the «opencv-python» package in pycharm, make sure that you have added your python path to ‘System Variables‘ section of Environment variables in Windows.
And also check whether you have configured a valid interpreter for your project
answered Apr 5, 2020 at 6:37
![]()
I ran into the same problem. One issue might be OpenCV is created for Python 2.7, not 3 (not all python 2.7 libraries will work in python 3 or greater). I also don’t believe you can download OpenCV directly through PyCharm’s package installer. I have found luck following the instructions: OpenCV Python. Specifically:
- Downloading and installing OpenCV from SourceForge
- Copying the cv2.pyd file from the download (opencvbuildpython2.7×64) into Python’s site-packages folder (something like: C:Python27Libsite-packages)
- In PyCharm, open the python Console (Tools>Python Console) and type:
import cv2, and assuming no errorsprint cv2.__version__
Alternatively, I have had luck using this package opencv-python, which you can straightforwardly install using pip with pip install opencv-python
Good luck!
answered Sep 3, 2016 at 15:31
mdoc-2011mdoc-2011
2,6974 gold badges21 silver badges43 bronze badges
python3.6 -m pip install opencv-python
will install cv2 in python3.6 branch
answered Jun 13, 2018 at 9:47
vishalvishal
8151 gold badge8 silver badges16 bronze badges
0
On Windows:
!pip install opencv-python
![]()
Neuron
5,0525 gold badges38 silver badges58 bronze badges
answered Jun 16, 2020 at 4:24
1
Try this. I am using Jupyter notebook (OS: Ubuntu 16.04 LTS on Google Cloud Platform + on Windows). Executed following command in the Jupyter notebook to install opencv:
!pip install opencv-contrib-python #working on both Windows and Ubuntu
After successful installation you will get following message:
Successfully installed opencv-contrib-python-4.1.0.25
Now restart the kernel and try to import opencv as:
import cv2
The same command can be used to installed opencv on Windows as well.
SOLUTION 2: try following commands to install opencv:
For Ubuntu:
Run following command from terminal:
sudo apt-get install libsm6 libxrender1 libfontconfig1
Restart Jupyter notebook kernel and execute following command:
!pip install opencv-contrib-python
NOTE: You can run all the above commands from the terminal as well without using ‘!’.
answered Jul 26, 2019 at 3:50
![]()
Keep it simple and just run.
pip install opencv-python
This is the simplest way of installing opencv.
If you still face issue, create a virtual environment and try installing opencv.
![]()
Neuron
5,0525 gold badges38 silver badges58 bronze badges
answered Sep 15, 2021 at 15:23
2
here is a tutorial that worked for me without any problem.
Copied from the site above the important part:
Download the OpenCV version corresponding to your Python installation
from here. In my case, I’ve used
opencv_python-3.1.0-cp35-cp35m-win32.whl.Now, open a cmd window like before. You can open this directly in your
Downloads folder if you SHIFT and right click inside it. The idea is
to open a cmd window where you’ve downloaded the above […] file. Use
the […] command to install […] OpenCV:1 pip install "opencv_python-3.1.0-cp35-cp35m-win32.whl"
Additional note: don’t forget to change the name of the downloaded file in the command you use.
Apparently by installing opencv, you’ll have access to cv2 too.
answered Dec 20, 2016 at 12:08
JuditJudit
392 bronze badges
Installing opencv is not that direct.
You need to pre-install some packages first.
I would not recommend the unofficial package opencv-python. Does not work properly in macos and ubuntu (see this post). No idea about windows.
There are many webs explaining how to install opencv and all required packages.
For example this one.
The problem of trying to install opencv several times is that you need to uninstall completely before attempting again, or you might end having many errors.
answered Apr 11, 2017 at 14:46
![]()
daniel_hckdaniel_hck
1,0803 gold badges19 silver badges38 bronze badges
you must install opencv-python
pip/pip3 install opencv-python
if you try import opencv-python, receive error.
Fix this error, use the import cv2
answered May 12, 2019 at 11:12
![]()
How about try some different mirrors?
If you are in China, I highly recommend you try:
sudo pip install --index https://pypi.mirrors.ustc.edu.cn/simple/ opencv-contrib-python
If not, just replace the url address to some other mirrors you like!
Good luck.
answered Jul 24, 2019 at 6:04
![]()
First step:
pip uninstall numpy
pip uninstall opencv-python
Second step:
pip install numpy
pip install opencv-python
answered Feb 7, 2021 at 7:25
![]()
Furkan GulsenFurkan Gulsen
1,3342 gold badges11 silver badges23 bronze badges
I had the same problem. Here are the steps for Windows 10 users.
Open CMD: win+r then type cmd. Now,
- Type
pip install virtualenv - Create a Virtual Environment, Type
virtualenv testopencv - Get Inside testopencv, Type
cd testopencv - Activate the Virtual Environment, Type
.Scriptsactivate - Now Install Opencv, Type
pip install opencv-contrib-python --upgrade - Let’s test Opencv, Type
Pythonthenimport cv2hit enter then typeprint(cv2.__version__)to check if its installed
Now, open a new cmd, win + r then type cmd, repeat step 6. If it gives you an error.
Go inside the testopencv folder, inside lib. Copy everything, go to your python directory, inside lib folder paste it and skip that are already present.
Again open a new cmd, repeat Step 6.
Hope it helps.
answered Jan 7, 2020 at 7:37
![]()
Debu ShinobiDebu Shinobi
2,00718 silver badges21 bronze badges
In jetso nano this work for me.
$ git clone https://github.com/JetsonHacksNano/buildOpenCV
$ cd buildOpenCV
![]()
4b0
21.8k30 gold badges95 silver badges142 bronze badges
answered Mar 30, 2020 at 11:42
![]()
When I was facing this issue I used to install OpenCV in pycharm installed package panel where we can find under the settings tab. Search «OpenCV-python» and install it in the installed package panel of right interpreter.
answered May 8, 2020 at 15:18
![]()
Hashan MalawanaHashan Malawana
3431 gold badge2 silver badges10 bronze badges
First run from cmd
pip --version
to make sure that you have the updated version installed.
Then run
pip install opencv-python
answered Jun 29, 2021 at 5:13
![]()
Go through with this link: https://learnopencv.com/install-opencv-4-on-raspberry-pi/
you can install OpenCV perfectly with out any error. but the problem was it will take lot of time to install.
I had used pi3 model B+ with 32GB class10 SD card for me it took more than 12 hours for complete installation.
answered Jul 25, 2021 at 7:01
If you still find any error to install open-cv in your mac, try this:
opencv-python==4.2.0.34
This worked for me.
answered May 2, 2022 at 22:28
![]()
Время на прочтение
2 мин
Количество просмотров 7.4K

В заголовке известная ошибка python3.
Интерпретатор python2 импортирует opencv без ошибок при установке совместно с python3 в единой среде исполнения.
Краткая инструкция по локализации ошибки далее.
Среда исполнения
Дистрибутив линукс с длинным циклом поддержки.
Установлены все стабильные обновления.
Все пакеты развёрнуты системным менеджером ( apt ) или сборкой в среде исполнения из исходных текстов штатными средствами.
Установлены штатным способом два интерпретатора: python-2.7 и python-3.5.
Пакетов со стороны, пакетов собранных вне среды исполнения, нарушенных зависимостей, конфликтов версий нет.
Признаки ошибки
Ошибка возникает на этапе загрузки библиотеки opencv в интерпретаторе python‑3.5.

Причина ошибки
Причина ошибки — разные файловые структуры у python‑2.7 и python‑3.5; отличие системы индексов версий в именовании каталогов и файлов.
В одном случае, python‑2.7, один индекс версии — 2.7.
В другом случае, python‑3.5, три индекса версии — 3, 3.5 и 3.5m.
Конфигуратор сборки opencv устанавливает файловые пути python3 подобно python2.
Сборка и установка модулей opencv для python3 производится с ошибками файловой структуры.
Локализация ошибки
Ошибка исправляется через уточнение связанных параметров cmake с последующей установкой opencv из исходных текстов.
CMAKE_BUILD_TYPE:STRING=Release

OPENCV_FORCE_PYTHON_LIBS:BOOL=ON
OPENCV_PYTHON3_VERSION:BOOL=ON

PYTHON2_EXECUTABLE:FILEPATH=/usr/bin/python2.7
PYTHON2_INCLUDE_DIR:PATH=/usr/include/python2.7
PYTHON2_INCLUDE_DIR2:PATH=/usr/include/x86_64-linux-gnu/python2.7
PYTHON2_LIBRARY:FILEPATH=/usr/lib/x86_64-linux-gnu/libpython2.7.so
PYTHON2_LIBRARY_DEBUG:FILEPATH=
PYTHON2_NUMPY_INCLUDE_DIRS:PATH=/usr/lib/python2.7/dist-packages/numpy/core/include
PYTHON2_PACKAGES_PATH:PATH=/usr/lib/python2.7/dist-packages

PYTHON3_EXECUTABLE:FILEPATH=/usr/bin/python3
PYTHON3_INCLUDE_DIR:PATH=/usr/include/python3.5m
PYTHON3_INCLUDE_DIR2:PATH=/usr/include/x86_64-linux-gnu/python3.5m
PYTHON3_LIBRARY:FILEPATH=/usr/lib/x86_64-linux-gnu/libpython3.5m.so
PYTHON3_LIBRARY_DEBUG:FILEPATH=
PYTHON3_NUMPY_INCLUDE_DIRS:PATH=/usr/lib/python3/dist-packages/numpy/core/include
PYTHON3_PACKAGES_PATH:PATH=/usr/lib/python3/dist-packages
Заключение
Ошибка локализована параметрами cmake.

Для других сред исполнения и версий python3 уточнять параметры cmake по‑обстоятельствам.
OpenCV Installation Troubleshooting Guide
[Revised 2011-08-29. See Change Log section for revision information.]This guide lists solutions for problems you might encounter when installing OpenCV and its dependencies. Many of the problems are related to using webcams. This guide is a companion guide to “A Comprehensive Guide to Installing and Configuring OpenCV 2.3 on Ubuntu,” which can be found on ozbotz.org.The problems are listed in the sequence that they might occur during a typical OpenCV install. If the problem is accompanied by an error message, the relevant part of the message is highlighted in yellow.
Here is a list of error messages that are addressed by this guide:
- ERROR: libx264 not found
- undefined reference to ‘x264_encoder_open_116’
- libv4lconvert-priv.h:25:21: fatal error: jpeglib.h: No such file or directory
- libv4l1.c:53:28: fatal error: linux/videodev.h: No such file or directory
- /home/osman/src/opencv/OpenCV-2.3.0/modules/highgui/src/cap_ffmpeg_impl.hpp:492:13: error: ‘CODEC_TYPE_VIDEO’ was not declared in this scope
- libv4lconvert: warning more framesizes then I can handle!
- [swscaler @ 0x89c3e30]No accelerated colorspace conversion found from yuv420p to bgr24.
- error while loading shared libraries: libopencv_core.so.2.3: cannot open shared object file: No such file or directory
- VIDIOC_DQBUF: Input/output error
- VIDIOC_QUERYMENU: Invalid argument
Problems Building ffmpeg
Problem
<84> .../ffmpeg$ ./configure --enable-gpl --enable-libfaac --enable-libmp3lame --enable-libopencore-amrnb --enable-libopencore-amrwb --enable-libtheora --enable-libvorbis --enable-libx264 --enable-libxvid --enable-nonfree --enable-postproc --enable-version3 --enable-x11grab

ERROR: libx264 not found
Solution
Use ffmpeg version 0.7.x. This error occurs if you configure ffmpeg version 0.6.x with the options shown above.
Problem
<84> .../ffmpeg$ makeSolution
LD ffmpeg_g
libavcodec/libavcodec.a(libx264.o): In function `X264_init':
/home/osman/src/ffmpeg/ffmpeg-0.7.3/libavcodec/libx264.c:395: undefined reference to 'x264_encoder_open_116'
collect2: ld returned 1 exit status
make: *** [ffmpeg_g] Error 1
Rebuild x264 and ffmpeg with the shared library option. To rebuild x264, change to the directory where you untared the x264 source files, and enter the following commands:
./configure --enable-shared --enable-pic

make

sudo make install
To rebuild ffmpeg, change to the directory where you untared the ffmpeg source files, and enter the following commands:
./configure --enable-gpl --enable-libfaac --enable-libmp3lame --enable-libopencore-amrnb --enable-libopencore-amrwb --enable-libtheora --enable-libvorbis --enable-libx264 --enable-libxvid --enable-nonfree --enable-postproc --enable-version3 --enable-x11grab --enable-shared

make

sudo make install
This solution comes from http://www.linuxquestions.org/questions/linux-newbie-8/problem-with-enable-libx264-option-in-ffmpeg-822156/page2.html.
Problems Building v4l
Problem
<37> .../v4l-utils-0.8.4 $ makeSolution
make -C lib all
make[1]: Entering directory `/home/osman/src/v4l/v4l-utils-0.8.4/lib'
make -C libv4lconvert all
make[2]: Entering directory `/home/osman/src/v4l/v4l-utils-0.8.4/lib/libv4lconvert'
cc -Wp,-MMD,"libv4lconvert.d",-MQ,"libv4lconvert.o",-MP -c -I../include -fvisibility=hidden -fPIC -DLIBDIR="/usr/local/lib" -DLIBSUBDIR="libv4l" -I../../include -I../../lib/include -D_GNU_SOURCE -DV4L_UTILS_VERSION='"0.8.4"' -g -O1 -Wall -Wpointer-arith -Wstrict-prototypes -Wmissing-prototypes -o libv4lconvert.o libv4lconvert.c
In file included from libv4lconvert.c:26:0:
libv4lconvert-priv.h:25:21: fatal error: jpeglib.h: No such file or directory compilation terminated.
make[2]: *** [libv4lconvert.o] Error 1
Install libjpeg. See “A Comprehensive Guide to Installing and Configuring OpenCV 2.3 on Ubuntu.”
Problem
<37> .../v4l-utils-0.8.4 $ make

...

cc -Wp,-MMD,"libv4l1.d",-MQ,"libv4l1.o",-MP -c -I../include -fvisibility=hidden -fPIC -I../../include -D_GNU_SOURCE -g -O1 -Wall -Wpointer-arith -Wstrict-prototypes -Wmissing-prototypes -o libv4l1.o libv4l1.c

libv4l1.c:53:28: fatal error: linux/videodev.h: No such file or directory

compilation terminated.

make[2]: *** [libv4l1.o] Error 1
Solution
Use v4l-utils-0.8.4 or later. This problem occurs when trying to compile an old version of v4l in Ubuntu 11.x. I have not seen this problem on Ubuntu 10.x.
Problems Building OpenCV
Problem
Make fails at around 30% with an error building cap_ffmeg.o. This error might look like this:
[ 29%] Building CXX object modules/highgui/CMakeFiles/opencv_highgui.dir/src/cap_ffmpeg.o

In file included from /home/osman/src/opencv/OpenCV-2.3.0/modules/highgui/src/cap_ffmpeg.cpp:45:0:

/home/osman/src/opencv/OpenCV-2.3.0/modules/highgui/src/cap_ffmpeg_impl.hpp: In member function ‘bool CvCapture_FFMPEG::reopen()’:

…

/home/osman/src/opencv/OpenCV-2.3.0/modules/highgui/src/cap_ffmpeg_impl.hpp:492:13: error: ‘CODEC_TYPE_VIDEO’ was not declared in this scope

...

/home/osman/src/opencv/OpenCV-2.3.0/modules/highgui/src/cap_ffmpeg_impl.hpp:828:10: error: ‘AVERROR_NUMEXPECTED’ was not declared in this scope

/home/osman/src/opencv/OpenCV-2.3.0/modules/highgui/src/cap_ffmpeg_impl.hpp:832:10: error: ‘AVERROR_NOFMT’ was not declared in this scope

/home/osman/src/opencv/OpenCV-2.3.0/modules/highgui/src/cap_ffmpeg_impl.hpp:834:10: error: ‘AVERROR_IO’ was not declared in this scope

/home/osman/src/opencv/OpenCV-2.3.0/modules/highgui/src/cap_ffmpeg_impl.hpp:836:10: error: ‘AVERROR_NOMEM’ was not declared in this scope
Solution
Install ffmpeg version 0.7.x. You are probably have version 0.8.x installed, which is not compatible with OpenCV 2.3.
Problems running a program using OpenCV libraries
Problem
$ ./my_webcam_program

libv4lconvert: warning more framesizes then I can handle!
Solution
Install v4l version 0.8.4 or later, and then run sudo ldconfig. Rerun your program; the message should go away. Note: I don’t really know in what version of v4l this was fixed, but I do know that it is fixed in version 0.8.4.
Problem
$ ./my_webcam_program

[swscaler @ 0x89c3e30]No accelerated colorspace conversion found from yuv420p to bgr24.

[swscaler @ 0x8893810]No accelerated colorspace conversion found from yuv420p to bgr24.

[swscaler @ 0x889c5b0]No accelerated colorspace conversion found from yuv420p to bgr24.

Last message repeated 1 times
Solution
The “accepted” solution is to rebuild x264 and ffmpeg with the shared library option. To rebuild x264, change to the directory where you untared the x264 source files, and enter the following commands:
./configure --enable-shared --enable-pic

make

sudo make install
To rebuild ffmpeg, change to the directory where you untared the ffmpeg source files, and enter the following commands:./configure --enable-gpl --enable-libfaac --enable-libmp3lame --enable-libopencore-amrnb --enable-libopencore-amrwb --enable-libtheora --enable-libvorbis --enable-libx264 --enable-libxvid --enable-nonfree --enable-postproc --enable-version3 --enable-x11grab --enable-shared
make
sudo make install
After rebuilding x264 and ffmpeg, you do not need to rebuild OpenCV. If the swscaler message still occurs when you run your program, run sudo ldconfig, and run your program again.
This solution comes from the following thread on ubuntuforums.org: http://ubuntuforums.org/showthread.php?t=1471616
Unfortunately for me, configuring and recompiling x264 and ffmpeg does not make the warning meesage go away. If try the solution above, please let me know in the comments if it works for you.
Problem
$ ./my_webcam_program

error while loading shared libraries: libopencv_core.so.2.3: cannot open shared object file: No such file or directory
Solutions (choose one)
1. Complete the “Configure Linux” step of the guide “A Comprehensive Guide to Installing and Configuring OpenCV 2.3 on Ubuntu.”
2. Set your LD_LIBRARY_PATHenvironment variable, as shown in the following example:export LD_LIBRARY_PATH=/usr/local/libReplace /usr/local/lib with the path where the OpenCV libraries are installed on your system.
Problem
VIDIOC_DQBUF: Input/output error

libv4l2: error converting / decoding frame data: v4l-convert: libjpeg error: Start Of Frame 0xc0: width=640, height=480, components=175

VIDIOC_DQBUF: Input/output error

libv4l2: error converting / decoding frame data: v4l-convert: libjpeg error: End Of Image
Solution
Make sure that your webcam is connected to a high-speed USB 2.0 port. I have seen this problem occur when my webcam was connected to a slower full-speed USB port.
Problem
<19> .../test1 $ ./my_webcam_program

VIDIOC_QUERYMENU: Invalid argument

VIDIOC_QUERYMENU: Invalid argument

VIDIOC_QUERYMENU: Invalid argument

VIDIOC_QUERYMENU: Invalid argument

VIDIOC_QUERYMENU: Invalid argument

VIDIOC_QUERYMENU: Invalid argument

VIDIOC_QUERYMENU: Invalid argument
Solution
I have not found a solution to this problem. If you know a solution, please let me know! The message is coming from v4l. The message occurs when a webcam is initialized. I think that my webcam, a Logitech C910, does not conform to the UVC specification, and v4l has trouble querying the parameters of the webcam. I can still get frames from the webcam, so I just ignore the message.
Change Log
- 2011-08-29 Added solution for ffmpeg make error
undefined reference to 'x264_encoder_open_116'
References
- A Comprehensive Guide to Installing and Configuring OpenCV 2.3 on Ubuntu

f22
Codeby Team
-
#2
Ignoring numpy: markers ‘python_version == «3.5»‘
don’t match your environment Ignoring numpy: markers ‘python_version == «3.6»‘
don’t match your environment Ignoring numpy: markers ‘python_version == «3.7»‘
don’t match your environment
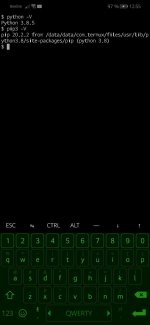
А какая версия python и pip установлена?
python -V
pip3 -V
Возможно стоит запускать установку от конкретной версии.
-
#3
А какая версия python и pip установлена?
python -V
pip3 -VВозможно стоит запускать установку от конкретной версии.
-
Screenshot_20200822_125502_com.termux.jpg
66 КБ
· Просмотры: 383
billy_605
-
#4
Короче, выполняеш все эти команды, прям все команды даже первую(установку питона):
1. pkg install python python-dev # установка питона
2. pkg install libjpeg-turbo-dev libpng-dev cmake pkg-config # установка нужных компонентов
3. git clone [URL]https://github.com/opencv/opencv[/URL] && cd opencv # качаеш пакет opencv из гитхаба, после установки пакета, комманда *&& cd opencv* автоматом зайдет в папку папку opencv
4. mkdir build && cd build # создаеш папку и открываеш его(папку)
5. LDFLAGS=" -llog -lpython3" cmake -DCMAKE_BUILD_TYPE=RELEASE -DCMAKE_INSTALL_PREFIX=$PREFIX -DBUILD_opencv_python3=on -DBUILD_opencv_python2=off -DWITH_QT=OFF -DWITH_GTK=OFF .. # ставиш эту комманду
6. make # выполняеш
7. make install # устанавливаеш
-
#5
Короче, выполняеш все эти команды, прям все команды даже первую(установку питона):
1.
pkg install python python-dev# установка питона2.
pkg install libjpeg-turbo-dev libpng-dev cmake pkg-config# установка нужных компонентов3.
git clone [URL]https://github.com/opencv/opencv[/URL] && cd opencv# качаеш пакет opencv из гитхаба, после установки пакета, комманда *&& cd opencv* автоматом зайдет в папку папку opencv4.
mkdir build && cd build# создаеш папку и открываеш его(папку)5.
LDFLAGS=" -llog -lpython3" cmake -DCMAKE_BUILD_TYPE=RELEASE -DCMAKE_INSTALL_PREFIX=$PREFIX -DBUILD_opencv_python3=on -DBUILD_opencv_python2=off -DWITH_QT=OFF -DWITH_GTK=OFF ..# ставиш эту комманду6.
make# выполняеш7.
make install# устанавливаеш
$pkg install python python-dev
Checking availability of current mirror: ok
Reading package lists… Done
Building dependency tree
Reading state information… Done
Package python-dev is not available, but is referred to by another package.
This may mean that the package is missing, has been obsoleted, or
is only available from another source
However the following packages replace it:
python
E: Package ‘python-dev’ has no installation candidate
billy_605
-
#6
$pkg install python python-dev
Checking availability of current mirror: ok
Reading package lists… Done
Building dependency tree
Reading state information… Done
Package python-dev is not available, but is referred to by another package.
This may mean that the package is missing, has been obsoleted, or
is only available from another source
However the following packages replace it:
pythonE: Package ‘python-dev’ has no installation candidate
Попробуй отделнeю установку:
1. pkq install python-dev
Если не будет, работать попробуй выполнить осталние команды.
-
#7
Попробуй отделнeю установку:
1.pkq install python-devЕсли не будет работать попробуй выполнить осталние команды
Тоже самое
billy_605
-
#8
Осталные комманды попробуй выполнить
-
#9
Осталные комманды попробуй выполнить
$ LDFLAGS=» -llog -lpython3″ cmake -DCMAKE_BUILD_TYPE=RELEASE -DCMAKE_INSTALL_PREFIX=$PREFIX -DBUILD_opencv_python3=on -DBUILD_opencv_python2=off -DWITH_QT=OFF -DWITH_GTK=OFF ..
— The CXX compiler identification is Clang 10.0.1
— The C compiler identification is Clang 10.0.1
— Detecting CXX compiler ABI info
— Detecting CXX compiler ABI info — done
— Check for working CXX compiler: /data/data/com.termux/files/usr/bin/c++ — skipped
— Detecting CXX compile features
— Detecting CXX compile features — done
— Detecting C compiler ABI info
— Detecting C compiler ABI info — done
— Check for working C compiler: /data/data/com.termux/files/usr/bin/cc — skipped
— Detecting C compile features
— Detecting C compile features — done
— Detected processor: aarch64
— Found PythonInterp: /data/data/com.termux/files/usr/bin/python (found suitable version «3.8.5», minimum required is «2.7»)
CMake Warning at cmake/OpenCVDetectPython.cmake:81 (message):
CMake’s ‘find_host_package(PythonInterp 2.7)’ found wrong Python version:
PYTHON_EXECUTABLE=/data/data/com.termux/files/usr/bin/python
PYTHON_VERSION_STRING=3.8.5
Consider providing the ‘PYTHON2_EXECUTABLE’ variable via CMake command line
or environment variables
Call Stack (most recent call first):
cmake/OpenCVDetectPython.cmake:271 (find_python)
CMakeLists.txt:599 (include)
— Could NOT find Python2 (missing: Python2_EXECUTABLE Interpreter)
Reason given by package:
Interpreter: Wrong major version for the interpreter «/data/data/com.termux/files/usr/bin/python»
— Found PythonInterp: /data/data/com.termux/files/usr/bin/python3 (found suitable version «3.8.5», minimum required is «3.2»)
— Looking for ccache — not found
— Performing Test HAVE_CXX_FSIGNED_CHAR
— Performing Test HAVE_CXX_FSIGNED_CHAR — Success
— Performing Test HAVE_C_FSIGNED_CHAR
— Performing Test HAVE_C_FSIGNED_CHAR — Success
— Performing Test HAVE_CXX_W
— Performing Test HAVE_CXX_W — Success
— Performing Test HAVE_C_W
— Performing Test HAVE_C_W — Success
— Performing Test HAVE_CXX_WALL
— Performing Test HAVE_CXX_WALL — Success
— Performing Test HAVE_C_WALL
— Performing Test HAVE_C_WALL — Success
— Performing Test HAVE_CXX_WERROR_RETURN_TYPE
— Performing Test HAVE_CXX_WERROR_RETURN_TYPE — Success
— Performing Test HAVE_C_WERROR_RETURN_TYPE
— Performing Test HAVE_C_WERROR_RETURN_TYPE — Success
— Performing Test HAVE_CXX_WERROR_NON_VIRTUAL_DTOR
— Performing Test HAVE_CXX_WERROR_NON_VIRTUAL_DTOR — Success
— Performing Test HAVE_C_WERROR_NON_VIRTUAL_DTOR
— Performing Test HAVE_C_WERROR_NON_VIRTUAL_DTOR — Success
— Performing Test HAVE_CXX_WERROR_ADDRESS
— Performing Test HAVE_CXX_WERROR_ADDRESS — Success
— Performing Test HAVE_C_WERROR_ADDRESS
— Performing Test HAVE_C_WERROR_ADDRESS — Success
— Performing Test HAVE_CXX_WERROR_SEQUENCE_POINT
— Performing Test HAVE_CXX_WERROR_SEQUENCE_POINT — Success
— Performing Test HAVE_C_WERROR_SEQUENCE_POINT
— Performing Test HAVE_C_WERROR_SEQUENCE_POINT — Success
— Performing Test HAVE_CXX_WFORMAT
— Performing Test HAVE_CXX_WFORMAT — Success
— Performing Test HAVE_C_WFORMAT
— Performing Test HAVE_C_WFORMAT — Success
— Performing Test HAVE_CXX_WERROR_FORMAT_SECURITY
— Performing Test HAVE_CXX_WERROR_FORMAT_SECURITY — Success
— Performing Test HAVE_C_WERROR_FORMAT_SECURITY
— Performing Test HAVE_C_WERROR_FORMAT_SECURITY — Success
— Performing Test HAVE_CXX_WMISSING_DECLARATIONS
— Performing Test HAVE_CXX_WMISSING_DECLARATIONS — Success
— Performing Test HAVE_C_WMISSING_DECLARATIONS
— Performing Test HAVE_C_WMISSING_DECLARATIONS — Success
— Performing Test HAVE_CXX_WMISSING_PROTOTYPES
— Performing Test HAVE_CXX_WMISSING_PROTOTYPES — Success
— Performing Test HAVE_C_WMISSING_PROTOTYPES
— Performing Test HAVE_C_WMISSING_PROTOTYPES — Success
— Performing Test HAVE_CXX_WSTRICT_PROTOTYPES
— Performing Test HAVE_CXX_WSTRICT_PROTOTYPES — Success
— Performing Test HAVE_C_WSTRICT_PROTOTYPES
— Performing Test HAVE_C_WSTRICT_PROTOTYPES — Success
— Performing Test HAVE_CXX_WUNDEF
— Performing Test HAVE_CXX_WUNDEF — Success
— Performing Test HAVE_C_WUNDEF
— Performing Test HAVE_C_WUNDEF — Success
— Performing Test HAVE_CXX_WINIT_SELF
— Performing Test HAVE_CXX_WINIT_SELF — Success
— Performing Test HAVE_C_WINIT_SELF
— Performing Test HAVE_C_WINIT_SELF — Success
— Performing Test HAVE_CXX_WPOINTER_ARITH
— Performing Test HAVE_CXX_WPOINTER_ARITH — Success
— Performing Test HAVE_C_WPOINTER_ARITH
— Performing Test HAVE_C_WPOINTER_ARITH — Success
— Performing Test HAVE_CXX_WSHADOW
— Performing Test HAVE_CXX_WSHADOW — Success
— Performing Test HAVE_C_WSHADOW
— Performing Test HAVE_C_WSHADOW — Success
— Performing Test HAVE_CXX_WSIGN_PROMO
— Performing Test HAVE_CXX_WSIGN_PROMO — Success
— Performing Test HAVE_C_WSIGN_PROMO
— Performing Test HAVE_C_WSIGN_PROMO — Success
— Performing Test HAVE_CXX_WUNINITIALIZED
— Performing Test HAVE_CXX_WUNINITIALIZED — Success
— Performing Test HAVE_C_WUNINITIALIZED
— Performing Test HAVE_C_WUNINITIALIZED — Success
— Performing Test HAVE_CXX_WINCONSISTENT_MISSING_OVERRIDE
— Performing Test HAVE_CXX_WINCONSISTENT_MISSING_OVERRIDE — Success
— Performing Test HAVE_C_WINCONSISTENT_MISSING_OVERRIDE
— Performing Test HAVE_C_WINCONSISTENT_MISSING_OVERRIDE — Success
— Performing Test HAVE_CXX_WNO_DELETE_NON_VIRTUAL_DTOR
— Performing Test HAVE_CXX_WNO_DELETE_NON_VIRTUAL_DTOR — Success
— Performing Test HAVE_C_WNO_DELETE_NON_VIRTUAL_DTOR
— Performing Test HAVE_C_WNO_DELETE_NON_VIRTUAL_DTOR — Success
— Performing Test HAVE_CXX_WNO_UNNAMED_TYPE_TEMPLATE_ARGS
— Performing Test HAVE_CXX_WNO_UNNAMED_TYPE_TEMPLATE_ARGS — Success
— Performing Test HAVE_C_WNO_UNNAMED_TYPE_TEMPLATE_ARGS
— Performing Test HAVE_C_WNO_UNNAMED_TYPE_TEMPLATE_ARGS — Success
— Performing Test HAVE_CXX_WNO_COMMENT
— Performing Test HAVE_CXX_WNO_COMMENT — Success
— Performing Test HAVE_C_WNO_COMMENT
— Performing Test HAVE_C_WNO_COMMENT — Success
— Performing Test HAVE_CXX_WNO_DEPRECATED_ENUM_ENUM_CONVERSION
— Performing Test HAVE_CXX_WNO_DEPRECATED_ENUM_ENUM_CONVERSION — Success
— Performing Test HAVE_C_WNO_DEPRECATED_ENUM_ENUM_CONVERSION
— Performing Test HAVE_C_WNO_DEPRECATED_ENUM_ENUM_CONVERSION — Success
— Performing Test HAVE_CXX_WNO_DEPRECATED_ANON_ENUM_ENUM_CONVERSION
— Performing Test HAVE_CXX_WNO_DEPRECATED_ANON_ENUM_ENUM_CONVERSION — Success
— Performing Test HAVE_C_WNO_DEPRECATED_ANON_ENUM_ENUM_CONVERSION
— Performing Test HAVE_C_WNO_DEPRECATED_ANON_ENUM_ENUM_CONVERSION — Success
— Performing Test HAVE_CXX_FDIAGNOSTICS_SHOW_OPTION
— Performing Test HAVE_CXX_FDIAGNOSTICS_SHOW_OPTION — Success
— Performing Test HAVE_C_FDIAGNOSTICS_SHOW_OPTION
— Performing Test HAVE_C_FDIAGNOSTICS_SHOW_OPTION — Success
— Performing Test HAVE_CXX_QUNUSED_ARGUMENTS
— Performing Test HAVE_CXX_QUNUSED_ARGUMENTS — Success
— Performing Test HAVE_C_QUNUSED_ARGUMENTS
— Performing Test HAVE_C_QUNUSED_ARGUMENTS — Success
— Performing Test HAVE_CPU_NEON_SUPPORT (check file: cmake/checks/cpu_neon.cpp)
— Performing Test HAVE_CPU_NEON_SUPPORT — Success
— Performing Test HAVE_CPU_FP16_SUPPORT (check file: cmake/checks/cpu_fp16.cpp)
— Performing Test HAVE_CPU_FP16_SUPPORT — Success
— Performing Test HAVE_CPU_BASELINE_FLAGS
— Performing Test HAVE_CPU_BASELINE_FLAGS — Success
— Performing Test HAVE_CXX_FVISIBILITY_HIDDEN
— Performing Test HAVE_CXX_FVISIBILITY_HIDDEN — Success
— Performing Test HAVE_C_FVISIBILITY_HIDDEN
— Performing Test HAVE_C_FVISIBILITY_HIDDEN — Success
— Performing Test HAVE_CXX_FVISIBILITY_INLINES_HIDDEN
— Performing Test HAVE_CXX_FVISIBILITY_INLINES_HIDDEN — Success
— Performing Test HAVE_C_FVISIBILITY_INLINES_HIDDEN
— Performing Test HAVE_C_FVISIBILITY_INLINES_HIDDEN — Success
— Performing Test HAVE_LINK_AS_NEEDED
— Performing Test HAVE_LINK_AS_NEEDED — Success
— Looking for pthread.h
— Looking for pthread.h — found
— Looking for posix_memalign
— Looking for posix_memalign — found
— Looking for malloc.h
— Looking for malloc.h — found
— Looking for memalign
— Looking for memalign — found
— Check if the system is big endian
— Searching 16 bit integer
— Looking for sys/types.h
— Looking for sys/types.h — found
— Looking for stdint.h
— Looking for stdint.h — found
— Looking for stddef.h
— Looking for stddef.h — found
— Check size of unsigned short
— Check size of unsigned short — done
— Searching 16 bit integer — Using unsigned short
— Check if the system is big endian — little endian
— Found ZLIB: /data/data/com.termux/files/usr/lib/libz.so (found suitable version «1.2.11», minimum required is «1.2.3»)
— Performing Test HAVE_C_WNO_UNUSED_PARAMETER
— Performing Test HAVE_C_WNO_UNUSED_PARAMETER — Success
— Performing Test HAVE_C_WNO_SIGN_COMPARE
— Performing Test HAVE_C_WNO_SIGN_COMPARE — Success
— Performing Test HAVE_C_WNO_SHORTEN_64_TO_32
— Performing Test HAVE_C_WNO_SHORTEN_64_TO_32 — Success
— Performing Test HAVE_C_WNO_IMPLICIT_FALLTHROUGH
— Performing Test HAVE_C_WNO_IMPLICIT_FALLTHROUGH — Success
— libjpeg-turbo: VERSION = 2.0.5, BUILD = opencv-4.4.0-dev-libjpeg-turbo
— Check size of size_t
— Check size of size_t — done
— Check size of unsigned long
— Check size of unsigned long — done
— Performing Test HAVE_BUILTIN_CTZL
— Performing Test HAVE_BUILTIN_CTZL — Success
— Looking for include file locale.h
— Looking for include file locale.h — found
— Looking for include file stdlib.h
— Looking for include file stdlib.h — found
— Looking for include file sys/types.h
— Looking for include file sys/types.h — found
— Looking for assert.h
— Looking for assert.h — found
— Looking for dlfcn.h
— Looking for dlfcn.h — found
— Looking for fcntl.h
— Looking for fcntl.h — found
— Looking for inttypes.h
— Looking for inttypes.h — found
— Looking for io.h
— Looking for io.h — not found
— Looking for limits.h
— Looking for limits.h — found
— Looking for memory.h
— Looking for memory.h — found
— Looking for search.h
— Looking for search.h — found
— Looking for string.h
— Looking for string.h — found
— Looking for strings.h
— Looking for strings.h — found
— Looking for sys/time.h
— Looking for sys/time.h — found
— Looking for unistd.h
— Looking for unistd.h — found
— Performing Test C_HAS_inline
— Performing Test C_HAS_inline — Success
— Check size of signed short
— Check size of signed short — done
— Check size of unsigned short
— Check size of unsigned short — done
— Check size of signed int
— Check size of signed int — done
— Check size of unsigned int
— Check size of unsigned int — done
— Check size of signed long
— Check size of signed long — done
— Check size of signed long long
— Check size of signed long long — done
— Check size of unsigned long long
— Check size of unsigned long long — done
— Check size of unsigned char *
— Check size of unsigned char * — done
— Check size of ptrdiff_t
— Check size of ptrdiff_t — done
— Check size of INT8
— Check size of INT8 — failed
— Check size of INT16
— Check size of INT16 — failed
— Check size of INT32
— Check size of INT32 — failed
— Looking for floor
— Looking for floor — not found
— Looking for pow
— Looking for pow — not found
— Looking for sqrt
— Looking for sqrt — not found
— Looking for isascii
— Looking for isascii — found
— Looking for memset
— Looking for memset — found
— Looking for mmap
— Looking for mmap — found
— Looking for getopt
— Looking for getopt — found
— Looking for memmove
— Looking for memmove — found
— Looking for setmode
— Looking for setmode — not found
— Looking for strcasecmp
— Looking for strcasecmp — found
— Looking for strchr
— Looking for strchr — found
— Looking for strrchr
— Looking for strrchr — found
— Looking for strstr
— Looking for strstr — found
— Looking for strtol
— Looking for strtol — found
— Looking for strtol
— Looking for strtol — found
— Looking for strtoull
— Looking for strtoull — found
— Looking for lfind
— Looking for lfind — found
— Performing Test HAVE_SNPRINTF
— Performing Test HAVE_SNPRINTF — Success
— Check if the system is big endian
— Searching 16 bit integer
— Searching 16 bit integer — Using unsigned short
— Check if the system is big endian — little endian
— Performing Test HAVE_C_WNO_UNUSED_BUT_SET_VARIABLE
— Performing Test HAVE_C_WNO_UNUSED_BUT_SET_VARIABLE — Failed
— Performing Test HAVE_C_WNO_MISSING_PROTOTYPES
— Performing Test HAVE_C_WNO_MISSING_PROTOTYPES — Success
— Performing Test HAVE_C_WNO_MISSING_DECLARATIONS
— Performing Test HAVE_C_WNO_MISSING_DECLARATIONS — Success
— Performing Test HAVE_C_WNO_UNDEF
— Performing Test HAVE_C_WNO_UNDEF — Success
— Performing Test HAVE_C_WNO_UNUSED
— Performing Test HAVE_C_WNO_UNUSED — Success
— Performing Test HAVE_C_WNO_CAST_ALIGN
— Performing Test HAVE_C_WNO_CAST_ALIGN — Success
— Performing Test HAVE_C_WNO_SHADOW
— Performing Test HAVE_C_WNO_SHADOW — Success
— Performing Test HAVE_C_WNO_MAYBE_UNINITIALIZED
— Performing Test HAVE_C_WNO_MAYBE_UNINITIALIZED — Failed
— Performing Test HAVE_C_WNO_POINTER_TO_INT_CAST
— Performing Test HAVE_C_WNO_POINTER_TO_INT_CAST — Success
— Performing Test HAVE_C_WNO_INT_TO_POINTER_CAST
— Performing Test HAVE_C_WNO_INT_TO_POINTER_CAST — Success
— Performing Test HAVE_C_WNO_MISLEADING_INDENTATION
— Performing Test HAVE_C_WNO_MISLEADING_INDENTATION — Success
— Performing Test HAVE_CXX_WNO_MISSING_DECLARATIONS
— Performing Test HAVE_CXX_WNO_MISSING_DECLARATIONS — Success
— Performing Test HAVE_CXX_WNO_UNUSED_PARAMETER
— Performing Test HAVE_CXX_WNO_UNUSED_PARAMETER — Success
— Performing Test HAVE_CXX_WNO_MISSING_PROTOTYPES
— Performing Test HAVE_CXX_WNO_MISSING_PROTOTYPES — Success
— Performing Test HAVE_CXX_WNO_UNDEF
— Performing Test HAVE_CXX_WNO_UNDEF — Success
— Performing Test HAVE_C_STD_C99
— Performing Test HAVE_C_STD_C99 — Success
— Performing Test HAVE_C_WNO_UNUSED_VARIABLE
— Performing Test HAVE_C_WNO_UNUSED_VARIABLE — Success
— Performing Test HAVE_C_WNO_UNUSED_FUNCTION
— Performing Test HAVE_C_WNO_UNUSED_FUNCTION — Success
— Could NOT find OpenJPEG (minimal suitable version: 2.0, recommended version >= 2.3.1)
— Performing Test HAVE_C_WNO_IMPLICIT_FUNCTION_DECLARATION
— Performing Test HAVE_C_WNO_IMPLICIT_FUNCTION_DECLARATION — Success
— Performing Test HAVE_C_WNO_UNINITIALIZED
— Performing Test HAVE_C_WNO_UNINITIALIZED — Success
— Performing Test HAVE_C_WNO_UNUSED_BUT_SET_PARAMETER
— Performing Test HAVE_C_WNO_UNUSED_BUT_SET_PARAMETER — Failed
— Performing Test HAVE_C_WNO_STRICT_OVERFLOW
— Performing Test HAVE_C_WNO_STRICT_OVERFLOW — Success
— Performing Test HAVE_C_WNO_POINTER_COMPARE
— Performing Test HAVE_C_WNO_POINTER_COMPARE — Success
— Performing Test HAVE_C_WNO_ABSOLUTE_VALUE
— Performing Test HAVE_C_WNO_ABSOLUTE_VALUE — Success
— Performing Test HAVE_C_WNO_STRICT_PROTOTYPES
— Performing Test HAVE_C_WNO_STRICT_PROTOTYPES — Success
— math lib ‘libm’ not found; floating point support disabled
— Looking for semaphore.h
— Looking for semaphore.h — found
— Performing Test HAVE_CXX_WNO_SHADOW
— Performing Test HAVE_CXX_WNO_SHADOW — Success
— Performing Test HAVE_CXX_WNO_UNUSED
— Performing Test HAVE_CXX_WNO_UNUSED — Success
— Performing Test HAVE_CXX_WNO_SIGN_COMPARE
— Performing Test HAVE_CXX_WNO_SIGN_COMPARE — Success
— Performing Test HAVE_CXX_WNO_UNINITIALIZED
— Performing Test HAVE_CXX_WNO_UNINITIALIZED — Success
— Performing Test HAVE_CXX_WNO_SWITCH
— Performing Test HAVE_CXX_WNO_SWITCH — Success
— Performing Test HAVE_CXX_WNO_PARENTHESES
— Performing Test HAVE_CXX_WNO_PARENTHESES — Success
— Performing Test HAVE_CXX_WNO_ARRAY_BOUNDS
— Performing Test HAVE_CXX_WNO_ARRAY_BOUNDS — Success
— Performing Test HAVE_CXX_WNO_EXTRA
— Performing Test HAVE_CXX_WNO_EXTRA — Success
— Performing Test HAVE_CXX_WNO_DEPRECATED_DECLARATIONS
— Performing Test HAVE_CXX_WNO_DEPRECATED_DECLARATIONS — Success
— Performing Test HAVE_CXX_WNO_MISLEADING_INDENTATION
— Performing Test HAVE_CXX_WNO_MISLEADING_INDENTATION — Success
— Performing Test HAVE_CXX_WNO_DEPRECATED
— Performing Test HAVE_CXX_WNO_DEPRECATED — Success
— Performing Test HAVE_CXX_WNO_SUGGEST_OVERRIDE
— Performing Test HAVE_CXX_WNO_SUGGEST_OVERRIDE — Failed
— Performing Test HAVE_CXX_WNO_INCONSISTENT_MISSING_OVERRIDE
— Performing Test HAVE_CXX_WNO_INCONSISTENT_MISSING_OVERRIDE — Success
— Performing Test HAVE_CXX_WNO_IMPLICIT_FALLTHROUGH
— Performing Test HAVE_CXX_WNO_IMPLICIT_FALLTHROUGH — Success
— Performing Test HAVE_CXX_WNO_TAUTOLOGICAL_COMPARE
— Performing Test HAVE_CXX_WNO_TAUTOLOGICAL_COMPARE — Success
— Performing Test HAVE_CXX_WNO_REORDER
— Performing Test HAVE_CXX_WNO_REORDER — Success
— Performing Test HAVE_CXX_WNO_UNUSED_RESULT
— Performing Test HAVE_CXX_WNO_UNUSED_RESULT — Success
— Performing Test HAVE_CXX_WNO_UNUSED_LOCAL_TYPEDEFS
— Performing Test HAVE_CXX_WNO_UNUSED_LOCAL_TYPEDEFS — Success
— Performing Test HAVE_CXX_WNO_SIGN_PROMO
— Performing Test HAVE_CXX_WNO_SIGN_PROMO — Success
— Performing Test HAVE_CXX_WNO_TAUTOLOGICAL_UNDEFINED_COMPARE
— Performing Test HAVE_CXX_WNO_TAUTOLOGICAL_UNDEFINED_COMPARE — Success
— Performing Test HAVE_CXX_WNO_IGNORED_QUALIFIERS
— Performing Test HAVE_CXX_WNO_IGNORED_QUALIFIERS — Success
— Performing Test HAVE_CXX_WNO_UNUSED_FUNCTION
— Performing Test HAVE_CXX_WNO_UNUSED_FUNCTION — Success
— Performing Test HAVE_CXX_WNO_UNUSED_CONST_VARIABLE
— Performing Test HAVE_CXX_WNO_UNUSED_CONST_VARIABLE — Success
— Performing Test HAVE_CXX_WNO_SHORTEN_64_TO_32
— Performing Test HAVE_CXX_WNO_SHORTEN_64_TO_32 — Success
— Performing Test HAVE_CXX_WNO_INVALID_OFFSETOF
— Performing Test HAVE_CXX_WNO_INVALID_OFFSETOF — Success
— Performing Test HAVE_CXX_WNO_ENUM_COMPARE_SWITCH
— Performing Test HAVE_CXX_WNO_ENUM_COMPARE_SWITCH — Success
CMake Error at cmake/android/OpenCVDetectAndroidSDK.cmake:49 (message):
Android SDK: specify path to Android SDK via ANDROID_SDK_ROOT /
ANDROID_HOME / ANDROID_SDK variables
Call Stack (most recent call first):
cmake/android/OpenCVDetectAndroidSDK.cmake:172 (ocv_detect_android_sdk)
CMakeLists.txt:702 (include)
— Configuring incomplete, errors occurred!
See also «/data/data/com.termux/files/home/opencv/build/CMakeFiles/CMakeOutput.log».
See also «/data/data/com.termux/files/home/opencv/build/CMakeFiles/CMakeError.log».
$ make
make: *** No targets specified and no makefile found. Stop.