РЕЧЬ ИДЕТ О «СТАРТОВОЙ ПЕЧКЕ»
до этого метода додумался не я. Я просто собрал мнения и советы людей.
(Мне посоветовали перед началом заправить картриджи тонером, чтоб при выходе из F-mode в S-mode не нацеплять доп.ошибки.)
1 Вынимаем печку и разбираем её:
откручиваем 4 болтика на корпусе +
снимаем 2шт синие штучки, рядом с ними нарисованы замочки (для их снятия их надо до конца закрыть, а дальше выдернуть.
Чистим ватной палочкой спиртиком силиконовый вал печки. (Ну я так сделал).
2 В печке 2 разъёма один (который нам нужен) находится ближе к краю корпуса, его надо открутить и вытащить. Для этого необходимо аккуратно уложенные провода внутри печки вытащить из пазов (провода толстые и тонкие тёмносерого цвета).
3 Вытащив разъем из корпуса (у меня получилось только на 20-30мм) протаскиваем к нему 2 проводочка ,заранее заготовленных, по пути следования к нему серых проводков. Из-за того, что в этом разъёме отсутствует как раз только две клеммы(контакты), то ошибиться куда цеплять нельзя, ОТСУТСТВУЮЩИЕ КОНТАКТЫ ЭТО НАШИ! Я в гнезда откуда не отходят внутрь печки 2 провода засунул 2 своих провода (предварительно на конце немного зачищенные). Т.К. не паял, то присутствие контакта проверил подключив тестер в режиме проверки наличия цепи (когда 2 провода тестера замыкаешь, а он пищит) и одним щупом к контакту, как на рисунке, а другой к соответствующему выведенному мной проводку.
4. Аккуратно собираем. Провода из печки вывел там, где синий рычаг развода или поднятия валов. Вывел их из принтера так, чтоб их не перебило или не нарушило изоляции.острыми гранями крышки принтера. (вывел в области рычажков закрытия печки синие, рядом с которыми нарисованы замочки).
5. Если принтер в F-mode, то его надо перевести в S-mode.
6. Отключаем принтер.
7. Подключаем к выведенным проводкам аналоговый тестер (со стрелочкой).В него предварительно ставим батарейку, или проверяем, что вставленная ещё жива. Выставляем его на положение 250mA.
8. Включаем принтер и когда стрелка подойдет к 250мА разрываем цепь, т.е. отсоединяем от проводка щуп тестера. Если стрелка дернется в обратную сторону, то значит надо поменять щупы тестера местами (спутали + с -). У меня получилось с 3 раза.
9. Перезагружаем принтер. Я перезагрузил принтер 2 раза, потому что после первой перезагрузки выпала ошибка вместо 980 — 115. Не понял почему, но факт. А после 2 перезагрузки зашумела печка и мои любимые ошибки о неустановленных цветных картриджах. ЗНАЧИТ ОК!
10 Переводим обратно принтер в F-mode.
11 Наслаждаемся.
Всем, кто помог СПАСИБО!

Сделал по инструкции Troy2,( кроме пункта 5. Если принтер в F-mode, то его надо перевести в S-mode.), включил принтер- инициализация, RAM тест и далее вышла ошибка 980, в меню зайти не смог, как посмотреть в каком MODE режиме принтер и поменять на нужный не понятно. При включении и инициализации стрелка амперметра даже не шелохнулась…?
——————————————————————
Кнопки «верх» «низ» «help» одновременно
Может кому пригодится на будущее:
Для смены режима необходимо зайти в м-menu ( включаем принтер и одновременно удерживаем кнопки HELP+UP+DOWN) ->далее вводим пароль :»000000″ кнопкой DOWN находим DIAGNOSTIC MODE…далее ENTER … ищем Factory mode …переключаем в Shiping mode.
Сброс печки только в S-mode.
Благодарю всех, кто помог, а особенно Troy2 очень помог, при сбросе печки тоже получил ошибку 155, после перезапуска вернул F-mode, получил сообщение, что мало черного тонера. А в целом печатать можно!

Случилась такая же ерунда на стартовой печке, бумага для холодного трансфера намоталась на вал.
Все сделал по описанию.
Дополнение:
Провода все распутал полностью, в итоге разъем вылез см на 5, чего достаточно для удобства подсоединения новый проводов.
Обнулял цифровым тестером. Контакт тестера COM цепляем на дальний от серых проводков контакт разъема, а Контакт тестера VmA на ближний к серым проводам. Фотки есть, могу как-нибудь выложить.
Выловить 250мА не смог, скидывал клемму СРАЗУ когда цифры начинали бежать.
Получилось попытки с третьей.
Если передержать, то появляется ошибка 155 (вроде) — наличие предохранителя в печке.
———————————————————
Предохранитель внутри снизу, на колодке. Я в своё время, когда боролся с подобной проблемой, нашел распиновку и картинки, так что ищите и обрящете (картинки не сохранил, поэтому показать не могу, да и принтер у меня был немного другой). Кажется, у Кудесника (kudesnik.net) были ссылки на методику сброса с картинками. Разбирать придётся, но там легко, насколько я помню (я справился методом тыка).
Предохранитель должен быть специальный. Ну то есть Вы можете рискнуть и поставить любой с подходящим номиналом (0,0625 А, кажется, но лучше поищите, могу неправильно помнить), но ставки — 150 рублей за «правильный» против ремонта материнки. Решайте, хотите ли играть в такую лотерею.
Кстати, поскольку мне пришлось это делать уже 3 раза, я предлагаю исключить из этой схемы тестер, все равно точно попасть с первого раза не удается. Делаем так: соединяем провода напрямую, затем включаем принтер. Пропускаем 2 фазы: 1-инициализация, 2-проверка памяти. Когда начинается 3 фаза-инициализация, засекаем 2 секунды и размыкаем цепь.
Вообще, мне кажется, что одной из причин застревания бумаги в печке является то, что температура запекания совместимого тонера ниже, чем оригинального, а по умолчанию для лотков выставлена средняя плотность бумаги. При печати на бумаге 80 г/м2 надо выставлять плотность бумаги «light».
Засекаем 2 секунды после того, как началась инициализация или после того, как она закончилась?!
После начала инициализации по времени это совсем мало и ничего дальше не происходит, вернее, та же ошибка 980. После засекать страшновато, ибо не понятно и боязно не так сделать и спалить мозги принту.
Кстати, можно обойтись без паяльника при выводе проводов. Берём не очень толстый провод, оголяем на 2 см просовываем в «окошко» гнезда, загибаем и откусываем лишнее, помещаем гнездо в штекер. Есть контакт!
————————————————-
Видео — Сброс ошибки 980 печка на OKI 610
https://my.mail.ru/mail/risograf/video/_myvideo/2.html
————————————————-
Парни, привет!
Как водится такая же беда! OKI C610, намоталась бумага на печку (не стартовая), 980 ошибка. Вылазила как с открытой верхней крышкой, так и с закрытой.
Изучил досконально тему, нашел в закромах стартовую печь, разобрал, внедрил провода, прозвонил, контакт есть, предполагаю (из предыдущих постов), что «+» внутри разъема, «-» снаружи.
Так вот, печку поставил ничего пока не подключая, провода не замыкая, включил принтер с открытой крышкой и он сказал, что к печати готов! Закрыл крышку, пытается завестись (видимо печка) и снова 980 ошибка.
Далее начал по инструкции подключать тестер (цифровой, стрелочника нет). В режима амперметра ничего не увидел, поставил на вольтаж (200мВ) и при старте до всяких инициализаций кратковременно появляется напряжение, потом тесты продолжаются, напруга больше не появляется. Пока крышка открыта — готовность к печати, как только закрываю, пытается завестись и далее 980 ошибка.
Пытался и через All OKI Reset обнулить, не знаю дало что-то или нет.
Но в итоге ресурс печки показывается 100%, а работать не хочет по причине 980 ошибки. Ставил и свою печку, у которой изначально проблема возникла — результат тот же.
Может я что не так делаю? А может тестер нужно подключать в момент старта печки когда крышку закрываю?
Выручайте, пожалуйста! Не знаю куда дальше смотреть.
Смотреть инструкцию по сбросу (на сайте Кудесника есть). Внимательно. И молиться, чтобы ничего ещё не сгорело.
И вывести принтер из Factory Mode.
—————————————————
Оба провода нужно подцеплять «изнутри». Прибор включается в разрыв цепи, вместо предохранителя. И Вы, размыканием контактов имитируете сработку предохранителя. Напряжение-то зачем выставлять?
Без прибора — просто замыкаете контакты и после включения принтера — размыкаете по времени.
И да, принтер ОБЯЗАТЕЛЬНО должен находиться в Ship Mode. Иначе не сработает.
——————————————————
Штатный — Shipping. В FM печка не сбросится.
Штатный вообще-то Shipping. Factory — это уже почти сервисный
————————————
Первый щелчок — включение принтера. Второй щелчок — сдергивание провода. Буквально 1-2 секунды. После второго щелчка стрелка падает — цепь разорвана.
———————————
В-общем, попросили меня сегодня обнулить чужой Oki-С610 (у нас 610n). Я попробовал это сделать предложенным мной способом без тестера и нарвался на ошибку 155. В конце-концов я его обнулил, но момент для обнуления оказался совсем другим. После включения принтера появляется надпись «please wait» и через 1,5 секунды, еще до первой инициализации надо размыкать цепь.
Таким образом, по времени точно не определить, очевидно это время как-то зависит от прошивки и может быть разным для принтеров одной марки.
Заметок и статей про обслуживание цветных принтеров OKI в интернете практически не встречается. Здесь эта заметка будет уже третьей по счету, связанная с обслуживанием цветных принтеров OKI.
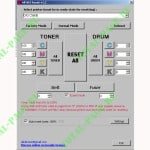
Утилита all OKI reset в режиме Expert mode
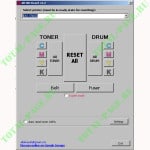
Утилита ALL OKI RESET в стандартном режиме
В заметке раскрою свой опыт использования утилиты all oki reset, а также ряд нюансов по ее использованию. Начну, пожалуй, с того, что развенчаю некоторые мифы и домыслы.
Миф №1 — с помощью утилиты можно программировать использованные чипы и потом продавать. Утилита действительно способна через принтер программировать чипы, но тут есть одно существенное ограничение. В зависимости от производителя чипов и модели принтера — можно обнулить чип обратно на 100% только, если остаток по чипу не менее 10%-20%. Если остаток по чипу меньше , то ничего не получится.
Миф №2 с помощью утилиты можно восстановить по счетчику работоспособность уже не печатающего (заблокированного) принтера. Сделать это не получится по такой простой причине, что команды на сброс принтер подает через обычную функцию печати. Если принтер заблокирован, то он просто не воспримет команду.
Миф №3 Утилита работает со всеми цветными принтерами OKI. До того, как утилита пошла в массы, так и было. Но сейчас ситуация в корне поменялась. Новая линейка принтеров OKI С822/С831/С841 и МФУ на их базе не работают с утилитой. В компании OKI изменили сервисные команды и пароли, что привело к неработоспособности утилиты с новой линейкой принтеров.
Обзор возможностей утилиты all oki reset
Сразу оговорюсь, что утилита может работать в двух режимах. В режиме «Стандартный» утилита позволяет просто обнулять счетчики расходных материалов. Режим «expert mode» позволяет сделать более точную корректировку показателей ресурса расходных материалов. При этом может как увеличивать так и уменьшать ресурс расходных материалов с шагом 1%. Счетчики, обнуляемые утилитой all oki reset:
 Счетчики тонер-картриджей. Утилита подает команду принтеру на сброс счетчиков чипов тонер-картриджей, и принтер записывает эти данные в чип. После сброса счетчиков эти чипы можно использовать и в другом аппарате. Помните про ограничения, описанные мною в начале заметки. Фактически принтер выступает в роли программатора RFID чипов.
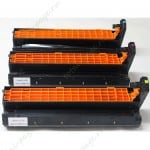 Счетчики драм-картриджей. Драм-картриджи не содержат чипы. Поэтому сброс счетчиков происходит при помощи специальных предохранителей. После сброса эти драм-картриджи в другом аппарате работать не будут. Если в драм-картридже фотовал сильно изношен,то лучше его перед сбросом заменить. Если этого не сделать, то из драм-картриджа начнет высыпаться тонер, который в свою очередь попадет на оптические датчики, что может привести к поломке аппарата.
 Счетчик транспортного ремня (Transfer Belt). Данный узел сбрасывается при помощи предохранителя, и к нему применяются те же правила, что и для драм-картриджей. Внимание!!! Перед сбросом Transfer Belt необходимо очистить бункер с отработанным тонером, иначе это может привести к сбоям в работе принтера или даже к его поломке.
 Счетчик Fuser unit (печка). Данный блок тоже сбрасывается при помощи предохранителя. При сбросе его счетчика с помощью утилиты к нему применяются те же правила, что и для двух предыдущих блоков. Печка в принтерах OKI сделана на совесть и при использовании обычной бумаги ее фактический ресурс в несколько раз превышает установленный производителем.
Как пользоваться утилитой.
Утилита имеет простой, интуитивно понятный интерфейс и не требует какой-либо инструкции. Просто выбираете из списка необходимый принтер и нажимаете кнопку сброса счетчика напротив блока, который необходимо обнулить. Внимание!!! Утилита требует установленной программной платформы NET Framework и наличие интернет. Отсутствие одной из этих двух составляющих приведут к невозможности работы утилиты. В редких случаях бывает, что команда из утилиты на принтер была подана, но счетчик при этом не скинулся.
Заключение.
Эта утилита не панацея, а просто небольшой набор сервисных команд, взятых из официальной сервисной утилиты Maintenance Utility MuWIN. Утилита является весьма тонким инструментом, который, в зависимости от того как им пользоваться, может или значительно сэкономить на расходах или погубить принтер. Я, например, считаю, что эту утилиту не стоит давать в руки не специалистам. У меня есть целый букет клиентов, который этой утилитой загубили аппараты. Если будете пользоваться утилитой, то очень аккуратно и при первой же необходимости производите замену износившихся деталей. Тогда принтеры OKI еще долго будут радовать своей бесперебойной работой и качественной печатью.
![]() Загрузка…
Загрузка…
Коды ошибок OKI, сервисные коды и фатальные ошибки цветных принтеров и МФУ OKI (Service Call, Fatal Error, Error Code) расшифровка фатальной ошибки, обнуление сервисной ошибки, сброс ошибки OKI. Что делать при появлении на экране аппарата критической | фатальной ошибки:
Вызов технической помощи
XXX: Неисправимая ошибка
Появление фатальных/неисправимых ошибок с индикацией сервисного кода (ХХХ на сообщении выше) обычно означает наличие довольно серьёзной ошибки в принтере, которая не может быть разрешена простым выключением/включением. Ниже можно ввести номер ошибки и получить её описание. Эта информация предоставляется только как справочная: решение о корректных действиях по устранению ошибки должен принимать авторизованный сервисный инженер!
Обратите внимание, что процедуры сброса ошибок не существует: после устранения причины возникновения ошибки, сообщение об ошибке автоматически пропадает с дисплея принтера!
Для получения описания фатальной ошибки введите её номер в соответствующее поле ниже и нажмите кнопку [Расшифровать ошибку]. Например, при появлении ошибки, как указано на изображении ниже, нужно ввести в поле ввода число 134 и получить описание ошибки.

Обращаю внимание, что ошибки с номерами 300-600 являются пользовательскими ошибками, которые кроме номера содержат довольно подробное
описание самой ошибки, а при нажатии на кнопку HELP можно получить подробное описание того, как эти ошибки разрешить.*
Сведения об ошибках, расшифровку которых можно получить выше, подходят для следующих цветных принтеров и МФУ OKI:
C301 / C310 / C321 / C330 / C3100 / C3200 / C3300 / C331 / C332 / C3400 / C3450 / C3520 MFP / C3530 MFP / C3600 / C510 / C5100 / C511 / C5200 / C530 /
C5300 / C531 / C532 / C5400 / C542 / C5510 MFP / C5540 MFP / C5550 MFP / C5600 / C5650 / C5700 / C5750 / C5800 / C5850 / C5900 / C5950 / C610 / C612 /
C710 / C711 / C711WT / C712 / C7100 / C7200 / C7300 / C7350 / C801 / C810 / C821 / C822 / C823 / C824 / C830 / C831 / C833 / C834 / C841 / C843 / C844 / C8600 / C8800 /
C9200 / C9300 / C9400 / C9500 / C9600 / C9650 / C9655 / C911 / C931 / C9800 / C9800 MFP / C9850 / C9850 MFP / MC332 / MC342 / MC350 / MC351 / MC352 /
MC360 / MC361 / MC362 / MC363 / MC560 / MC561 / MC562 / MC563 / MC573 / MC760 / MC770 / MC780 / MC851 / MC853 / MC860 / MC861 / MC873 / Pro6410NC /
Pro7411WT / Pro8432WT / Pro9420WT / Pro9431 / Pro9541 / Pro9542 / Pro9431E / Pro9541E / Pro9542E
* — ошибки распространяются только на принтеры OKI C9600 / C9650 / C9800 / C9850 и МФУ на их базе
Четырехзначные ошибки распространяются только на принтеры C911/C931, ES9431/ES9541/ES9542 и Pro9431/Pro9541/Pro9542.
Список ошибок существенно пополнен по сравнению с той версией, что была ранее размещена на старой версии этого сайта и скопипастена всеми, кому не лень. Именно поэтому теперь отображается не таблица,
а форма для расшифровки конкретной ошибки.
Дата последнего обновления базы ошибок:
26 Апреля 2022.
- Manuals
- Brands
- Oki Manuals
- Printer
- C610 Series
- User manual
-
Contents
-
Table of Contents
-
Troubleshooting
-
Bookmarks
Quick Links
Related Manuals for Oki C610
Summary of Contents for Oki C610
-
Page 1
C610 / C711 User’s Guide… -
Page 2: Preface
07105601 Iss. 1; Copyright © 2009. All rights reserved. Oki is a registered trademark of Oki Electric Industry Company, Ltd. Oki Printing Solutions is a registered trademark of Oki Data Corporation. Energy Star is a trademark of the United States Environmental Protection Agency.
-
Page 3: Emergency First Aid
Oki Data Corporation, 4-11-22 Shibaura, Minato-ku, Tokyo 108-8551, Japan MPORTER TO THE AUTHORISED REPRESENTATIVE Oki Europe Limited (trading as OKI Printing Solutions) Blays House Wick Road Egham Surrey, TW20 0HJ United Kingdom For all sales, support and general enquiries contact your local distributor.
-
Page 4: Table Of Contents
ONTENTS Preface ………..2 Emergency first aid .
-
Page 5
Oki contact details…….. -
Page 6: Notes, Cautions And Warnings
OTES CAUTIONS AND WARNINGS NOTE A note provides additional information to supplement the main text. CAUTION! A caution provides additional information which, if ignored, may result in equipment malfunction or damage. WARNING! A warning provides additional information which, if ignored, may result in a risk of personal injury.
-
Page 7: About This Guide
BOUT THIS GUIDE NOTE Images used in this manual may include optional features that your product does not have installed. OCUMENTATION SUITE This guide is part of a suite of online and printed documentation provided to help you become familiar with your product and to make the best use of its many powerful features. The documentation is summarised below for reference and is found on the manuals DVD unless indicated otherwise: >…
-
Page 8: On-Line Usage
LINE USAGE This guide is intended to be read on screen using Adobe Reader. Use the navigation and viewing tools provided in Adobe Reader. There are many cross-references within this book, each highlighted as blue text. When you click on a cross-reference the display will instantly jump to the part of the manual containing the referenced material.
-
Page 9: Introduction
> “Ask Oki” – a user-friendly function for Windows that provides a direct link from your printer driver screen to a dedicated web site specific to the exact model you are using. This is where you’ll find all the advice, assistance and support you could need to help you get the best possible results from your Oki printer.
-
Page 10: Printer Overview
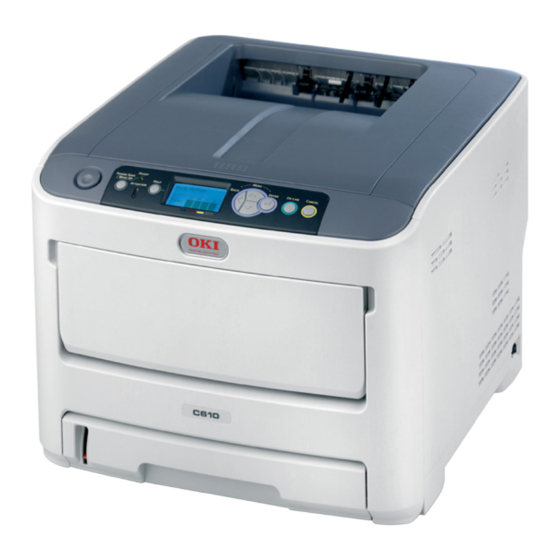
RINTER OVERVIEW RONT VIEW C610 1. Output stacker, face down. 5. Paper level indicator. Standard printed copy delivery point. Holds 6. Front cover release lever. up to 250 sheets at 80g/m². 7. Multi-purpose tray release recess. 2. Operator panel. 8. Top cover release button.
-
Page 11
C711 1. Output stacker, face down. 5. Paper level indicator. Standard printed copy delivery point. Holds 6. Front cover release lever. up to 350 sheets at 80g/m². 7. Multi-purpose tray release recess. 2. Operator panel. 8. Top cover release button. Menu driven operator controls and LCD 9. -
Page 12: Rear View
EAR VIEW This view shows the connection panel, the rear output stacker and the location of the optional duplex (two-sided printing) unit. C610 1. ON/OFF switch. 5. USB interface. 2. AC power socket. 6. ACC interface (host USB). 3. Duplex unit (when fitted).
-
Page 13: Changing The Display Language
When the rear paper stacker is folded down paper exits the printer through the rear of the printer and is stacked here face up. This is mainly used for heavy print media. When used in conjunction with the multi purpose feed tray, the paper path through the printer is essentially straight.
-
Page 14: Paper Recommendations
Ultra heavy2 189 — 220g/m² Legal 13in. 216 x 330mm Ultra heavy3 221 — 250g/m² Legal 13.5in. 216 x 343mm C610: Tray 1: 64 — 120g/m² Legal 14in. 216 x 356mm Tray 2/3: 64 — 220g/m² MP Tray: 64 — 250g/m²…
-
Page 15: Multi Purpose Tray
10mm. ACE DOWN STACKER C610: The face down stacker on the top of the printer can hold up to 250 sheets of 80g/m² standard paper, and can handle paper stocks up to 188g/m².
-
Page 16: Loading Paper
OADING PAPER NOTE For illustrative purposes, the C711 printer has been shown. If you have a C610 printer, the principle is the same with any exceptions noted. ASSETTE TRAYS Remove the paper tray from the printer. Fan the paper to be loaded at the edges (1) and in the middle (2) to ensure that all sheets are properly separated, then tap the edges of the stack on a flat surface to make it flush again (3).
-
Page 17
Load paper (letter headed paper face down and top edge towards the front of the printer), as shown. > Adjust the rear stopper (a) and paper guides (b) to the size of paper being used. CAUTION! C711 ONLY: IMPORTANT: Set paper size dial (c) to the size of paper being used (A4 in the above example). -
Page 18
For face down printing, make sure the face up (rear) stacker (a) is closed (the paper exits from the top of the printer). Stacking capacity is approximately 250 sheets for the C610 and 350 sheets for the C711, depending on paper weight. -
Page 19: Multi Purpose Tray
ULTI PURPOSE TRAY Open the multi purpose tray (a). Fold out the paper supports (b). Press gently down on the paper platform (c) to ensure it is latched down. Load the paper and adjust the paper guides (d) to the size of paper being used. >…
-
Page 20: Operation
PERATION For full details of how to use the machine and any optional accessories to print jobs efficiently and effectively, please refer to the Printing Guide and the Barcode Guide. For full details of how to access and use the printer security features, please refer to the Security Guide.
-
Page 21: Menu Functions
ENU FUNCTIONS This section lists the menus accessed via the controls on the printer’s operator panel and displayed in the LCD window. PERATOR PANEL 1. Ready LED ON: Ready to receive data. 2. Display Displays the printer status and any error messages. BLINKING: Processing data.
-
Page 22: How To Change The Settings — User
OW TO CHANGE THE SETTINGS USER It should be noted that many of these settings can be, and often are, overridden by settings in the printer drivers. However, several of the driver settings can be left at “Printer Setting”, which will then default to the settings entered in these printer menus. Where applicable, factory default settings are shown in bold type in the following tables.
-
Page 23: Configuration Menu
Using the up or down MENU button, identify the parameter as required. Press the Enter button to enter an asterisk (*) on the right side of the setting selected. Press the On Line button to switch to online. The machine will automatically re- boot.
-
Page 24: Print Information Menu
RINT INFORMATION MENU This menu provides a quick method of listing various items stored within the printer. ITEM ACTION EXPLANATION Configuration Execute Select execute to print out a configuration report. Network Execute Scroll down to this parameter and select execute to print out Network information.
-
Page 25: Print Secure Job
RINT SECURE JOB NOTE: This menu only displays if the optional SD card is installed. ITEM ACTION EXPLANATION Encrypted Job Not Found Used for printing an encrypted authentication print job (Encrypted Job) stored in the SD card. Print After inputting a password, “Searching Job” is displayed Delete until a job appropriate for the password is found.
-
Page 26: Menus
Unit of Measurement Selects UOM Inches or millimeter. Select by scroll and Enter button. Default: millimeter Tray1 Config Configure Paper Size/Media Type/Media Weight. Select by scroll and Enter button. Default: Paper Size: C610 A4/A5/A6/B5/ Legal14/ Legal13.5/ Legal13/Letter/ Executive/ Custom C711 Cassette/…
-
Page 27
ITEM ACTION EXPLANATION Tray Configuration MPTray Config Configure Paper Size/Media Type/Media (cont.) Weight/Tray Usage. Select by scroll and Enter button. Paper Size: A4/A5/A6/B5/ Legal14/Legal 13.5/Legal13/ Letter/ Executive/ Custom/Com-9 Envelope/Com- 10 Envelope/ Monarch Envelope/DL Envelope/C5/ Index Card Media Type: Plain/ USERTYPE 1 to 5 are displayed only if registered Letterhead/ in the host PC. -
Page 28
ITEM ACTION EXPLANATION System Adjust Power Save Time Select from 1/2/3/4/5/10/15/30/60/ 120/180 Minutes. Default: Select by scroll and Enter button. Sleep Time Select from 1/2/3/4/5/10/15/30/60/ 120/180 Minutes. Default: Select by scroll and Enter button. Clearable Warning Select from: ONLINE/Job. Select by scroll and Enter button. -
Page 29
ITEM ACTION EXPLANATION System Adjust Drum Cleaning Sets whether to rotate the drum in idle prior to (cont.) printing in order to reduce horizontal white Default: lines. Be warned that this will shorten the ID life by as much as this rotation. Select by scroll and Enter button. -
Page 30: Admin Setup
DMIN SETUP ITEM SETTINGS EXPLANATION Enter xxxxxxxxxxxx Enter a password to gain entry to the Admin Setup menu. Password Password should be from 6 to 12 digits of alpha/numeric characters (or mix) The default value is “aaaaaa” Network TCP/IP Enable Sets TCP/IP Protocol.
-
Page 31
ITEM SETTINGS EXPLANATION Network Gateway xxx.xxx.xxx.xxx Sets the Gateway (default router) address. Setup Address 0.0.0.0 means that there is no router. (cont.) Display Conditions: > TCP/IP should be enabled. > IP Version is not IPv6. Enable Sets Enable/Disable of Web. Disable Enable: Web/IPP is available. -
Page 32
ITEM SETTINGS EXPLANATION Print Setup Binding Long Edge Specifies Binding in duplex printing. (cont.) Short Edge Display Condition: a duplex unit is installed and enabled. Refer to “Duplex” on page Media Check Enable Sets whether the printer checks the matching of printed data size and that of the tray. -
Page 33
ITEM SETTINGS EXPLANATION Print Setup X Dimension 64 mm Specifies paper width of Custom paper as a default value. (cont.) Sets a paper size at right angles to the paper run direction. 210 mm 216 mm Y Dimension 127 mm Specifies paper length of Custom paper as a default value. -
Page 34
ITEM SETTINGS EXPLANATION PCL Setup A4 Print 78 column Sets the number of characters for A4 paper. (cont.) Width 80 column Auto LF. This is for 10-CPI characters when Auto CR/LF Mode is set to OFF. This menu is enabled only when A4 paper is selected in the menu that sets the print width of A4 paper in portrait orientation. -
Page 35
ITEM SETTINGS EXPLANATION IBM PPR Character 10 CPI Specifies character pitch in IBM PPR emulation. Setup Pitch 12 CPI 17 CPI 20 CPI Proportional Font 12CPI to Specifies 12CPI pitch for Condense Mode. Condense 20CPI 12CPI to 12CPI Character SET-2 Sets a character set. -
Page 36
ITEM SETTINGS EXPLANATION EPSON FX Character 10 CPI/12 CPI/ Specifies character pitch in Epson FX emulation. Setup Pitch 17 CPI 20 CPI/ Proportional Character SET-2 Sets a character set. SET-1 Symbol Set IBM-437 Sets the Symbol Set for Epson FX Emulation. (see machine operator panel for complete list). -
Page 37
ITEM SETTINGS EXPLANATION Memory Receive Auto Sets the size of receive buffer Setup Buffer Size 0.5 megabyte 1 megabyte 2 megabyte 4 megabyte 8 megabyte 16 megabyte 32 megabyte Resource Auto Sets the size of resource saving area. Save 0.5 megabyte 1 megabyte 2 megabyte 4 megabyte… -
Page 38
ITEM SETTINGS EXPLANATION SD Card This item is displayed only if the SD card (option) is installed. Setup Initialize Execute Initializes the SD Card to the factory default setting. Machine performs partition-division, and initializes each partition. When this menu is executed, the following confirmation message appears. -
Page 39
ITEM SETTINGS EXPLANATION System Near Life Enable/Disable Set LCD panel control at the time of near-life warning for setup Status drum, fuser and belt. Enable: Display a near-life warning. Disable: Do not display a near-life warning. Near Life Enable/Disable Controls the settings of the Attention LED when near end of life warning of toner, drum, fuser, or belt occurs. -
Page 40: Calibration
ITEM SETTINGS EXPLANATION Settings Restore Execute Changes to the menu setting saved. (cont.) Settings When the Enter button is pressed, the following confirmation message appears. Are You Sure? Yes/No If No is selected, the previous menu display resumes. If Yes is selected, changes to the menu settings are saved and this menu is exited.
-
Page 41: Boot Menu
OOT MENU This menu should only be changed by the System Administrators. In order to gain access to this menu, follow the instructions in “How to change the settings — administrator” on page This menu is in ENGLISH only (default settings in bold type). Parallel Setup NOTE This menu item is applicable to the C711 only.
-
Page 42
USB Setup This menu controls the operation of the printer’s USB data interface. ITEM SETTINGS EXPLANATION Enable / Disable ENABLES / DISABLES the USB port. Speed 480 / 12 Mbps Selects the interface speed. After setting change the menu, the printer restarts on exit. Soft Reset Enable / Disable Enables or disables the SOFT RESET command. -
Page 43
ITEM SETTINGS EXPLANATION Reset Cipher Key Execute Resets a cipher key to be used on an encrypted SD card. When this processing is done, all data stored on the SD card cannot be restored. After execution, the following confirmation messages will appear. Are You Sure? If No is selected, the display will return to the previous menu. -
Page 44: Storage Setup
Storage setup NOTE This menu only displays if the optional SD card is installed. ITEM SETTINGS EXPLANATION Check File System Execute Resolves mismatch between actual memory and displayed memory available in a file system. Performs administration data (FAT information) recovery. Performs recovery only for an SD Card.
-
Page 45: Power Setup
Power setup ITEM SETTINGS EXPLANATION Peak Power Control Normal Sets Peak Power Control level. Power Save Enable Sets Enable/Disable of Power Save Mode. Disable If Power Save is disabled, pressing the Power Save / Wake Up button on the control panel will manually override this setting.
-
Page 46
ITEM SETTINGS EXPLANATION Supplies Report Enable/Disable Indication of frequency of consumable exchange/non indication is set. When Enable is set, also the maintenance counter is indicated in together. Conditions for display: Enable must be selected in Print Statistics > Usage Report. Reset Main Counter Execute The main counter is reset. -
Page 47: Maintenance
AINTENANCE NOTE For illustrative purposes, the C711 printer has been shown. If you have a C610 printer, the principle is the same. EPLACING CONSUMABLE ITEMS Only use genuine original consumables to ensure the best quality and performance from your hardware. Non original products may adversely affect your printer’s performance and invalidate your warranty.
-
Page 48
Note the positions of the four cartridges. 1. Cyan cartridge 2. Magenta cartridge 3. Yellow cartridge 4. Black cartridge Pull the coloured toner release lever on the cartridge to be replaced fully towards the front of the printer. Lift the right-hand end of the cartridge and then draw the cartridge to the right to release the left-hand end as shown, and withdraw the toner cartridge out of the printer. -
Page 49
Gently shake the new cartridge from end to end several times to loosen and distribute the toner evenly inside the cartridge. Remove the wrapping material and peel off the adhesive tape from the underside of the cartridge. Holding the cartridge by its top centre with the coloured lever to the right, lower it into the printer over the image drum unit from which the old cartridge was removed. -
Page 50: Image Drum Replacement
Gently wipe the LED head surface with a clean, lint free cloth. Finally, close the top cover and press down firmly at both sides so that the cover latches closed. MAGE DRUM REPLACEMENT CAUTION! Static sensitive devices, handle with care. The printer contains four image drums: cyan, magenta, yellow and black.
-
Page 51
Note the positions of the four toner cartridges (a) and image drums (b). It is essential that they go back in the same order. Holding it by its top centre, lift the image drum, complete with its toner cartridge, up and out of the printer. -
Page 52
Lift the right-hand end of the toner cartridge (1) and then draw the cartridge to the right to release the left-hand end as shown (2), and withdraw the toner cartridge out of the image drum cartridge. Place the cartridge on a piece of paper to avoid marking your furniture. -
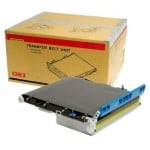
Page 53: Replacing The Transfer Belt Unit
Holding the complete assembly by its top centre, lower it into place in the printer, locating the pegs at each end into their slots in the sides of the printer cavity. Finally, close the top cover and press down firmly at both sides so that the cover latches closed.
-
Page 54
Lift each of the image drum units out of the printer and place them in a safe place away from direct sources of heat and light. CAUTION! The green image drum surface at the base of each cartridge is very delicate and light sensitive. -
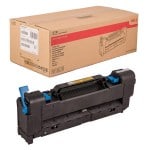
Page 55: Fuser Replacement
Lower the new belt unit into place, with the lifting bar at the front and the drive gear towards the rear of the printer. Locate the drive gear into the gear inside the printer by the rear left corner of the unit, and lower the belt unit flat inside the printer. Turn the two fasteners (a) 90°…
-
Page 56
Pull the two fuser retaining levers (b) towards the front of the printer so that they are fully upright. Holding the fuser by its handle (a), lift the fuser straight up and out of the printer. If the fuser is still warm, place it on a flat surface which will not be damaged by heat. Remove the new fuser from its packaging and remove the transit material. -
Page 57: Cleaning The Led Head
LEANING THE HEAD Clean the LED heads when printing does not come out clearly, has white lines or when text is blurred. There is no need to switch off the printer to clean the lens. Press the cover release and open the printer’s top cover fully. Gently wipe the LED head surface with a clean, lint free cloth.
-
Page 58: Installing Upgrades
NSTALLING UPGRADES NOTE For illustrative purposes, the C711 printer has been shown. If you have a C610 printer, the principle is the same. This section explains how to install optional equipment into your printer. This includes: > duplex (two-sided printing) unit >…
-
Page 59: Memory Upgrade
EMORY UPGRADE The basic printer model comes equipped with 256MB of main memory. This can be upgraded with an additional memory board of 256MB or 512MB, giving a maximum total memory capacity of 768MB. Switch the printer off and disconnect the AC power cable. Press the cover release and open the printer’s top cover fully.
-
Page 60
Carefully remove the new memory board from its wrapping. Try to handle the board only by its short edges, avoiding contact with any metal parts as far as possible. In particular, avoid touching the edge connector. Notice that the memory board has a small cutout in the edge connector, which is closer to one end than the other. -
Page 61
Close the front cover, and close the top cover, pressing down firmly at each side to latch it closed. Reconnect the AC power cable and switch the printer on. When the printer is ready, print a menu map as follows: Press the Enter button. -
Page 62: Sd Card
CARD The optional SD card enables collating of printed pages and can be used to store overlays and macros, fonts, and secure or proof documents waiting to be printed. Switch the printer off and disconnect the AC power cable. Press the cover release and open the printer’s top cover fully. WARNING! If the printer has been powered on recently, the fuser will be hot.
-
Page 63
Notice that the SD card has one chamfered corner. Gently push the SD card into the slot as shown. Locate the retaining clips at the bottom of the side cover into their rectangular holes near the bottom of the printer. Close the top of the side cover up to the printer and refit the securing screw loosened in step 4. -
Page 64: Additional Paper Tray(S)
DDITIONAL PAPER TRAY Switch the printer off and disconnect the AC power cable. Place additional paper tray(s) on desired location. Observing safety rules for lifting and, using locating guides, place printer on top of the additional paper tray(s). Re-connect the AC power cable and switch the printer ON. All that remains is to adjust the printer driver to make full use of the new features (“Setting the driver device options”…
-
Page 65: Setting The Driver Device Options
ETTING THE DRIVER DEVICE OPTIONS Once your new upgrade has been installed, you may need to update the printer driver so that the additional features are available to your applications. Accessories such as additional paper trays will only be usable if the printer driver on your computer knows they are there.
-
Page 66: Storage Cabinet
Panther (Mac OS X 10.3) Open the Mac OS X Print & Fax Preferences. Click Printing. Click Set Up Printers…. Ensure your machine is selected and click Show Info…. Click the menu and choose Installable Options…. Select all hardware options appropriate to your machine and click Apply Changes….
-
Page 67: Troubleshooting
ROUBLESHOOTING Provided that you follow the recommendations in this guide on the use of print media, and you keep the media in good condition prior to use, your printer should give years of reliable service. However, paper jams occasionally do occur, and this section explains how to clear them quickly and simply.
-
Page 68: Paper Sensor Error Codes
APER SENSOR ERROR CODES 380, 400 CODE # LOCATION CODE # LOCATION Paper exit Duplex unit Duplex unit Duplex unit MP Tray Duplex unit Paper Tray Duplex unit Paper feed Paper tray Paper path Paper size a. If fitted. Troubleshooting > 68…
-
Page 69: Clearing Paper Jams
LEARING PAPER JAMS NOTE For illustrative purposes, the C711 printer has been shown. If you have a C610 printer, the principle is the same. If a sheet is well advanced out of the top of the printer, simply grip it and pull gently to draw it fully out.
-
Page 70
he assembly down gently onto a piece of paper to prevent toner from marking Put t your furniture and to avoid damaging the green drum surface, and cover. CAUTION! The green image drum surface at the base of the Image Drum is very delicate and light sensitive. -
Page 71
Look into the printer to check whether any sheets of paper are visible on any part of the belt unit. CAUTION! Do not use any sharp or abrasive objects to separate sheets from the belt. This may damage the belt surface. To remove a sheet with its leading edge at the front of the belt (a), carefully lift the sheet from the belt and pull it forwards into the internal drum cavity and withdraw the sheet. -
Page 72
through the drum cavity area. Then allow the pressure release lever to rise again. NOTE If the sheet is well advanced into the fuser (only a short length is still visible), do not attempt to pull it back. To remove a sheet in the fuser, push the two retaining levers (e) towards the rear of the printer to release the fuser. -
Page 73
Starting with the cyan image drum unit nearest the fuser, replace the four image drums into the drum cavity, making sure to locate them in the correct order. Holding the complete assembly by its top centre, lower it into place in the printer, locating the pegs at each end into their slots in the sides of the printer cavity. -
Page 74
If a duplex unit is fitted, lift lever (j) and lower the duplex unit cover and pull out any sheets found in this area. Close the duplex unit cover Pull down the MP Tray using the depressions. Lift the front cover release lever and lower the front cover. -
Page 75: Specifications
C711 — N31194B ITEM SPECIFICATION Dimensions C610: 435 x 547 x 340mm (W x D x H) without duplex unit C711: 435 x 547 x 389mm (W x D x H) without duplex unit Weight C610: 26Kg approx. (without duplex unit) C711: 27.6Kg approx.
-
Page 76: Index
NDEX Belt Operator Panel …… 21 how to replace ….53 Paper Cleaning the LED head jam clearing ..57 ….. 67 jam, error codes ….68 loading cassette trays ..16 Duplex loading letterhead …. 17 how to install recommended types ….
-
Page 77: Oki Contact Details
Tel:+353 1 4049590 Kowloon, Hong Kong Fax:+353 1 4049591 Tel:(852) 2736 0130 http://www.oki.ie Fax:(852) 2376 3725 OKI Systems — Northern Ireland The IPL Group 40 Sydenham Park 63-85 Victoria Street Belfast, BT4 1PW Beaconsfield NSW 2015, Australia Tel:+44 (0)28 90 20 1110 Tel:(61) 2 9690 8200 http://www.oki.ie…
-
Page 78
Oki Europe Limited Blays House Wick Road Egham Surrey, TW20 0HJ United Kingdom Tel: +44 (0) 208 219 2190 Fax: +44 (0) 208 219 2199 www.okiprintingsolutions.com…
This manual is also suitable for:
C711